taskset简介
# taskset
Usage: taskset [options] [mask | cpu-list] [pid|cmd [args...]]
Show or change the CPU affinity of a process.
Options:
-a, --all-tasks operate on all the tasks (threads) for a given pid
-p, --pid operate on existing given pid
-c, --cpu-list display and specify cpus in list format
-h, --help display this help
-V, --version output version information
The default behavior is to run a new command:
taskset 03 sshd -b 1024
You can retrieve the mask of an existing task:
taskset -p 700
Or set it:
taskset -p 03 700
List format uses a comma-separated list instead of a mask:
taskset -pc 0,3,7-11 700
Ranges in list format can take a stride argument:
e.g. 0-31:2 is equivalent to mask 0x55555555
For more details see taskset(1).
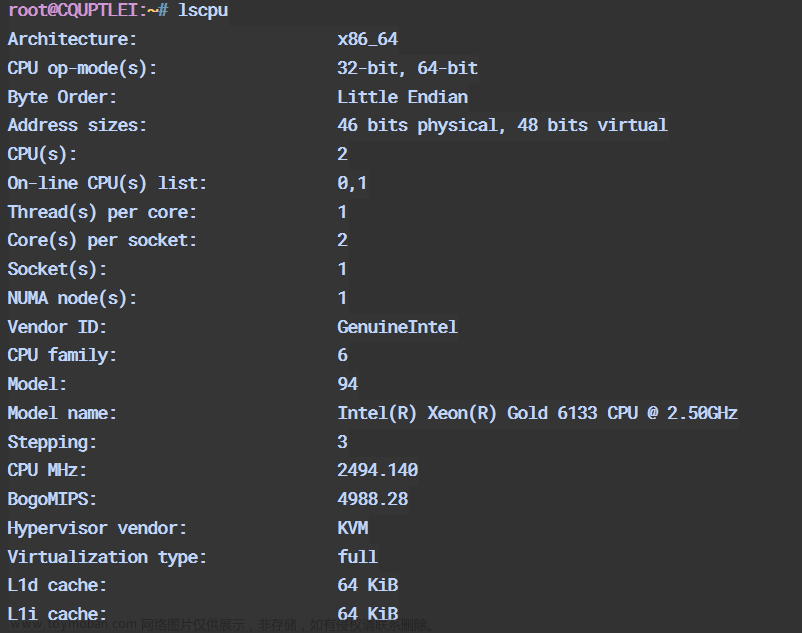
查看cpu的核数
cat /proc/cpuinfo
root@w0112-virtual-machine:/home/w0112# cat /proc/cpuinfo
processor	: 0
vendor_id	: GenuineIntel
cpu family	: 6
model		: 158
model name	: Intel(R) Core(TM) i5-8300H CPU @ 2.30GHz
stepping	: 10
microcode	: 0xde
cpu MHz		: 2304.000
cache size	: 8192 KB
physical id	: 0
siblings	: 1
core id		: 0
cpu cores	: 1
apicid		: 0
initial apicid	: 0
fpu		: yes
fpu_exception	: yes
cpuid level	: 22
wp		: yes
flags		: fpu vme de pse tsc msr pae mce cx8 apic sep mtrr pge mca cmov pat pse36 clflush mmx fxsr sse sse2 ss syscall nx pdpe1gb rdtscp lm constant_tsc arch_perfmon nopl xtopology tsc_reliable nonstop_tsc eagerfpu pni pclmulqdq ssse3 fma cx16 pcid sse4_1 sse4_2 x2apic movbe popcnt tsc_deadline_timer aes xsave avx f16c rdrand hypervisor lahf_lm abm 3dnowprefetch fsgsbase tsc_adjust bmi1 avx2 smep bmi2 invpcid rdseed adx smap clflushopt xsaveopt xsavec arat
bugs		:
bogomips	: 4608.00
clflush size	: 64
cache_alignment	: 64
address sizes	: 43 bits physical, 48 bits virtual
power management:

processor	: 1
vendor_id	: GenuineIntel
cpu family	: 6
model		: 158
model name	: Intel(R) Core(TM) i5-8300H CPU @ 2.30GHz
stepping	: 10
microcode	: 0xde
cpu MHz		: 2304.000
cache size	: 8192 KB
physical id	: 2
siblings	: 1
core id		: 0
cpu cores	: 1
apicid		: 2
initial apicid	: 2
fpu		: yes
fpu_exception	: yes
cpuid level	: 22
wp		: yes
flags		: fpu vme de pse tsc msr pae mce cx8 apic sep mtrr pge mca cmov pat pse36 clflush mmx fxsr sse sse2 ss syscall nx pdpe1gb rdtscp lm constant_tsc arch_perfmon nopl xtopology tsc_reliable nonstop_tsc eagerfpu pni pclmulqdq ssse3 fma cx16 pcid sse4_1 sse4_2 x2apic movbe popcnt tsc_deadline_timer aes xsave avx f16c rdrand hypervisor lahf_lm abm 3dnowprefetch fsgsbase tsc_adjust bmi1 avx2 smep bmi2 invpcid rdseed adx smap clflushopt xsaveopt xsavec arat
bugs		:
bogomips	: 4608.00
clflush size	: 64
cache_alignment	: 64
address sizes	: 43 bits physical, 48 bits virtual
power management:
processor指出是第几个cpu处理器
root@w0112-virtual-machine:/home/w0112# cat /proc/cpuinfo | grep processor
processor : 0
processor : 1
cpu cores指出每个处理器的核心数量
root@w0112-virtual-machine:/home/w0112# cat /proc/cpuinfo | grep "cpu cores"
cpu cores : 1
cpu cores : 1
由此可以看出我的虚拟机有两个处理器,每个处理器有一个核
虚拟机可以通过如下设置配置
taskset使用
测试脚本bb.sh
#!/bin/sh
while [ 1 ]
do
date=`date`
echo "date:$date"
sleep 5
done
默认不绑定cpu
运行脚本
./bb.sh &
查看脚本程序的进程ID
root@w0112-virtual-machine:/home/w0112# ps | grep bb.sh
3037 pts/13 00:00:00 bb.sh
查看默认bb.sh绑定到那个核
语法:taskset -p PID
taskset -p 3037
root@w0112-virtual-machine:/home/w0112# taskset -p 3037
pid 3037's current affinity mask: 3
3表示默认使用了cpu0 cpu1
使用CPU编号绑定核
启动绑定到指定CPU
语法:taskset -c cpu-list PID
指定绑定到cpu0
root@w0112-virtual-machine:/home/w0112# taskset -c 0 ./bb.sh&
[2] 3175
查看进程运行在那个核
root@w0112-virtual-machine:/home/w0112# taskset -p 3175
pid 3175's current affinity mask: 1
1表示cpu0
指定绑定到cpu0和cpu1
root@w0112-virtual-machine:/home/w0112# taskset -c 0,1 ./bb.sh &
[1] 3307
查看绑定结果
root@w0112-virtual-machine:/home/w0112# taskset -p 3307
pid 3307's current affinity mask: 3
3表示cpu0和cpu1
启动后绑定
运行测试脚本
./bb.sh &
root@w0112-virtual-machine:/home/w0112# ./bb.sh &
[1] 3389
进程ID 3389
绑定到cpu0
语法: taskset -cp cpu PID
绑定到CPU0
root@w0112-virtual-machine:/home/w0112# taskset -cp 0 3389
pid 3389's current affinity list: 0,1
pid 3389's new affinity list: 0
默认绑定到两个核,修改之后绑定到CPU0
查看绑定结果
oot@w0112-virtual-machine:/home/w0112# taskset -p 3389
pid 3389's current affinity mask: 1
mask为1表示cpu0
绑定到cpu0和cpu1
绑定指令
root@w0112-virtual-machine:/home/w0112# taskset -cp 0,1 3389
pid 3389's current affinity list: 0
pid 3389's new affinity list: 0,1
affinity是从0开始 mask是从1开始
查看绑定结果
root@w0112-virtual-machine:/home/w0112# taskset -p 3389
pid 3389's current affinity mask: 3
mask 3表示cpu0和cpu1 对应二进制0011,即是cpu0和cpu1
使用mask形式绑定核
指令介绍
语法:taskset -p mask PID
按照二进制形式从最低为到最高位分别表示cpu的核的序号
0xffffffffffffffff :表示是64核
0x0000000000000001:表示是cpu的第1核
0x0000000000000007:表示是cpu的第1、2、3个核
绑定cpu的两个核
root@w0112-virtual-machine:/home/w0112# taskset -p 0x3 3389
pid 3389's current affinity mask: 3
pid 3389's new affinity mask: 3
查看绑定结果
root@w0112-virtual-machine:/home/w0112# taskset -p 3389
pid 3389's current affinity mask: 3
判断进程目前分配到cpu ID
ps -o pid,psr,comm -p <PID>
root@w0112-virtual-machine:/home/w0112# ps -o pid,psr,comm -p 3389
PID PSR COMMAND
3389 0 bb.sh
表示进程bb.sh目前在cpu0上运行,PSR显示的是当前运行在的核的编号,如果没有绑定cpu,可能会出现运行在1上,这个由内核调度来完成的
文章来源地址https://www.toymoban.com/news/detail-628487.html
文章来源:https://www.toymoban.com/news/detail-628487.html
到了这里,关于linux下绑定进程到指定CPU的操作方法的文章就介绍完了。如果您还想了解更多内容,请在右上角搜索TOY模板网以前的文章或继续浏览下面的相关文章,希望大家以后多多支持TOY模板网!


