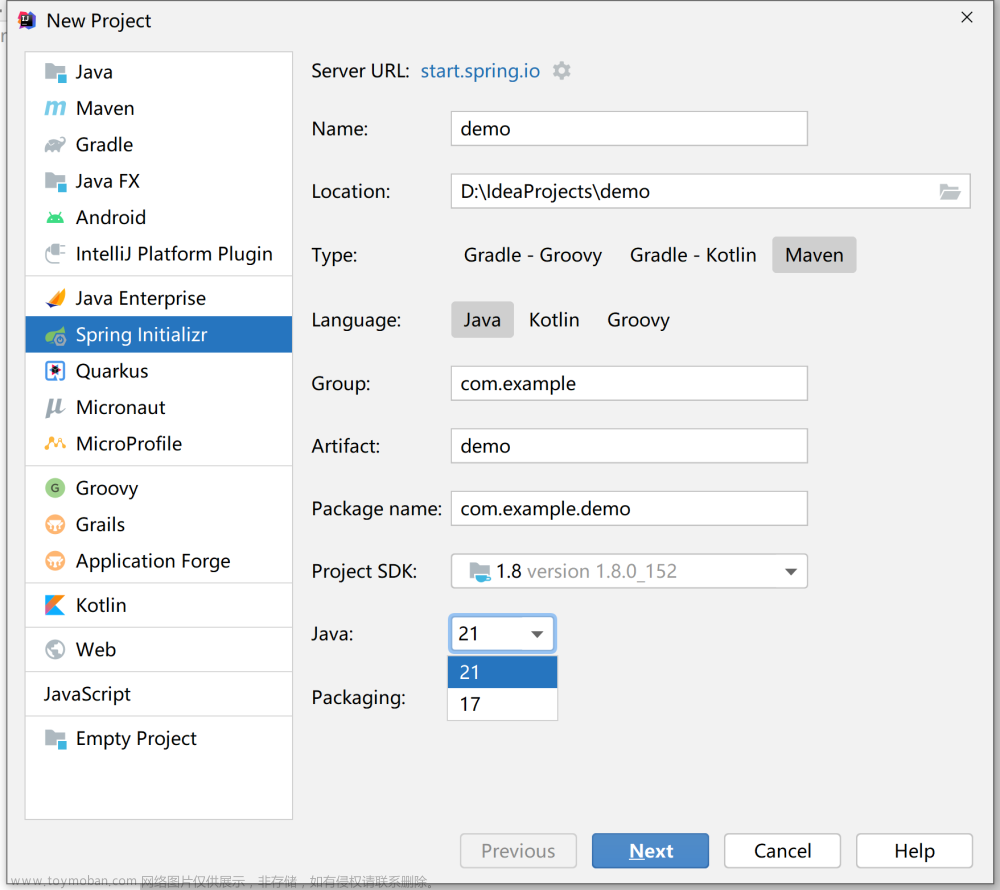
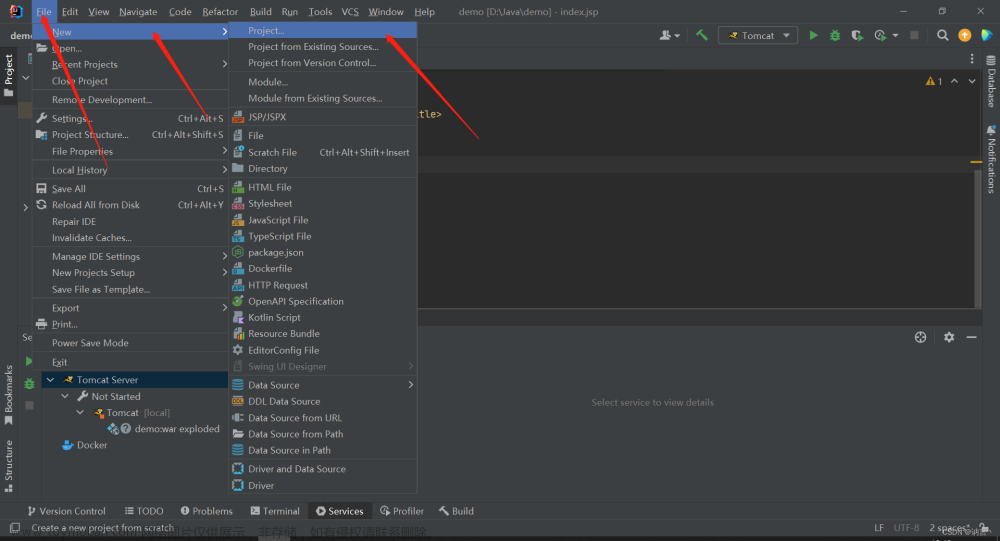
1、点击创建项目,选中一下内容:
2、点击下一步之后,填写创建项目的位置以记项目名称和包名称,如下图所示:
3、点击下一步是你maven的配置,如果没问题直接点击完成就好了,如图所示:
4、创建好之后如下图所示:
5、看一下项目结构,明显不对,java的目录都没有,所以我们新建一下,首先在main上面右键新建目录命名java,再新建resources文件夹。建好如下图所示:
6、引入springmvc的依赖,引入后记得刷新maven依赖。如下图所示:
代码如下:
<!-- https://mvnrepository.com/artifact/org.springframework/spring-webmvc -->
    <dependency>
      <groupId>org.springframework</groupId>
      <artifactId>spring-webmvc</artifactId>
      <version>5.2.5.RELEASE</version>
    </dependency>
7、配置WEB.XML
 <!-- 配置前端控制器 -->
  <servlet>
    <servlet-name>springmvc</servlet-name>
    <servlet-class>org.springframework.web.servlet.DispatcherServlet</servlet-class>
    <!-- contextConfigLocation配置SpringMVC加载的配置文件 -->
    <init-param>
      <param-name>contextConfigLocation</param-name>
      <param-value>classpath:springmvc.xml</param-value>
    </init-param>
  </servlet>
  <!-- 声明哪些请求会被我当前的Servlet处理-->
  <servlet-mapping>
    <servlet-name>springmvc</servlet-name>
    <url-pattern>/</url-pattern>
  </servlet-mapping>
8、springmvc.xml配置
在resources下新建一个springmvc.xml文件
<?xml version="1.0" encoding="UTF-8"?>
<beans xmlns="http://www.springframework.org/schema/beans"
	xmlns:xsi="http://www.w3.org/2001/XMLSchema-instance"
	xmlns:mvc="http://www.springframework.org/schema/mvc"
	xmlns:p="http://www.springframework.org/schema/p"
	xmlns:context="http://www.springframework.org/schema/context"
	xmlns:aop="http://www.springframework.org/schema/aop"
	xsi:schemaLocation="
	http://www.springframework.org/schema/context
http://www.springframework.org/schema/context/spring-context-4.3.xsd
	http://www.springframework.org/schema/beans
http://www.springframework.org/schema/beans/spring-beans-4.3.xsd
http://www.springframework.org/schema/mvc
 http://www.springframework.org/schema/mvc/spring-mvc-4.3.xsd
http://www.springframework.org/schema/aop
http://www.springframework.org/schema/aop/spring-aop-4.3.xsd">
	<!-- 开启Spring注解扫描 -->
	<context:component-scan base-package="com.scj.*" />
	<!-- 开启SpringMVC注解 -->
	<mvc:annotation-driven />
	<!--静态资源过滤-->
	<mvc:default-servlet-handler/>
	<!-- 视图解析器:ViewResolver -->
	<bean class="org.springframework.web.servlet.view.InternalResourceViewResolver">
		<!-- 前缀 -->
		<property name="prefix" value="/WEB-INF/"></property>
		<!-- 后缀 -->
		<property name="suffix" value=".html"></property>
	</bean>
	<!-- 静态资源访问 -->
	<mvc:resources location="/static/" mapping="/static/**" />

</beans>
9、新建一个controller和html页面进行解析跳转
controller页面内容如下: 文章来源:https://www.toymoban.com/news/detail-632621.html
html页面如下:
10、由于用到了jquery,引入一下:
11、访问一下进行测试:http://localhost:8081/test/hello
访问如图所示: 文章来源地址https://www.toymoban.com/news/detail-632621.html
到了这里,关于idea创建springmvc项目的文章就介绍完了。如果您还想了解更多内容,请在右上角搜索TOY模板网以前的文章或继续浏览下面的相关文章,希望大家以后多多支持TOY模板网!


