目录
一、项目介绍
项目背景:
相机型号:
二、机械臂自由抓取演示
使用注意事项:
操作步骤:
三、核心代码讲解
① 机械臂相关运动驱动代码
② BGR图像转换伪彩色深度图像代码
③ 目标跟随及抓取动作代码
开发者:居正
如果大家对这个项目感兴趣的话,可以评论或私聊我,加群进行交流。同时也可以关注3D视觉开发者社区哦。
一、项目介绍
项目背景:
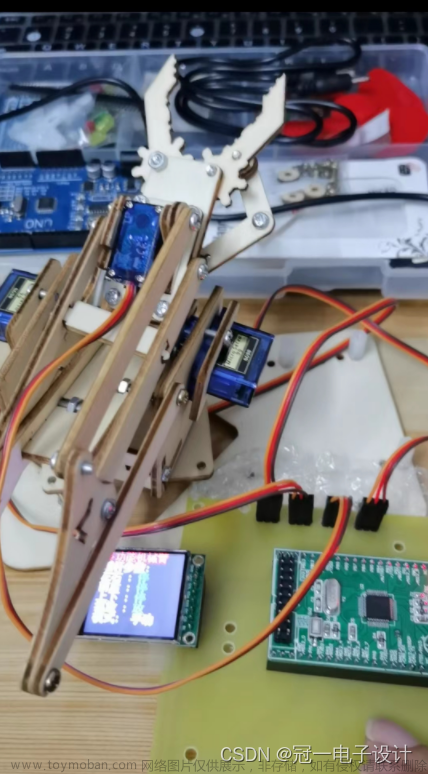
基于奥比中光OpenCV实验箱,配合六自由度机械臂实现360度物体自由抓取,同时设置两种姿态配合桌面抓取和自由抓取,使机械爪能够精准的对目标进行抓取。

相机型号:
OpenCV实验箱搭配了奥比中光目前最新的深度相机Gemini2,它十分小巧,方便嵌入到任何设备中,同时对图像深度信息采集十分精准,经过测试Gemini2可支持2米以上超长距离的物体识别与跟踪。
二、机械臂自由抓取演示
机械臂自由抓取演示视频
使用注意事项:
因为机械臂长度有限制,所以在使用药瓶自由抓取的时候,尽可能与摄像头保持水平,过高过远都无法准确抓取。因为角度限制,使用大药瓶在进行桌面抓取时,会发生滑爪现象,所以尽量使用小药瓶进行桌面抓取,大药瓶仅可进行自由抓取,小药瓶无限制。
| 范围 \ 目标类型 | 大药瓶 | 小药瓶 |
|---|---|---|
| 高度 | 30---40cm | 30---35cm |
| 距离 | 以自身为圆心,半径为31cm以内距离 | 以自身为圆心,半径为30cm以内距离 |
操作步骤:
首先找到例程运行所在的文件夹Code202308,打开终端(Ctrl+alt+T),输入命令cd Desktop/,接着cd Robotic_arm_apps,运行例程文件 python3 free_pickup.py

显示上图界面代表运行例程成功,可以进行实验了。
三、核心代码讲解
我将这里分成三个部分,分别是 ① 机械臂相关运动驱动代码 ② BGR图像转换伪彩色深度图像代码 ③ 目标跟随及抓取动作代码。
① 机械臂相关运动驱动代码
下面代码是用来控制舵机对抓取动作位置的控制。x是中心铜柱到目标的抓取距离,y是抓取高度。
import math

def step(x = None, y = None):

    pi = 3.14

    L1 = 105     # L1
    L2 = 110     # L2
    L3 = 110     # L3

    if x is None:
        x = int(input("x:"))
    if y is None:
        y = int(input("y:"))
    theta = math.radians(0)

    Bx = x - L3 * math.cos(theta)
    By = y - L3 * math.sin(theta)

    lp = Bx**2 + By**2
    alpha = math.atan2(By, Bx)
    tmp = (L1*L1 + lp - L2*L2) / (2*L1*math.sqrt(lp))
    if tmp < -1:
        tmp = -1
    elif tmp > 1:
        tmp = 1
    beta = math.acos(tmp)
    q1 = -(pi/2.0 - alpha - beta)
    tmp = (L1*L1 + L2*L2 - lp) / (2*L1*L2)
    if tmp < -1:
        tmp = -1
    elif tmp > 1:
        tmp = 1
    q2 = math.acos(tmp) - pi
    q3 = - q1 - q2 - pi/2

    step_5 = int(2047 + int(math.degrees(q1) * 11.375))
    step_4 = int(2047 + int(math.degrees(q2) * 11.375))
    step_3 = int(2047 - int(math.degrees(q3) * 11.375))

    return step_3, step_4, step_5
L1、L2、L3 是自定义连杆长度(标定值,提前测量好),接着定义好关节姿态theta坐标(x,y),接着计算中间位置Bx,By,即第二个关节的位置。这里用三角函数和末端关节的位置和姿态来求解,包括后面的所有动作基本上都是用三角函数逆解运算。
计算第一个和第二个关节的角度q1,q2,使用二连杆机械臂的逆运动学公式。这里用math.acos 和 math.atan2 函数来求解反余弦和反正切,使用math.sqrt函数求平方根。
计算第三个关节的角度q3,使用末端关节的姿态(预先定义,theta)减去前两个角度得到。math.degrees 函数将弧度转换为角度。
接着用底层舵机控制库,传送舵机姿态,并返回舵机姿态。
② BGR图像转换伪彩色深度图像代码
下面的代码是将相机采集到的深度信息配合BGR图像转换成伪彩色深度图像。
ret_bgr, bgr_image = orbbec_cap.retrieve(None, cv.CAP_OBSENSOR_BGR_IMAGE)
ret_depth, depth_map = orbbec_cap.retrieve(None, cv.CAP_OBSENSOR_DEPTH_MAP)

if ret_depth:
    depth_map_8U = depth_map * 255.0 / 5000
    depth_map_8U = np.clip(depth_map_8U, 0, 255)
    depth_map_8U = np.uint8(depth_map_8U)

    color_depth_map = cv.applyColorMap(depth_map_8U, cv.COLORMAP_JET)
    cv.imshow("Depth: ColorMap",  color_depth_map)
首先对图像进行归一化和均值处理,强制转换类型,并显示图像。
③ 目标跟随及抓取动作代码
此处代码是核心运动及抓取动作,包括了目标跟随代码还有旋转同步抓取动作代码。
def track_arm(packetHandler, bbox, frame_size,pid_errorx,pid_errory):
    c = frame_size[0] + 25
    s = frame_size[1] + (frame_size[1]/2)

    centerx = bbox[0]
    centery = bbox[1]
    stepx = int((centerx - c /2))
    stepy = int((centery - s /2))

    P_x = 0.2
    P_y = 0.3

    I_x = 0.05
    I_y = 0.06

    errorx = stepx - pid_errorx
    errory = stepy - pid_errory

    scs_present_position_3, scs_comm_result, scs_error = packetHandler.ReadPos(SCS_ID_3)
    scs_present_position_6, scs_comm_result, scs_error = packetHandler.ReadPos(SCS_ID_6)

    ACC_X = int (abs(P_x * stepx) + I_x * abs(errorx))
    if ACC_X > 256:
        ACC_X = 255
    elif ACC_X < 0:
        ACC_X = 0
    ACC_Y = int (abs(P_y * stepy) + I_y * abs(errory))
    if ACC_Y > 256:
        ACC_Y = 255
    elif ACC_Y < 0:
        ACC_Y = 0

    if scs_present_position_3 + stepy >= 3070:
        scs_comm_result, scs_error = packetHandler.WritePosEx(SCS_ID_5, 2480, SCS_MOVING_SPEED, SCS_MOVING_ACC)
        #packetHandler.WritePosEx(SCS_ID_2, 2048, SCS_MOVING_SPEED, SCS_MOVING_ACC)
    if scs_present_position_3 + stepy <= 2550:
        scs_comm_result, scs_error = packetHandler.WritePosEx(SCS_ID_5, 2900, SCS_MOVING_SPEED, SCS_MOVING_ACC)
    else:
        scs_comm_result, scs_error = packetHandler.WritePosEx(SCS_ID_3, scs_present_position_3 + stepy, SCS_MOVING_SPEED, ACC_Y)
        scs_comm_result, scs_error = packetHandler.WritePosEx(SCS_ID_6, scs_present_position_6 + stepx, SCS_MOVING_SPEED, ACC_X)

    pid_errorx = stepx
    pid_errory = stepy

    return pid_errorx, pid_errory
上面的是目标跟随代码,实现原理是将目标始终固定到图像的中央,在利用PID算法对舵机进行移动,消除舵机抖动。
下面的是舵机跟随旋转代码,原理是利用掩膜目标坐标进行三角函数逆解运算,求出目标旋转角度,再将角度传送给舵机进行同步旋转。文章来源:https://www.toymoban.com/news/detail-639423.html
def track_set_2(contours, x, y, w, h):
    arg = 0.0
    X_1 = x
    Y_1 = y
    X_2 = x + w - 1
    Y_2 = y + h - 1
    l = len(contours)
    for i in range(l - 1):
        if contours[i][0][0] == X_1:
            L1 = contours[i][0][1]
            break
    for i in range(l - 1):
        if contours[i][0][0] == X_2:
            L2 = contours[i][0][1]
            break
    for i in range(l - 1):
        if contours[i][0][1] == Y_1:
            R1 = contours[i][0][0]
            break
    for i in range(l - 1):
        if contours[i][0][1] == Y_2:
            R2 = contours[i][0][0]
            break
    '''0--90 AND 90--180 '''
    if R1 > R2 and h / w <= 0.65 * 56 / 22:
        arg1 = math.acos((R1 - X_1)/math.sqrt((R1 - X_1) * (R1 - X_1) + (Y_1 - L1) * (Y_1 - L1))) / math.pi * 180
        arg2 = math.acos((X_2 - R2)/math.sqrt((X_2 - R2) * (X_2 - R2) + (L2 - Y_2) * (L2 - Y_2))) / math.pi * 180
        arg = (arg1 + arg2) / 2
    if R1 < R2 and h / w <= 0.65 * 56 / 22:
        arg1 = math.acos((X_1 - R2) / math.sqrt((X_1 - R2) * (X_1 - R2) + (L1 - Y_2) * (L1 - Y_2))) / math.pi * 180
        arg2 = math.acos((R1 - X_2) / math.sqrt((R1 - X_2) * (R1 - X_2) + (Y_1 - L2) * (Y_1 - L2))) / math.pi * 180
        arg = (arg1 + arg2) / 2
    if h / w > 0.65 * 56 / 22:
        arg = 90
    arg = 1024 + int (arg / 180 * 2047)
return arg如果大家对这个项目感兴趣的话,可以评论或私聊我,加群进行交流。同时也可以关注3D视觉开发者社区哦。文章来源地址https://www.toymoban.com/news/detail-639423.html
到了这里,关于OpenCV实验箱---机械臂自由抓取例程开发使用手册的文章就介绍完了。如果您还想了解更多内容,请在右上角搜索TOY模板网以前的文章或继续浏览下面的相关文章,希望大家以后多多支持TOY模板网!


