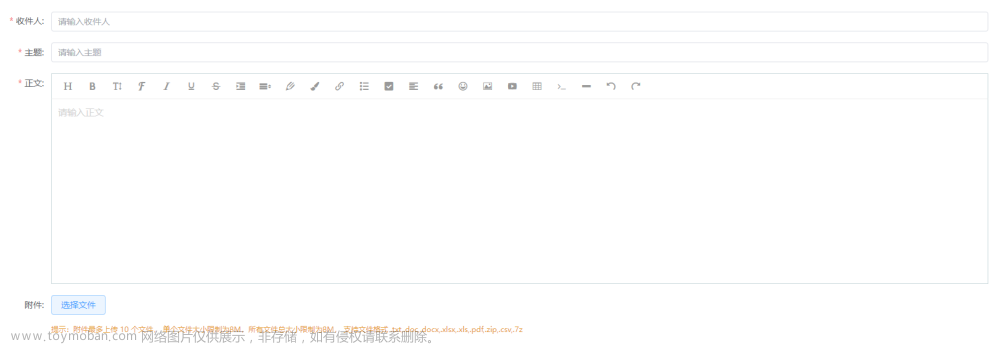
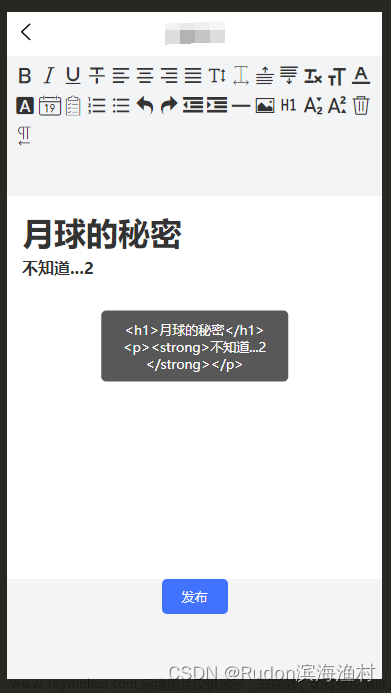
那么这一节我们在编辑公司信息的弹窗中使用富文本插件wangEditor官网
案例内效果:
安装wangEditor
npm install @wangeditor/editor --savenpm install @wangeditor/editor-for-vue@next --save

在弹窗中引入wangEditor结构
文档部分:
代码部分:
<template>
	<el-dialog v-model="state.dialogFormVisible" :title="title" width="600px" destroy-on-close>
		<div style="border: 1px solid #ccc">
		<!-- wangEditor结构 -->
			<Toolbar style="border-bottom: 1px solid #ccc" :editor="editorRef" :defaultConfig="toolbarConfig"
				:mode="mode" />
			<Editor style="height: 500px; overflow-y: hidden;" v-model="valueHtml" :defaultConfig="editorConfig"
				:mode="mode" @onCreated="handleCreated" />
		</div>
		<template #footer>
			<span class="dialog-footer">
				<el-button @click="cancel">取消</el-button>
				<el-button type="primary" @click="yes">
					确认
				</el-button>
			</span>
		</template>
	</el-dialog>
</template>
api接口部分
后端
需要注意的是,在35集《完成轮播图以及公司介绍接口》中
我们的参数是set_value,类型是varchar,但文案我们应该使用text类型
所以我们新建一个字段为set_text,用来存放我们的公司介绍等信息
同时,我们新增了一个接口,通过mysql like语法获取所有的信息
// 编辑公司介绍的接口 参数 set_text set_name
exports.changeCompanyIntroduce = (req, res) => {
	const sql = 'update setting set set_text = ? where set_name = ? '
	db.query(sql, [req.body.set_text, req.body.set_name], (err, result) => {
		if (err) return res.cc(err)
		res.send({
			status: 0,
			message: '修改公司介绍成功'
		})
	})
}

// 获取公司介绍 参数 set_name
exports.getCompanyIntroduce = (req, res) => {
	const sql = 'select * from setting where set_name = ?'
	db.query(sql, req.body.set_name,(err, result) => {
		if (err) return res.cc(err)
		res.send(result[0].set_value)
	})
}

// 新增接口 获取所有的公司介绍 用于首页
exports.getAllCompanyIntroduce = (req, res) => {
	// res.send(req.body.set_name)
	const sql = "select * from setting where set_name like '公司%' "
	db.query(sql, (err, result) => {
		if (err) return res.cc(err)
		res.send(result)
	})
}
前端\文章来源:https://www.toymoban.com/news/detail-640018.html
// 修改公司介绍
export const changeCompanyIntroduce= (set_text,set_name) => {
	return instance({
		url: '/set/changeCompanyIntroduce',
		method: 'POST',
		data:{
			set_text,
			set_name
		}
	})
}

// 获取公司介绍/组织结构/公司战略/高层信息
export const getCompanyIntroduce= set_name => {
	return instance({
		url: '/set/getCompanyIntroduce',
		method: 'POST',
		data:{
			set_name
		}
	})
}

// 获取所有介绍信息
export const getAllCompanyIntroduce = () => {
	return instance({
		url: '/set/getAllCompanyIntroduce ',
		method: 'POST',
	})
}
editor组件script部分
<script lang="ts" setup>
	import '@wangeditor/editor/dist/css/style.css' // 引入 css
	import {
		onBeforeUnmount, ref, shallowRef,
		reactive
	} from 'vue'
	import { Editor, Toolbar } from '@wangeditor/editor-for-vue'
	import { bus } from "@/utils/mitt.js"
	import {
		ElMessage
	} from "element-plus"
	// changecompanyintro
	import { changeCompanyIntroduce, getCompanyIntroduce} from '@/api/set'
	const title = ref()
	bus.on("editorTitle", async (id : number) => {
		if (id == 1) {
			title.value = '编辑公司介绍'
			valueHtml.value = await getCompanyIntroduce('公司介绍')
		}
		if (id == 2) {
			title.value = '编辑公司架构'
			valueHtml.value = await getCompanyIntroduce('公司架构')
		}
		if (id == 3) {
			title.value = '编辑公司战略'
			valueHtml.value = await getCompanyIntroduce('公司战略')
		}
		if (id == 4) {
			title.value = '编辑高层介绍'
			valueHtml.value = await getCompanyIntroduce('高层介绍')
		}
	})
	// 编辑器实例,必须用 shallowRef
	const editorRef = shallowRef()
	// mode
	const mode = ref('default')
	// 内容 HTML
	const valueHtml = ref()
	const toolbarConfig = {
		excludeKeys: []
	}
	const editorConfig = {
		placeholder: '请输入内容...',
		MENU_CONF: {
			uploadImage: {
				//上传图片配置
				server: 'http://127.0.0.1:3007/set/uploadCompanyPicture', //上传接口地址
				fieldName: 'file', //上传文件名
				methods: 'post',
				metaWithUrl: true, // 参数拼接到 url 上
				// 单个文件上传成功之后
				// onSuccess(file, res) {
				// },
				// 自定义插入图片
				customInsert(res, insertFn) {
					insertFn(res.url)
				},
			},
		}
	}
	// 上传图片,修改 uploadImage 菜单配置
	// 需要注意的是,如何去修改参数?
	toolbarConfig.excludeKeys = [
		'blockquote',
		'bgColor',
		'color',
		'group-more-style',
		'fontFamily',
		'bulletedList',
		'numberedList',
		'lineHeight',
		'todo',
		'emotion',
		'insertLink',
		'group-video',
		'insertTable',
		'codeBlock',
		'divider',
		'fullScreen',
		// 'group-image',

		// 排除菜单组,写菜单组 key 的值即可
	]
	// 点击确认 修改文案
	const yes = async () => {
		// 去除 编辑两个字
		console.log(title.value.slice(-4))
		// 两个参数 set_text set_name
		const res = await changeCompanyIntroduce(valueHtml.value,title.value.slice(-4))
		console.log(res)
		if (res.status == 0) {
			ElMessage({
				message: '修改公司介绍成功!',
				type: 'success',
			})
			state.dialogFormVisible = false
		} else {
			state.dialogFormVisible = false
			ElMessage.error('修改公司介绍失败,请检查网络是否通畅!')
		}
	}


	// 组件销毁时,也及时销毁编辑器
	onBeforeUnmount(() => {
		const editor = editorRef.value
		if (editor == null) return
		editor.destroy()
	})

	const handleCreated = (editor : any) => {
		editorRef.value = editor // 记录 editor 实例,重要!
	}
	const state = reactive({
		dialogFormVisible: false,
	});

	// 取消删除
	const cancel = () => {
		ElMessage.error("取消赋权!");
		state.dialogFormVisible = false;
	};

	// 暴露open方法
	const open = () => {
		state.dialogFormVisible = true;
	};
	defineExpose({
		open,
	});

	// 取消订阅/监听
	onBeforeUnmount(() => {
		bus.all.clear()
	})
怎么去修改富文本的编辑器?
①找到对应的data-menu-key
②放入toolbarConfig.excludeKeys中 文章来源地址https://www.toymoban.com/news/detail-640018.html
到了这里,关于Vue3使用wangEditor的文章就介绍完了。如果您还想了解更多内容,请在右上角搜索TOY模板网以前的文章或继续浏览下面的相关文章,希望大家以后多多支持TOY模板网!


