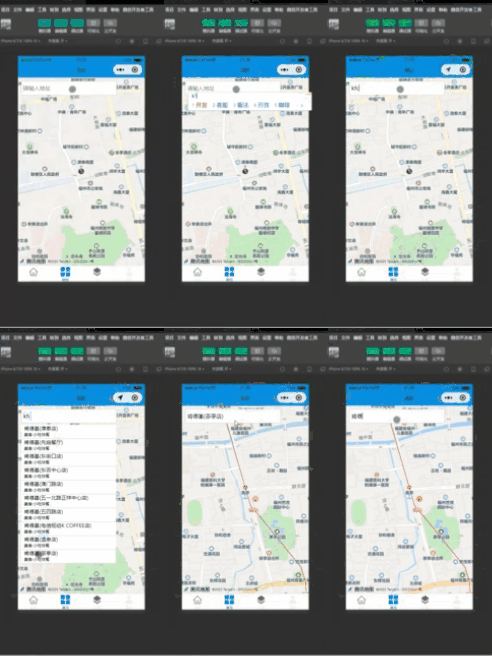
演示
效果图
微信小程序实现交互文章来源:https://www.toymoban.com/news/detail-643511.html
文章来源地址https://www.toymoban.com/news/detail-643511.html
html
<view wx:if="{{calendarArr.length}}">
  <view class="height_786 df_fdc_aic">
    <view class="grid_c7_104">
      <view class="font_weight_800 text_align_center {{index===0||index===week.length-1?'color_777':'color_333'}}" wx:for="{{week}}" wx:key="id">{{item.title}}</view>
    </view>

    <view class="grid_c7_104 margin_t_26 grid_row_gap_16">
      <view class="height_104 dis_c_cc radius_6 text_align_center {{item.date===date&&!item.$b?'back_primary color_EEE':''}} {{item.date===newDate?'font_weight_800 font_style_oblique color_FF780A':''}} {{item.$isWeekend}}" wx:for="{{calendarArr}}" wx:key="id" data-item="{{item}}" catchtap="selectCalendar">
        <view>{{item.cDay}}</view>
        <view class="font_size_22 {{item.$festival}}">{{item.$SF}}</view>
      </view>
    </view>
  </view>

  <view class="margin_t_26 dis_r_c">
    <view class="width_95 dis_r_sa padding_tb_8 text_align_center shadow_0_0_6_6_CCC radius_8">
      <view wx:for="{{info.list}}" wx:key="id">
        <view>{{item.cTitle}}</view>
        <view>{{item.lTitle}}</view>
      </view>
    </view>
  </view>

  <view class="margin_t_26">
    <picker-view class="height_300" indicator-class="height_90" value="{{pickerVal}}" bindchange="bindChange">
      <picker-view-column>
        <view class="height_90 text_align_center dis_r_c" wx:for="{{years}}" wx:key="index">
          <text>{{item.title}}</text>
        </view>
      </picker-view-column>
      <picker-view-column>
        <view class="height_90 text_align_center dis_r_c" wx:for="{{months}}" wx:key="index">
          <text>{{item.title}}</text>
        </view>
      </picker-view-column>
    </picker-view>
  </view>
</view>
JavaScript
// 注意这里引入的方式
// 因为不想构建小程序
// 所以直接把下载好的日历转换文件夹放到小程序中引用即可
import calendar from '../../../utils/js-calendar-converter/src/index';

Page({
  /**
   * 页面的初始数据
   */
  data: {
    y: undefined,
    m: undefined,
    d: undefined,
    date: '',
    calendarArr: [],
    week: [{
        id: 'id0',
        title: '日',
        value: 0
      },
      {
        id: 'id1',
        title: '一',
        value: 1
      },
      {
        id: 'id2',
        title: '二',
        value: 2
      },
      {
        id: 'id3',
        title: '三',
        value: 3
      },
      {
        id: 'id4',
        title: '四',
        value: 4
      },
      {
        id: 'id5',
        title: '五',
        value: 5
      },
      {
        id: 'id6',
        title: '六',
        value: 6
      }
    ],
    info: {},
    years: [],
    months: [],
    pickerVal: [0, 0],
    newDate: ''
  },

  /**
   * 选择年份与月份
   * @param {object} obj
   * @return {undefined} undefined
   */
  bindChange({
    detail: {
      value
    }
  }) {
    let self = this,
      selfData = self.data,
      years = selfData.years,
      months = selfData.months,
      y = selfData.y,
      m = selfData.m,
      d = selfData.d,
      year = years[value[0]].value,
      month = months[value[1]].value,
      newDate = '';

	// 当滑动到不是当年当月的时候默认选中当月1号
    newDate = year !== y || month !== m ? `${year}-${month}-1` : `${year}-${month}-${d}`;

    self.setData({
      newDate,
      pickerVal: value
    }, () => self.createCalendar(year, month));
  },

  /**
   * 显示的信息
   * @param {object} obj
   * @return {Array} info
   */
  handleInfo(obj) {
    let list = [{
        id: 'id1',
        cTitle: obj.cYear + '年',
        lTitle: obj.gzYear + obj.Animal + '年'
      },
      {
        id: 'id2',
        cTitle: obj.cMonth + '月',
        lTitle: obj.gzMonth + obj.IMonthCn
      },
      {
        id: 'id3',
        cTitle: obj.cDay + '日',
        lTitle: obj.gzDay + obj.IDayCn
      },
      {
        id: 'id4',
        cTitle: obj.ncWeek,
        lTitle: obj.astro
      }
    ];

    obj.list = list;

    this.setData({
      info: obj
    });
  },

  /**
   * 创建日期
   * @param y 年
   * @return undefined
   */
  selectCalendar({
    currentTarget: {
      dataset: {
        item
      }
    }
  }) {
    this.handleInfo(item);
    this.setData({
      newDate: item.date
    });
  },

  /**
   * 创建日期
   * @param y 年
   * @param m 月
   * @param d 日
   * @return [{}]
   */
  creationDate(y, m, d) {
    let arr = [];

    for (let i = 1; i < d + 1; i++) {
      let obj = calendar.solar2lunar(y, m, i);

      arr.push({
        ...obj
      });
    }

    return arr;
  },

  /**
   * 收集创建日期需要的数据(重要函数)
   * @param {Number} y 年
   * @param {number} m 月
   * @return [{}]
   */
  createCalendar(y, m) {
    let self = this,
      selfData = self.data,
      newDate = selfData.newDate,
      y1 = y,
      y2 = y,
      y3 = y,
      m1 = m - 1,
      m2 = m,
      m3 = m + 1,
      d1 = undefined,
      d2 = undefined,
      d3 = undefined,
      arr1 = [],
      arr2 = [],
      arr3 = [],
      len2 = 0,
      nWeek1 = undefined,
      nWeek3 = undefined,
      info = {};

    if (m === 1)(y1 = y - 1, m1 = 12);
    if (m === 12)(y3 = y + 1, m3 = 1);

    d1 = calendar.solarDays(y, m1);
    d2 = calendar.solarDays(y, m2);
    d3 = calendar.solarDays(y, m3);

    arr1 = self.creationDate(y1, m1, d1);
    arr2 = self.creationDate(y2, m2, d2);
    arr3 = self.creationDate(y3, m3, d3);
    len2 = arr2.length;
    nWeek1 = arr2[0].nWeek;
    nWeek3 = arr2[len2 - 1].nWeek;

    nWeek1 = nWeek1 === 7 ? 0 : arr2[0].nWeek;
    nWeek3 = nWeek3 === 6 ? 0 : nWeek3 === 7 ? nWeek3 - 1 : 6 - nWeek3;

    // 前部分补全一个星期
    for (let i = arr1.length - 1; nWeek1 > 0; i--) {
      let item = arr1[i];

      item.$b = true;
      arr2.unshift(item);
      nWeek1--;
    }

    // 后部分补全一个星期
    for (let i = 0; i < nWeek3; i++) {
      let item = arr3[i];

      item.$b = true;
      arr2.push(item);
    }

    arr2 = arr2.map((item, i) => {
      if (item.IDayCn === '初一' && !item.festival && !item.Term && !item.lunarFestival) {
        item.$festival = '';
        item.$SF = item.IMonthCn;
      } else if (item.festival) {
        item.$festival = 'color_primary';
        item.$SF = item.festival;
      } else if (item.Term) {
        item.$festival = 'color_primary';
        item.$SF = item.Term;
      } else if (item.lunarFestival) {
        item.$festival = 'color_primary';
        item.$SF = item.lunarFestival;
      } else {
        item.$festival = '';
        item.$SF = item.IDayCn;
      }

      if (['星期六', '星期日'].includes(item.ncWeek) && item.cMonth === m) {
        item.$isWeekend = 'color_777';
      } else if (item.$b) {
        item.$isWeekend = 'color_CCC';
      } else {
        item.$isWeekend = 'color_333';
      }
      item.$id = `id${i+1}`;

      if (item.date === newDate) info = item;

      return item;
    });

    self.handleInfo(info);

    self.setData({
      calendarArr: arr2
    });
  },

  /**
   * 初始化
   */
  init() {
    let self = this,
      y = undefined,
      m = undefined,
      d = undefined,
      years = [],
      months = [],
      pickerVal = [],
      date = new Date();

    y = date.getFullYear();
    m = date.getMonth() + 1;
    d = date.getDate();

	// 获取100年时间的日历
    for (let i = y - 95; i <= y + 5; i++) years.push({
      id: `id${i}`,
      title: i + '年',
      value: i
    });

    for (let i = 0; i < 12; i++) months.push({
      id: `id${i}`,
      title: i + 1 + '月',
      value: i + 1
    });

    pickerVal = [
      years.findIndex(item => item.value === y),
      months.findIndex(item => item.value === m)
    ];

    self.setData({
        y,
        m,
        d,
        date: `${y}-${m}-${d}`,
        newDate: `${y}-${m}-${d}`,
        years,
        months
      },
      () => (self.createCalendar(y, m), self.setData({
        pickerVal
      })));
  },

  /**
   * 生命周期函数--监听页面加载
   */
  onLoad(options) {
    this.init();
  },

  /**
   * 生命周期函数--监听页面初次渲染完成
   */
  onReady() {

  },

  /**
   * 生命周期函数--监听页面显示
   */
  onShow() {

  },

  /**
   * 生命周期函数--监听页面隐藏
   */
  onHide() {

  },

  /**
   * 生命周期函数--监听页面卸载
   */
  onUnload() {

  },

  /**
   * 页面相关事件处理函数--监听用户下拉动作
   */
  onPullDownRefresh() {

  },

  /**
   * 页面上拉触底事件的处理函数
   */
  onReachBottom() {

  },

  /**
   * 用户点击右上角分享
   */
  onShareAppMessage() {

  }
})
到了这里,关于微信小程序实现日历功能、日历转换插件、calendar的文章就介绍完了。如果您还想了解更多内容,请在右上角搜索TOY模板网以前的文章或继续浏览下面的相关文章,希望大家以后多多支持TOY模板网!


