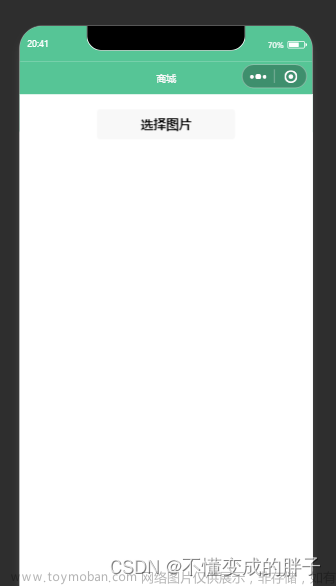
话不多说,直接上代码文章来源地址https://www.toymoban.com/news/detail-643974.html
1、页面布局
<view class="buttons" style="height: 50px;">
  <view
  class="upload btn"
  style="background-color: #d18118;"
  bindtap="uploadImage"> 上传图片
  </view>
  <view
    class="getCropperImage btn"
    style="background-color: #04b00f;"
    bindtap="getCropperImage">
    生成图片
  </view>
</view>
<view class="canvas">
  <canvas
  style="width: {{canvasWidth}}px;height: {{canvasHeight}}px;"
  type="2d"
  id="canvas-1"
  canvas-id="canvas-1"
  disable-scroll="true"
  ></canvas>

  <canvas
  style="width: {{canvasWidth}}px;height: {{canvasHeight}}px;position: absolute;top: 0;z-index: 999;"
  type="2d"
  id="canvas-2"
  disable-scroll="true"
  bindtouchstart="touchStart"
  bindtouchmove="touchMove"
  bindtouchend="touchEnd"
  ></canvas>
</view>
2、页面样式
page{
  padding: 0;
  -webkit-user-select: none;
  user-select: none;
  width: 100%;
  height: 100%;
  background-color: #c0c0c0;
  font-family: Arial, Helvetica, sans-serif;
  overflow-x: hidden;
}
.buttons{
  display: flex;
  flex-direction: row;
  justify-content: space-between;
  align-items: center;
  padding: 0 25rpx;
  border-bottom: 1rpx solid white;
}
.canvas{
  position: relative;
}
3、页面逻辑
let ctx = null;
let canvas = null;
Page({
  data: {
    canvasWidth:300,
    canvasHeight:500,
    pixelRatio:2,

    pointRadius:12,// 裁剪框边角原点半径
    point:[[48,48],[312, 48],[312, 224],[48, 224]],// 裁剪框边角原点位置
    moveIndex:-1//点击的剪切框原点小标
  },

  onLoad (options) {
    const that = this;
    wx.getSystemInfo({
      success (res) {
        that.setData({
          canvasWidth:res.windowWidth,
          canvasHeight:res.windowHeight -50,
          pixelRatio: res.pixelRatio,
        })
      }
    })
  },

  uploadImage(){
    const that = this;
    wx.chooseMedia({
      count: 1,
      mediaType: ['image','video'],
      sourceType: ['album', 'camera'],
      maxDuration: 30,
      camera: 'back',
      success(res) {
        that.drawImage(res.tempFiles[0].tempFilePath);
      }
    })
  },

  drawImage(src){
    const self = this;
    wx.getImageInfo({
      src: src,
      success (res) {
        const width = self.data.canvasWidth;
        const height = self.data.canvasHeight;
        var innerAspectRadio = res.width / res.height;//图片宽高比
        var customAspectRadio = width / height;//画布宽高比
        let x = 0;
        let y = 0;
        let baseWidth = 0;//图片在画布宽度
        let baseHeight = 0;//图片在画布高度
        if (innerAspectRadio > customAspectRadio) {
          baseWidth = width*0.8;
          baseHeight = (width / innerAspectRadio)*0.8;
        } else {
          baseWidth = height * innerAspectRadio;
          baseHeight = height;
        }
        x = (width-baseWidth)/2;
        y = (height-baseHeight)/2;
        // 绘制图片
        wx.createSelectorQuery().select('#canvas-1').fields({ node: true, size: true }).exec((res) => {
          // Canvas 对象
          const canvas = res[0].node
          // 渲染上下文
          const ctx = canvas.getContext('2d');
          // 初始化画布大小
          const dpr = self.data.pixelRatio
          canvas.width = width * dpr
          canvas.height = height * dpr
          ctx.scale(dpr, dpr)
          // 开始绘制
          let image = canvas.createImage();//创建iamge实例
          image.src = src;  //引入图片
          image.onload = function () {
            ctx.drawImage(image, x, y, baseWidth, baseHeight);
            self.setData({
              point:[[x-10,y-10],[x+baseWidth+10,y-10],[x+baseWidth+10,y+baseHeight+10],[x-10,y+baseHeight+10]]
            },()=>{
              self.pointInit()
            })
          }
        })
      }
    })
  },

  pointInit(){
    const that = this;
    const query = wx.createSelectorQuery()
    query.select('#canvas-2').fields({ node: true, size: true }).exec((res) => {
      // Canvas 对象
      const canvas = res[0].node
      that.canvas = canvas;
      // 渲染上下文
      const ctx = canvas.getContext('2d');
      that.ctx = ctx;
      // 初始化画布大小
      const dpr = that.data.pixelRatio
      canvas.width = that.data.canvasWidth * dpr
      canvas.height = that.data.canvasHeight * dpr
      ctx.scale(dpr, dpr)
      // 开始绘制
      that.drawPoint(that.data.point)
    })
  },

  drawPoint(point){
    const ctx = this.ctx;
    const pointRadius = this.data.pointRadius;
    ctx.clearRect(0, 0, this.data.canvasWidth, this.data.canvasHeight)
    ctx.beginPath()
    ctx.fillStyle = 'rgb(0, 0, 200)';
    ctx.arc(point[0][0], point[0][1], pointRadius, 0, 2*Math.PI , true)
    ctx.arc(point[1][0], point[1][1], pointRadius, 0, 2*Math.PI , true)
    ctx.fill()
    ctx.beginPath()
    ctx.arc(point[2][0], point[2][1], pointRadius, 0, 2*Math.PI , true)
    ctx.arc(point[3][0], point[3][1], pointRadius, 0, 2*Math.PI , true)
    ctx.fill()
    ctx.beginPath()
    ctx.lineWidth = 4
    ctx.strokeStyle = 'rgba(255,255,255,0.6)';
    ctx.lineJoin = 'round'
    ctx.lineCap = 'round'
    ctx.lineTo(point[0][0], point[0][1])
    ctx.lineTo(point[1][0], point[1][1])
    ctx.lineTo(point[2][0], point[2][1])
    ctx.lineTo(point[3][0], point[3][1])
    ctx.lineTo(point[0][0], point[0][1])
    ctx.stroke()
    ctx.fillStyle = 'rgb(0, 0, 0, 0.5)';
    ctx.fill()
  },

  //  手势初始监测
  touchStart: function touchStart (e) {
    var that = this;
    var ref = e.touches[0];
    const point = this.data.point;
    const pointRadius = this.data.pointRadius;
    let moveIndex = -1;
    for(var i=0;i<4;i++){
      if(ref.x > (point[i][0]-pointRadius) && ref.x < (point[i][0]+pointRadius)){
        if(ref.y > (point[i][1]-pointRadius) && ref.y < (point[i][1]+pointRadius)){
          moveIndex = i;
          break;
        }
      }
    }
    if(moveIndex!=-1){
      that.setData({
        moveIndex:moveIndex
      })
    }
  },

  //  手势滑动
  touchMove: function touchMove (e) {
    var ref = e.touches[0];
    var x = ref.x;
    var y = ref.y;
    if(this.data.moveIndex!=-1){
      const point = this.data.point;
      const index = this.data.moveIndex;
      point[index][0] = x;
      point[index][1] = y;
      this.setData({
        point:point
      },()=>{
        this.drawPoint(point);
      })
    }
  },

  // 手势滑动结束
  touchEnd: function touchEnd (e) {
    var ref = e.changedTouches[0];
    var x = ref.x;
    var y = ref.y;
    if(this.data.moveIndex!=-1){
      const point = this.data.point;
      const index = this.data.moveIndex;
      point[index][0] = x;
      point[index][1] = y;
      this.setData({
        point:point,
        moveIndex:-1
      })
    }
  },

  getCropperImage(){
    const self = this;
    const point = this.data.point;
    wx.createSelectorQuery().select('#canvas-1').fields({ node: true, size: true }).exec((res) => {
      // Canvas 对象
      const canvas = res[0].node
      // 渲染上下文
      const ctx = canvas.getContext('2d');
      // 初始化画布大小
      // const dpr = self.data.pixelRatio
      // canvas.width = self.data.windowWidth * dpr
      // canvas.height = self.data.windowHeight * dpr
      // ctx.scale(dpr, dpr)
      // // 开始绘制
      // ctx.beginPath()
      // ctx.moveTo(point[0][0], point[0][1]);
      // ctx.lineTo(point[1][0], point[1][1]);
      // ctx.lineTo(point[2][0], point[2][1]);
      // ctx.lineTo(point[3][0], point[3][1]);
      // ctx.lineTo(point[0][0], point[0][1]);
      // //先关闭绘制路径。注意,此时将会使用直线连接当前端点和起始端点。
      // ctx.closePath();
      // ctx.fill()
      // ctx.clip()

      debugger
      wx.canvasToTempFilePath({
        x: 0,
        y: 0,
        width: 200,
        height: 200,
        destWidth: 200,
        destHeight: 200,
        canvasId: 'canvas-1',
        success: function (res) {
          debugger
          console.log(res.tempFilePath)
        },
        fail: function (res) {
          debugger
          console.log(res)
        },
      },this)
    })

  }
})
文章来源:https://www.toymoban.com/news/detail-643974.html
到了这里,关于微信小程序实现图片多点裁剪的文章就介绍完了。如果您还想了解更多内容,请在右上角搜索TOY模板网以前的文章或继续浏览下面的相关文章,希望大家以后多多支持TOY模板网!


