  <!--富文本接收的位置-->
  <view class="white-box">
    <view class="title">
      <view class="yellow-fence"></view>
      <view class="v1">教研记录</view>
    </view>
    <view class="add-btn" bindtap="addRecords">添加新的教研记录</view>
    <view wx:for="{{records}}" class="rich-text-box" wx:key="index">
      <!-- <mp-html content="{{item}}" selectable="true" show-img-menu="true" /> -->
      <rich-text nodes="{{item}}" data-index="{{index}}" bindtap="echoRecordsData"></rich-text>
    </view>
  </view>

  <view class="white-box">
    <view class="title">
      <view class="yellow-fence"></view>
      <view class="v1">研究成果</view>
    </view>
    <view class="add-btn" bindtap="addAchievement">添加研究成果说明</view>
    <view wx:for="{{achievement}}" class="rich-text-box" wx:key="index">
      <!-- <mp-html content="{{item}}" selectable="true" show-img-menu="true" /> -->
      <rich-text nodes="{{item}}" data-index="{{index}}" bindtap="echoAchievementData"></rich-text>
    </view>
  </view>
以上是富文本的值返回接收的地方 下面是富文本的html文章来源:https://www.toymoban.com/news/detail-650150.html
<!--富文本编辑器弹窗-->
<view class="container" style="height:100vh;" wx:if="{{showEidter}}">
<view class="save-box">
<view class="v1" bindtap="cancelEidter">取消</view>
<view class="v2" bindtap="saveEditer">确定</view>
</view>
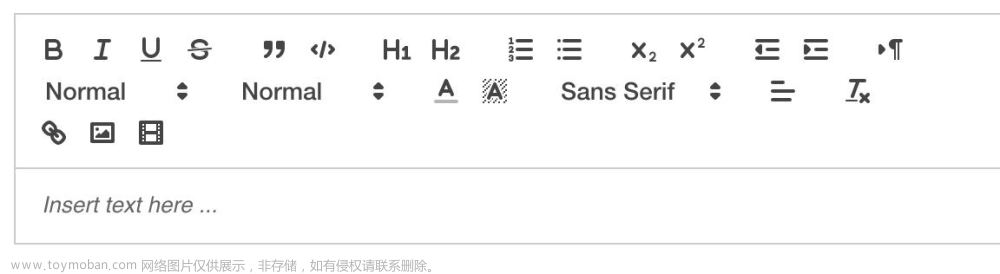
<editor id="editor" class="ql-container" placeholder="{{placeholder}}" bindstatuschange="onStatusChange" bindready="onEditorReady" bindfocus="onFocus" bindinput="onBlur">
</editor>
<view class="toolbar" catchtouchend="format">
<i class="iconfont icon-charutupian" catchtouchend="insertImage"></i>
<i class="iconfont icon-format-header-2 {{formats.header === 2 ? 'ql-active' : ''}}" data-name="header" data-value="{{2}}"></i>
<i class="iconfont icon-format-header-3 {{formats.header === 3 ? 'ql-active' : ''}}" data-name="header" data-value="{{3}}"></i>
<i class="iconfont icon-zitijiacu {{formats.bold ? 'ql-active' : ''}}" data-name="bold"></i>
<i class="iconfont icon-zitixieti {{formats.italic ? 'ql-active' : ''}}" data-name="italic"></i>
<i class="iconfont icon-zitixiahuaxian {{formats.underline ? 'ql-active' : ''}}" data-name="underline"></i>
<i class="iconfont icon--checklist" data-name="list" data-value="check"></i>
<i class="iconfont icon-youxupailie {{formats.list === 'ordered' ? 'ql-active' : ''}}" data-name="list" data-value="ordered"></i>
<i class="iconfont icon-wuxupailie {{formats.list === 'bullet' ? 'ql-active' : ''}}" data-name="list" data-value="bullet"></i>
</view>
</view>Page({
data: {
/*富文本-start*/
formats: {},
readOnly: false,
placeholder: '开始输入...',
isClickImg: false,
records: [], //教研记录列表
isRecordsEidt: false, //是否编辑的是教研记录
recordsEidtIndex: null, //教研记录编辑的是哪一条
achievement: [], //研究成果列表
isAchievementEidt: false, //是否编辑的是研究成果
achievementEidtIndex: null, //研究成果编辑的是哪一条
showEidter: false,
editData: '',
/*富文本-end*/
},
onLoad(options) {},
/*富文本编辑器-start*/
//编辑教研记录列表
echoRecordsData(e) {
const that = this
let oidx = e.currentTarget.dataset.index
this.setData({
isRecordsEidt: true,
showEidter: true,
recordsEidtIndex: oidx,
isAchievementEidt: false, //是否编辑的是研究成果
achievementEidtIndex: null, //研究成果编辑的是哪一条
})
//console.log(that.data.records[oidx])
// 修改时,反显数据
this.createSelectorQuery().select("#editor")
.context((res) => {
res.context.setContents({
html: that.data.records[oidx],
});
})
.exec();
},
echoAchievementData(e) {
const that = this
let oidx = e.currentTarget.dataset.index
this.setData({
isAchievementEidt: true,
showEidter: true,
achievementEidtIndex: oidx,
isRecordsEidt: false, //是否编辑的是教研记录
recordsEidtIndex: null, //教研记录编辑的是哪一条
})
//console.log(that.data.records[oidx])
// 修改时,反显数据
this.createSelectorQuery().select("#editor")
.context((res) => {
res.context.setContents({
html: that.data.achievement[oidx],
});
})
.exec();
},
//重置
cancelEidter() {
this.setData({
isRecordsEidt: false,
showEidter: false,
recordsEidtIndex: null,
isAchievementEidt: false,
achievementEidtIndex: null,
editData: ''
})
},
saveEditer() {
//如果是教研记录新增
let recordsEidtIndex = this.data.recordsEidtIndex
let achievementEidtIndex = this.data.achievementEidtIndex
if (this.data.isRecordsEidt) {
let odata = this.data.records
if (recordsEidtIndex || recordsEidtIndex === 0) {
//编辑
odata[recordsEidtIndex] = this.data.editData
} else {
//新增
odata.push(this.data.editData)
}
this.setData({
records: odata
})
//console.log(this.data.records)
this.cancelEidter()
} else if (this.data.isAchievementEidt || achievementEidtIndex === 0) {
let odata = this.data.achievement
if (achievementEidtIndex) {
//编辑
odata[achievementEidtIndex] = this.data.editData
} else {
//新增
odata.push(this.data.editData)
}
this.setData({
achievement: odata
})
//console.log(this.data.records)
this.cancelEidter()
}
},
addRecords() {
this.setData({
isRecordsEidt: true,
showEidter: true
})
},
addAchievement() {
this.setData({
isAchievementEidt: true,
showEidter: true
})
},
readOnlyChange() {
this.setData({
readOnly: !this.data.readOnly
})
},
onEditorReady() {
const that = this
wx.createSelectorQuery().select('#editor').context(function (res) {
//console.log(res)
if (res.context) {
that.editorCtx = res.context
}
}).exec()
},
format(e) {
let {
name,
value
} = e.target.dataset
if (!name) return
// console.log('format', name, value)
this.editorCtx.format(name, value)
},
onStatusChange(e) {
const formats = e.detail
this.setData({
formats
})
},
insertDivider() {
this.editorCtx.insertDivider({
success: function () {
console.log('insert divider success')
}
})
},
clear() {
this.editorCtx.clear({
success: function (res) {
console.log("clear success")
}
})
},
removeFormat() {
this.editorCtx.removeFormat()
},
insertDate() {
const date = new Date()
const formatDate = `${date.getFullYear()}/${date.getMonth() + 1}/${date.getDate()}`
this.editorCtx.insertText({
text: formatDate
})
},
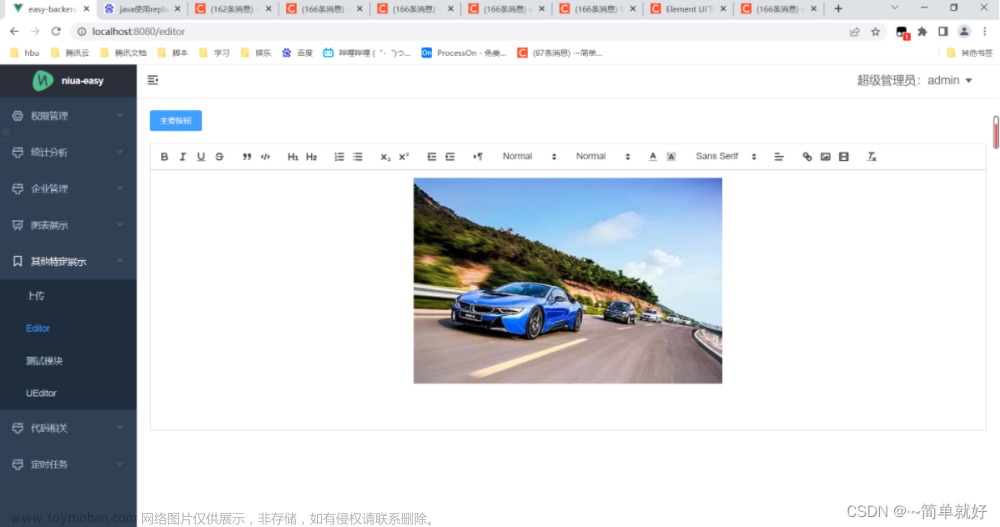
insertImage() {
this.setData({
isClickImg: true
})
const that = this
wx.chooseImage({
count: 1,
success: function (res) {
that.editorCtx.insertImage({
src: res.tempFilePaths[0],
data: {
id: 'abcd',
role: 'god'
},
width: '80%',
success: function () {
console.log('insert image success')
}
})
}
})
},
onFocus() {
this.setData({
isClickImg: false
})
},
onBlur(e) {
//console.log(this.data.isClickImg)
//防止上传的图片直接失焦 保存内容的问题
if (!this.data.isClickImg) {
//console.log(e.detail.html)
this.setData({
editData: e.detail.html
})
}
//this.oneEditor.blur()
},
/*富文本编辑器-end*/
})/*富文本编辑器-start*/
.container {
position: fixed;
top: 0;
right: 0;
bottom: 0;
left: 0;
z-index: 999;
display: flex;
flex-direction: column;
background: #fff;
}
.ql-container {
flex: 1;
padding: 10px 10px 50px 10px;
box-sizing: border-box;
font-size: 16px;
line-height: 1.5;
}
.ql-active {
color: #22C704;
}
.iconfont {
display: inline-block;
width: 30px;
height: 30px;
cursor: pointer;
font-size: 20px;
}
.toolbar {
position: fixed;
left: 0;
right: 100%;
bottom: 0;
padding: 0 10px;
display: flex;
align-items: center;
justify-content: space-between;
width: 100%;
height: 50px;
box-sizing: border-box;
background: #fff;
border-top: 1rpx solid #f2f2f2;
}
.save-box{ margin: 10rpx 10rpx 0 0; display: flex; justify-content: flex-end;}
.save-box .v1,.save-box .v2{ font-size: 28rpx; width: 100rpx; height: 60rpx; text-align: center; line-height: 60rpx; border-radius: 12rpx;}
.save-box .v1{ margin-right: 10rpx; background: #ddd; color: #fff;}
.save-box .v2{ background: #ffb81c; color: #fff;}
.rich-text-box{ margin-bottom: 20rpx;}
/*富文本编辑器-end*/
记录一下使用方法 也可以参考一下怎么使用文章来源地址https://www.toymoban.com/news/detail-650150.html
到了这里,关于微信小程序使用editor富文本编辑器 以及回显 全屏弹窗的模式的文章就介绍完了。如果您还想了解更多内容,请在右上角搜索TOY模板网以前的文章或继续浏览下面的相关文章,希望大家以后多多支持TOY模板网!