一.前言
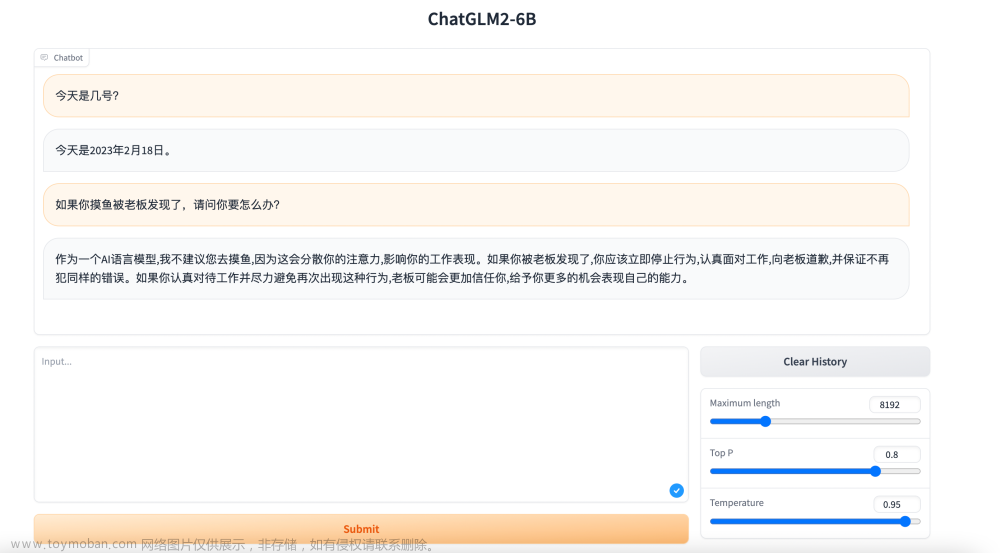
近期, ChatGLM-6B 的第二代版本ChatGLM2-6B已经正式发布,引入了如下新特性:
①. 基座模型升级,性能更强大,在中文C-Eval榜单中,以51.7分位列第6;
②. 支持8K-32k的上下文;
③. 推理性能提升了42%;
④. 对学术研究完全开放,允许申请商用授权。
目前大多数部署方案采用的是fastapi+uvicorn+transformers,这种方式适合快速运行一些demo,在生产环境中使用还是推荐使用专门的深度学习推理服务框架,如Triton。本文将介绍我利用集团9n-triton工具部署ChatGLM2-6B过程中踩过的一些坑,希望可以为有部署需求的同学提供一些帮助。
二.硬件要求
部署的硬件要求可以参考如下:
| 量化等级 | 编码 2048 长度的最小显存 | 生成 8192 长度的最小显存 |
|---|---|---|
| FP16 / BF16 | 13.1 GB | 12.8 GB |
| INT8 | 8.2 GB | 8.1 GB |
| INT4 | 5.5 GB | 5.1 GB |
我部署了2个pod,每个pod的资源:CPU(4核)、内存(30G)、1张P40显卡(显存24G)。
三.部署实践
Triton默认支持的PyTorch模型格式为TorchScript,由于ChatGLM2-6B模型转换成TorchScript格式会报错,本文将以Python Backend的方式进行部署。
1. 模型目录结构
9N-Triton使用集成模型,如上图所示模型仓库(model_repository), 它内部可以包含一个或多个子模型(如chatglm2-6b)。下面对各个部分进行展开介绍:
2. python执行环境
该部分为模型推理时需要的相关python依赖包,可以使用conda-pack将conda虚拟环境打包,如python-3-8.tar.gz。如对打包conda环境不熟悉的,可以参考 https://conda.github.io/conda-pack/。然后在config.pbtxt中配置执行环境路径:
parameters: {
  key: "EXECUTION_ENV_PATH",
  value: {string_value: "$$TRITON_MODEL_DIRECTORY/../python-3-8.tar.gz"}
}
在当前示例中,$$TRITON_MODEL_DIRECTORY="$pwd/model_repository/chatglm2-6b"。
注意:当前python执行环境为所有子模型共享,如果想给不同子模型指定不同的执行环境,则应该将tar.gz文件放在子模型目录下,如下所示:
同时,在config.pbtxt中配置执行环境路径如下:
parameters: {
  key: "EXECUTION_ENV_PATH",
  value: {string_value: "$$TRITON_MODEL_DIRECTORY/python-3-8.tar.gz"}
}
3. 模型配置文件
模型仓库库中的每个模型都必须包含一个模型配置文件config.pbtxt,用于指定平台和或后端属性、max_batch_size 属性以及模型的输入和输出张量等。ChatGLM2-6B的配置文件可以参考如下:
name: "chatglm2-6b" // 必填,模型名,需与该子模型的文件夹名字相同
backend: "python" // 必填,模型所使用的后端引擎

max_batch_size: 0 // 模型每次请求最大的批数据量,张量shape由max_batch_size和dims组合指定,对于 max_batch_size 大于 0 的模型,完整形状形成为 [ -1 ] + dims。 对于 max_batch_size 等于 0 的模型,完整形状形成为 dims。
input [ // 必填,输入定义
  {
    name: "prompt" //必填,名称
    data_type: TYPE_STRING //必填,数据类型
    dims: [ -1 ] //必填,数据维度,-1 表示可变维度
  },
  {
    name: "history"
    data_type: TYPE_STRING
    dims: [ -1 ]
  },
  {
    name: "temperature"
    data_type: TYPE_STRING
    dims: [ -1 ]
  },
  {
    name: "max_token"
    data_type: TYPE_STRING
    dims: [ -1 ]
  },
  {
    name: "history_len"
    data_type: TYPE_STRING
    dims: [ -1 ]
  }
]
output [ //必填,输出定义
  {
    name: "response"
    data_type: TYPE_STRING
    dims: [ -1 ]
  },
  {
    name: "history"
    data_type: TYPE_STRING
    dims: [ -1 ]
  }
]
parameters: { //指定python执行环境
  key: "EXECUTION_ENV_PATH",
  value: {string_value: "$$TRITON_MODEL_DIRECTORY/../python-3-8.tar.gz"}
}
instance_group [ //模型实例组
  {
      count: 1  //实例数量
      kind: KIND_GPU  //实例类型
      gpus: [ 0 ]  //指定实例可用的GPU索引
  }
]
其中必填项为最小模型配置,模型配置文件更多信息可以参考: https://github.com/triton-inference-server/server/blob/r22.04/docs/model_configuration.md
4. 自定义python backend
主要需要实现model.py 中提供的三个接口:
①. initialize: 初始化该Python模型时会进行调用,一般执行获取输出信息及创建模型的操作
②. execute: python模型接收请求时的执行函数;
③. finalize: 删除模型时会进行调用;
如果有 n 个模型实例,那么会调用 n 次initialize 和 finalize这两个函数。
ChatGLM2-6B的model.py文件可以参考如下:
import os
# 设置显存空闲block最大分割阈值
os.environ['PYTORCH_CUDA_ALLOC_CONF'] = 'max_split_size_mb:32'
# 设置work目录

os.environ['TRANSFORMERS_CACHE'] = os.path.dirname(os.path.abspath(__file__))+"/work/"
os.environ['HF_MODULES_CACHE'] = os.path.dirname(os.path.abspath(__file__))+"/work/"

import json

# triton_python_backend_utils is available in every Triton Python model. You
# need to use this module to create inference requests and responses. It also
# contains some utility functions for extracting information from model_config
# and converting Triton input/output types to numpy types.
import triton_python_backend_utils as pb_utils
import sys
import gc
import time
import logging
import torch
from transformers import AutoTokenizer, AutoModel
import numpy as np

gc.collect()
torch.cuda.empty_cache()

logging.basicConfig(format='%(asctime)s - %(filename)s[line:%(lineno)d] - %(levelname)s: %(message)s',
                    level=logging.INFO)

class TritonPythonModel:
    """Your Python model must use the same class name. Every Python model
    that is created must have "TritonPythonModel" as the class name.
    """

    def initialize(self, args):
        """`initialize` is called only once when the model is being loaded.
        Implementing `initialize` function is optional. This function allows
        the model to intialize any state associated with this model.

        Parameters
        ----------
        args : dict
          Both keys and values are strings. The dictionary keys and values are:
          * model_config: A JSON string containing the model configuration
          * model_instance_kind: A string containing model instance kind
          * model_instance_device_id: A string containing model instance device ID
          * model_repository: Model repository path
          * model_version: Model version
          * model_name: Model name
        """
        # You must parse model_config. JSON string is not parsed here
        self.model_config = json.loads(args['model_config'])

        output_response_config = pb_utils.get_output_config_by_name(self.model_config, "response")
        output_history_config = pb_utils.get_output_config_by_name(self.model_config, "history")

        # Convert Triton types to numpy types
        self.output_response_dtype = pb_utils.triton_string_to_numpy(output_response_config['data_type'])
        self.output_history_dtype = pb_utils.triton_string_to_numpy(output_history_config['data_type'])

        ChatGLM_path = os.path.dirname(os.path.abspath(__file__))+"/ChatGLM2_6B"
        self.tokenizer = AutoTokenizer.from_pretrained(ChatGLM_path, trust_remote_code=True)
        model = AutoModel.from_pretrained(ChatGLM_path,
                                          torch_dtype=torch.bfloat16,
                                          trust_remote_code=True).half().cuda()
        self.model = model.eval()
        logging.info("model init success")

    def execute(self, requests):
        """`execute` MUST be implemented in every Python model. `execute`
        function receives a list of pb_utils.InferenceRequest as the only
        argument. This function is called when an inference request is made
        for this model. Depending on the batching configuration (e.g. Dynamic
        Batching) used, `requests` may contain multiple requests. Every
        Python model, must create one pb_utils.InferenceResponse for every
        pb_utils.InferenceRequest in `requests`. If there is an error, you can
        set the error argument when creating a pb_utils.InferenceResponse

        Parameters
        ----------
        requests : list
          A list of pb_utils.InferenceRequest

        Returns
        -------
        list
          A list of pb_utils.InferenceResponse. The length of this list must
          be the same as `requests`

        """
        output_response_dtype = self.output_response_dtype
        output_history_dtype = self.output_history_dtype

        # output_dtype = self.output_dtype
        responses = []
        # Every Python backend must iterate over everyone of the requests
        # and create a pb_utils.InferenceResponse for each of them.
        for request in requests:
            prompt = pb_utils.get_input_tensor_by_name(request, "prompt").as_numpy()[0]
            prompt = prompt.decode('utf-8')
            history_origin = pb_utils.get_input_tensor_by_name(request, "history").as_numpy()
            if len(history_origin) > 0:
                history = np.array([item.decode('utf-8') for item in history_origin]).reshape((-1,2)).tolist()
            else:
                history = []
            temperature = pb_utils.get_input_tensor_by_name(request, "temperature").as_numpy()[0]
            temperature = float(temperature.decode('utf-8'))
            max_token = pb_utils.get_input_tensor_by_name(request, "max_token").as_numpy()[0]
            max_token = int(max_token.decode('utf-8'))
            history_len = pb_utils.get_input_tensor_by_name(request, "history_len").as_numpy()[0]
            history_len = int(history_len.decode('utf-8'))

            # 日志输出传入信息
            in_log_info = {
                "in_prompt":prompt,
                "in_history":history,
                "in_temperature":temperature,
                "in_max_token":max_token,
                "in_history_len":history_len
                       }
            logging.info(in_log_info)
            response,history = self.model.chat(self.tokenizer,
                                               prompt,
                                               history=history[-history_len:] if history_len > 0 else [],
                                               max_length=max_token,
                                               temperature=temperature)
            # 日志输出处理后的信息
            out_log_info = {
                "out_response":response,
                "out_history":history
                       }
            logging.info(out_log_info)
            response = np.array(response)
            history = np.array(history)

            response_output_tensor = pb_utils.Tensor("response",response.astype(self.output_response_dtype))
            history_output_tensor = pb_utils.Tensor("history",history.astype(self.output_history_dtype))

            final_inference_response = pb_utils.InferenceResponse(output_tensors=[response_output_tensor,history_output_tensor])
            responses.append(final_inference_response)
            # Create InferenceResponse. You can set an error here in case
            # there was a problem with handling this inference request.
            # Below is an example of how you can set errors in inference
            # response:
            #
            # pb_utils.InferenceResponse(
            #    output_tensors=..., TritonError("An error occured"))

        # You should return a list of pb_utils.InferenceResponse. Length
        # of this list must match the length of `requests` list.
        return responses

    def finalize(self):
        """`finalize` is called only once when the model is being unloaded.
        Implementing `finalize` function is OPTIONAL. This function allows
        the model to perform any necessary clean ups before exit.
        """
        print('Cleaning up...')
5. 部署测试
① 选择9n-triton-devel-gpu-v0.3镜像创建notebook测试实例;
② 把模型放在/9n-triton-devel/model_repository目录下,模型目录结构参考3.1;
③ 进入/9n-triton-devel/server/目录,拉取最新版本的bin并解压:wget http://storage.jd.local/com.bamboo.server.product/7196560/9n_predictor_server.tgz
④ 修改/9n-triton-devel/server/start.sh 为如下:
mkdir logs
\rm -rf /9n-triton-devel/server/logs/*
\rm -rf /tmp/python_env_*
export LD_LIBRARY_PATH=/9n-triton-devel/server/lib/:$LD_LIBRARY_PATH
nohup ./bin/9n_predictor_server --flagfile=./conf/server.gflags 2>&1 >/dev/null &
sleep 2
pid=`ps x |grep "9n_predictor_server" | grep -v "grep" | grep -v "ldd" | grep -v "stat" | awk '{print $1}'`
echo $pid
⑤ 运行 /9n-triton-devel/server/start.sh 脚本
⑥ 检查服务启动成功(ChatGLM2-6B模型启动,差不多13分钟左右)
方法1:查看8010端口是否启动:netstat -natp | grep 8010
方法2:查看日志:cat /9n-triton-devel/server/logs/predictor_core.INFO
⑦ 编写python grpc client访问测试服务脚本,放于/9n-triton-devel/client/目录下,访问端口为8010,ip为127.0.0.1,可以参考如下:
#!/usr/bin/python3
# -*- coding: utf-8 -*-
import sys
sys.path.append('./base')
from multi_backend_client import MultiBackendClient
import triton_python_backend_utils as python_backend_utils
import multi_backend_message_pb2

import time
import argparse
import io
import os
import numpy as np
import json
import struct

def print_result(response, batch_size ):
    print("outputs len:" + str(len(response.outputs)))

    if (response.error_code == 0):
        print("response : ", response)

        print(f'res shape: {response.outputs[0].shape}')
        res = python_backend_utils.deserialize_bytes_tensor(response.raw_output_contents[0])
        for i in res:
            print(i.decode())

        print(f'history shape: {response.outputs[1].shape}')
        history = python_backend_utils.deserialize_bytes_tensor(response.raw_output_contents[1])
        for i in history:
            print(i.decode())


def send_one_request(sender, request_pb, batch_size):
    succ, response = sender.send_req(request_pb)
    if succ:
        print_result(response, batch_size)
    else:
      print('send_one_request fail ', response)

def send_request(ip, port, temperature, max_token, history_len, batch_size=1, send_cnt=1):
    request_sender = MultiBackendClient(ip, port)

    request = multi_backend_message_pb2.ModelInferRequest()
    request.model_name = "chatglm2-6b"

    # 输入占位
    input0 = multi_backend_message_pb2.ModelInferRequest().InferInputTensor()
    input0.name = "prompt"
    input0.datatype = "BYTES"
    input0.shape.extend([1])

    input1 = multi_backend_message_pb2.ModelInferRequest().InferInputTensor()
    input1.name = "history"
    input1.datatype = "BYTES"
    input1.shape.extend([-1])

    input2 = multi_backend_message_pb2.ModelInferRequest().InferInputTensor()
    input2.name = "temperature"
    input2.datatype = "BYTES"
    input2.shape.extend([1])

    input3 = multi_backend_message_pb2.ModelInferRequest().InferInputTensor()
    input3.name = "max_token"
    input3.datatype = "BYTES"
    input3.shape.extend([1])

    input4 = multi_backend_message_pb2.ModelInferRequest().InferInputTensor()
    input4.name = "history_len"
    input4.datatype = "BYTES"
    input4.shape.extend([1])

    query = '请给出一个具体示例'
    input0.contents.bytes_contents.append(bytes(query, encoding="utf8"))
    request.inputs.extend([input0])

    history_origin = np.array([['你知道鸡兔同笼问题么', '鸡兔同笼问题是一个经典的数学问题,涉及到基本的代数方程和解题方法。问题描述为:在一个笼子里面,有若干只鸡和兔子,已知它们的总数和总腿数,问鸡和兔子的数量各是多少?\n\n解法如下:假设鸡的数量为x,兔子的数量为y,则总腿数为2x+4y。根据题意,可以列出方程组:\n\nx + y = 总数\n2x + 4y = 总腿数\n\n通过解方程组,可以求得x和y的值,从而确定鸡和兔子的数量。']]).reshape((-1,))
    history = [bytes(item, encoding="utf8") for item in history_origin]
    input1.contents.bytes_contents.extend(history)
    request.inputs.extend([input1])

    input2.contents.bytes_contents.append(bytes(temperature, encoding="utf8"))
    request.inputs.extend([input2])

    input3.contents.bytes_contents.append(bytes(max_token, encoding="utf8"))
    request.inputs.extend([input3])

    input4.contents.bytes_contents.append(bytes(history_len, encoding="utf8"))
    request.inputs.extend([input4])

    # 输出占位
    output_tensor0 = multi_backend_message_pb2.ModelInferRequest().InferRequestedOutputTensor()
    output_tensor0.name = "response"
    request.outputs.extend([output_tensor0])

    output_tensor1 = multi_backend_message_pb2.ModelInferRequest().InferRequestedOutputTensor()
    output_tensor1.name = "history"
    request.outputs.extend([output_tensor1])

    min_ms = 0
    max_ms = 0
    avg_ms = 0
    for i in range(send_cnt):
        start = time.time_ns()
        send_one_request(request_sender, request, batch_size)
        cost = (time.time_ns()-start)/1000000
        print ("idx:%d cost  ms:%d" % (i, cost))
        if cost > max_ms:
            max_ms = cost
        if cost < min_ms or min_ms==0:
            min_ms = cost
        avg_ms += cost
    avg_ms /= send_cnt
    print("cnt=%d max=%dms min=%dms avg=%dms" % (send_cnt, max_ms, min_ms, avg_ms))

if __name__ == '__main__':
        parser = argparse.ArgumentParser()
        parser.add_argument( '-ip', '--ip_address', help = 'ip address', default='127.0.0.1', required=False)
        parser.add_argument( '-p',  '--port', help = 'port', default='8010', required=False)
        parser.add_argument( '-t',  '--temperature', help = 'temperature', default='0.01', required=False)
        parser.add_argument( '-m',  '--max_token', help = 'max_token', default='16000', required=False)
        parser.add_argument( '-hl',  '--history_len', help = 'history_len', default='10', required=False)
        parser.add_argument( '-b',  '--batch_size', help = 'batch size', default=1, required=False, type = int)
        parser.add_argument( '-c',  '--send_count', help = 'send count', default=1, required=False, type = int)
        args = parser.parse_args()
        send_request(args.ip_address, args.port, args.temperature, args.max_token, args.history_len, args.batch_size, args.send_count)
通用predictor请求格式可以参考: https://github.com/kserve/kserve/blob/master/docs/predict-api/v2/grpc_predict_v2.proto
6. 模型部署
九数算法中台提供了两种部署模型服务方式,分别为界面部署和SDK部署。利用界面中的模型部署只支持JSF协议接口,若要提供JSF服务接口,则可以参考 http://easyalgo.jd.com/help/%E4%BD%BF%E7%94%A8%E6%8C%87%E5%8D%97/%E6%A8%A1%E5%9E%8B%E8%AE%A1%E7%AE%97/%E6%A8%A1%E5%9E%8B%E9%83%A8%E7%BD%B2.html 直接部署。
由于我后续需要将ChatGLM2-6B模型集成至langchain中使用,所以对外提供http协议接口比较便利,经与算法中台同学请教后使用SDK方式部署可以满足。由于界面部署和SDK部署目前研发没有对齐,用界面部署时直接可以使用3.1中的模型结构,使用SDK部署则需要调整模型结构如下:
同时需要在config.pbtxt中将执行环境路径设置如下:
parameters: {
  key: "EXECUTION_ENV_PATH",
  value: {string_value: "$$TRITON_MODEL_DIRECTORY/1/python-3-8.tar.gz"}
}
模型部署代码可以参考如下:
from das.triton.model import TritonModel

model = TritonModel("chatglm2-6b")

predictor = model.deploy(
    path="$pwd/model_repository/chatglm2-6b", # 模型文件所在的目录
    protocol='http',
    endpoint = "9n-das-serving-lf2.jd.local",
    cpu=4,
    memory=30,
    use_gpu=True, # 根据是否需要gpu加速推理来配置
    override = True,
    instances=2
    )
四.集成至langchain
使用langchain可以快速基于LLM模型开发一些应用。使用LLMs模块封装ChatGLM2-6B,请求我们的模型服务,主要实现_call函数,可以参考如下代码:
import json
import time
import base64
import struct
import requests
import numpy as np
from pathlib import Path
from abc import ABC, abstractmethod
from langchain.llms.base import LLM
from langchain.llms import OpenAI
from langchain.llms.utils import enforce_stop_tokens
from typing import Dict, List, Optional, Tuple, Union, Mapping, Any

import warnings
warnings.filterwarnings("ignore")

class ChatGLM(LLM):
    max_token = 32000
    temperature = 0.01
    history_len = 10
    url = ""
    def __init__(self):
        super(ChatGLM, self).__init__()

    @property
    def _llm_type(self):
        return "ChatGLM2-6B"

    @property
    def _history_len(self) -> int:
        return self.history_len

    @property
    def _max_token(self) -> int:
        return self.max_token

    @property
    def _temperature(self) -> float:
        return self.temperature

    def _deserialize_bytes_tensor(self, encoded_tensor):
        """
        Deserializes an encoded bytes tensor into an
        numpy array of dtype of python objects
        Parameters
        ----------
        encoded_tensor : bytes
            The encoded bytes tensor where each element
            has its length in first 4 bytes followed by
            the content
        Returns
        -------
        string_tensor : np.array
            The 1-D numpy array of type object containing the
            deserialized bytes in 'C' order.
        """
        strs = list()
        offset = 0
        val_buf = encoded_tensor
        while offset < len(val_buf):
            l = struct.unpack_from("<I", val_buf, offset)[0]
            offset += 4
            sb = struct.unpack_from("<{}s".format(l), val_buf, offset)[0]
            offset += l
            strs.append(sb)
        return (np.array(strs, dtype=np.object_))

    @classmethod
    def _infer(cls, url, query, history, temperature, max_token, history_len):
        query = base64.b64encode(query.encode('utf-8')).decode('utf-8')
        history_origin = np.asarray(history).reshape((-1,))
        history = [base64.b64encode(item.encode('utf-8')).decode('utf-8') for item in history_origin]
        temperature = base64.b64encode(temperature.encode('utf-8')).decode('utf-8')
        max_token = base64.b64encode(max_token.encode('utf-8')).decode('utf-8')
        history_len = base64.b64encode(history_len.encode('utf-8')).decode('utf-8')
        data = {
            "model_name": "chatglm2-6b",
            "inputs": [
                {"name": "prompt", "datatype": "BYTES", "shape": [1], "contents": {"bytes_contents": [query]}},
                {"name": "history", "datatype": "BYTES", "shape": [-1], "contents": {"bytes_contents": history}},
                {"name": "temperature", "datatype": "BYTES", "shape": [1], "contents": {"bytes_contents": [temperature]}},
                {"name": "max_token", "datatype": "BYTES", "shape": [1], "contents": {"bytes_contents": [max_token]}},
                {"name": "history_len", "datatype": "BYTES", "shape": [1], "contents": {"bytes_contents": [history_len]}}
                ],
            "outputs": [{"name": "response"},
                        {"name": "history"}]
            }
        response = requests.post(url = url,
                                 data = json.dumps(data, ensure_ascii=True),
                                 headers = {"Content_Type": "application/json"},
                                 timeout=120)
        return response

    def _call(self,
              query: str,
              history: List[List[str]] =[],
              stop: Optional[List[str]] =None):
        temperature = str(self.temperature)
        max_token = str(self.max_token)
        history_len = str(self.history_len)
        url = self.url
        response = self._infer(url, query, history, temperature, max_token, history_len)
        if response.status_code!=200:
            return "查询结果错误"
        if stop is not None:
            response = enforce_stop_tokens(response, stop)
        result = json.loads(response.text)
        # 处理response
        res = base64.b64decode(result['raw_output_contents'][0].encode('utf-8'))
        res_response = self._deserialize_bytes_tensor(res)[0].decode()
        return res_response

    def chat(self,
              query: str,
              history: List[List[str]] =[],
              stop: Optional[List[str]] =None):
        temperature = str(self.temperature)
        max_token = str(self.max_token)
        history_len = str(self.history_len)
        url = self.url
        response = self._infer(url, query, history, temperature, max_token, history_len)
        if response.status_code!=200:
            return "查询结果错误"
        if stop is not None:
            response = enforce_stop_tokens(response, stop)
        result = json.loads(response.text)
        # 处理response
        res = base64.b64decode(result['raw_output_contents'][0].encode('utf-8'))
        res_response = self._deserialize_bytes_tensor(res)[0].decode()
        # 处理history
        history_shape = result['outputs'][1]["shape"]
        history_enc = base64.b64decode(result['raw_output_contents'][1].encode('utf-8'))
        res_history = np.array([i.decode() for i in self._deserialize_bytes_tensor(history_enc)]).reshape(history_shape).tolist()
        return res_response, res_history

    @property
    def _identifying_params(self) -> Mapping[str, Any]:
        """Get the identifying parameters.
        """
        _param_dict = {
            "url": self.url
        }
        return _param_dict
注意:模型服务调用url等于在模型部署页面调用信息URL后加上" MutilBackendService/Predict "
五.总结
本文详细介绍了在集团9n-triton工具上部署ChatGLM2-6B过程,希望可以为有部署需求的同学提供一些帮助。
作者:京东保险 赵风龙文章来源:https://www.toymoban.com/news/detail-650504.html
来源:京东云开发者社区 转载请注明出处文章来源地址https://www.toymoban.com/news/detail-650504.html
到了这里,关于chatglm2-6b模型在9n-triton中部署并集成至langchain实践的文章就介绍完了。如果您还想了解更多内容,请在右上角搜索TOY模板网以前的文章或继续浏览下面的相关文章,希望大家以后多多支持TOY模板网!