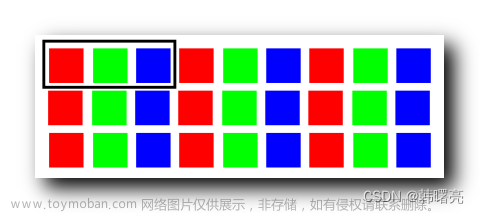
本文参考论文SeAFusion模型中的图像预处理。
图像转换
RGB -> YCrCb
以图像尺寸为[1, 3, 480, 640]为例
import torch

def RGB2YCrCb(input_im):    	# 1*3*480*640
    device = torch.device("cuda:0")
    im_flat = input_im.transpose(1, 3).transpose(1, 2).reshape(-1, 3)
    # (nhw,c) (1,3,480,640)->(1,640,480,3)->(1,480,640,3)->(307200,3)
    # 这样转换是方便向量的乘加运算
    R = im_flat[:, 0]
    G = im_flat[:, 1]
    B = im_flat[:, 2]       		# 下面的就是向量的运算了
    Y = 0.299 * R + 0.587 * G + 0.114 * B
    Cr = (R - Y) * 0.713 + 0.5
    Cb = (B - Y) * 0.564 + 0.5
    Y = torch.unsqueeze(Y, 1)       # (307200,1)
    Cr = torch.unsqueeze(Cr, 1)
    Cb = torch.unsqueeze(Cb, 1)
    temp = torch.cat((Y, Cr, Cb), dim=1).to(device)
    out = (
        temp.reshape(
            list(input_im.size())[0],
            list(input_im.size())[2],
            list(input_im.size())[3],
            3,
        )   				# reshape为(1,480,640,3)
        .transpose(1, 3)    # (1,3,640,480)
        .transpose(2, 3)    # (1,3,480,640)
    )
    return out
三通道操作
from PIL import Image
import os
import torchvision.transforms as transforms

dir = r"../MSRS/Visible/train/MSRS"
file = "00002D.png"
path = os.path.join(dir,file)

# 加载并展示源图像
images_vis = Image.open(path).convert('RGB')    # 读出图像并转为RGB格式
Image._showxv(images_vis,title="可见光图像")     # 展示源图像

# 然后转换,并展示
images_vis = transforms.ToTensor()(images_vis).cuda()   # torch.Size([3, 480, 640]).这步转为tensor,并将图像数据放缩到【0,1】。
images_vis = torch.unsqueeze(images_vis,0)              # 加了个批,torch.Size([1, 3, 480, 640])
images_vis_ycrcb = RGB2YCrCb(images_vis)				# 进行转换

# 如果有需要,可以这样分离出灰度图像Y
Y = images_vis_ycrcb[:,:1]		# torch.Size([1, 1, 480, 640]),操作与Y = images_vis_ycrcb[:,0]同
单通道操作(本身就是灰度图像)
import torchvision.transforms as transform
image_vis = transform.ToTensor()(Image.open(path)).float()
# 加载图像(576,768)时,Image加载的就是(576, 768, 1),无需再unsqueeze(2)

Y = images_vis.cuda()
YCrCb -> RGB
以图像尺寸为[1, 3, 480, 640]为例
def YCrCb2RGB(input_im):    		# torch.Size([1, 3, 480, 640])
    device = torch.device("cuda:{}".format(args.gpu) if torch.cuda.is_available() else "cpu")
    im_flat = input_im.transpose(1, 3).transpose(1, 2).reshape(-1, 3)   # torch.Size([307200, 3])
    mat = torch.tensor(
        [[1.0, 1.0, 1.0], [1.403, -0.714, 0.0], [0.0, -0.344, 1.773]]
    ).to(device)
    bias = torch.tensor([0.0 / 255, -0.5, -0.5]).to(device)
    temp = (im_flat + bias).mm(mat).to(device)  #torch.Size([307200, 3])
    out = (
        temp.reshape(
            list(input_im.size())[0],
            list(input_im.size())[2],
            list(input_im.size())[3],
            3,
        )
        .transpose(1, 3)
        .transpose(2, 3)
    )
    return out  # torch.Size([1, 3, 480, 640])
三通道操作文章来源:https://www.toymoban.com/news/detail-650819.html
fusion_ycrcb = torch.cat(   # 以Y通道与Cr,Cb的重叠作为YCrCb图像。
                (Y, images_vis_ycrcb[:, 1:2, :, :], images_vis_ycrcb[:, 2:, :, :]),
                dim=1,
            )   # torch.Size([1, 3, 480, 640])
fusion_image = YCrCb2RGB(fusion_ycrcb)  # torch.Size([1, 3, 480, 640]),3是RGB通道数
参考文章:
SeAFusion论文代码
numpy 与 torch中压缩、扩展维度的方法
TypeError: Cannot handle this data type: (1, 1, 28), |u1
torch.tensor的类型转换以及和numpy的转换文章来源地址https://www.toymoban.com/news/detail-650819.html
到了这里,关于python将RGB图像转为灰度图像的文章就介绍完了。如果您还想了解更多内容,请在右上角搜索TOY模板网以前的文章或继续浏览下面的相关文章,希望大家以后多多支持TOY模板网!


