在Windows登录界面进行截图,目前尝试到的以下的截图方法可以截取到图,其它的方式要么卡住,要么截出来是黑屏的,直接上代码:
/// <summary>使用Graphics方式捕获桌面截图(效率低于DesktopCapture,主要用户登录界面截图)</summary>
  internal class GraphicCapture
  {
    private const int Desktopvertres = 117;
    private const int Desktophorzres = 118;
    /// <summary>当前最新一帧</summary>
    private Bitmap _currentFrame;
    private Rectangle _currentScreenBounds;
    private Graphics _graphic;
    private readonly object _screenLock = new object();
    private Bitmap _originBitmap;private bool _isManualCaptureStop;
    private PixelFormat _pixelFormat = PixelFormat.Bgra32;

    private Size DesktopSize
    {
      get
      {
        IntPtr dc = GraphicCapture.GetDC(IntPtr.Zero);
        int deviceCaps1 = GraphicCapture.GetDeviceCaps(dc, 117);
        int deviceCaps2 = GraphicCapture.GetDeviceCaps(dc, 118);
        GraphicCapture.ReleaseDC(IntPtr.Zero, dc);
        return new Size(deviceCaps2, deviceCaps1);
      }
    }

    [DllImport("user32.dll")]
    private static extern IntPtr GetDC(IntPtr ptr);

    [DllImport("gdi32.dll")]
    private static extern int GetDeviceCaps(IntPtr hdc, int nIndex);

    [DllImport("User32.dll")]
    private static extern int ReleaseDC(IntPtr hWnd, IntPtr hDC);

    /// <summary>构造函数</summary>
    public GraphicCapture()
    {
      this._currentScreenBounds = this.GetScreenRectangle(Screen.PrimaryScreen);
      this._originBitmap = this.CreateBitmap();
      this._graphic = Graphics.FromImage((Image) this._originBitmap);
    }

    private Rectangle GetScreenRectangle(Screen screen)
    {
      Rectangle bounds = screen.Bounds;
      return new Rectangle(new Point(bounds.X, bounds.Y), this.DesktopSize);
    }

    /// <summary>Bitmap转byte[]</summary>
    /// <param name="bitmap"></param>
    /// <returns></returns>
    private byte[] BitmapToByteArray(Bitmap bitmap)
    {
      System.Drawing.Imaging.PixelFormat format = this.PixelFormatConverter(this.PixelFormat);
      Rectangle rect = new Rectangle(0, 0, bitmap.Width, bitmap.Height);
      BitmapData bitmapdata = bitmap.LockBits(rect, ImageLockMode.ReadOnly, format);
      int length = Math.Abs(bitmapdata.Stride) * bitmap.Height;
      byte[] destination = new byte[length];
      Marshal.Copy(bitmapdata.Scan0, destination, 0, length);
      bitmap.UnlockBits(bitmapdata);
      return destination;
    }

    private Bitmap CreateBitmap()
    {
      System.Drawing.Imaging.PixelFormat pixelFormat = this.PixelFormatConverter(this.PixelFormat);
      Size desktopSize = this.DesktopSize;
      int width = desktopSize.Width;
      desktopSize = this.DesktopSize;
      int height = desktopSize.Height;
      int format = (int) pixelFormat;
      return new Bitmap(width, height, (System.Drawing.Imaging.PixelFormat) format);
    }

    private System.Drawing.Imaging.PixelFormat PixelFormatConverter(
      PixelFormat customPixelFormat)
    {
      if (true)
        ;
      System.Drawing.Imaging.PixelFormat pixelFormat;
      if (customPixelFormat != PixelFormat.Bgra32)
      {
        if (customPixelFormat != PixelFormat.Bgr24)
          throw new ArgumentOutOfRangeException("PixelFormat", (object) this.PixelFormat, (string) null);
        pixelFormat = System.Drawing.Imaging.PixelFormat.Format24bppRgb;
      }
      else
        pixelFormat = System.Drawing.Imaging.PixelFormat.Format32bppArgb;
      if (true)
        ;
      return pixelFormat;
    }

    /// <summary>检索最新的桌面图像和关联的元数据</summary>
    private byte[] GetLatestFrameToByte() => this.BitmapToByteArray(this.GetLatestFrameToBitmap());

    /// <summary>检索最新的桌面图像</summary>
    /// <returns></returns>
    private Bitmap GetLatestFrameToBitmap()
    {
      lock (this._screenLock)
      {
        Graphics graphic = this._graphic;
        int x = this._currentScreenBounds.X;
        int y = this._currentScreenBounds.Y;
        Size desktopSize = this.DesktopSize;
        int width1 = desktopSize.Width;
        desktopSize = this.DesktopSize;
        int height1 = desktopSize.Height;
        Size blockRegionSize = new Size(width1, height1);
        graphic.CopyFromScreen(x, y, 0, 0, blockRegionSize);
        Size newSize;
        ref Size local = ref newSize;
        desktopSize = this.DesktopSize;
        int width2 = (int) ((double) desktopSize.Width * this.Scale);
        desktopSize = this.DesktopSize;
        int height2 = (int) ((double) desktopSize.Height * this.Scale);
        local = new Size(width2, height2);
        this._currentFrame = newSize.Width == this._originBitmap.Width && newSize.Height == this._originBitmap.Height ? this._originBitmap : new Bitmap((Image) this._originBitmap, newSize);
      }
      return this._currentFrame;
    }

    /// <summary>捕获图像像素格式,默认为BGRA32</summary>
    public PixelFormat PixelFormat
    {
      get => this._pixelFormat;
      set
      {
        this._pixelFormat = value;
        this._originBitmap?.Dispose();
        this._graphic?.Dispose();
        this._originBitmap = this.CreateBitmap();
        this._graphic = Graphics.FromImage((Image) this._originBitmap);
      }
    }

    /// <summary>捕获图像缩放大小,默认为1.0</summary>
    public double Scale { get; set; } = 1.0;

    /// <summary>新帧捕获事件</summary>
    public event EventHandler<CaptureFrame> FrameArrived;

    /// <summary>开始捕获</summary>
    public void StartCapture()
    {
      this._isManualCaptureStop = false;
    }

    /// <summary>停止捕获</summary>
    public void StopCapture()
    {
      this._cancellationTokenSource?.Cancel();
      this._isManualCaptureStop = true;
    }

    /// <summary>获取下一帧图像数据</summary>
    /// <param name="captureFrame"></param>
    /// <returns></returns>
    public bool TryGetNextFrame(out CaptureFrame captureFrame)
    {
      captureFrame = (CaptureFrame) null;
      if (this._isManualCaptureStop)
        return false;try
      {
        byte[] byteArray = this.BitmapToByteArray(this.GetLatestFrameToBitmap());
        Size size = new Size((int) ((double) this.DesktopSize.Width * this.Scale), (int) ((double) this.DesktopSize.Height * this.Scale));
        captureFrame = new CaptureFrame(size, this.PixelFormat, byteArray);
        return true;
      }
      catch (Exception ex)
      {
        return false;
      }
    }
  }
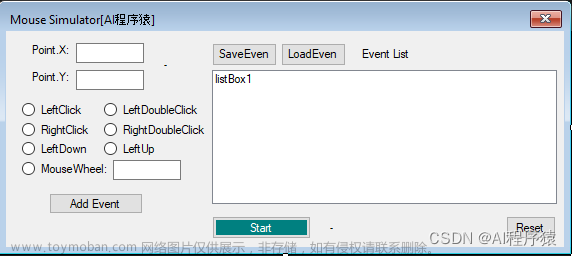
操作鼠标键盘等操作可以参考本人另一篇文章:使用C#制作可以录制自动化执行Windows操作脚本工具——类似于按键精灵 - log9527 - 博客园 (cnblogs.com)文章来源地址https://www.toymoban.com/news/detail-654875.html
文章来源:https://www.toymoban.com/news/detail-654875.html
到了这里,关于C# Windows登录界面进行截图,控制鼠标键盘等操作实现(三)的文章就介绍完了。如果您还想了解更多内容,请在右上角搜索TOY模板网以前的文章或继续浏览下面的相关文章,希望大家以后多多支持TOY模板网!