引言
有时候服务器,为了安全需要,会限制某些ip和端口对服务器的访问。那具体该如何配置呢?本文带你解决。
禁用IP和端口
1、方法1:iptables
iptables v1.8.4
Usage: iptables -[ACD] chain rule-specification [options]
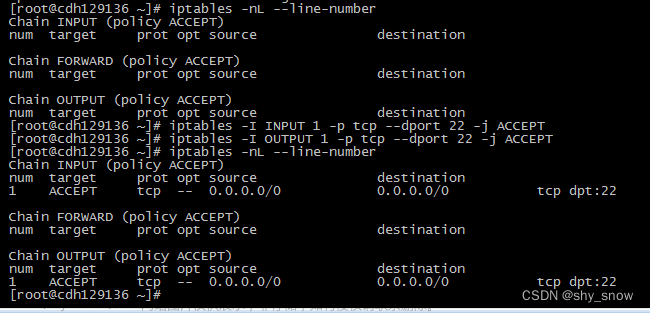
iptables -I chain [rulenum] rule-specification [options]
iptables -R chain rulenum rule-specification [options]
iptables -D chain rulenum [options]
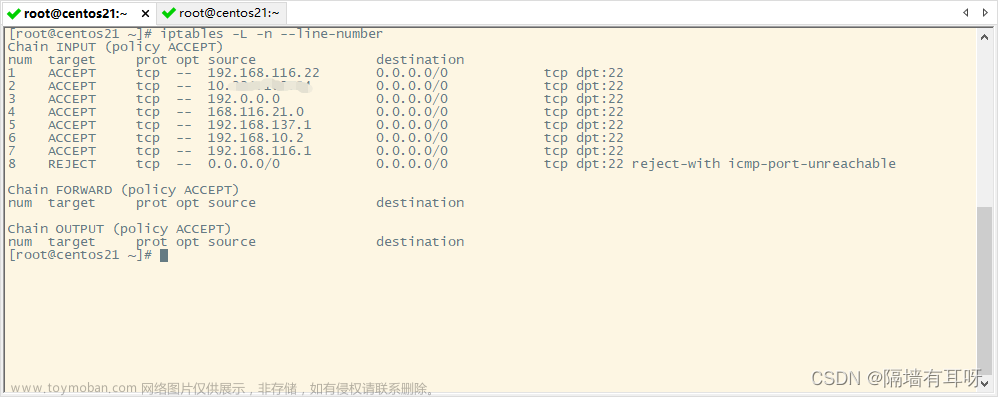
iptables -[LS] [chain [rulenum]] [options]
iptables -[FZ] [chain] [options]
iptables -[NX] chain
iptables -E old-chain-name new-chain-name
iptables -P chain target [options]
iptables -h (print this help information)
Commands:
Either long or short options are allowed.
--append -A chain Append to chain
--check -C chain Check for the existence of a rule
--delete -D chain Delete matching rule from chain
--delete -D chain rulenum
Delete rule rulenum (1 = first) from chain
--insert -I chain [rulenum]
Insert in chain as rulenum (default 1=first)
--replace -R chain rulenum
Replace rule rulenum (1 = first) in chain
--list -L [chain [rulenum]]
List the rules in a chain or all chains
--list-rules -S [chain [rulenum]]
Print the rules in a chain or all chains
--flush -F [chain] Delete all rules in chain or all chains
--zero -Z [chain [rulenum]]
Zero counters in chain or all chains
--new -N chain Create a new user-defined chain
--delete-chain
-X [chain] Delete a user-defined chain
--policy -P chain target
Change policy on chain to target
--rename-chain
-E old-chain new-chain
Change chain name, (moving any references)
Options:
--ipv4 -4 Nothing (line is ignored by ip6tables-restore)
--ipv6 -6 Error (line is ignored by iptables-restore)
[!] --protocol -p proto protocol: by number or name, eg. `tcp'
[!] --source -s address[/mask][...]
source specification
[!] --destination -d address[/mask][...]
destination specification
[!] --in-interface -i input name[+]
network interface name ([+] for wildcard)
--jump -j target
target for rule (may load target extension)
--goto -g chain
jump to chain with no return
--match -m match
extended match (may load extension)
--numeric -n numeric output of addresses and ports
[!] --out-interface -o output name[+]
network interface name ([+] for wildcard)
--table -t table table to manipulate (default: `filter')
--verbose -v verbose mode
--wait -w [seconds] maximum wait to acquire xtables lock before give up
--wait-interval -W [usecs] wait time to try to acquire xtables lock
default is 1 second
--line-numbers print line numbers when listing
--exact -x expand numbers (display exact values)
[!] --fragment -f match second or further fragments only
--modprobe=<command> try to insert modules using this command
--set-counters PKTS BYTES set the counter during insert/append
[!] --version -V print package version.
- 🈲端口
iptables -A INPUT -p tcp --dport 80 -j DROP
iptables -A INPUT -p tcp --dport 5053 -j DROP
- 🈲IP
iptables -I INPUT -s 10.115.10.129 -j DROP
- 保存配置
sudo service iptables save
实测这条命令行不通,报错:iptables: unrecognized service
下面这条可以
sudo iptables-save
2、方法2:ufw
UFW (Uncomplicated Firewall)是Ubuntu 自带的防火墙配置工具 。UFW 是一个用来管理 iptables 防火墙规则的用户友好的前端工具。它的主要目的就是为了使得管理 iptables 更简单。
Usage: ufw COMMAND

Commands:
 enable                          enables the firewall
 disable                         disables the firewall
 default ARG                     set default policy
 logging LEVEL                   set logging to LEVEL
 allow ARGS                      add allow rule
 deny ARGS                       add deny rule
 reject ARGS                     add reject rule
 limit ARGS                      add limit rule
 delete RULE|NUM                 delete RULE
 insert NUM RULE                 insert RULE at NUM
 route RULE                      add route RULE
 route delete RULE|NUM           delete route RULE
 route insert NUM RULE           insert route RULE at NUM
 reload                          reload firewall
 reset                           reset firewall
 status                          show firewall status
 status numbered                 show firewall status as numbered list of RULES
 status verbose                  show verbose firewall status
 show ARG                        show firewall report
 version                         display version information

Application profile commands:
 app list                        list application profiles
 app info PROFILE                show information on PROFILE
 app update PROFILE              update PROFILE
 app default ARG                 set default application policy
Ubuntu安装完毕,默认没有启动ufw。所以如果直接运行上述语句,那么它启动后就会使用默认规则,禁止一切流量,包括SSH的22端口,如果本来就是在SSH上远程操作,那么悲剧了,所以要先启用SSH的端口(默认是22,如果你设置了其他端口就加上去)
sudo ufw allow 22
sudo ufw reject 80 #(拒绝,直接返回:Connection refused)
sudo ufw deny 5053 #(否认,过段时间后返回:Connection timed out)
sudo ufw enable
sudo ufw status
- 查看ufw防火墙是否在工作,查看使用中的规则
ufw status
- 启动/关闭/重置ufw防火墙
ufw enable
ufw disable
ufw reset
- 允许其它主机访问本机21端口,协议包含tcp和udp
ufw allow 21
-允许其它主机使用tcp协议访问本机80端口
ufw allow 80/tcp
- 可以使用in或out来指定向内还是向外。如果未指定,默认是in
允许访问本机http端口
ufw allow in http
- 禁止其它主机访问本机80端口,
-
reject,直接告诉拒绝,返回的提示信息更多,比如ssh该主机时,直接返回:Connection refused
-
deny,否认,返回的提示信息少,比如ssh该主机时,过段时间后才返回:Connection timed out
-
ufw reject 80
ufw deny 80
- 禁止本机对外访问192.168.1.1
(实测有用)
ufw deny out to 192.168.1.1
- 禁止192.168.1.1对内访问本机
(实测没用)
ufw deny from 192.168.1.1
- 删除规则,只要在命令中加入delete就行了
ufw delete deny 80/tcp
- 打开/关闭log
ufw logging on
ufw logging off
logging on后 默认是low 等级。ufw支持多个等级: ‘low’, ‘medium’, ‘high’ and ‘full’。简单说low记录事件做少,其他等级记录逐级增加。使用默认的low level就够了。log文件保存在/var/log/ufw.log 文件内,可以用tail -n COUNT file的形式显示最后几行文章来源:https://www.toymoban.com/news/detail-655492.html
参考文档
Linux下iptables屏蔽IP和端口号
Ubuntu 18.04 防火墙设置ufw详解
如何在 Ubuntu 20.04 上使用 UFW 来设置防火墙
Ubuntu自带防火墙ufw配置和用法文章来源地址https://www.toymoban.com/news/detail-655492.html
到了这里,关于【linux】iptables和ufw禁用IP和端口的文章就介绍完了。如果您还想了解更多内容,请在右上角搜索TOY模板网以前的文章或继续浏览下面的相关文章,希望大家以后多多支持TOY模板网!