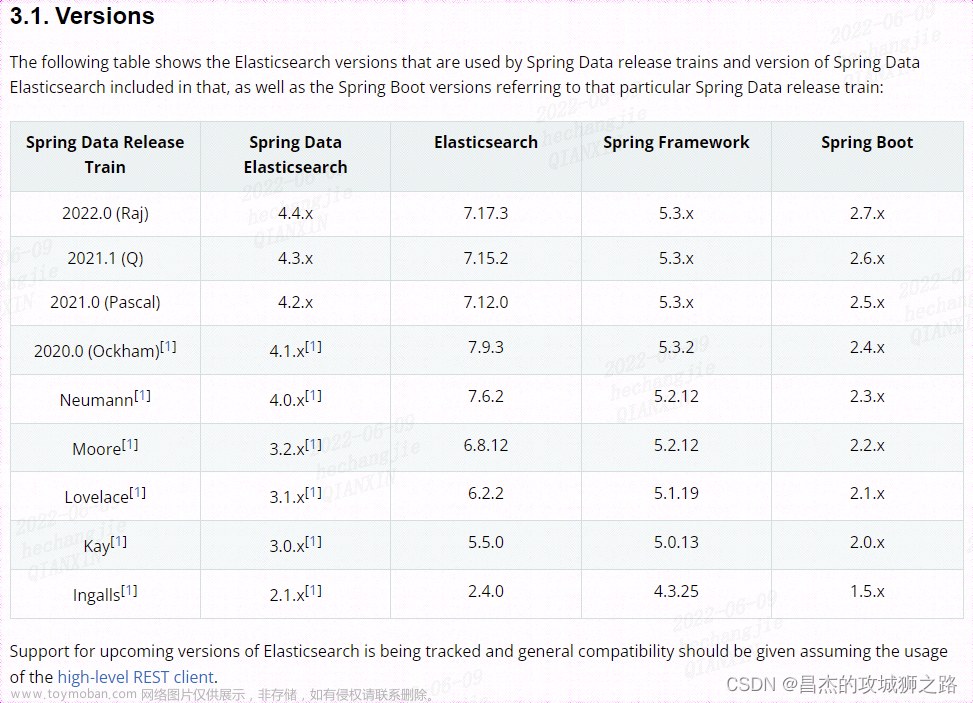
参考官网
Apache Hive integration | Elasticsearch for Apache Hadoop [7.17] | Elastic
官网的介绍很简单,我看了很多博客,写的也很简单,但是我搞了半天才勉强成功,分享下,免得各位多走弯路。
环境准备


官网也很贴心的给了几种方式。
1.$ bin/hive --auxpath=/path/elasticsearch-hadoop.jar
2.$ bin/hive -hiveconf hive.aux.jars.path=/path/elasticsearch-hadoop.jar
3.修改hive-site.xml
看似方法很多 其实有问题,首先我们现在都是beeline模式登录,bin/hive已经被废弃了。那么beeline能用吗?貌似可以用 第1和第2基本上是一样的
网上还有一种办法 直接把jar上传到这个目录/opt/cloudera/parcels/CDH/lib/hive/auxlib/ auxlib很明显就是上面的变量

beeline -u "jdbc:hive2://cdp-node02:2181,cdp-node03:2181,cdp-node04:2181/;serviceDiscoveryMode=zooKeeper;zooKeeperNamespace=hiveserver2" -hiveconf hive.aux.jars.path=/path/elasticsearch-hadoop.jar
发现还是没有读取到jar 算了吧

第3种貌似是最好的,但是要动集群配置很麻烦,
于是只有用最简单的方式add jar,注意这个只是当前会话有效;
下载jar包
这个时候有小伙伴会问了 这个jar怎么来的,我看官网好像也没给例子呀。
通过maven,新建一个工程,记住这个工程还有用的
网上看到还有可以直接在服务器wget的。。
<dependency>
    <groupId>org.elasticsearch</groupId>
    <artifactId>elasticsearch-hadoop</artifactId>
    <version>7.14.2</version>
</dependency>
对了低版本的es可能没有个http-client的jar
<dependency>
<groupId>commons-httpclient</groupId>
<artifactId>commons-httpclient</artifactId>
<version>3.1</version>
</dependency>
通过maven把这个jar下下来 ,然后再上传到服务,记住改下es.version

添加到hdfs
 进入beeline add jar
add jar hdfs:///user/hive/elasticsearch-hadoop-7.5.1.jar;
add jar hdfs:///user/hive/commons-httpclient-3.1.jar;
或者
add jar hdfs:///user/hive/elasticsearch-hadoop-7.14.2.jar;
list jar 可以看是否添加成功
至此 我们的hive已经有了这个jar。
开始建表
官网很多demo,肯定找最简单的来。
参考配置

但是此时我又有问题了。这个demo 明显不对,es的地址都没有啊。
Configuration | Elasticsearch for Apache Hadoop [7.17] | Elastic


这里提到了essential 和required看来都是必须的,还有写defalut的就不说了。
用户认证
因为我的es还有认证所以需要输入用户密码继续在配置里找参数

create external table esdata.cc_test2
(id string ,name string ,des string )
STORED BY 'org.elasticsearch.hadoop.hive.EsStorageHandler'
TBLPROPERTIES(
'es.net.http.auth.user'='xxxxx',
'es.net.http.auth.pass'='xxxxxx' ,
'es.nodes'='9.134.161.140', --连接地址
'es.resource' = 'i_dw_cc_test' ) --es7的时候没有type了,这里不需要写type
至此参考了了很多人的文章,感觉也差不多了。结果还是有问题。
报错1
先说一个问题。建好表后,insert into的时候报错了

我已经认证了,为什么这里还是报权限错误呢?我这个用户在es是可以查和插入这个index的数据的 确定以及肯定。
分析报错原因,查看源码,这里就提到刚刚那个工程了。
搜索RestClient.getHttpNodes

这个熟不熟悉。这个不就是kibana的get请求么,我在es试了确实没权限,要组长帮忙开通这个权限后,这个错就解决了。
报错2
接着建表。然后又出错了!!!!!!
先给大家看下代码 注意这个node =9.134.161.140

连接 正常。我hive建表的es.node也是这个地址

但是当我执行select count(1) from cc_test;时报错了。
Error: Error while compiling statement: FAILED: Execution Error, return code 2 from org.apache.hadoop.hive.ql.exec.tez.TezTask. Vertex failed, vertexName=Map 1, vertexId=vertex_1690006488152_0865_1_00, diagnostics=[Vertex vertex_1690006488152_0865_1_00 [Map 1] killed/failed due to:ROOT_INPUT_INIT_FAILURE, Vertex Input: cc_test initializer failed, vertex=vertex_1690006488152_0865_1_00 [Map 1], org.elasticsearch.hadoop.rest.EsHadoopInvalidRequest: [GET] on [_nodes/http] failed; server[9.10.132.27:9200] returned [403|Forbidden:]
--注意这里9.10.132.27 怎么这是个啥ip。
at org.elasticsearch.hadoop.rest.RestClient.checkResponse(RestClient.java:486)
at org.elasticsearch.hadoop.rest.RestClient.execute(RestClient.java:443)
at org.elasticsearch.hadoop.rest.RestClient.execute(RestClient.java:437)
at org.elasticsearch.hadoop.rest.RestClient.execute(RestClient.java:397)
at org.elasticsearch.hadoop.rest.RestClient.execute(RestClient.java:401)
at org.elasticsearch.hadoop.rest.RestClient.get(RestClient.java:177)
at org.elasticsearch.hadoop.rest.RestClient.getHttpNodes(RestClient.java:134)
at org.elasticsearch.hadoop.rest.RestClient.getHttpDataNodes(RestClient.java:151)
at org.elasticsearch.hadoop.rest.InitializationUtils.filterNonDataNodesIfNeeded(InitializationUtils.java:157)
因为es不是我搭建的,所以我也很难搞。但是没关系,我刚刚不是java客户端连接上了吗? 我根据客户端查下, 其实上面的那张图片也说明了这个问题,就是怎么连接到DATANODE了呢?

添加参数
无奈,继续查找参数。

es.nodes.ingest.only (default false) -- 这个感觉也有用懒得试了。
es.nodes.wan.only (default false) --反正是加了这个参数就好了。其中过程复杂就不说了。
简单的理解,我们最开始写的地址没有错,但是es这个家伙会发现其他节点的ip,然后用其他ip去连,你这个为true了就只能用我写的那个了。后面看了下这个和腾讯云 阿里云部署有关。
成功案例
最后的建表语句
create external table esdata.cc_test3
(id string ,name string ,des string )
STORED BY 'org.elasticsearch.hadoop.hive.EsStorageHandler'
TBLPROPERTIES(
'es.net.http.auth.user'='xxxx',
'es.net.http.auth.pass'='xxxx' ,
'es.nodes'='9.134.161.140',
'es.nodes.wan.only'='true',
'es.resource' = 'i_dw_cc_test',
'es.index.auto.create' = 'false');

count


group by

 insert


遗留问题
以为到这里就大功告成了吗? 我遇到了一个最大的问题。。。。一直没说
就是我不能select * 。 上面的那个查询是可以select id,name from t group by id,name
但是tm的就是不能直接select *!!!!!!!!!!!!!!

关键是这个报错我连错误日志都看不懂,感觉就是连接hive出错了。但是select 其他都是正常呀。。 等待研究。。。。 这个报错我仔细看了下源码,好像是读取我的输入内容 也就是select *
读取之后解析的时候出问题了(我select 普通表是ok的)
又没有好心人遇到过同样的问题,留个言。
-----------2023-08-02---------------------------
最近又试了下发现这个问题神奇的自己好了。目前怀疑是和我当初在es建的index有关,但是又没有证据。
目前select insert各种正常。
但是注意
hive可以insert 和select 但是是无法truncate es的数据的!!
delete因为没有建事务表暂时不知道
进一步探索
以为到这就完了吗?还有!!
比如我上面创建外表的时候tblproperties里会有user和pass,当其他人show create table的时候就可以看到账号密码,不安全。或者其他同事也想创建es外表,但是呢es的账户又不好直接告诉别人,那怎么办?
这玩意让我想到了以前用jdbc外表的时候,也有类似的操作
jdbc外表加密
JDBC Storage Handler - Apache Hive - Apache Software Foundation
CREATEEXTERNALTABLEstudent_jdbc
(
namestring,
ageint,
gpadouble
)
STOREDBY'org.apache.hive.storage.jdbc.JdbcStorageHandler'
TBLPROPERTIES (
"hive.sql.database.type"="MYSQL",
"hive.sql.jdbc.driver"="com.mysql.jdbc.Driver",
"hive.sql.jdbc.url"="jdbc:mysql://localhost/sample",
"hive.sql.dbcp.username"="hive",
"hive.sql.dbcp.password"="hive",
"hive.sql.table"="STUDENT",
"hive.sql.dbcp.maxActive"="1"
);
转化后

那么推断es肯定也有类似的加密措施
es外表加密
Configuration | Elasticsearch for Apache Hadoop [7.17] | Elastic

这里提到了es.keystore.location 好像是把密码放到一个文件里,然后通过文件去读取密码
点击secure settings
Security | Elasticsearch for Apache Hadoop [7.17] | Elastic
Authentication
The authentication support in elasticsearch-hadoop is of two types:
Username/Password
Set these through es.net.http.auth.user and es.net.http.auth.pass properties.
PKI/X.509
Use X.509 certificates to authenticate elasticsearch-hadoop to elasticsearch-hadoop. For this, one would need to setup the keystore containing the private key and certificate to the appropriate user (configured in Elasticsearch) and the truststore with the CA certificate used to sign the SSL/TLS certificates in the Elasticsearch cluster. That is one setup the key to authenticate elasticsearch-hadoop and also to verify that is the right one. To do so, one should setup the es.net.ssl.keystore.location and es.net.ssl.truststore.location properties to indicate the keystore and truststore to use. It is recommended to have these secured through a password in which case es.net.ssl.keystore.pass and es.net.ssl.truststore.pass properties are required.
--就是这里了 可以存密码
官方案例
##基础操作
$> java -classpath path/to/eshadoop.jar org.elasticsearch.hadoop.cli.Keytool <command> <args>
##创建一个文件保存密码
$> java -classpath path/to/eshadoop.jar org.elasticsearch.hadoop.cli.Keytool create
$> ls
esh.keystore
##查看文件里有哪些属性
$> java -classpath path/to/eshadoop.jar org.elasticsearch.hadoop.cli.Keytool list
##添加属性 交互模式
$> java -classpath path/to/eshadoop.jar org.elasticsearch.hadoop.cli.Keytool add the.setting.name.to.set
##添加属性 非交互模式
$> cat /file/containing/setting/value | java -classpath path/to/eshadoop.jar org.elasticsearch.hadoop.cli.Keytool add --stdin the.setting.name.to.set
##移除属性
$> java -classpath path/to/eshadoop.jar org.elasticsearch.hadoop.cli.Keytool remove the.setting.name.to.set
自己操作
[root@cdp-node12 /home/cclovezbf]# pwd
/home/cclovezbf
[root@cdp-node12 /home/cclovezbf]#
[root@cdp-node12 /home/cclovezbf]# ls
elasticsearch-hadoop-7.14.2.jar
[root@cdp-node12 /home/cclovezbf]# java -cp elasticsearch-hadoop-7.14.2.jar org.elasticsearch.hadoop.cli.Keytool create
[root@cdp-node12 /home/cclovezbf]# ls
elasticsearch-hadoop-7.14.2.jar esh.keystore
[root@cdp-node12 /home/cclovezbf]# java -cp elasticsearch-hadoop-7.14.2.jar org.elasticsearch.hadoop.cli.Keytool add es.net.http.auth.user
Enter value for es.net.http.auth.user: xxxx
[root@cdp-node12 /home/cclovezbf]# java -cp elasticsearch-hadoop-7.14.2.jar org.elasticsearch.hadoop.cli.Keytool list
es.net.http.auth.user
然后我久兴高采烈的
create external table if not exists dwintdata_es.dw_f_da_websites2
(
    `eid`                   string COMMENT '新企业编码EID',
    `source_eid`            string COMMENT '数据源企业编码EID',
    `web_type`              string COMMENT '网址类型',
    `web_name`              string COMMENT '网址名称',
    `web_url`               string COMMENT '网址',
    `date`                  string COMMENT '获取日期',
    `local_row_update_time` string COMMENT '合合备库数据更新时间',
    `etl_create_time`       string COMMENT 'Kudu数据更新时间',
    `etl_update_time`       string COMMENT 'DW数据更新时间',
    data_source             string
)
    STORED BY 'org.elasticsearch.hadoop.hive.EsStorageHandler'
    TBLPROPERTIES (
        'es.net.http.auth.pass' = 's2@enterprise',
        'es.keystore.location' = '/home/cclovezbf/esh.keystore',
        'es.nodes' = '9.134.161.140',
        'es.nodes.wan.only' = 'true',
        'es.index.auto.create' = 'false',
        'es.resource' = 'i_dm_f_da_websites'
        );
神奇的是昨天晚上这样建表后就ok了。也能select, 我今天感觉不对,想把文件放到hdfs上就把昨天的表删除了,结果今天建的也不能查了,昨天的表也删除了,找不到语句了,真是他妈的服了。
Error: java.io.IOException: org.elasticsearch.hadoop.EsHadoopIllegalArgumentException: Expected to find keystore file at [hdfs://s2cluster/user/hive/esh.keystore] but was unable to. Make sure that it is available on the classpath, or if not, that you have specified a valid file URI. (state=,code=0)
无奈之下继续看官网
Once your settings are all specified, you must make sure that the keystore is available on every node. This can be done by placing it on each node’s local file system, or by adding the keystore to the job’s classpath. Once the keystore has been added, its location must be specified with the
es.keystore.location. To reference a local file, use a fully qualified file URL (exfile:///path/to/file). If the secure store is propagated using the command line, just use the file’s name.
这里说了两种办法
1.是每个节点的文件系统都放keystore
2.是add keystore 我理解为 add jar/add file一样
难搞啊 这个暂且不提。。。。
开始hive2es导数
问题1,如果我重复插入es,那么es的数据会翻倍!!!
例如 insert overwrite table estable select * from hivetable 执行两次 es数据会double
本身如果是文件外表也就是最简单的外表,可以通过设置属性'external.table.purge'='TRUE',
是可以直接删除外表对应的数据的(hive3.1.1)低版本不知道 高版本是可以的。
直接truncate table estable 会报错。那么怎么办呢?
有人说 我设置一个etl_update_time 每天只导一天数据,这样可以避免,但是如果你某天的数据有问题,怎么删除或者覆盖es的数据呢?
覆盖?es有个_id的!!! 为什么会重复呢?就是要因为这个 _id是自动生成的,相同的数据也会生成不同的_id,所以我们指定就好了。
还是举例 es表i_dw_cc_test 字段 id name es
create external table if not exists dwintdata_es.i_dw_cc_test
(
    id string,
    name string,
    des string
)
    STORED BY 'org.elasticsearch.hadoop.hive.EsStorageHandler'
    TBLPROPERTIES (
        'es.net.http.auth.pass' = 'xxxx',
        'es.net.http.auth.user' = 'xxxx',
        'es.nodes' = '9.134.161.140',
        'es.nodes.wan.only' = 'true',
        'es.index.auto.create' = 'false',
        'es.mapping.id' = 'id',
        'es.resource' = 'i_dw_cc_test'
        );
执行语句 insert into dwintdata_es.i_dw_cc_test values ("1","2","3");

执行语句insert into dwintdata_es.i_dw_cc_test values ("1","1","1");

可以看到数据发生变化。
ok 这样就搞定了。以为这样就完了吗?
问题2 如何对齐es和hive表的字段
insert into dwintdata_es.i_dw_cc_test( name,id, des) values ("name","id","des");

insert into dwintdata_es.i_dw_cc_test select "name1" name ,"id1" id,"des1" des

结果错位了。
使用Hive读写ElasticSearch中的数据 – lxw的大数据田地

低版本的时候有这个,现在貌似看不到了,我也没找到替代的。后面再找
问题3 导数过程报错
hive表大概有5亿数据,再导入导es的时候,导了1亿多就报错了。貌似是连接数太多了,es承受不了

这位大佬也有类似的原因

后面我也对hive on tez进行了参数优化,错误也没有了文章来源:https://www.toymoban.com/news/detail-661662.html
hive on tez资源控制_cclovezbf的博客-CSDN博客文章来源地址https://www.toymoban.com/news/detail-661662.html
到了这里,关于hive通过外表整合es,超详细过程。的文章就介绍完了。如果您还想了解更多内容,请在右上角搜索TOY模板网以前的文章或继续浏览下面的相关文章,希望大家以后多多支持TOY模板网!


