背景
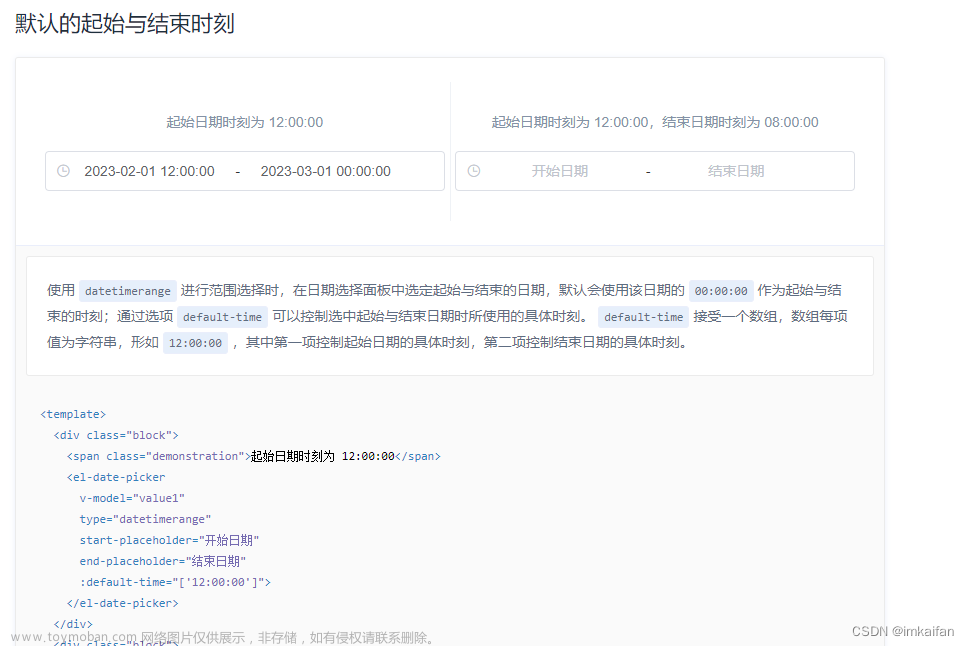
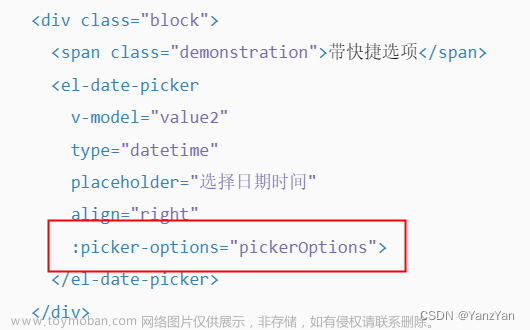
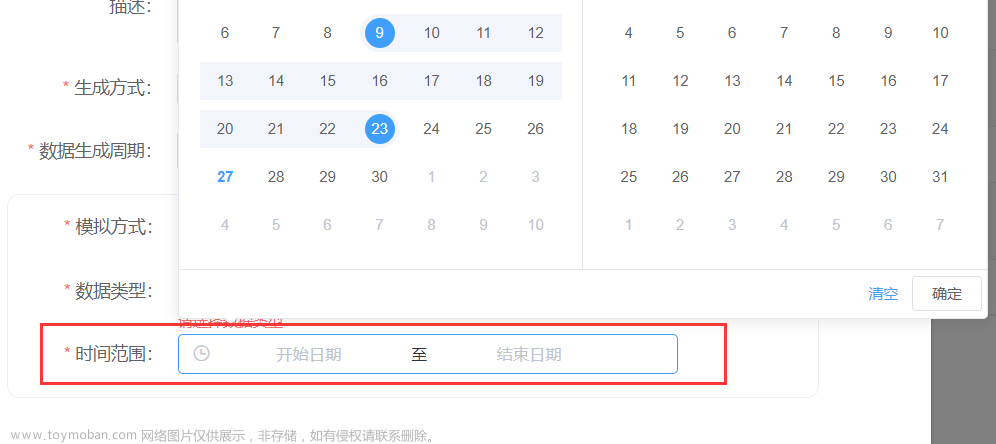
业务开发过程中遇到一个日期范围选择的需求,和Element UI的DateTimePicker组件比较类似,由两个日历控件组成,联动选择起始时间和结束时间。
问题
WPF中提供了一个DatePicker的控件,主要由DatePickerTextBox、Button和一个Calendar组成,其中Calendar是后台代码动态添加的,因此不能直接通过自定义DatePicker的控件模板实现需求。这里通过实现自定义DateTimePicker控件来满足需求。
技术要点与实现
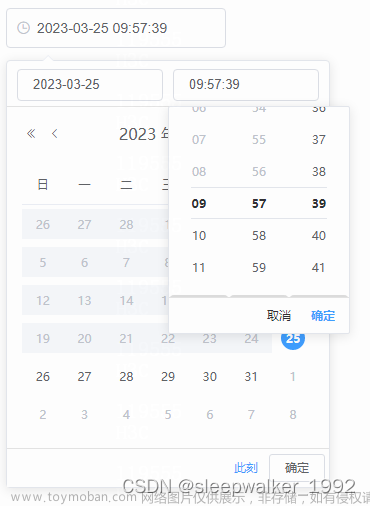
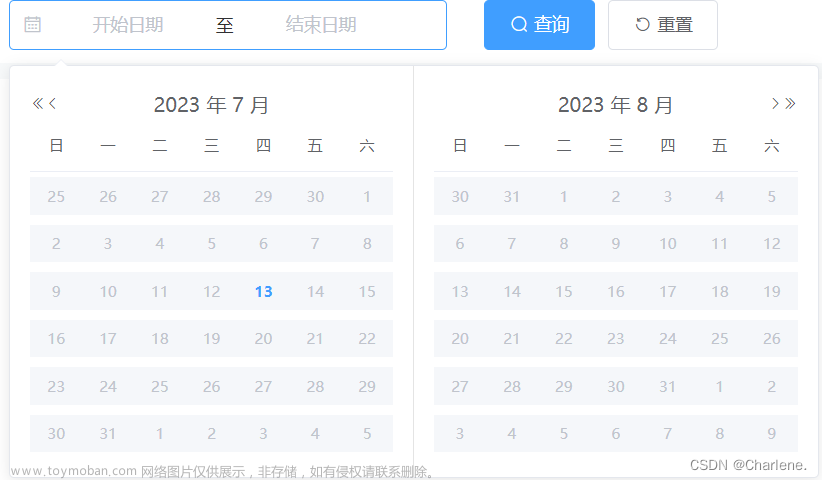
由于Calendar结构比较复杂,本文通过控件组合的方式简单实现自定义DateTimePicker。先来看下实现效果。
首先创建一个名为DateTimePicker的UserControl,添加依赖属性HoverStart和HoverEnd用于控制日历中的开始日期和结束日期,添加依赖属性DateTimeRangeStart和DateTimeRangeEnd用于设置外部设置/获取起始时间和结束时间。
然后在XAML中添加两个WatermarkTextBox用于输入起始时间和结束时间(增加校验规则验证时间的合法性,这里不再详细说明如何写校验规则,具体可参考ValidationRule实现参数绑定)。接着添加一个Popup(默认关闭),并在其中添加两个Calendar用于筛选日期,以及四个ComboBox用于筛选小时和分钟。当WatermarkTextBox捕获到鼠标时触发Popup打开。
<Grid>
    <Border Height="30" Width="320" BorderBrush="#c4c4c4" BorderThickness="1" CornerRadius="2">
        <StackPanel x:Name="datetimeSelected" Orientation="Horizontal" Height="30">
            <local:WatermarkTextBox x:Name="DateStartWTextBox" Style="{StaticResource DateWatermarkTextBoxStyle}" GotMouseCapture="WatermarkTextBox_GotMouseCapture">
                <local:WatermarkTextBox.Resources>
                    <helper:BindingProxy x:Key="dateRangeCeiling" Data="{Binding Text,ElementName=DateEndWTextBox}"/>
                </local:WatermarkTextBox.Resources>
                <local:WatermarkTextBox.Text>
                    <Binding Path="DateTimeRangeStart" ElementName="self" StringFormat="{}{0:yyyy-MM-dd HH:mm}" UpdateSourceTrigger="PropertyChanged">
                        <Binding.ValidationRules>
                            <helper:DateTimeValidationRule Type="Range">
                                <helper:ValidationParams Param1="{x:Static System:DateTime.Today}" Param2="{Binding Data,Source={StaticResource dateRangeCeiling}}"/>
                            </helper:DateTimeValidationRule>
                        </Binding.ValidationRules>
                    </Binding>
                </local:WatermarkTextBox.Text>
            </local:WatermarkTextBox>
            <TextBlock Text="~"/>
            <local:WatermarkTextBox x:Name="DateEndWTextBox" Style="{StaticResource DateWatermarkTextBoxStyle}" GotMouseCapture="WatermarkTextBox_GotMouseCapture">
                <local:WatermarkTextBox.Resources>
                    <helper:BindingProxy x:Key="dateRangeFloor" Data="{Binding Text,ElementName=DateStartWTextBox}"/>
                </local:WatermarkTextBox.Resources>
                <local:WatermarkTextBox.Text>
                    <Binding Path="DateTimeRangeEnd" ElementName="self" StringFormat="{}{0:yyyy-MM-dd HH:mm}" UpdateSourceTrigger="PropertyChanged">
                        <Binding.ValidationRules>
                            <helper:DateTimeValidationRule Type="Floor">
                                <helper:ValidationParams Param1="{Binding Data,Source={StaticResource dateRangeFloor}}"/>
                            </helper:DateTimeValidationRule>
                        </Binding.ValidationRules>
                    </Binding>
                </local:WatermarkTextBox.Text>
            </local:WatermarkTextBox>
            <local:ImageButton Width="18" Height="18" Click="ImageButton_Click"
                HoverImage="/Platanus;component/Images/calendar_hover.png"
                NormalImage="/Platanus;component/Images/calendar.png" />
        </StackPanel>
    </Border>
    <Popup x:Name="DatetimePopup" AllowsTransparency="True" StaysOpen="False" Placement="Top" VerticalOffset="-10" HorizontalOffset="-300" PlacementTarget="{Binding ElementName=datetimeSelected}" PopupAnimation="Slide">
        <Grid Background="White" Margin="3">
            <Grid.Effect>
                <DropShadowEffect Color="Gray"  BlurRadius="16"  ShadowDepth="3" Opacity="0.2" Direction="0" />
            </Grid.Effect>
            <Grid.RowDefinitions>
                <RowDefinition Height="*"/>
                <RowDefinition Height="42"/>
                <RowDefinition Height="42"/>
            </Grid.RowDefinitions>
            <StackPanel Orientation="Horizontal">
                <Calendar x:Name="startCalendar" DockPanel.Dock="Left"
                            Style="{DynamicResource CalendarStyle}" SelectionMode="SingleRange" SelectedDatesChanged="Calendar_SelectedDatesChanged"/>
                <Line Y1="0" Y2="{Binding ActualHeight ,ElementName=startCalendar}" Stroke="#e4e4e4"/>
                <Calendar x:Name="endCalendar" DockPanel.Dock="Right"
                            Style="{DynamicResource CalendarStyle}" SelectionMode="SingleRange" SelectedDatesChanged="Calendar_SelectedDatesChanged" DisplayDate="{Binding DisplayDate,ElementName=startCalendar,Converter={StaticResource DateTimeAddtionConverter},ConverterParameter=1}"/>
            </StackPanel>
            <Border Grid.Row="1" BorderThickness="0 0 0 1" BorderBrush="#e4e4e4">
                <StackPanel Orientation="Horizontal" TextElement.Foreground="#999999" TextElement.FontSize="14">
                    <TextBlock Text="开始时间:" Margin="15 0 7 0"/>
                    <ComboBox x:Name="startHours" Width="64" ItemStringFormat="{}{0:D2}" SelectionChanged="startHours_SelectionChanged"/>
                    <TextBlock Text=":" Margin="5 0 5 0"/>
                    <ComboBox x:Name="startMins" ItemStringFormat="{}{0:D2}" Width="64"/>
                    <TextBlock Text="截止时间:" Margin="40 0 7 0"/>
                    <ComboBox x:Name="endHours" ItemStringFormat="{}{0:D2}" Width="64"/>
                    <TextBlock Text=":" Margin="5 0 5 0"/>
                    <ComboBox x:Name="endMins" ItemStringFormat="{}{0:D2}" Width="64"/>
                </StackPanel>
            </Border>
            <StackPanel Grid.Row="2" Orientation="Horizontal" HorizontalAlignment="Right" Margin="0 0 11 0">
                <local:ImageButton x:Name="clearBtn" Style="{StaticResource ImageLinkButton}" Content="清空" FontSize="14" Foreground="#0099ff"
                                    Click="clearBtn_Click"
                                    NormalImage="{x:Null}"
                                    HoverImage="{x:Null}"
                                    DownImage="{x:Null}"
                                    />
                <Button x:Name="yesBtn" Content="确定" Width="56" Height="28" Margin="12 0 0 0" Click="yesBtn_Click">
                    <Button.Style>
                        <Style TargetType="{x:Type Button}" BasedOn="{StaticResource BaseButtonStyle}">
                            <Setter Property="BorderThickness" Value="1"/>
                            <Setter Property="BorderBrush" Value="#dcdfe6"/>
                            <Setter Property="Foreground" Value="#333333"/>
                            <Setter Property="OverridesDefaultStyle" Value="True"/>
                            <Setter Property="Template">
                                <Setter.Value>
                                    <ControlTemplate TargetType="{x:Type Button}">
                                        <Border x:Name="border" Background="Transparent" BorderBrush="{TemplateBinding BorderBrush}" BorderThickness="{TemplateBinding BorderThickness}" CornerRadius="3" ClipToBounds="True">
                                            <ContentPresenter
                                            RecognizesAccessKey="True"
                                            Margin="{TemplateBinding Padding}"
                                            SnapsToDevicePixels="{TemplateBinding SnapsToDevicePixels}"
                                            HorizontalAlignment="{TemplateBinding HorizontalContentAlignment}"
                                            VerticalAlignment="{TemplateBinding VerticalContentAlignment}"/>
                                        </Border>
                                        <ControlTemplate.Triggers>
                                            <MultiTrigger>
                                                <MultiTrigger.Conditions>
                                                    <Condition Property="IsPressed" Value="false"/>
                                                    <Condition Property="IsMouseOver" Value="true"/>
                                                </MultiTrigger.Conditions>
                                                <Setter Property="BorderBrush" Value="#409eff"/>
                                                <Setter Property="Foreground" Value="#409eff"/>
                                            </MultiTrigger>
                                        </ControlTemplate.Triggers>
                                    </ControlTemplate>
                                </Setter.Value>
                            </Setter>
                        </Style>
                    </Button.Style>
                </Button>
            </StackPanel>
        </Grid>
    </Popup>
</Grid>
紧接着就是修改Calendar的样式了。通常情况下,自定义控件模板只需要在Visual Studio的设计窗口或者Blend中选中控件,然后右键菜单中编辑模板即可。可能由于Calendar中的部分元素(CalendarButton和CalendarDayButton)是后台代码生成,这个方法编辑Calendar模板副本生成的CalendarStyle不包含完整的可视化树结构,无法对样式进一步修改。幸运的是微软官方文档公开了控件的默认样式和模板,在此基础上进行修改即可。通过官方文档可以发现Calendar完整的可视化树中包含了四个类型控件Calendar、CalendarItem、CalendarButton、CalendarDayButton。其中CalendarDayButton对应的就是日历中具体的“天”,管理着具体的“天”的状态,比如选中状态、不可选状态等,这也是我们主要修改的地方,接下来看下CalendarDayButton的样式。(其他几个元素的样式和模板参照官方文档修改即可)
<Style x:Key="CalendarDayButtonStyle" TargetType="{x:Type CalendarDayButton}">
    <Setter Property="MinWidth" Value="5" />
    <Setter Property="MinHeight" Value="5" />
    <Setter Property="Width" Value="42"/>
    <Setter Property="Height" Value="42"/>
    <Setter Property="FontSize" Value="12" />
    <Setter Property="HorizontalContentAlignment" Value="Center" />
    <Setter Property="VerticalContentAlignment" Value="Center" />
    <Setter Property="BorderThickness" Value="0"/>
    <Setter Property="Template">
        <Setter.Value>
            <ControlTemplate TargetType="{x:Type CalendarDayButton}">
                <Grid Height="26" MouseUp="Grid_MouseUp">
                    <Border x:Name="SelectedBackground" Background="#f2f6fc" Visibility="Collapsed">
                        <Border.CornerRadius>
                            <MultiBinding Converter="{StaticResource SelectedDatesConverter}">
                                <Binding/>
                                <Binding Path="HoverStart" RelativeSource="{RelativeSource AncestorType={x:Type local:DateTimePicker}}"/>
                                <Binding Path="HoverEnd" RelativeSource="{RelativeSource AncestorType={x:Type local:DateTimePicker}}"/>
                            </MultiBinding>
                        </Border.CornerRadius>
                    </Border>
                    <Grid Width="22" Height="22">
                        <Rectangle x:Name="StartStopBackground" Fill="#409eff" RadiusX="11" RadiusY="11" >
                            <Rectangle.Visibility>
                                <MultiBinding Converter="{StaticResource SelectedDatesConverter}">
                                    <Binding/>
                                    <Binding Path="HoverStart" RelativeSource="{RelativeSource AncestorType={x:Type local:DateTimePicker}}"/>
                                    <Binding Path="HoverEnd" RelativeSource="{RelativeSource AncestorType={x:Type local:DateTimePicker}}"/>
                                    <Binding Path="IsInactive" RelativeSource="{RelativeSource AncestorType={x:Type CalendarDayButton}}"/>
                                </MultiBinding>
                            </Rectangle.Visibility>
                        </Rectangle>
                        <Border
                        Background="{TemplateBinding Background}"
                        BorderBrush="{TemplateBinding BorderBrush}"
                        BorderThickness="{TemplateBinding BorderThickness}" />
                        <Rectangle
                        x:Name="HighlightBackground"
                        Grid.ColumnSpan="2"
                        Fill="#FFBADDE9"
                        Opacity="0"
                        RadiusX="11"
                        RadiusY="11" />
                        <ContentPresenter
                        x:Name="NormalText"
                        HorizontalAlignment="{TemplateBinding HorizontalContentAlignment}"
                        VerticalAlignment="{TemplateBinding VerticalContentAlignment}"
                        TextElement.Foreground="#FF333333" />
                        <Path
                        x:Name="Blackout"
                        Grid.ColumnSpan="2"
                        Margin="3"
                        HorizontalAlignment="Stretch"
                        VerticalAlignment="Stretch"
                        Data="M8.1772461,11.029181 L10.433105,11.029181 L11.700684,12.801641 L12.973633,11.029181 L15.191895,11.029181 L12.844727,13.999395 L15.21875,17.060919 L12.962891,17.060919 L11.673828,15.256231 L10.352539,17.060919 L8.1396484,17.060919 L10.519043,14.042364 z"
                        Fill="#FF000000"
                        Opacity="0"
                        RenderTransformOrigin="0.5,0.5"
                        Stretch="Fill" />
                        <Rectangle
                        x:Name="DayButtonFocusVisual"
                        Grid.ColumnSpan="2"
                        IsHitTestVisible="false"
                        RadiusX="11"
                        RadiusY="1"
                        Stroke="#FF45D6FA"
                        Visibility="Collapsed" />
                    </Grid>
                </Grid>
                <ControlTemplate.Triggers>
                    <Trigger Property="IsInactive" Value="True">
                        <Setter Property="Visibility" Value="Collapsed" TargetName="SelectedBackground"/>
                        <Setter Property="TextElement.Foreground" Value="#c0c4cc" TargetName="NormalText"/>
                    </Trigger>
                    <Trigger Property="IsBlackedOut" Value="true">
                        <Setter Property="Visibility" Value="Collapsed" TargetName="SelectedBackground"/>
                        <Setter Property="TextElement.Foreground" Value="#c0c4cc" TargetName="NormalText"/>
                    </Trigger>
                    <MultiTrigger>
                        <MultiTrigger.Conditions>
                            <Condition Property="IsInactive" Value="false"/>
                            <Condition Property="IsSelected" Value="true"/>
                        </MultiTrigger.Conditions>
                        <MultiTrigger.Setters>
                            <Setter Property="Visibility" Value="Visible" TargetName="SelectedBackground"/>
                        </MultiTrigger.Setters>
                    </MultiTrigger>
                    <MultiTrigger>
                        <MultiTrigger.Conditions>
                            <Condition Property="IsInactive" Value="false"/>
                            <Condition Property="IsBlackedOut" Value="false"/>
                            <Condition Property="IsMouseOver" Value="true"/>
                        </MultiTrigger.Conditions>
                        <MultiTrigger.Setters>
                            <Setter Property="Opacity" Value="0.5" TargetName="HighlightBackground"/>
                        </MultiTrigger.Setters>
                    </MultiTrigger>
                    <MultiTrigger>
                        <MultiTrigger.Conditions>
                            <Condition Property="IsInactive" Value="false"/>
                            <Condition Property="IsToday" Value="true"/>
                        </MultiTrigger.Conditions>
                        <MultiTrigger.Setters>
                            <Setter Property="TextElement.Foreground" Value="#409eff" TargetName="NormalText"/>
                        </MultiTrigger.Setters>
                    </MultiTrigger>
                    <MultiTrigger>
                        <MultiTrigger.Conditions>
                            <Condition Property="IsInactive" Value="false"/>
                            <Condition Property="Visibility" Value="Visible" SourceName="StartStopBackground"/>
                        </MultiTrigger.Conditions>
                        <MultiTrigger.Setters>
                            <Setter Property="TextElement.Foreground" Value="#ffffff" TargetName="NormalText"/>
                        </MultiTrigger.Setters>
                    </MultiTrigger>
                </ControlTemplate.Triggers>
            </ControlTemplate>
        </Setter.Value>
    </Setter>
</Style>
样式中用到一个MultiBinding绑定CalendarDayButton以及前边提到的两个依赖属性:HoverStart和HoverEnd,然后通过MultiValueConverter转换器比较CalendarDayButton是否处于选中的日期范围,根据不同的状态设置其背景样式和字体颜色。SelectedDatesConverter的实现如下:
public class SelectedDatesConverter : IMultiValueConverter
{
    public object Convert(object[] values, Type targetType, object parameter, CultureInfo culture)
    {
        if (targetType.Name == "CornerRadius")
        {
            if (values.Length < 3) return new CornerRadius(0);
            if (values[0].Equals(values[1])) return new CornerRadius(13, 0, 0, 13);
            else if (values[0].Equals(values[2])) return new CornerRadius(0, 13, 13, 0);
            else return new CornerRadius(0);
        }
        else
        {
            if (values.Length < 3) return Visibility.Collapsed;
            if ((values[0].Equals(values[1]) || values[0].Equals(values[2])) && System.Convert.ToBoolean(values[3]) == false) return Visibility.Visible;
            else return Visibility.Collapsed;
        }
    }

    public object[] ConvertBack(object value, Type[] targetTypes, object parameter, CultureInfo culture)
    {
        throw new NotImplementedException();
    }
}
最后就是在后台代码中根据日历的SelectedDatesChanged事件设置HoverStart和HoverEnd的值,以此来控制DateTimePicker中选中日期的样式。文章来源:https://www.toymoban.com/news/detail-662440.html
总结
本文分享了一种简单实现自定义DateTimePicker控件的方式,同时也介绍了另外一种查看原生控件默认样式和模板的方法:查看微软官方文档。这种方法虽然不如在Visual Studio的设计窗口或者Blend中编辑模板副本方便,但提供了完整的结构、每个元素的组成部分以及可视化状态,方便开发人员清晰的了解控件全貌,可以应对修改复杂的原生控件样式和模板的需求。文章来源地址https://www.toymoban.com/news/detail-662440.html
到了这里,关于WPF实现Element UI风格的日期时间选择器的文章就介绍完了。如果您还想了解更多内容,请在右上角搜索TOY模板网以前的文章或继续浏览下面的相关文章,希望大家以后多多支持TOY模板网!