参考资料
- 阵列立方体和相机适配体验
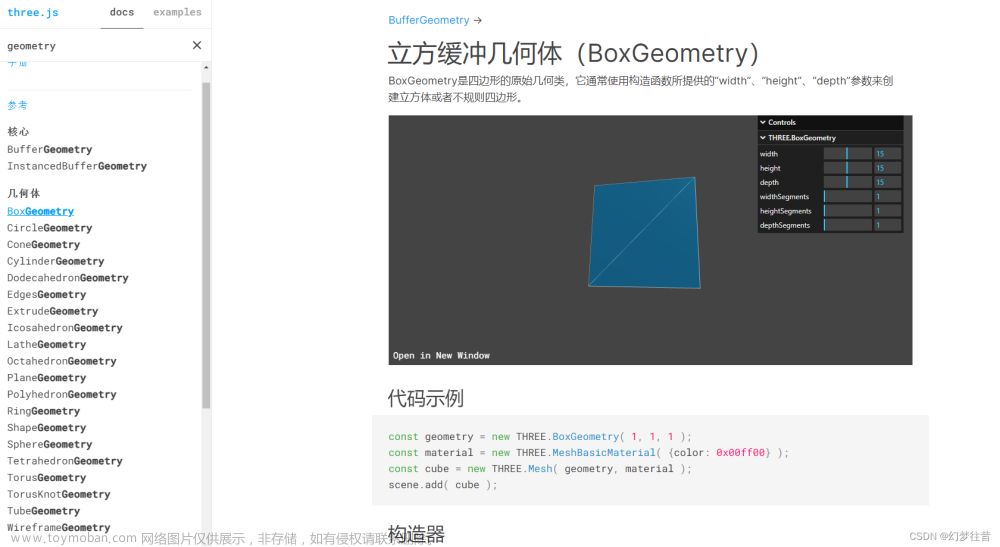
- Threejs常见几何体简介
- …
- gui.js库(可视化改变三维场景)
知识点
注:基于Three.jsv0.155.0文章来源地址https://www.toymoban.com/news/detail-665299.html
- 长方体:BoxGeometry
- 球体:SphereGeometry
- 圆柱:CylinderGeometry
- 矩形平面:PlaneGeometry
- 圆形平面:CircleGeometry
- 高光网格材质:MeshPhongMaterial(shininess、specular)
- WebGL渲染器设置:antialias 、setPixelRatio、setClearColor
- gui.js库:add、addColor、addFolder、name、step、onChange
- 关键词搜索examples:
Find in Folder
代码实现
阵列立方体
<!DOCTYPE html>
<html lang="en">
<head>
	<meta charset="UTF-8">
	<title>Three.js</title>
</head>
  <body>
  </body>
  <!-- 具体路径配置,你根据自己文件目录设置,我的是课件中源码形式 -->
  <script type="importmap">
    {
      "imports": {
        "three": "./js/three.module.js",
        "three/addons/": "../three.js/examples/jsm/"
      }
    }
  </script>
  <script type="module">
    import * as THREE from 'three';
    import { OrbitControls } from 'three/addons/controls/OrbitControls.js';

    const width = 800
    const height = 500

    // 场景
    const scene = new THREE.Scene();
    // 几何体
    const geometry = new THREE.BoxGeometry(100, 100, 100);
    // 材质
    // MeshBasicMaterial:不受光
    // MeshLambertMaterial:受光
    const material = new THREE.MeshLambertMaterial({
      color: 0x00ffff, //设置材质颜色
      transparent: true,//开启透明
      opacity: 0.8,//设置透明度
    });

    for (let i = 0; i < 10; i++) {
      for (let j = 0; j < 10; j++) {
          const mesh = new THREE.Mesh(geometry, material); //网格模型对象Mesh
          // 在XOZ平面上分布
          mesh.position.set(i * 200, 0, j * 200);
          scene.add(mesh); //网格模型添加到场景中
      }
    }

    // 坐标系
    const axes = new THREE.AxesHelper(200);
    scene.add(axes);

    // 点光源
    const pointLight = new THREE.PointLight( 0xffffff, 1.0, 0, 0);
    pointLight.position.set(2000, 2000, 2000 );
    scene.add( pointLight );

    // 环境光
    const ambientLight = new THREE.AmbientLight( 0xffffff, 0.2);
    scene.add( ambientLight );

    // 相机
    const camera = new THREE.PerspectiveCamera(60, width / height, 1, 8000);
    // camera.position.set(292, 223, 185);
    //在原来相机位置基础上拉远,可以观察到更大的范围
    camera.position.set(2000, 2000, 2000);
    camera.lookAt(1000, 0, 1000);

    // 渲染器
    const renderer = new THREE.WebGLRenderer();
    renderer.setSize(width, height);
    renderer.render(scene, camera);
    document.body.appendChild(renderer.domElement);

    // 控制器
    const controls = new OrbitControls(camera, renderer.domElement);
    controls.target.set(1000, 0, 1000);
    controls.update();

    controls.addEventListener('change', () => {
      renderer.render(scene, camera);
    });
  </script>
</html>
常见几何体
<!DOCTYPE html>
<html lang="en">
<head>
	<meta charset="UTF-8">
	<title>Three.js</title>
</head>
  <body>
  </body>
  <!-- 具体路径配置,你根据自己文件目录设置,我的是课件中源码形式 -->
  <script type="importmap">
    {
      "imports": {
        "three": "./js/three.module.js",
        "three/addons/": "../three.js/examples/jsm/"
      }
    }
  </script>
  <script type="module">
    import * as THREE from 'three';
    import { OrbitControls } from 'three/addons/controls/OrbitControls.js';

    const width = 800
    const height = 500

    // 场景
    const scene = new THREE.Scene();
    // 几何体:
    // 正方体
    // const geometry = new THREE.BoxGeometry(100, 100, 100);
    // 球体
    // const geometry = new THREE.SphereGeometry(100);
    // 圆锥体
    // const geometry = new THREE.CylinderGeometry(50, 100, 100);
    // 正方形平面
    // const geometry = new THREE.PlaneGeometry(100, 100);
    // 圆形平面
    const geometry = new THREE.CircleGeometry(100);

    // 材质
    const material = new THREE.MeshLambertMaterial({
      color: 0x00ff00,
      transparent: true,
      opacity: 0.8,
      side: THREE.DoubleSide, //两面可见
    });

    // 网格模型:物体
    const mesh = new THREE.Mesh(geometry, material);
    mesh.position.set(0, 0, 0);
    scene.add(mesh);

    // 坐标系
    const axes = new THREE.AxesHelper(200);
    scene.add(axes);

    // 点光源
    const pointLight = new THREE.PointLight( 0xffffff, 1.0, 0, 0);
    pointLight.position.set(2000, 2000, 2000 );
    scene.add( pointLight );

    // 环境光
    const ambientLight = new THREE.AmbientLight( 0xffffff, 0.2);
    scene.add( ambientLight );

    // 相机
    const camera = new THREE.PerspectiveCamera(75, width/height, 0.1, 1000);
    camera.position.set(200, 200, 200);
    camera.lookAt(scene.position);

    // 渲染器
    const renderer = new THREE.WebGLRenderer();
    renderer.setSize(width, height);
    renderer.render(scene, camera);
    document.body.appendChild(renderer.domElement);

    // 控制器
    const controls = new OrbitControls(camera, renderer.domElement);
    controls.addEventListener('change', () => {
      renderer.render(scene, camera);
    });

  </script>
</html>
高光网格材质
<!DOCTYPE html>
<html lang="en">
<head>
	<meta charset="UTF-8">
	<title>Three.js</title>
</head>
  <body>
  </body>
  <!-- 具体路径配置,你根据自己文件目录设置,我的是课件中源码形式 -->
  <script type="importmap">
    {
      "imports": {
        "three": "./js/three.module.js",
        "three/addons/": "../three.js/examples/jsm/"
      }
    }
  </script>
  <script type="module">
    import * as THREE from 'three';
    import { OrbitControls } from 'three/addons/controls/OrbitControls.js';

    const width = 800
    const height = 500

    // 场景
    const scene = new THREE.Scene();
    // 几何体:
    // 球体
    // const geometry = new THREE.BoxGeometry(100, 100, 100);
    const geometry = new THREE.SphereGeometry(100);

    // 材质
    const material = new THREE.MeshPhongMaterial({
      color: 0x00ff00,
      shininess: 80, //高光部分的亮度,默认30
      specular: 0x444444, //高光部分的颜色
    });

    // 网格模型:物体
    const mesh = new THREE.Mesh(geometry, material);
    mesh.position.set(0, 0, 0);
    scene.add(mesh);

    // 坐标系
    const axes = new THREE.AxesHelper(200);
    scene.add(axes);

    // 点光源
    const pointLight = new THREE.PointLight( 0xffffff, 1.0, 0, 0);
    pointLight.position.set(2000, 2000, 2000 );
    scene.add( pointLight );

    // 环境光
    const ambientLight = new THREE.AmbientLight( 0xffffff, 0.2);
    scene.add( ambientLight );

    // 相机
    const camera = new THREE.PerspectiveCamera(75, width/height, 0.1, 1000);
    camera.position.set(200, 200, 200);
    camera.lookAt(scene.position);

    // 渲染器
    const renderer = new THREE.WebGLRenderer();
    renderer.setSize(width, height);
    renderer.render(scene, camera);
    document.body.appendChild(renderer.domElement);

    // 控制器
    const controls = new OrbitControls(camera, renderer.domElement);
    controls.addEventListener('change', () => {
      renderer.render(scene, camera);
    });

  </script>
</html>
WebGL渲染器设置
<!DOCTYPE html>
<html lang="en">
<head>
	<meta charset="UTF-8">
	<title>Three.js</title>
</head>
  <body>
  </body>
  <!-- 具体路径配置,你根据自己文件目录设置,我的是课件中源码形式 -->
  <script type="importmap">
    {
      "imports": {
        "three": "./js/three.module.js",
        "three/addons/": "../three.js/examples/jsm/"
      }
    }
  </script>
  <script type="module">
    import * as THREE from 'three';
    import { OrbitControls } from 'three/addons/controls/OrbitControls.js';

    const width = 800
    const height = 500

    // 场景
    const scene = new THREE.Scene();
    // 几何体:
    // 球体
    const geometry = new THREE.BoxGeometry(100, 100, 100);

    // 材质
    const material = new THREE.MeshLambertMaterial({
      color: 0x00ff00, //设置材质颜色
      transparent: true,//开启透明
      opacity: 0.8,//设置透明度
    });

    // 网格模型:物体
    const mesh = new THREE.Mesh(geometry, material);
    mesh.position.set(0, 0, 0);
    scene.add(mesh);

    // 坐标系
    const axes = new THREE.AxesHelper(200);
    scene.add(axes);

    // 点光源
    const pointLight = new THREE.PointLight( 0xffffff, 1.0, 0, 0);
    pointLight.position.set(2000, 2000, 2000 );
    scene.add( pointLight );

    // 环境光
    const ambientLight = new THREE.AmbientLight( 0xffffff, 0.2);
    scene.add( ambientLight );

    // 相机
    const camera = new THREE.PerspectiveCamera(75, width/height, 0.1, 1000);
    camera.position.set(200, 200, 200);
    camera.lookAt(scene.position);

    // 渲染器
    const renderer = new THREE.WebGLRenderer({
      antialias: true
    });
    // 设置设备比,固定写法
    renderer.setPixelRatio(window.devicePixelRatio);
    // 设置背景色
    renderer.setClearColor(0x444444, 1);
    // 设置渲染器的尺寸
    renderer.setSize(width, height);
    renderer.render(scene, camera);
    document.body.appendChild(renderer.domElement);

    // 控制器
    const controls = new OrbitControls(camera, renderer.domElement);
    controls.addEventListener('change', () => {
      renderer.render(scene, camera);
    });
  </script>
</html>
gui.js库
<!DOCTYPE html>
<html lang="en">
<head>
	<meta charset="UTF-8">
	<title>Three.js</title>
</head>
  <body>
  </body>
  <!-- 具体路径配置,你根据自己文件目录设置,我的是课件中源码形式 -->
  <script type="importmap">
    {
      "imports": {
        "three": "./js/three.module.js",
        "three/addons/": "../three.js/examples/jsm/"
      }
    }
  </script>
  <script type="module">
    import * as THREE from 'three';
    import { OrbitControls } from 'three/addons/controls/OrbitControls.js';
    import { GUI } from 'three/addons/libs/lil-gui.module.min.js';

    const width = 800
    const height = 500

    const gui = new GUI();
    gui.domElement.style.right = '0px';
    gui.domElement.style.width = '300px';

    // 场景
    const scene = new THREE.Scene();
    // 几何体:
    // 球体
    const geometry = new THREE.BoxGeometry(100, 100, 100);

    // 材质
    const material = new THREE.MeshLambertMaterial({
      color: 0x00ff00, //设置材质颜色
      transparent: true,//开启透明
      opacity: 0.8,//设置透明度
    });
    console.log('🚀 ~ file: 1.19gui.js库(可视化改变三维场景).html:42 ~ material:', material)

    // 网格模型:物体
    const mesh = new THREE.Mesh(geometry, material);
    mesh.position.set(0, 0, 0);
    scene.add(mesh);

    // 坐标系
    const axes = new THREE.AxesHelper(200);
    scene.add(axes);

    // 点光源
    const pointLight = new THREE.PointLight( 0xffffff, 1.0, 0, 0);
    pointLight.position.set(2000, 2000, 2000 );
    scene.add( pointLight );

    // 环境光
    const ambientLight = new THREE.AmbientLight( 0xffffff, 0.2);
    scene.add( ambientLight );

    // 相机
    const camera = new THREE.PerspectiveCamera(75, width/height, 0.1, 1000);
    camera.position.set(200, 200, 200);
    camera.lookAt(scene.position);

    // 渲染器
    const renderer = new THREE.WebGLRenderer({
      antialias: true
    });
    // 设置设备比,固定写法
    renderer.setPixelRatio(window.devicePixelRatio);
    // 设置背景色
    renderer.setClearColor(0x444444, 1);
    // 设置渲染器的尺寸
    renderer.setSize(width, height);
    renderer.render(scene, camera);
    document.body.appendChild(renderer.domElement);

    // 控制器
    const controls = new OrbitControls(camera, renderer.domElement);
    controls.addEventListener('change', () => {
      renderer.render(scene, camera);
    });

    var guiObj = {
      color: '0xffffff',
      obj: {
        左: -100,
        中: 0,
        右: 200
      },
      bool: false,
    }

    // 动画渲染
    // 跟踪时间
    function render() {
      requestAnimationFrame(render);
      guiObj.bool && (mesh.rotation.y += 0.01);
      renderer.render(scene, camera);
    }

    render();

    const ambientFoloer = gui.addFolder('环境光');
    ambientFoloer.close();

    // gui动态改变光的强度
    ambientFoloer.add(ambientLight, 'intensity', 0, 2).name('环境光强度');

    const materialFoloer = gui.addFolder('材料');
    materialFoloer.close();

    // gui动态改变材料颜色
    materialFoloer.addColor(guiObj, 'color').name('材料颜色').onChange(function (value) {
      mesh.material.color.set(value)
    });

    const meshFoloer = gui.addFolder('物体');
    meshFoloer.close();

    // gui动态改变材料颜色
    meshFoloer.add(mesh.position, 'y', [-100, 0 ,200]).name('物体y轴');

    // gui动态改变材料颜色
    meshFoloer.add(mesh.position, 'x',  {
      左: -100,
      中: 0,
      右: 200
    }).name('物体x轴');

    meshFoloer.add(mesh.position, 'x', 0, 100).step(2);

    meshFoloer.add(mesh.position, 'y', 0, 100);

    meshFoloer.add(mesh.position, 'z', 0, 100);

    meshFoloer.add(guiObj, 'bool').name('是否旋转');
  </script>
</html>
文章来源:https://www.toymoban.com/news/detail-665299.html
到了这里,关于Three.js之几何体、高光材质、渲染器设置、gui的文章就介绍完了。如果您还想了解更多内容,请在右上角搜索TOY模板网以前的文章或继续浏览下面的相关文章,希望大家以后多多支持TOY模板网!


