Electron是一款使用Html、Css、JS开发跨平台桌面应用的框架。
话不多说直接开搞。
必坑指南:
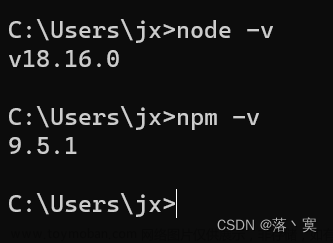
- node版本>=18.0
- 使用淘宝镜像安装
npm相关包; - 把下面两行配置放到你的
npmrc文件中electron_mirror=https://npm.taobao.org/mirrors/electron/ ELECTRON_MIRROR=https://npm.taobao.org/mirrors/electron/
创建项目
使用下面命令创建一个空项目
mkdir electron-demo && cd electron-demo
npm init
安装electron依赖包,等待安装完成
cnpm install --save-dev electron
写代码
创建index.html
<!DOCTYPE html>
<html lang="en">
<head>
    <meta charset="UTF-8">
    <title>Title</title>
</head>
<body>
  <h1 id="hello"></h1>
</body>
</html>
创建preload.js,会在应用加载渲染进程之前执行这个文件的代码
// dom内容加载成功的监听
window.addEventListener('DOMContentLoaded', () => {
	// 加载页面成功之后设置元素的内容
    const element = document.getElementById('hello')
    element.innerText = 'Hello,Electron!'
})
创建main.js,整个项目的入口js文件
const { app, BrowserWindow } = require('electron')
const {join} = require("path");

// 创建应用窗口
const createWindow = () => {
    const win = new BrowserWindow({
    	// 窗口尺寸
        width: 800,
        height: 600,
        webPreferences: {
        	// 设置渲染前执行的js文件
            preload: join(__dirname, 'preload.js')
        }
    })
    // 加载的html文件
    win.loadFile('index.html')
}

app.whenReady().then(() => {
    createWindow()
})
启动项目
修改package.json
设置入口js文件
"main": "main.js",
设置启动脚本
  "scripts": {
    "start": "electron ."
  },
执行脚本文章来源:https://www.toymoban.com/news/detail-666846.html
npm start
正常情况会出现下面这个窗口 文章来源地址https://www.toymoban.com/news/detail-666846.html
到了这里,关于Electron之初体验的文章就介绍完了。如果您还想了解更多内容,请在右上角搜索TOY模板网以前的文章或继续浏览下面的相关文章,希望大家以后多多支持TOY模板网!


