1.nvue页面使用
nvue页面可以直接使用live-pusher组件。
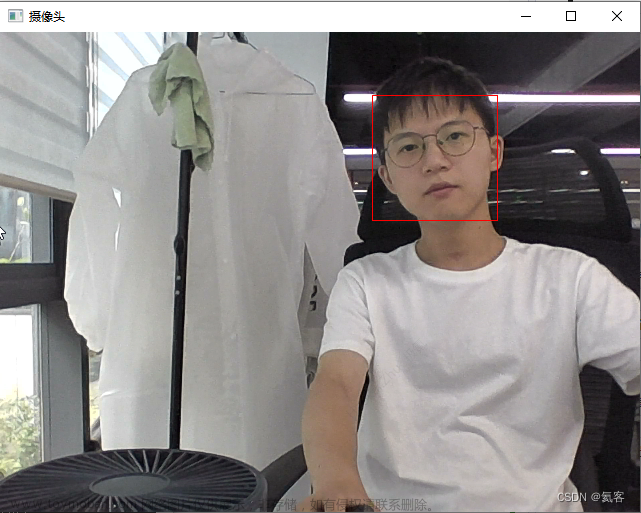
由于live-pusher是矩形的,一般人脸识别使用圆形,所以添加cover-image可覆盖在live-pusher上层,修改样式。
<template>
	<div>
		<div class="livefater">
			<div style="width: 300px;height: 300px;border-radius: 150px;overflow: hidden;">
				<live-pusher id='livePusher' ref="livePusher" class="livePusher" url="" mode="SD" :muted="true"
					:enable-camera="true" :auto-focus="true" :beauty="1" whiteness="2" aspect="1:1"
					@statechange="statechange" @netstatus="netstatus" @error="error"></live-pusher>
			</div>
			<cover-image src="/static/faceRecognition/facebox.png" class="gaiimg"></cover-image>
		</div>
		<view class="message" style="color: #76adf1;">
			<text class="info">请平视屏幕,并正对光源,将脸部移入圆圈内</text>
		</view>
		<zero-loading v-if="loading" mask type="triangle"></zero-loading>
		<u-top-tips ref="uNotify"></u-top-tips>
	</div>
</template>

<script>
	import {
		homeMenuList,
		menuNameList
	} from '@/utils/homeListMap.js'
	import {
		getNewCount,
		getLastGroup
	} from "@/api/toChatWith.js"
	import {
		login,
		registeredUser,
		getUserInfo,
		listMenus
	} from '@/api/login.js';

	export default {
		data() {
			return {
				imgData: '',
				pusher: null,
				scanWin: null,
				faceInitTimeout: null,
				snapshTimeout: null,
				uploadFileTask: null,
				faceNum: 0,
				loading: false,
			}
		},
		mounted() {
			// 注意:需要在onReady中 或 onLoad 延时
			this.pusher = uni.createLivePusherContext("livePusher", this);
			var that = this
			setTimeout(() => {
				this.startPreview()
			})
		},
		onUnload() {
			console.log('关闭')
			this.pusher && this.pusher.close({
				success: (a) => {
					console.log("关闭");
				}
			})
		},
		methods: {
			//获取快照
			snapshotPusher() {
				var that = this
				this.pusher.snapshot({
					success: (e) => {
						console.log(e.message, '拍照信息');
						//获取图片base64
						that.getMinImage(e.message.tempImagePath);
					},
				})
			},
			// 开启摄像头
			startPreview() {
				var that = this
				this.pusher.startPreview({
					success: (a) => {
						console.log("livePusher.startPreview:" + JSON.stringify(a));
						that.snapshotPusher()
					},
					fail(err) {
						console.log(err);
					}
				});
			},
			//使用plus.zip.compressImage压缩图片
			getMinImage(imgPath) {
				plus.zip.compressImage({
						src: imgPath,
						dst: imgPath,
						overwrite: true,
						quality: 40
					},
					zipRes => {
						setTimeout(() => {
							var reader = new plus.io.FileReader();
							reader.onloadend = res => {
								//获取图片base64
								var speech = res.target.result; //base64图片
								this.onLogin(speech)
								this.imgData = speech;
							};
							//一定要使用plus.io.convertLocalFileSystemURL将target地址转换为本地文件地址,否则readAsDataURL会找不到文件
							reader.readAsDataURL(plus.io.convertLocalFileSystemURL(zipRes.target));
						}, 100);
					},
					function(error) {
						console.log('Compress error!', error);
					}
				);
			},
			//调用登录接口
			onLogin(val) {
				login({
					"loginType": "faceLogin",
					"image": val.split(',')[1]
				}).then(async (res) => {
					console.log(res)
					if (res.code === '200' && res.data.clientUuid) { //识别成功
						//写登录逻辑
					} else { //超过五次识别未成功,则取消识别
						this.faceNum += 1
						if (this.faceNum >= 5) {
							uni.showToast({
								icon: 'none',
								title: '人员未登记!'
							})
							setTimeout(() => {
								uni.navigateBack();
							}, 2000)
						} else {
							this.snapshotPusher()
						}
					}
				}).catch(err => {
					console.log(err, '调用接口失败')
				})
			},


		},
	}
</script>

<style lang="less" scoped>
	/*#ifndef APP-NVUE*/
	page {
		background: #fff;
	}

	/*#endif*/

	.u-navbar__content__left {
		display: flex !important;
		align-items: center;
	}

	.u_nav_slot {
		display: flex;
		align-items: center;
		flex-direction: row;
		color: rgba(0, 0, 0, 0.9);
		font-size: 14.4rpx;
		font-weight: 700;

	}

	.text {
		margin-left: 1rpx;
		color: #fff;
		font-size: 16rpx;
	}

	.box {
		z-index: 99;
		position: absolute;
		left: 35%;
		top: 25%;
		width: 250rpx;
		height: 250rpx;
		background: pink;
	}


	.info {
		color: #76adf1 !important;
		font-size: 26rpx;
	}

	.livePusher {
		width: 300px;
		height: 300px;
	}

	.livefater {
		display: flex;
		justify-content: center;
		flex-direction: column;
		align-items: center;
		margin-top: 10rpx;
		margin-bottom: 50rpx;
		height: 350px;
		overflow: hidden;
	}

	.gaiimg {
		width: 462px;
		height: 350px;
		position: absolute;
		top: 0;
	}
</style>
2.vue页面使用
vue页面直接使用live-pusher组件将无法进入方法的回调中。
可见:官方描述
需要使用plus.video.createLivePusher方法
使用该方法,cover-image无法直接覆盖在上层,可以使用如下,添加一个html文件覆盖在上层,注意在页面销毁的时候,需要将该html隐藏! this.scanWin.hide();
  this.scanWin = plus.webview.create('/static/cover.html', '', {
                    background: 'transparent',
                    borderRaduis: '50%',
                });
                // // //新引入的webView显示
                this.scanWin.show();
<template>
    <view>
        <button style="margin-top: 500px;background-color: #3c96f3" @click="snapshotPusher">
            拍照
        </button>

        <view id="livepusher" style="width: 250px;height: 250px;background-color: #fff;margin: auto;"></view>
        <view class="tips_text">
            <text class="textphoto">正对屏幕,确保面不都在画面之内</text>
        </view>
        <zero-loading v-if="loading" mask type="triangle"></zero-loading>
        <u-top-tips ref="uNotify"></u-top-tips>
    </view>
</template>

<script>
import permission from '@/utils/permission.js'
import { homeMenuList, menuNameList } from '@/utils/homeListMap.js'
import { getNewCount, getLastGroup } from "@/api/toChatWith.js"

import { login, registeredUser, getUserInfo, listMenus } from '@/api/login.js'
export default {
    data() {
        return {
            imgData: '',
            pusher: null,
            scanWin: null,
            faceInitTimeout: null,
            snapshTimeout: null,
            uploadFileTask: null,
            intervalId: null,
            faceNum: 0,
            loading: false,
        };
    },
    methods: {
        //初始化
        faceInit() {
            this.faceInitTimeout = setTimeout(async () => {
                this.pusherInit();
                // 覆盖在视频之上的内容,根据实际情况编写
                // 利用plus.webview.create将扫描框页面及扫描动画(xxx.html)覆盖在视频之上;
                this.scanWin = plus.webview.create('/static/cover.html', '', {
                    background: 'transparent',
                    borderRaduis: '50%',
                });
                // // //新引入的webView显示
                this.scanWin.show();
            }, 1000);
        },
        //初始化播放器
        pusherInit() {
            // 获取当前窗口
            const currentWebview = this.$mp.page.$getAppWebview();
            // 创建推流,url不填写代表不上传
            this.pusher = plus.video.createLivePusher('livepusher', {
                url: '',
                top: '15%',
                left: '10%',
                width: '250px',
                height: '250px',
                position: 'absolute',
                aspect: '9:16',
                muted: false,
                'z-index': 999,
            });

            // 将推流对象加到当前页面中
            currentWebview.append(this.pusher);

            //反转摄像头
            this.pusher.switchCamera();
            //开始预览
            this.pusher.preview();

            setTimeout(() => {
                // this.snapshotPusher()
            }, 1000);
        },

        //获取快照
        snapshotPusher() {
            let that = this
            this.snapshTimeout = setTimeout(() => {
                this.pusher.snapshot(
                    e => {
                        //拿到本地文件路径
                        var src = e.tempImagePath;
                        console.log(src)
                        //获取图片base64
                        this.getMinImage(src);
                    },
                    function (e) {
                        plus.nativeUI.alert('snapshot error: ' + JSON.stringify(e));
                    }
                );
            }, 100);
        },

        //使用plus.zip.compressImage压缩图片
        getMinImage(imgPath) {
            plus.zip.compressImage({
                src: imgPath,
                dst: imgPath,
                overwrite: true,
                quality: 40
            },
                zipRes => {
                    setTimeout(() => {
                        var reader = new plus.io.FileReader();
                        reader.onloadend = res => {
                            //获取图片base64
                            var speech = res.target.result; //base64图片
                            this.onLogin(speech)
                            this.imgData = speech;
                        };
                        //一定要使用plus.io.convertLocalFileSystemURL将target地址转换为本地文件地址,否则readAsDataURL会找不到文件
                        reader.readAsDataURL(plus.io.convertLocalFileSystemURL(zipRes.target));
                    }, 100);
                },
                function (error) {
                    console.log('Compress error!', error);
                }
            );
        },

        //调用登录接口
        onLogin(val) {
            login({
                "loginType": "faceLogin",
                "image": val.split(',')[1]
            }).then(async (res) => {
                console.log(res)
                if (res.code === '200' && res.data.clientUuid) {//识别成功
              //登录逻辑
                } else {//超过五次识别未成功,则取消识别
                    this.faceNum += 1
                    this.snapshotPusher()
                    if (this.faceNum >= 5) {
                        clearInterval(this.intervalId)
                        uni.showToast({
                            icon: 'none', title: '人员未登记!'
                        })
                        uni.navigateBack();
                    }
                }
            })
        },

        Error(message) {
            // 弹出错误提示
            this.$refs.uNotify.show({
                title: message,
                type: 'error',
                duration: '2000',
            })
        },
        handleMeus(list) {
            const menu = JSON.parse(JSON.stringify(homeMenuList))
            menuNameList.forEach(item => {
                menu[item].data = list[item] ? list[item] : []
            })
            console.log(menu, 'menu')
            this.$store.commit('SET_MENULIST', menu)
        }
    },
    onLoad(option) {
        //#ifdef APP-PLUS
        this.faceInit();
        //#endif
    },
    onUnload() {
        console.log('hide')
        this.faceInitTimeout && clearTimeout(this.faceInitTimeout);
        this.snapshTimeout && clearTimeout(this.snapshTimeout);
        this.scanWin.hide();
    },
};
</script>

<style lang="scss" scoped>
.tips_text {
    margin-top: 320px;
}
</style>
总结:更推荐使用nvue的使用方式,本人本地使用时vue方式拍照的时候会出现聚焦问题。文章来源:https://www.toymoban.com/news/detail-668074.html
有朋友想要图片的可以下面自取:将水印P掉就可以了,只是简单扣了个圆,有其他需求可找自己公司的UI设计。 文章来源地址https://www.toymoban.com/news/detail-668074.html
到了这里,关于uniapp 安卓使用live-pusher实现人脸识别(拍照)功能的文章就介绍完了。如果您还想了解更多内容,请在右上角搜索TOY模板网以前的文章或继续浏览下面的相关文章,希望大家以后多多支持TOY模板网!


