😀前言
本篇博文是关于Spring Boot(Vue3+ElementPlus+Axios+MyBatisPlus+Spring Boot 前后端分离)【二】的,希望你能够喜欢
🏠个人主页:晨犀主页
🧑个人简介:大家好,我是晨犀,希望我的文章可以帮助到大家,您的满意是我的动力😉😉
💕欢迎大家:这里是CSDN,我总结知识的地方,欢迎来到我的博客,感谢大家的观看🥰
如果文章有什么需要改进的地方还请大佬不吝赐教 先在此感谢啦😊
Spring Boot(Vue3+ElementPlus+Axios+MyBatisPlus+Spring Boot 前后端分离)【二】
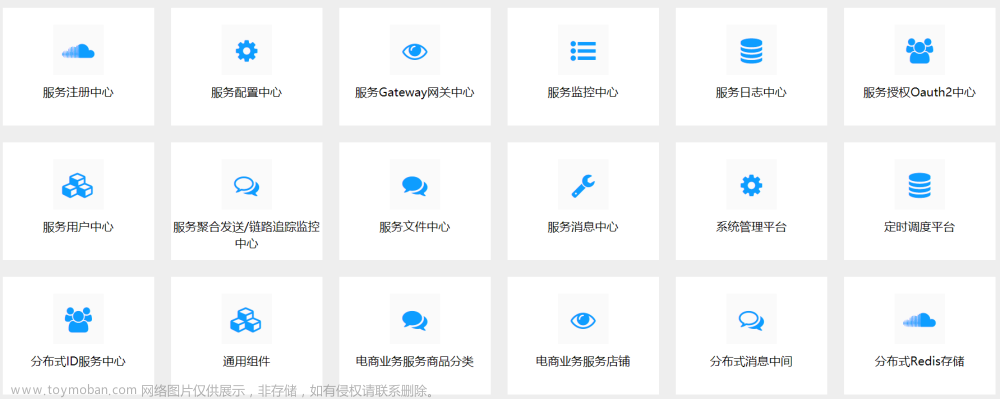
项目介绍
项目功能/界面
项目操作界面

技术栈
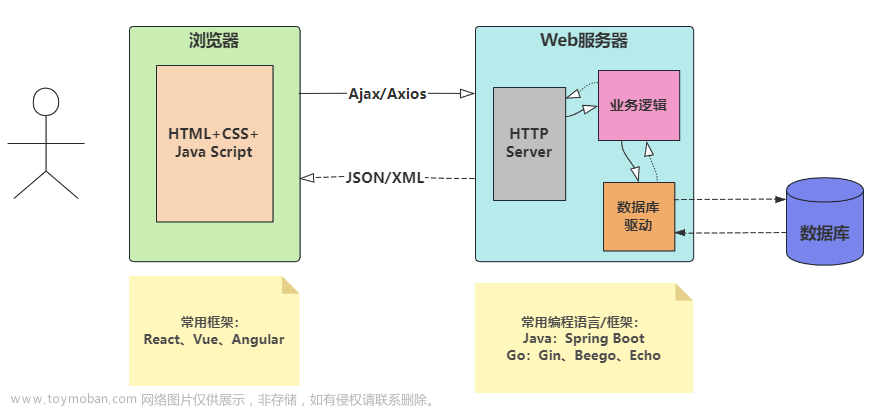
前后端分离开发, 前端主体框架Vue3 + 后端基础框架Spring-Boot
- 前端技术栈: Vue3+Axios+ElementPlus
- 后端技术栈: Spring Boot + MyBatis Plus
- 数据库-MySQL
- 项目的依赖管理-Maven
- 分页-MyBatis Plus 的分页插件
实现功能02-创建项目基础界面
需求分析/图解

思路分析
- 使用Vue3+ElementPlus 完成
代码实现
- 修改springboot_vue\src\App.vue 成如下形式, 会删除部分用不上的代码,增加
<template>
<div>
</div>
</template>
<style>
</style>
- 修改springboot_vue\src\views\HomeView.vue
<template>
    <!-- 去掉class="home"-->
    <div>
        <!-- <img alt="Vue logo" src="../assets/logo.png">-->
        <!-- <HelloWorld msg="Welcome to Your Vue.js App"/>-->
    </div>
</template>
<script>
    // @ is an alias to /src
    // import HelloWorld from '@/components/HelloWorld.vue'
    export default {
        name: 'HomeView',
        components: {
            // HelloWorld
        }
    }
</script>
- 删除springboot_vue\src\components\HelloWorld.vue
- 创建springboot_vue\src\components\Header.vue
<template>
    <div style="height: 50px; line-height: 50px; border-bottom: 1px solid #ccc; display:
    flex">
        <div style="width: 200px; padding-left: 30px; font-weight: bold; color: dodgerblue">后台管理</div>
        <div style="flex: 1"></div>
        <div style="width: 100px">下拉框</div>
    </div>
</template>
<script>
    export default {
        name: "Header"
    }
</script>
<style scoped>
</style>
- 修改springboot_vue\src\App.vue , 引入Header 组件
<template>
    <div>
        <Header />
        Home
    </div>
</template>
<style>
</style>
<script>
    import Header from "@/components/Header";
    export default {
        name: "Layout",
        components: {
            Header
        }
    }
</script>
- 创建全局的global.css(先准备着, 后面有用) , 以后有全局样式就可以写在这里,springboot_vue\src\assets\css\global.css
* {
    margin: 0;
    padding: 0;
    box-sizing: border-box;
    }
- 修改springboot_vue\src\main.js , 引入global.css
import { createApp } from 'vue'
import App from './App.vue'
import router from './router'
import store from './store'
import '@/assets/css/global.css'

createApp(App).use(store).use(router).mount('#app')
- 修改springboot_vue\src\main.js, 引入Element Plus ,并测试, 如何引入,
文档https://element-plus.gitee.io/zh-CN/guide/quickstart.html

import { createApp } from 'vue'
import App from './App.vue'
import router from './router'
import store from './store'
import '@/assets/css/global.css'
import ElementPlus from 'element-plus'
import 'element-plus/dist/index.css'
createApp(App).use(store).use(router).use(ElementPlus).mount('#app')
- 修改springboot_vue\src\App.vue , 引入一个el-button,看看是否生效
<template>
    <div>
        <Header />
        Home <el-button>我的按钮</el-button>
    </div>
</template>
<style>
</style>
<script>
    import Header from "@/components/Header";
    export default {
        name: "Layout",
        components: {
            Header
        }
    }
</script>

-
修改springboot_vue\src\components\Header.vue ,引入下拉框,
文档https://doc-archive.element-plus.org/#/zh-CN/component/dropdown【是旧版对应的文档】

<template>
    <div style="height: 50px; line-height: 50px; border-bottom: 1px solid #ccc; display:
    flex">
        <div style="width: 200px; padding-left: 30px; font-weight: bold; color: dodgerblue">后台管理</div>
        <div style="flex: 1"></div>
        <div style="width: 100px">
            <el-dropdown>
                <span class="el-dropdown-link">
                    tom
                    <i class="el-icon-arrow-down el-icon--right"></i>
                </span>
                <template #dropdown>
                    <el-dropdown-menu>
                        <el-dropdown-item>个人信息</el-dropdown-item>
                        <el-dropdown-item>退出登录</el-dropdown-item>
                    </el-dropdown-menu>
                </template>
            </el-dropdown>
        </div>
    </div>
</template>
<script>
    export default {
        name: "Header"
    }
</script>
<style scoped>
</style>

-
创建侧边栏组件, 并引入导航菜单组件springboot_vue\src\components\Aside.vue ,
参考文档:https://doc-archive.element-plus.org/#/zh-CN/component/menu

粘贴的代码要注意:

<template>
    <div>
        <!-- 说明-->
        <!-- 先去掉, 这两个方法, 否则会报错-->
        <!-- @open="handleOpen"-->
        <!-- @close="handleClose"-->
        <el-menu default-active="2" class="el-menu-vertical-demo">
            <el-sub-menu index="1">
                <template #title>
                    <i class="el-icon-location"></i>
                    <span>导航一</span>
                </template>
                <el-menu-item-group>
                    <template #title>分组一</template>
                    <el-menu-item index="1-1">选项1</el-menu-item>
                    <el-menu-item index="1-2">选项2</el-menu-item>
                </el-menu-item-group>
                <el-menu-item-group title="分组2">
                    <el-menu-item index="1-3">选项3</el-menu-item>
                </el-menu-item-group>
                <el-sub-menu index="1-4">
                    <template #title>选项4</template>
                    <el-menu-item index="1-4-1">选项1</el-menu-item>
                </el-sub-menu>
            </el-sub-menu>
            <el-menu-item index="2">
                <i class="el-icon-menu"></i>
                <template #title>导航二</template>
            </el-menu-item>
            <el-menu-item index="3" disabled>
                <i class="el-icon-document"></i>
                <template #title>导航三</template>
            </el-menu-item>
            <el-menu-item index="4">
                <i class="el-icon-setting"></i>
                <template #title>导航四</template>
            </el-menu-item>
        </el-menu>
    </div>
</template>
<script>
    export default {
        name: "Aside"
    }
</script>
<style scoped>
</style>
- 修改springboot_vue\src\App.vue, 将页面分成三个部分
<template>
    <div>
        <!-- 头部-->
        <Header />
        <!-- 主体-->
        <div style="display: flex">
            <!-- 侧边栏-->
            <Aside />
            <!-- 内容区域,表格, 这个部分是从HomeView.vue 组件来的-->
            <router-view style="flex: 1" />
        </div>
    </div>
</template>
<style>
</style>
<script>
    import Header from "@/components/Header";
    import Aside from "@/components/Aside";
    export default {
        name: "Layout",
        components: {
            Header,
            Aside
        }
    }
</script>
- 修改springboot_vue\src\views\HomeView.vue, 加入一个el-button,进行测试
<template>
    <div>
        <el-button>我的按钮</el-button>
    </div>
</template>
<script>
    // @ is an alias to /src
    export default {
        name: 'HomeView',
        components: {
        }
    }
</script>
- 看看主页面的效果, 基本结构已经出来了

- 对主页面进行一个完善, 比如导航栏的宽度, 去掉不必要的子菜单等, 修改springboot_vue\src\components\Aside.vue
<template>
    <div>
        <!-- 说明-->
        <!-- 先去掉, 这两个方法, 否则会报错-->
        <!-- @open="handleOpen"-->
        <!-- @close="handleClose"-->
        <el-menu style="width: 200px" default-active="2" class="el-menu-vertical-demo">

            <el-sub-menu index="1-4">
                <template #title>选项4</template>
                <el-menu-item index="1-4-1">选项1</el-menu-item>
            </el-sub-menu>
            <el-menu-item index="2">
                <i class="el-icon-menu"></i>
                <template #title>导航二</template>
            </el-menu-item>
            <el-menu-item index="3" disabled>
                <i class="el-icon-document"></i>
                <template #title>导航三</template>
            </el-menu-item>
            <el-menu-item index="4">
                <i class="el-icon-setting"></i>
                <template #title>导航四</template>
            </el-menu-item>
        </el-menu>
    </div>
</template>
<script>
    export default {
        name: "Aside"
    }
</script>
<style scoped>
</style>
- 修改springboot_vue\src\views\HomeView.vue , 引入表格,后面来显示数据, 参考文档

<template>
    <!-- 去掉class="home"-->
    <div>
        <!-- <img alt="Vue logo" src="../assets/logo.png">-->
        <!-- <HelloWorld msg="Welcome to Your Vue.js App"/>-->
        <!-- <el-button>我的按钮</el-button> -->
        <!-- 去掉字段的width, 让其自适应-->
        <el-table :data="tableData" stripe style="width: 90%">
            <el-table-column prop="date" label="日期"></el-table-column>
            <el-table-column prop="name" label="姓名"></el-table-column>
            <el-table-column prop="address" label="地址"></el-table-column>
        </el-table>
    </div>
</template>
<script>
    // @ is an alias to /src
    // import HelloWorld from '@/components/HelloWorld.vue'
    export default {
        name: 'HomeView',
        components: {
            // HelloWorld
        },
        data() {
            return {
                tableData: []
            }
        }
    }
</script>

-
可以看到, element-plus 默认是英文的, 我们将其国际化一下https://doc-archive.element-plus.org/#/zh-CN/component/i18n ,
修改springboot_vue\src\main.js

import {createApp} from 'vue'
import App from './App.vue'
import router from './router'
import store from './store'
import ElementPlus from 'element-plus'
import 'element-plus/dist/index.css'
import '@/assets/css/global.css'
import zhCn from 'element-plus/es/locale/lang/zh-cn'
createApp(App).use(store).use(router).use(ElementPlus,{locale: zhCn,}).mount('#app')
- 修改springboot_vue\src\views\HomeView.vue, 从官网设置一些测试数据, 并支持日期排序

<template>
    <!-- 去掉class="home"-->
    <div>
        <!-- <img alt="Vue logo" src="../assets/logo.png">-->
        <!-- <HelloWorld msg="Welcome to Your Vue.js App"/>-->
        <!-- <el-button>我的按钮</el-button>-->
        <el-table :data="tableData" stripe style="width: 90%">
            <el-table-column sortable prop="date" label="日期"></el-table-column>
            <el-table-column prop="name" label="姓名"></el-table-column>
            <el-table-column prop="address" label="地址"></el-table-column>
        </el-table>
    </div>
</template>
<script>
    // @ is an alias to /src
    // import HelloWorld from '@/components/HelloWorld.vue'
    export default {
        name: 'HomeView',
        components: {
            // HelloWorld
        },
        data() {
            return {
                tableData: [{
                    date: '2016-05-02',
                    name: '王小虎',
                    address: '上海市普陀区金沙江路1518 弄',
                },
                {
                    date: '2016-05-04',
                    name: '王小虎',
                    address: '上海市普陀区金沙江路1517 弄',
                },
                {
                    date: '2016-05-01',
                    name: '王小虎',
                    address: '上海市普陀区金沙江路1519 弄',
                }
                ]
            }
        }
    }
</script>

- 修改springboot_vue\src\views\HomeView.vue, 增加相关的操作按钮和搜索框, 参考el-input 组件文档, 表格的固定列文档


<template>
    <!-- 去掉class="home"-->
    <div>
        <div style="margin: 10px 0">
            <el-button type="primary">新增</el-button>
            <el-button>其它</el-button>
        </div>
        <!-- 搜索-->
        <div style="margin: 10px 0">
            <el-input v-model="search" placeholder=" 请输入关键字" style="width:
30%"></el-input>
            <el-button style="margin-left: 10px" type="primary">查询</el-button>
        </div>
        <el-table :data="tableData" stripe style="width: 90%">
            <el-table-column sortable prop="date" label="日期"></el-table-column>
            <el-table-column prop="name" label="姓名"></el-table-column>
            <el-table-column prop="address" label="地址"></el-table-column>
            <el-table-column fixed="right" label="操作" width="100">
                <template #default="scope">
                    <el-button @click="handleEdit(scope.row)" type="text">编辑</el-button>
                    <el-button type="text">删除</el-button>
                </template>
            </el-table-column>
        </el-table>
    </div>
</template>
<script>
    // @ is an alias to /src
    // import HelloWorld from '@/components/HelloWorld.vue'
    export default {
        name: 'HomeView',
        components: {
            // HelloWorld
        },
        data() {
            return {
                search: '',
                tableData: [{
                    date: '2016-05-02',
                    name: '王小虎',
                    address: '上海市普陀区金沙江路1518 弄',
                },
                {
                    date: '2016-05-04',
                    name: '王小虎',
                    address: '上海市普陀区金沙江路1517 弄',
                },
                {
                    date: '2016-05-01',
                    name: '王小虎',
                    address: '上海市普陀区金沙江路1519 弄',
                }
                ]
            }
        },
        methods: {
            handleEdit() {
            }
        }
    }
</script>
------运行效果-------
😁热门专栏推荐
Thymeleaf快速入门及其注意事项
Spring Initailizr–快速入门–SpringBoot的选择
带你了解SpringBoot支持的复杂参数–自定义对象参数-自动封装
Rest 优雅的url请求处理风格及注意事项文章来源:https://www.toymoban.com/news/detail-671774.html
文章到这里就结束了,如果有什么疑问的地方请指出,诸大佬们一起来评论区一起讨论😁
希望能和诸大佬们一起努力,今后我们一起观看感谢您的阅读🍻
如果帮助到您不妨3连支持一下,创造不易您们的支持是我的动力🤞文章来源地址https://www.toymoban.com/news/detail-671774.html
到了这里,关于Spring Boot(Vue3+ElementPlus+Axios+MyBatisPlus+Spring Boot 前后端分离)【二】的文章就介绍完了。如果您还想了解更多内容,请在右上角搜索TOY模板网以前的文章或继续浏览下面的相关文章,希望大家以后多多支持TOY模板网!

![SSM(Vue3+ElementPlus+Axios+SSM前后端分离)--功能实现[五]](https://imgs.yssmx.com/Uploads/2024/02/633520-1.png)

![SSM(Vue3+ElementPlus+Axios+SSM前后端分离)--搭建Vue 前端工程[二]](https://imgs.yssmx.com/Uploads/2024/02/635781-1.png)