百度云人脸识别
预览效果
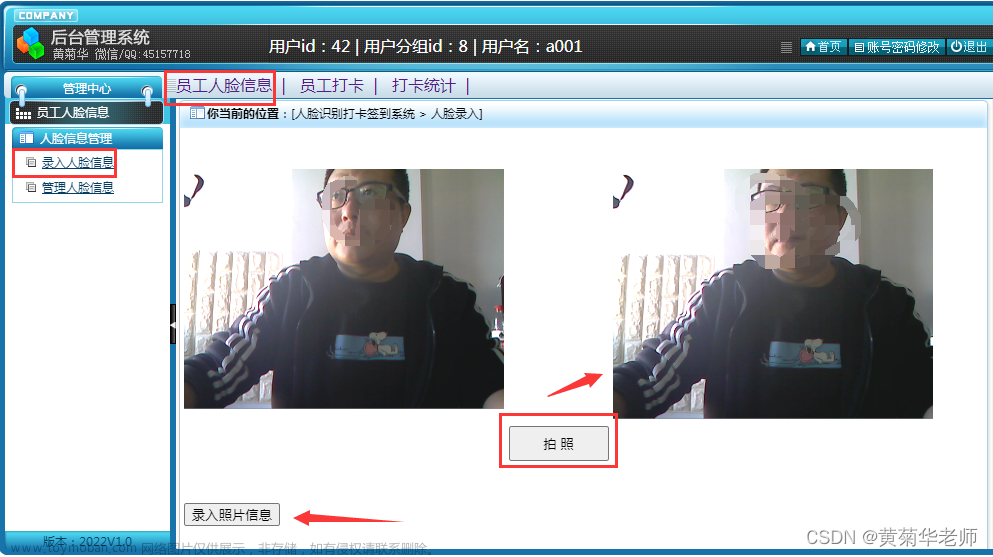
先来看一下Java借助百度云人脸识别实现人脸注册登录功能的预览效果

环境准备
登录百度智能云控制台:https://console.bce.baidu.com/,开通人脸识别

选择人脸识别项,创建人脸识别应用

人脸识别接口默认全部选择,也可以选择添加其他接口。

得到应用ID、 API KEY、Secret Key
百度云API的基本使用
人脸识别API文档:https://cloud.baidu.com/doc/FACE/index.html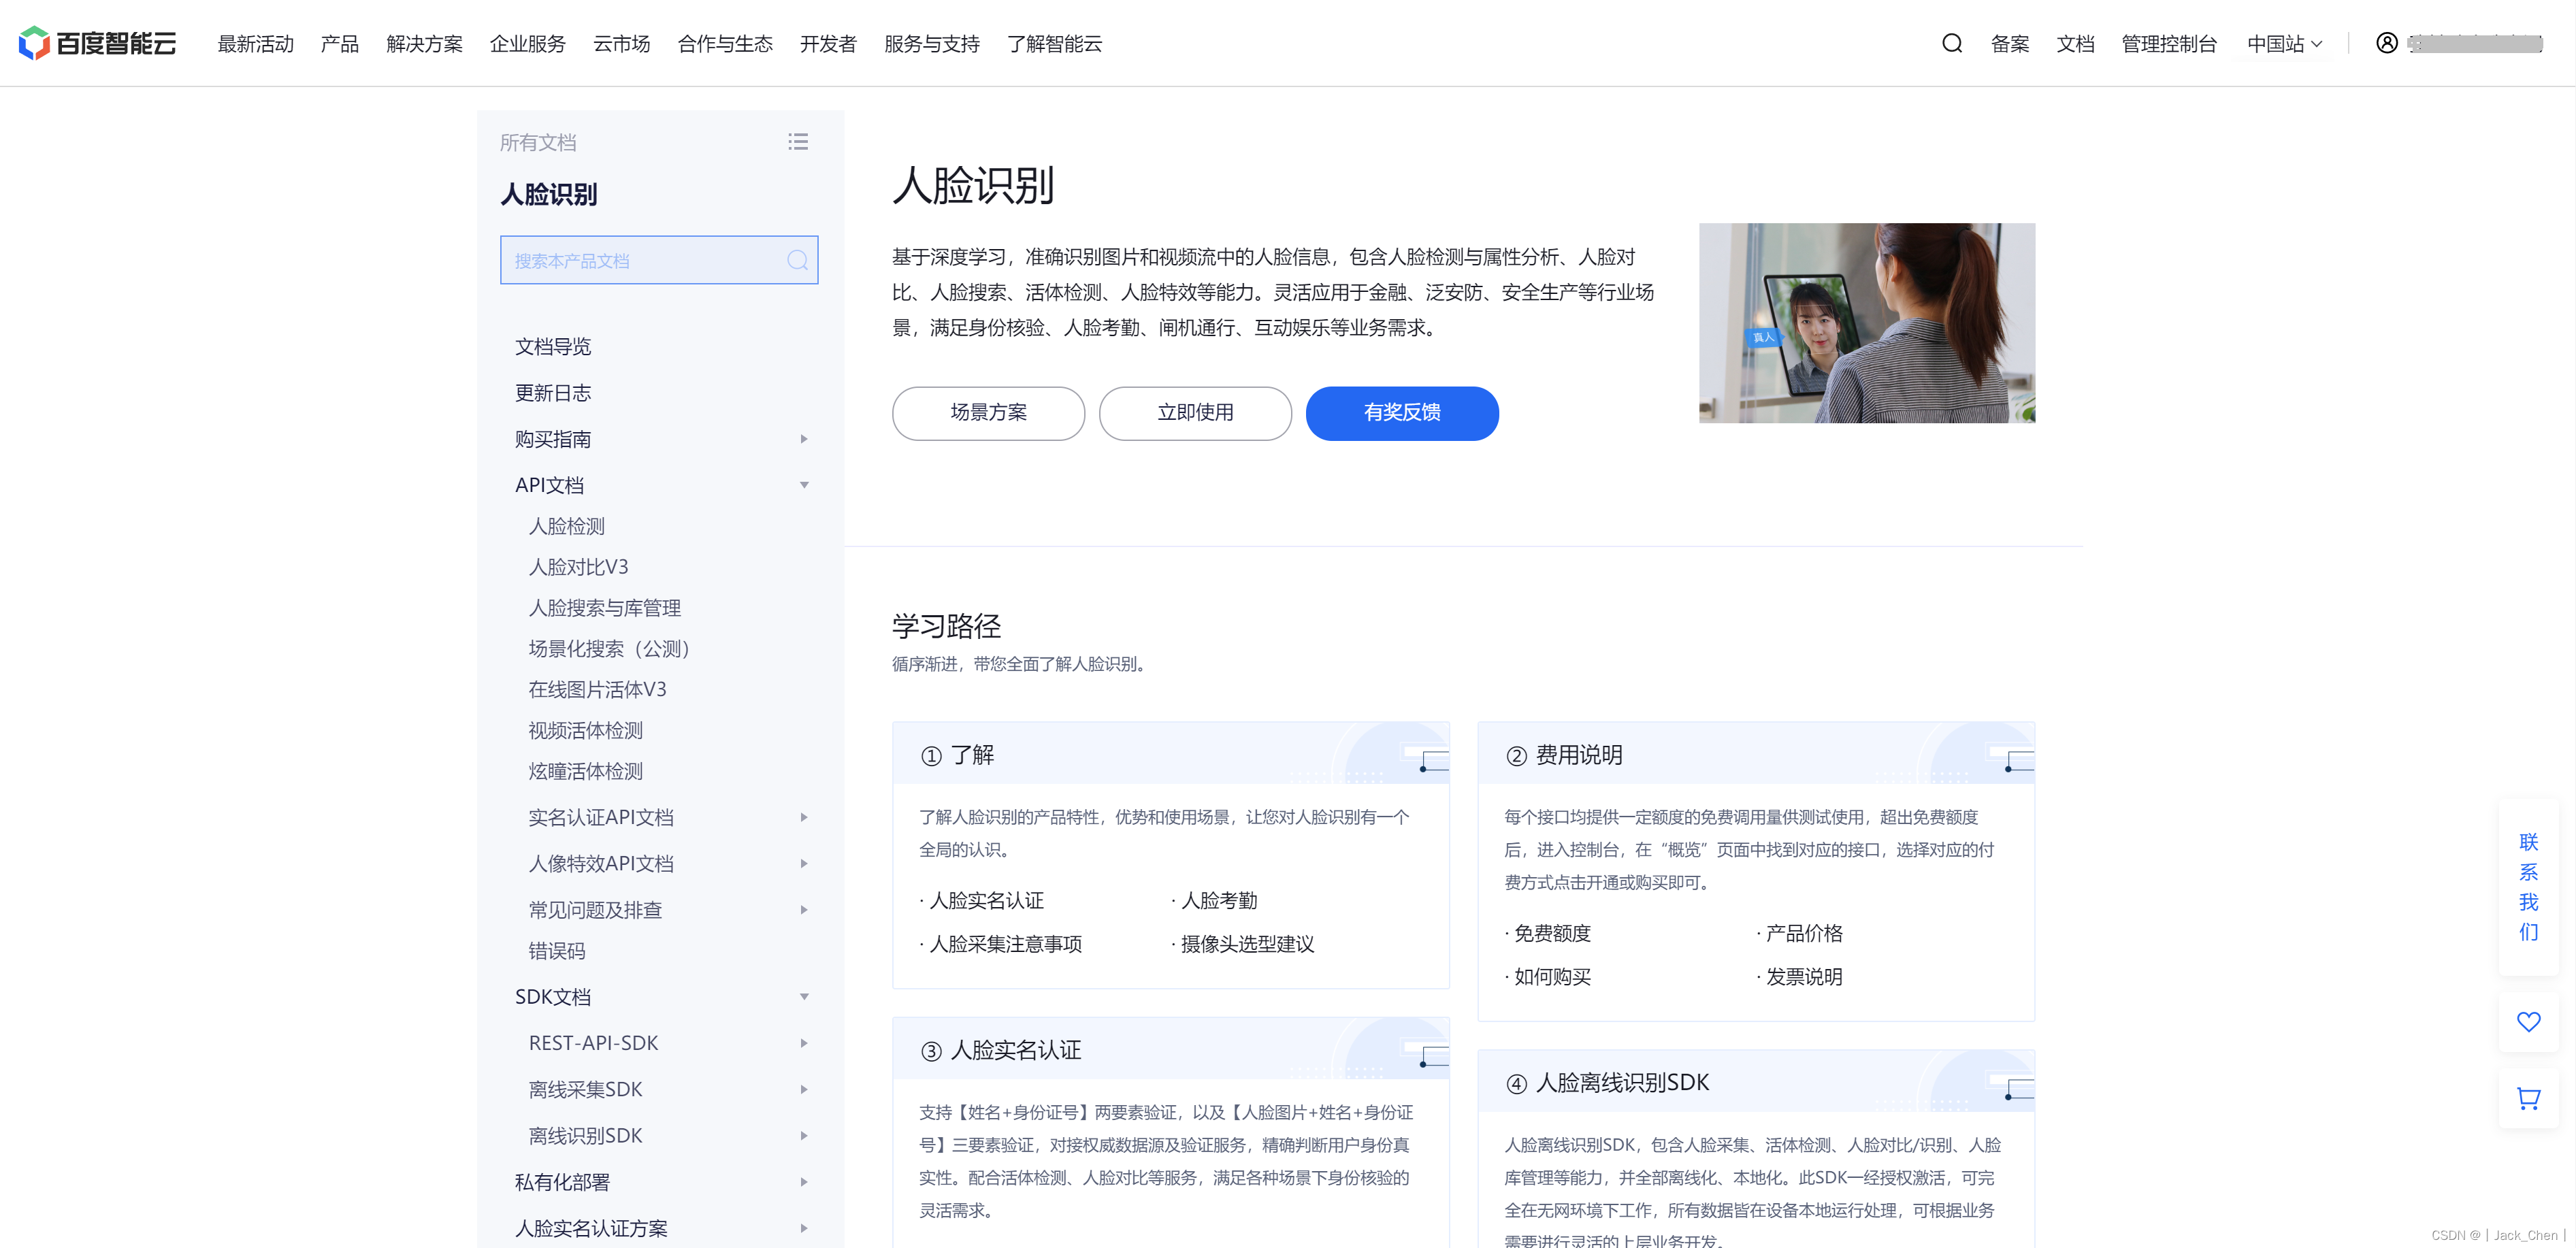
人脸识别SDK下载:https://ai.baidu.com/sdk

添加依赖
下载对应语言的SDK后安装
Face Java SDK或使用maven依赖。
这里使用Maven依赖,访问https://mvnrepository.com搜索com.baidu.aip

<dependency>
    <groupId>com.baidu.aip</groupId>
    <artifactId>java-sdk</artifactId>
    <version>4.16.10</version>
</dependency>
新建AipFace
AipFace是人脸识别的Java客户端,为使用人脸识别的开发人员提供了一系列的交互方法。初始化完成后建议单例使用,避免重复获取access_token
public class Sample {
    //设置APPID/AK/SK
    public static final String APP_ID = "你的 App ID";
    public static final String API_KEY = "你的 Api Key";
    public static final String SECRET_KEY = "你的 Secret Key";

    public static void main(String[] args) {
        // 初始化一个AipFace
        AipFace client = new AipFace(APP_ID, API_KEY, SECRET_KEY);

        // 可选:设置网络连接参数
        // 建立连接的超时时间(单位:毫秒)
        client.setConnectionTimeoutInMillis(2000);
        // 通过打开的连接传输数据的超时时间(单位:毫秒)
        client.setSocketTimeoutInMillis(60000);

        // 可选:设置代理服务器地址, http和socket二选一,或者均不设置
        client.setHttpProxy("proxy_host", proxy_port);  // 设置http代理
        client.setSocketProxy("proxy_host", proxy_port);  // 设置socket代理

        // 调用接口
        String image = "取决于image_type参数,传入BASE64字符串或URL字符串或FACE_TOKEN字符串";
        String imageType = "BASE64";

        // 人脸检测
        JSONObject res = client.detect(image, imageType, options);
        System.out.println(res.toString(2));

    }
}
人脸检测
获得眼、口、鼻轮廓,识别多种人脸属性,如性别,年龄,表情等信息
应用场景:如人脸属性分析,基于人脸关键点的加工分析,人脸营销活动等。
具体参考人脸识别Api文档主页:
SDK文档
	REST-API-SDK
		Java-SDK
			人脸检测
import com.baidu.aip.face.AipFace;
import com.baidu.aip.util.Base64Util;
import org.json.JSONException;
import org.json.JSONObject;
import org.junit.jupiter.api.Test;
import org.springframework.boot.test.context.SpringBootTest;

import java.io.IOException;
import java.nio.file.Files;
import java.nio.file.Paths;
import java.util.HashMap;

@SpringBootTest
class FaceApplicationTests {

    @Test
    public void testFaceCheck() throws IOException, JSONException {
        /**
         * 传入appId、apiKey、secretkey。创建Java代码和百度云交互的Client对象
         */
        AipFace client = new AipFace("26820026", "wiGTH1L6Peh9QFrgW0yqUx8b", "lIHbEgfUpzvgN4qYHYaGt77ggqicwvaf");

        // 构造模拟人像图片。 取决于image_type参数,传入BASE64字符串或URL字符串或FACE_TOKEN字符串
        String path = "D:\\face.png";
        byte[] bytes = Files.readAllBytes(Paths.get(path));
        String encode = Base64Util.encode(bytes);

        // 传入可选参数调用接口
        HashMap<String, Object> options = new HashMap<>();
        options.put("face_field", "age");
        options.put("max_face_num", "2");
        options.put("face_type", "LIVE");
        options.put("liveness_control", "LOW");

        // 调用Api进行人脸检测
        /**
         * image 图片的url或者base64字符串
         * imageType 图片形式(URL,BASE64)
         * options Map中配置基本参数,null:使用默认配置
         */
        JSONObject res = client.detect(encode, "BASE64", options);
        System.out.println(res.toString(2));
    }
}
人脸检测结果返回数据
face_num:检测到的图片中的人脸数量

face_listface_num:检测到的图片中的人脸数量人脸信息列表,具体包含的参数参考下面的列表

face_token:人脸图片的唯一标识

location:人脸在图片中的位置
{
  "result": {
    "face_num": 1,
    "face_list": [
      {
        "liveness": {
          "livemapscore": 0.3849793375
        },
        "angle": {
          "roll": -8.37,
          "pitch": 17.62,
          "yaw": 16.2
        },
        "face_token": "a99aa4ef86a0abf7e91bd79fee0170e5",
        "location": {
          "top": 126.19,
          "left": 202.3,
          "rotation": -1,
          "width": 142,
          "height": 140
        },
        "face_probability": 1,
        "age": 22
      }
    ]
  },
  "log_id": 1322968968,
  "error_msg": "SUCCESS",
  "cached": 0,
  "error_code": 0,
  "timestamp": 1658935322
}
人脸对比
对比如下人脸
    public static void main(String[] args) throws Exception {
        /**
         * 传入appId、apiKey、secretkey。创建Java代码和百度云交互的Client对象
         */
        AipFace client = new AipFace("27285857", "oaHvQava3f9upcKof3wXa20a", "EDGmHiWRtheCsudE9zyo7cYA8AmZKK9G");

        // 登录图片
        String loginImagePath = "D:\\user\\login.jpg";
        String loginImagePath2 = "D:\\user\\login2.jpg";
        // 对比的图片
        String comparedImagePath = "D:\\user\\compared.jpg";

        Double faceComparison = faceComparison(client, loginImagePath, comparedImagePath);
        if (faceComparison > 85) {
            System.out.println("人脸识别登录成功");
        } else {
            System.out.println("人脸识别登录失败");
        }
        Double faceComparison2 = faceComparison(client, loginImagePath2, comparedImagePath);
        if (faceComparison2 > 85) {
            System.out.println("人脸识别登录成功");
        } else {
            System.out.println("人脸识别登录失败");
        }
    }

    static Double faceComparison(AipFace client, String loginImagePath, String comparedImagePath) throws Exception {
        byte[] loginImageBytes = Files.readAllBytes(Paths.get(loginImagePath));
        byte[] comparedImageBytes = Files.readAllBytes(Paths.get(comparedImagePath));
        String image1 = Base64Util.encode(loginImageBytes);
        String image2 = Base64Util.encode(comparedImageBytes);

        // image1/image2也可以为url或facetoken, 相应的imageType参数需要与之对应。
        MatchRequest req1 = new MatchRequest(image1, "BASE64");
        MatchRequest req2 = new MatchRequest(image2, "BASE64");
        ArrayList<MatchRequest> requests = new ArrayList<>();
        requests.add(req1);
        requests.add(req2);

        JSONObject match = client.match(requests);
        System.out.println(match.toString(2));
        return match.getJSONObject("result").getDouble("score");
    }
响应数据结果
score	人脸相似度得分

face_list 人脸信息列表

face_token	人脸的唯一标志
{
  "result": {
    "score": 100,
    "face_list": [
      {
        "face_token": "27f621640149e860bd3108d7baf2d316"
      },
      {
        "face_token": "27f621640149e860bd3108d7baf2d316"
      }
    ]
  },
  "log_id": 1938820671,
  "error_msg": "SUCCESS",
  "cached": 0,
  "error_code": 0,
  "timestamp": 1662201138
}
人脸识别登录成功
{
  "result": {
    "score": 36.30554962,
    "face_list": [
      {
        "face_token": "4f7391b4d7807d112f9cff4809ff15f1"
      },
      {
        "face_token": "27f621640149e860bd3108d7baf2d316"
      }
    ]
  },
  "log_id": 1939016848,
  "error_msg": "SUCCESS",
  "cached": 0,
  "error_code": 0,
  "timestamp": 1662201139
}
人脸识别登录失败
人脸注册
用于从人脸库中新增用户,可以设定多个用户所在组,及组内用户的人脸图片,
应用场景:构建您的人脸库,如会员人脸注册,已有用户补全人脸信息等。
人脸库、用户组、用户、用户下的人脸层级关系如下:
人脸库
	用户组一
		用户01
			人脸
		用户02
			人脸
			人脸
	用户组二
	用户组三
    @Test
    public void testFaceRegister() throws IOException, JSONException {
        /**
         * 传入appId、apiKey、secretkey。创建Java代码和百度云交互的Client对象
         */
        AipFace client = new AipFace("26820026", "wiGTH1L6Peh9QFrgW0yqUx8b", "lIHbEgfUpzvgN4qYHYaGt77ggqicwvaf");

        // 构造模拟人像图片。 取决于image_type参数,传入BASE64字符串或URL字符串或FACE_TOKEN字符串
        String path = "D:\\face.png";
        byte[] bytes = Files.readAllBytes(Paths.get(path));
        String encode = Base64Util.encode(bytes);

        // 传入可选参数调用接口
        HashMap<String, String> options = new HashMap<String, String>();
        options.put("user_info", "user's info");
        options.put("quality_control", "NORMAL");
        options.put("liveness_control", "LOW");
        options.put("action_type", "REPLACE");

        // 调用api方法完成人脸注册
        /**
         * image 图片的url或者base64字符串
         * imageType 图片形式(URL,BASE64)
         * groupId 组Id(固定一个字符串)
         * userId 用户Id
         * options hashMap基本参数配置
         */
        JSONObject res = client.addUser(encode, "BASE64", "group1", "user1", options);
        System.out.println(res.toString(2));
    }
返回数据
log_id是请求标识码,随机数,唯一

location是人脸在图片中的位置

face_token是人脸图片的唯一标识
{
  "result": {
    "face_token": "a99aa4ef86a0abf7e91bd79fee0170e5",
    "location": {
      "top": 126.19,
      "left": 202.3,
      "rotation": -1,
      "width": 142,
      "height": 140
    }
  },
  "log_id": 1689402612,
  "error_msg": "SUCCESS",
  "cached": 0,
  "error_code": 0,
  "timestamp": 1658935689
}
自动创建组并添加相应照片
人脸搜索
人脸搜索是在指定人脸集合中进行直接地人脸检索操作
    @Test
    public void testFaceSearch() throws IOException, JSONException {
        /**
         * 传入appId、apiKey、secretkey。创建Java代码和百度云交互的Client对象
         */
        AipFace client = new AipFace("26820026", "wiGTH1L6Peh9QFrgW0yqUx8b", "lIHbEgfUpzvgN4qYHYaGt77ggqicwvaf");

        // 构造模拟人像图片。 取决于image_type参数,传入BASE64字符串或URL字符串或FACE_TOKEN字符串
        String path = "D:\\face.png";
        byte[] bytes = Files.readAllBytes(Paths.get(path));
        String encode = Base64Util.encode(bytes);

        // 传入可选参数调用接口
        HashMap<String, Object> options = new HashMap<>();
        options.put("match_threshold", "70");
        options.put("quality_control", "NORMAL");
        options.put("liveness_control", "LOW");
        options.put("user_id", "user1");
        options.put("max_user_num", "3");

        //人脸搜索
        JSONObject res = client.search(encode, "BASE64", "group1,group2", options);
        System.out.println(res.toString(2));
    }
返回数据
face_token:人脸标志

user_list:匹配的用户信息列表

group_id:用户所属的group_id

user_id:用户的user_id

user_info:注册用户时携带的user_info

score:用户的匹配得分
{
  "result": {
    "face_token": "a99aa4ef86a0abf7e91bd79fee0170e5",
    "user_list": [
      {
        "score": 100,
        "group_id": "group1",
        "user_id": "user1",
        "user_info": "user's info"
      }
    ]
  },
  "log_id": 1961953770,
  "error_msg": "SUCCESS",
  "cached": 0,
  "error_code": 0,
  "timestamp": 1658935961
}
人脸删除
用于将用户从某个组中删除。
    @Test
    public void testFaceDelete() throws JSONException {
        /**
         * 传入appId、apiKey、secretkey。创建Java代码和百度云交互的Client对象
         */
        AipFace client = new AipFace("26820026", "wiGTH1L6Peh9QFrgW0yqUx8b", "lIHbEgfUpzvgN4qYHYaGt77ggqicwvaf");

        // 用户id
        String userId = "user1";
        // 用户组id
        String groupId = "group1";
        // 需要删除的人脸图片token
        String faceToken = "a99aa4ef86a0abf7e91bd79fee0170e5";

        // 人脸删除
        JSONObject res = client.faceDelete(userId, groupId, faceToken, null);
        System.out.println(res.toString(2));
    }
{
  "result": null,
  "log_id": 2967502100,
  "error_msg": "SUCCESS",
  "cached": 0,
  "error_code": 0,
  "timestamp": 1658972967
}

身份验证
    public static void main(String[] args) throws Exception {
        /**
         * 传入appId、apiKey、secretkey。创建Java代码和百度云交互的Client对象
         */
        AipFace client = new AipFace("27285857", "oaHvQava3f9upcKof3wXa20a", "EDGmHiWRtheCsudE9zyo7cYA8AmZKK9G");

        // 登录图片
        String imagePath = "D:\\user\\face.png";
        // 推荐阈值0.8,超过即判断为同一人
        Double faceComparison = authentication(client, imagePath, "身份证", "真实姓名");
        if (faceComparison >= 80) {
            System.out.println("身份验证成功");
        } else {
            System.out.println("身份验证成失败");
        }
    }

    static Double authentication(AipFace client, String imagePath, String idCardNumber, String name) throws Exception {
        // 传入可选参数调用接口
        HashMap<String, String> options = new HashMap<>();
        options.put("quality_control", "NORMAL");
        options.put("liveness_control", "LOW");

        byte[] imagePathBytes = Files.readAllBytes(Paths.get(imagePath));
        String image = Base64Util.encode(imagePathBytes);
        String imageType = "BASE64";

        // 身份验证
        JSONObject res = client.personVerify(image, imageType, idCardNumber, name, options);
        System.out.println(res.toString(2));
        double score = res.getDouble("score");
        return score;
    }
{
  "result": {
    "code": "908",
    "session_id": "S6313318d119c4671440984"
  },
  "serverlogid": 3053070821,
  "error_msg": "SUCCESS",
  "err_msg": "SUCCESS",
  "cached": 0,
  "error_code": 0,
  "err_no": 0,
  "timestamp": 1662202253
}
Spring Boot集成百度云人脸识别
添加依赖
	 <dependency>
            <groupId>org.springframework.boot</groupId>
            <artifactId>spring-boot-starter-web</artifactId>
        </dependency>
        <!--百度AI-->
        <dependency>
            <groupId>com.baidu.aip</groupId>
            <artifactId>java-sdk</artifactId>
            <version>4.8.0</version>
        </dependency>
        <dependency>
            <groupId>com.alibaba</groupId>
            <artifactId>fastjson</artifactId>
            <version>1.2.79</version>
        </dependency>
配置application.yml
server:
  port: 8888
  # 413 Payload Too Large
#  max-http-header-size: 1024KB
  servlet:
    context-path: /face


baidu:
  face:
    appId: 27285866
    apiKey: oaHvQava3f9upcKof3wXa20a
    secretKey: EDGmHiWRthA8AmZxdE9zyo7cYA8AmZKK9G
    imageType: BASE64
    groupId: group1
BaiduAiUtils工具类封装
@Component
@Slf4j
public class BaiduAiUtils {

    @Value("${baidu.face.appId}")
    private String APP_ID;
    @Value("${baidu.face.apiKey}")
    private String API_KEY;
    @Value("${baidu.face.secretKey}")
    private String SECRET_KEY;
    @Value("${baidu.face.imageType}")
    private String IMAGE_TYPE;
    @Value("${baidu.face.groupId}")
    private String groupId;

    private AipFace client;

    private HashMap<String, String> map = new HashMap<>();

    private BaiduAiUtils() {
        //图片质量控制 NONE: 不进行控制 LOW:较低的质量要求 NORMAL: 一般的质量要求 HIGH: 较高的质量要求 默认 NONE
        map.put("quality_control", "NORMAL");
        // 活体检测控制 NONE: 不进行控制 LOW:较低的活体要求(高通过率 低攻击拒绝率) NORMAL: 一般的活体要求(平衡的攻击拒绝率, 通过率) HIGH: 较高的活体要求(高攻击拒绝率 低通过率) 默认NONE
        map.put("liveness_control", "LOW");
    }

    @PostConstruct
    public void init() {
        client = new AipFace(APP_ID, API_KEY, SECRET_KEY);
    }

    /**
     * 用户照片存入人脸库中
     */
    public Boolean faceRegister(String userId, String image) {
        JSONObject res = client.addUser(image, IMAGE_TYPE, groupId, userId, map);
        log.info("addUser result :{}", res);
        Integer errorCode = res.getInt("error_code");
        return errorCode == 0 ? true : false;
    }

    /**
     * 更新人脸库中的用户照片
     */
    public Boolean faceUpdate(String userId, String image) {
        JSONObject res = client.updateUser(image, IMAGE_TYPE, groupId, userId, map);
        log.info("updateUser result :{}", res);
        Integer errorCode = res.getInt("error_code");
        return errorCode == 0 ? true : false;
    }

    /**
     * 判断上传的图片中是否具有面部信息
     */
    public Boolean faceCheck(String image) {
        JSONObject res = client.detect(image, IMAGE_TYPE, map);
        log.info("detect result :{}", res);
        if (res.has("error_code") && res.getInt("error_code") == 0) {
            JSONObject resultObject = res.getJSONObject("result");
            Integer faceNum = resultObject.getInt("face_num");
            return faceNum == 1 ? true : false;
        } else {
            return false;
        }
    }

    /**
     * 1.搜索人脸库中相似的人脸并返回数据
     *
     * 2.判断人脸匹配得分(score)大于80分则认为是同一个人
     */
    public String faceSearch(String image) {
        JSONObject res = client.search(image, IMAGE_TYPE, groupId, map);
        log.info("search result :{}", res);
        if (res.has("error_code") && res.getInt("error_code") == 0) {
            JSONObject result = res.getJSONObject("result");
            JSONArray userList = result.getJSONArray("user_list");
            if (userList.length() > 0) {
                JSONObject user = userList.getJSONObject(0);
                double score = user.getDouble("score");
                if (score > 80) {
                    return user.getString("user_id");
                }
            }
        }
        return null;
    }

}
Controller层
@Controller
@RequestMapping("/user")
public class UserController {

    @Autowired
    private FaceService faceService;

    @RequestMapping("/test")
    @ResponseBody
    public String test() {
        return "hello world";
    }

    /**
     * 人脸登录
     */
    @RequestMapping("/login")
    @ResponseBody
    public JSONObject searchface(@RequestBody JSONObject jsonObject) {
        StringBuffer imagebast64 = new StringBuffer(jsonObject.getString("imagebast64"));
        String userId = faceService.loginByFace(imagebast64);
        JSONObject res = new JSONObject();
        res.put("userId", userId);
        res.put("code", 200);
        return res;
    }

    /**
     * 人脸登录
     *
     * @return
     * @throws Exception
     */
    @RequestMapping("/register")
    @ResponseBody
    public JSONObject registerFace(@RequestBody JSONObject jsonObject) {
        StringBuffer imagebast64 = new StringBuffer(jsonObject.getString("imagebast64"));
        String userId = UUID.randomUUID().toString().substring(0, 4);
        Boolean registerFace = faceService.registerFace(userId + "", imagebast64);

        JSONObject res = new JSONObject();
        res.put("userId", userId);
        if (registerFace) {
            res.put("code", 200);
        }
        return res;
    }
}
Service层
@Service
public class FaceService {

    @Autowired
    private BaiduAiUtils baiduAiUtils;

    /**
     * 人脸登录
     */
    public String loginByFace(StringBuffer imagebast64) {
    	// 处理base64编码内容
        String image = imagebast64.substring(imagebast64.indexOf(",") + 1, imagebast64.length());
        String userId = baiduAiUtils.faceSearch(image);
        return userId;
    }

    /**
     * 人脸注册
     */
    public Boolean registerFace(String userId, StringBuffer imagebast64) {
  	    // 处理base64编码内容
        String image = imagebast64.substring(imagebast64.indexOf(",") + 1, imagebast64.length());
        Boolean registerFace = baiduAiUtils.faceRegister(userId, image);
        return registerFace;
    }
}
跨域配置
使用前后端分离,配置解决跨域问题
@Configuration
public class WebConfigurer implements WebMvcConfigurer {

     @Override
     public void addCorsMappings(CorsRegistry registry) {
         // 为url添加映射路径
         registry.addMapping("/**")
                 // 设置允许的域
                 .allowedOrigins("*")
                 // 设置允许请求的方式
                 .allowedMethods("*")
                 // 设置允许的header
                 .allowedHeaders("*")
                 // 设置是否发送cookie信息
                 .allowCredentials(true);
     }
}
Vue前端
H5新媒体接口调用摄像头
利用H5新媒体接口调用摄像头实现与后端接口对接
<template>
  <div>
    <el-row>
      <el-col :span="12">
        <el-row type="flex" class="row-bg" justify="center" style="text-align:center;margin-top:200px">
          <el-col :span="12">
            <el-button type="primary" @click="login">人脸登录</el-button>
          </el-col>
          <el-col :span="12">
            <el-button type="success" @click="register">人脸注册</el-button>
          </el-col>
        </el-row>
      </el-col>

      <el-col :span="12">
        <b>{{ tips }}</b>
        <div>
          <video id="video" width="500px" height="500px" autoplay="autoplay"></video>
          <canvas id="canvas" width="500px" height="500px" style="display: none;"></canvas>
        </div>
      </el-col>
    </el-row>
  </div>
</template>

<script>
import { login, register } from '@/api/face'

export default {
  name: 'Index',
  data() {
    return {
      tips: '',
      mediaStreamTrack: null
    }
  },
  methods: {
    /**
     * 打开摄像头
     */
    openMedia(tag) {
      const that = this
      that.tips = '正在打开摄像头'
      const constraints = { video: { width: 500, height: 500 }, audio: false }
      // 获得video摄像头区域
      const video = document.getElementById('video')
      /**
       * H5新媒体接口:navigator.mediaDevices.getUserMedia()
       * 1.提示用户是否允许媒体输入,(媒体输入主要包括相机,视频采集设备,屏幕共享服务,麦克风,A/D转换器等)
       * 2.返回一个Promise对象
       * 3.如果用户同意使用权限,则会将MediaStream对象作为resolve()的参数传给then()
       * 4.如果用户拒绝使用权限,或者请求的媒体资源不可用,则会将 PermissionDeniedError 作为 reject()的参数传给catch()
       */
      const promise = navigator.mediaDevices.getUserMedia(constraints)
      promise.then((mediaStream) => {
        that.mediaStreamTrack = typeof mediaStream.stop === 'function' ? mediaStream : mediaStream.getTracks()[0]
        video.srcObject = mediaStream
        video.play()
        that.tips = '请正视摄像头'
        setTimeout(() => that.photograph(tag), 2000)
      }).catch(error => {
        console.log(error)
      })
    },

    /**
     * 关闭摄像头
     */
    closeMedia() {
      if (this.mediaStreamTrack) {
        this.mediaStreamTrack.stop()
        this.openOrCloseVideo(true)
        this.tips = '操作成功'
      }
    },

    /**
     * 视频框是否隐藏
     * @param val
     */
    openOrCloseVideo(val) {
      if (val) {
        document.getElementById('video').style.display = 'none'
      } else {
        document.getElementById('video').style.display = 'block'
      }
    },

    /**
     * 登录事件
     */
    login() {
      this.openOrCloseVideo(false)
      this.openMedia(1)
    },

    /**
     * 注册事件
     */
    register() {
      this.openOrCloseVideo(false)
      this.openMedia(2)
    },

    /**
     * 拍照进行注册、登录
     */
    photograph(tag) {
      // 获得Canvas对象
      const video = document.getElementById('video')
      const canvas = document.getElementById('canvas')
      const ctx = canvas.getContext('2d')
      ctx.drawImage(video, 0, 0, 500, 500)
      // 从画布上获取照片数据
      const img = document.getElementById('canvas').toDataURL()
      this.tips = '正在识别'
      const data = { 'imagebast64': img }
      if (tag === 1) {
        login(data).then(res => {
          console.log('进行登录')
          console.log(res)
        }).finally(() => this.closeMedia())
      } else if (tag === 2) {
        console.log('进行注册')
        register(data).then(res => {
          console.log(res)
        }).finally(() => this.closeMedia())
      }
    }

  }
}
</script>

<style scoped>

</style>
跨域问题
由于前后端分离,存在跨域问题,使用Vue代理方式进行解决,在vue.config.js中配置
  devServer: {
    port: port,
    proxy: {
      // 代理名字代表请求路径 face代表前端访问地址为http://localhost:6666/face/xxx
      '/face': {
        // 转发后的地址为http://localhost:8888/face/xxx
        target: 'http://localhost:8888',
        changeOrigin: true,
        // 转发后的地址重写规则是什么
        pathRewrite: {
          // 以/face开头的原路径转换成空 就是去掉
          '^/face': '/'
        }
      }
    },
    open: false,
    overlay: {
      warnings: false,
      errors: true
    },
    before: require('./mock/mock-server.js')
  },
使用代理后,似乎有问题,JSON参数后端无法接收,且请求一直pending挂起。于是查询发现如下设置后可解决。
  devServer: {
    port: port,
    proxy: {
      // 代理名字代表请求路径 face代表前端访问地址为http://localhost:6666/face/xxx
      '/face': {
        // 转发后的地址为http://localhost:8888/face/xxx
        target: 'http://localhost:8888',
        changeOrigin: true,
        onProxyReq: function(proxyReq, req, res, options) {
          if (req.body) {
            const bodyData = JSON.stringify(req.body)
            // incase if content-type is application/x-www-form-urlencoded -> we need to change to application/json
            proxyReq.setHeader('Content-Type', 'application/json')
            proxyReq.setHeader('Content-Length', Buffer.byteLength(bodyData))
            // stream the content
            proxyReq.write(bodyData)
          }
        },
        // 转发后的地址重写规则是什么
        pathRewrite: {
          // 以/face开头的原路径转换成空 就是去掉
          '^/face': '/'
        }
      }
    },
    open: false,
    overlay: {
      warnings: false,
      errors: true
    },
    before: require('./mock/mock-server.js')
  },
如上设置后总感觉有一定问题,于是直接修改request.js文件,让请求地址访问后端接口。
1.修改.env.development文件
ENV = 'development'

VUE_APP_BASE_API = '/face'
2.修改request.js文件文章来源:https://www.toymoban.com/news/detail-674163.html
const port = 8888;
const service = axios.create({
  // baseURL: process.env.VUE_APP_BASE_API, // url = base url + request url
  baseURL: window.location.protocol + '//' + window.location.hostname + (port == 80 ? '' : ':' + port)+ process.env.VUE_APP_BASE_API, // url = base url + request url
  timeout: 5000 // request timeout
})
最好的方式还是使用Nginx解决跨域问题。文章来源地址https://www.toymoban.com/news/detail-674163.html
到了这里,关于Java借助百度云人脸识别实现人脸注册、登录功能的完整示例的文章就介绍完了。如果您还想了解更多内容,请在右上角搜索TOY模板网以前的文章或继续浏览下面的相关文章,希望大家以后多多支持TOY模板网!


