目录
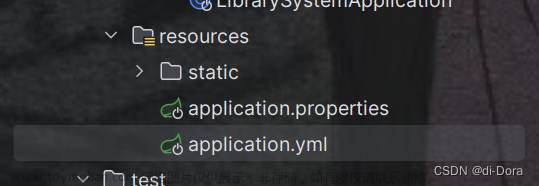
1.配置文件格式(3种)
例:修改服务器端口。(3种)
src/main/resources/application.properties
server.port=80src/main/resources/application.yml(主要用这种)
server:
  port: 80
src/main/resources/application.yaml
server:
port: 80SpringBoot配置文件加载优先级:/application.properties > application.yml > application.yaml
2.yaml数据格式
yaml,一种数据序列化格式。
优点:容易阅读、以数据为中心,重数据轻格式。
yam文件扩展名:.yml(主流)、.yaml
语法规则:
大小写敏感
属性值前面添加空格。(空格和冒号要隔开)
# 表示注释
数组格式:
enterprise:
  name: abc
  age: 16
  tel: 111111
  subject:
    - Java
    - C
    - C++
3.yaml数据读取方式(3种)
application.yml
lesson: SpringBoot

server:
  port: 80

enterprise:
  name: abc
  age: 16
  tel: 111111
  subject:
    - Java
    - C
    - C++
controller/BookController.java 有下面三种写法
① @Value(直接读取)
package com.example.controller;

import org.springframework.beans.factory.annotation.Value;
import org.springframework.web.bind.annotation.GetMapping;
import org.springframework.web.bind.annotation.PathVariable;
import org.springframework.web.bind.annotation.RequestMapping;
import org.springframework.web.bind.annotation.RestController;

@RestController
@RequestMapping("/books")
public class BookController {

    @Value("${lesson}")
    private String lesson;

    @Value("${server.port}")
    private Integer port;

    @Value("${enterprise.subject[0]}")
    private String subject_0;

    @GetMapping("/{id}")
    public String getById(@PathVariable Integer id) {
        System.out.println(lesson);
        System.out.println(port);
        System.out.println(subject_0);
        return "hello, spring boot!";
    }
}
② Environmet(封装后读取)
package com.example.controller;

import org.springframework.beans.factory.annotation.Autowired;
import org.springframework.core.env.Environment;
import org.springframework.web.bind.annotation.GetMapping;
import org.springframework.web.bind.annotation.PathVariable;
import org.springframework.web.bind.annotation.RequestMapping;
import org.springframework.web.bind.annotation.RestController;

@RestController
@RequestMapping("/books")
public class BookController {

    @Autowired
    private Environment environment;

    @GetMapping("/{id}")
    public String getById(@PathVariable Integer id) {
        System.out.println(environment.getProperty("lesson"));
        System.out.println(environment.getProperty("server.port"));
        System.out.println(environment.getProperty("enterprise.age"));
        System.out.println(environment.getProperty("enterprise.subject[1]"));
        return "hello, spring boot!";
    }
}
③ 实体类封装属性(封装后读取)
package com.example.controller;

import com.example.domain.Enterprise;
import org.springframework.beans.factory.annotation.Autowired;
import org.springframework.web.bind.annotation.GetMapping;
import org.springframework.web.bind.annotation.PathVariable;
import org.springframework.web.bind.annotation.RequestMapping;
import org.springframework.web.bind.annotation.RestController;

@RestController
@RequestMapping("/books")
public class BookController {

    @Autowired
    private Enterprise enterprise;

    @GetMapping("/{id}")
    public String getById(@PathVariable Integer id) {
        System.out.println(enterprise);
        return "hello, spring boot!";
    }
}
需要额外封装一个类domain/enterprise.java
package com.example.domain;

import org.springframework.boot.context.properties.ConfigurationProperties;
import org.springframework.stereotype.Component;

import java.util.Arrays;

@Component
@ConfigurationProperties(prefix = "enterprise")
public class Enterprise {
    private String name;
    private Integer age;
    private String tel;
    private String[] subject;

    public void setName(String name) {
        this.name = name;
    }

    public void setAge(Integer age) {
        this.age = age;
    }

    public void setTel(String tel) {
        this.tel = tel;
    }

    public void setSubject(String[] subject) {
        this.subject = subject;
    }

    @Override
    public String toString() {
        return "Enterprise{" +
                "name='" + name + '\'' +
                ", age=" + age +
                ", tel='" + tel + '\'' +
                ", subject=" + Arrays.toString(subject) +
                '}';
    }
}
pom.xml也需要额外添加一个依赖
<dependency>
  <groupId>org.springframework.boot</groupId>
  <artifactId>spring-boot-configuration-processor</artifactId>
  <optional>true</optional>
</dependency>
4.多环境开发配置
resources/application.xml
spring:
  profiles:
    active: pro

---
# 开发
spring:
  config:
    activate:
      on-profile: dev
server:
  port: 80

---
# 生产
spring:
  config:
    activate:
      on-profile: pro
server:
  port: 81

---
# 测试
spring:
  config:
    activate:
      on-profile: test
server:
  port: 82
5.使用命令行启动多环境
java -jar xxx.jar --spring.profiles.active=test --server.port=88 参数加载的优先顺序可以从官网获得:Core Features
6.Maven与SpringBoot关联操作
在开发中,关于环境配置,应该以Maven为主,SpringBoot为辅。
①Maven中设置多环境属性
pom.xml
  <profiles>
		<profile>
			<id>dev</id>
			<properties>
				<profile.active>dev</profile.active>
			</properties>
		</profile>
		<profile>
			<id>pro</id>
			<properties>
				<profile.active>pro</profile.active>
			</properties>
			<activation>
				<activeByDefault>true</activeByDefault>
			</activation>
		</profile>
		<profile>
			<id>test</id>
			<properties>
				<profile.active>test</profile.active>
			</properties>
		</profile>
	</profiles>
使用插件对资源文件开启对默认占位符的解析
<plugin>
  <groupId>org.apache.maven.plugins</groupId>
  <artifactId>maven-resources-plugin</artifactId>
  <version>3.3.1</version>
  <configuration>
    <encoding>UTF-8</encoding>
    <useDefaultDelimiters>true</useDefaultDelimiters>
  </configuration>
</plugin>
②SpringBoot引入Maven属性
application.yml
spring:
  profiles:
    active: ${profile.active}

---
# 开发
spring:
  config:
    activate:
      on-profile: dev
server:
  port: 80

---
# 生产
spring:
  config:
    activate:
      on-profile: pro
server:
  port: 81

---
# 测试
spring:
  config:
    activate:
      on-profile: test
server:
  port: 82
③Maven打包,进行测试

 文章来源:https://www.toymoban.com/news/detail-674556.html
7.配置文件分类
 文章来源地址https://www.toymoban.com/news/detail-674556.html
到了这里,关于SpringBoot入门篇2 - 配置文件格式、多环境开发、配置文件分类的文章就介绍完了。如果您还想了解更多内容,请在右上角搜索TOY模板网以前的文章或继续浏览下面的相关文章,希望大家以后多多支持TOY模板网!


