uivew 2.0
uniapp 海报画板 DCloud 插件市场文章来源地址https://www.toymoban.com/news/detail-674725.html
第一步,下载插件并导入HbuilderX
第二步,文件内 引入 海报组件
<template>
	<painter ref="haibaorefs"></painter>
<template>
<script>
	import painter from '@/components/painter.vue'
	export default {
	components: {painter},
	methods: {
	// 点击打开海报弹窗
		clickFun(){
			this.$refs.haibaorefs.open();
		}
	}
}
<script>
第三步,子组件 海报 源码, components/painter.vue 文件内容
<template>
<!-- 弹窗 -->
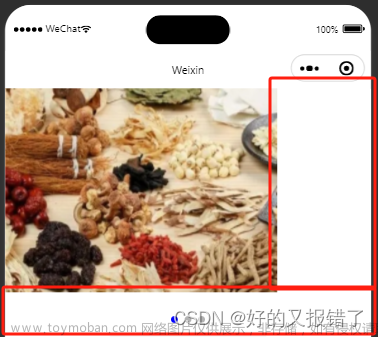
<u-popup :show="goodsshow" mode="center" round='26rpx' z-index='10076' bgColor='transparent' @close="goodsclose">
<view class="popupbox">
<view class="swiperbox">
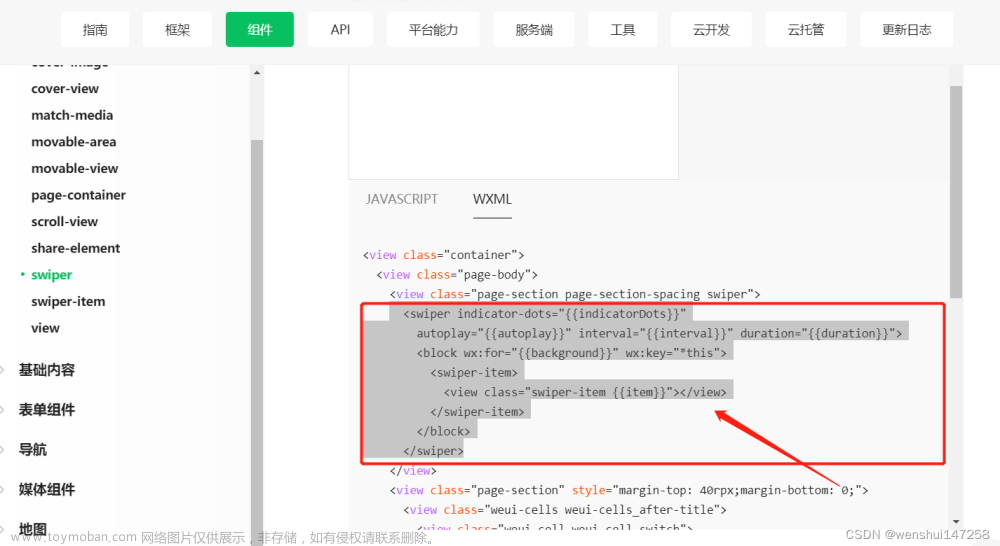
<swiper
class="swiper"
:indicator-dots="false"
:autoplay="false"
:circular="true"
skip-hidden-item-layout
previous-margin='35rpx'
next-margin='35rpx'
@change="swiperChange">
<swiper-item v-for="(item,i) in list" :key="i">
<view class="" v-if="item.coverimg">
<image :src="item.coverimg" mode="" class="swiperImg" show-menu-by-longpress></image>
</view>
<l-painter
v-else
@success='successFun($event,i)'
isCanvasToTempFilePath
path-type="url"
css="width: 600rpx;height:900rpx; box-sizing: border-box; position: relative;">
<l-painter-image :src="item.image"
css="width: 600rpx;height:900rpx;border-radius: 20rpx;object-fit: cover;"/>
<l-painter-view css="position: absolute; bottom: 40rpx; right: 40rpx; background: #fff; padding:10rpx 8rpx;border-radius: 10rpx; ">
<l-painter-image :src="erweima"
css="width: 146rpx;height:143rpx;object-fit: cover;"/>
</l-painter-view>
</l-painter>
</swiper-item>
</swiper>
</view>
<view class="btnbox" @click="saveFun()">
<!-- <view class="btn btn1" @click="goodsshow = false">长按识别分享海报</view> -->
<view class="btn btn2">保存到本地</view>
</view>
</view>
</u-popup>
</template>
<script>
export default {
components: {},
props: {
// list: {
// type: Array,
// default: null
// }
},
data() {
return {
goodsshow: false,
current: 0,
list: [{
image: 'https://m.360buyimg.com/babel/jfs/t1/196317/32/13733/288158/60f4ea39E6fb378ed/d69205b1a8ed3c97.jpg',
coverimg:'', // 海报生成图片的临时地址
id: 11
},
{
image: 'https://m.360buyimg.com/babel/jfs/t1/196317/32/13733/288158/60f4ea39E6fb378ed/d69205b1a8ed3c97.jpg',
coverimg:'',
id: 11
},
{
image: require('@/static/img/1.jpg'),
coverimg:'',
id: 11
},
],
erweima: require('@/static/img/1.jpg')
}
},
mounted() {
},
methods: {
open(){
this.goodsshow = true;
},
goodsclose() {
this.goodsshow = false;
},
swiperChange(e) {
this.current = e.detail.current;
},
// 接收海报临时路径
successFun(e,i){
console.log('接收海报临时路径',e,i)
uni.getSavedFileList({
success: function (res) {
console.log(res.fileList);
}
});
this.list.forEach((item,index) => {
if(index == i){
item.coverimg = e;
}
});
},
// 保存到本地
saveFun(){
let that = this;
console.log(that.list[that.current].coverimg,'保存图片的临时路径和下标',this.current)
uni.saveImageToPhotosAlbum({
filePath: that.list[that.current].coverimg,
success: function () {
console.log('save success');
uni.$u.toast('海报已保存到相册')
}
});
},
// 分享给好友(底部弹出)
shareFun() {
let that = this;
console.log(that.list[that.current].coverimg, '保存图片的临时路径')
uni.showShareImageMenu({
path: that.list[that.current].coverimg,
success: function () {
console.log('save success');
},
complete:function(resres){
console.log(resres,'不论成功失败都显示')
}
});
},
// 跳转
navTo(url) {
uni.navigateTo({
url: url
})
},
},
}
</script>
<style lang='scss' scoped>
swiper-item {
/* display: flex;
justify-content: center;
align-items: center; */
}
.popupbox {
display: flex;
justify-content: center;
align-items: center;
flex-direction: column;
.swiperbox {
background-color: transparent;
width: 750rpx;
height: 900rpx;
box-sizing: border-box;
.swiper {
width: 750rpx;
height: 900rpx;
overflow: hidden;
border-radius: 20rpx;
box-sizing: border-box;
.swiperImg {
width: 600rpx;
height: 900rpx;
border-radius: 20rpx;
}
}
}
.btnbox {
margin: 50rpx auto 0;
.btn {
width: 315px;
height: 96rpx;
line-height: 96rpx;
text-align: center;
border-radius: 48rpx;
font-size: 32rpx;
font-weight: 500;
}
.btn2 {
background: linear-gradient(177deg, #F2582F, #E1200B);
color: #ffffff;
}
}
}
</style>
文章来源:https://www.toymoban.com/news/detail-674725.html
到了这里,关于【uniapp】微信小程序 , 海报轮播图弹窗,点击海报保存到本地,长按海报图片分享,收藏或保存的文章就介绍完了。如果您还想了解更多内容,请在右上角搜索TOY模板网以前的文章或继续浏览下面的相关文章,希望大家以后多多支持TOY模板网!