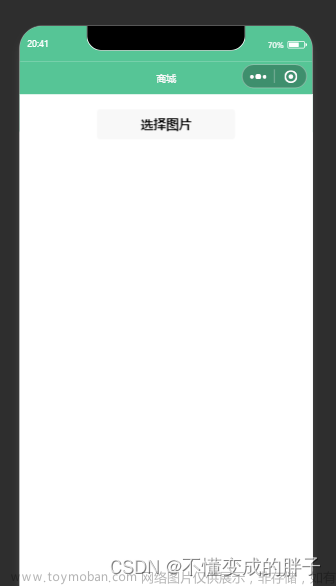
图例

方法一
1、安装插件 wxml2canvas
npm install --save wxml2canvasgit地址参照:https://github.com/wg-front/wxml2canvas
2、类型
// 小程序页面
let data={
	list:[{
		type:'wxml',
		class:'.test_center .draw_canvas',
		limit:'.test_center',
		x:0,
		y:0
	}]
}
3、数据结构
let testData=[
{
PageIndex:1,
ImageUrl:"https://minio.23544.com:9010/mk-sys-test/origin-paper/432531489095806/2023-06-26-15-42-38/9d43c15bb1834cacb0a8900b5e45dfb2/1.jpg",
Height:1680.0,
Width:1200.0,
Questions:[
{"QuestionNum":"1-2","X":140.00000450195313,"Y":515.989620895996,"Width":149.77778,"Height":54.77778,"score":1.00,"totalScore":2.00},
{"QuestionNum":"1111","X":113.10765335144043,"Y":756.3195006567382,"Width":799.77778,"Height":199.77778,"score":0.0,"totalScore":0.0},
{"QuestionNum":"2222","X":100.0000025946045,"Y":822.2222792822265,"Width":799.77778,"Height":199.77778,"score":0.0,"totalScore":0.0},
{"QuestionNum":"12","X":95.9895980078125,"Y":1260.989620895996,"Width":1022.77778,"Height":305.77778,"score":1.00,"totalScore":14.00},
]
},
{
PageIndex:1,
ImageUrl:"https://minio.23544.com:9010/mk-sys-test/origin-paper/432531489095806/2023-06-26-15-42-38/9d43c15bb1834cacb0a8900b5e45dfb2/1.jpg",
Height:1680.0,
Width:1200.0,
Questions:[
{"QuestionNum":"1-2","X":140.00000450195313,"Y":515.989620895996,"Width":149.77778,"Height":54.77778,"score":1.00,"totalScore":2.00},
{"QuestionNum":"1111","X":113.10765335144043,"Y":756.3195006567382,"Width":799.77778,"Height":199.77778,"score":0.0,"totalScore":0.0},
{"QuestionNum":"2222","X":100.0000025946045,"Y":822.2222792822265,"Width":799.77778,"Height":199.77778,"score":0.0,"totalScore":0.0},
{"QuestionNum":"12","X":95.9895980078125,"Y":1260.989620895996,"Width":1022.77778,"Height":305.77778,"score":1.00,"totalScore":14.00},
]
}
]
4、页面引用
<template>
    <canvas canvas-id="canvas1" class="test_center"></canvas>
</template>

<script setup>
import Wxml2Canvas from 'wxml2canvas';
const onclicks=()=> {
	person.drawImage = new Wxml2Canvas({
		width: 340,
		height: 210,
		element: 'canvas1',
		background: '#f0f0f0',
		finish(url) {
			console.log(7777,url)
			uni.previewImage({
				// 需要预览的图片链接列表
				urls: [url],
				// 为当前显示图片的链接/索引值
				current: url,
				// 图片指示器样式
				indicator:'default',
				// 是否可循环预览
				loop:false
			});
		},
		error (res) {
		}
	});
	let data = {
		list: [
			{
			   type: 'image',
			   x: 0,
			   y: 0,
			   url: person.itemExam.ImageUrl,
			   style: {
				   width: person.itemExam.Width*person.scaleWidth,
				   height: person.itemExam.Height*person.scaleWidth,
				   border: '0 solid #aaaaaa',
				   boxShadow: '10 20 20 rgba(0, 0, 0, 0.4)'
			   }
		    }
		]
	}
	person.itemExam.Questions.forEach((quest,itIndex)=>{
		data.list.push({
			type: 'text',
			text: quest.score,
			x: quest.X*person.scaleWidth,
			y: quest.Y*person.scaleWidth,
			style: {
				textAlign: 'right',
				width: quest.Width*person.scaleWidth-40,
				height: quest.Height*person.scaleWidth-40,
				fontSize: 16,
				color: 'red',
				border: '0px solid red',
				padding: '6px 40px 0 0'
			}
		})
		data.list.push({
			type: 'text',
			text: '  /'+quest.totalScore,
			x: quest.X*person.scaleWidth,
			y: quest.Y*person.scaleWidth,
			style: {
				textAlign: 'right',
				width: quest.Width*person.scaleWidth-6,
				height: quest.Height*person.scaleWidth-6,
				fontSize: 16,
				color: 'blue',
				border: '1px solid red',
				padding: '6px 6px 0 0'
			}
		})
	})

	person.drawImage.draw(data);
}
</script>
方法二
1、使用canvas画图组件
有坑:uni.getImageInfo 方法转出的地址是http 不是https,而 uni.previewImage 识别 https的,否则图片会出不来文章来源:https://www.toymoban.com/news/detail-675148.html
<template>
<canvas v-if="person.isShowExam" @click="saveFile" class="test_center" canvas-id="postCanvars" :width="person.itemExam.Width*person.scaleWidth" :height="person.itemExam.Height*person.scaleWidth"></canvas>
<view v-else @click="saveFile" class="test_center" :style="{width:person.itemExam.Width*person.scaleWidth+'px;',height:person.itemExam.Height*person.scaleWidth+'px;'}">
	<image class="draw_canvas" data-type="image" :src="person.itemExam.ImageUrl" mode=""></image>
	<view class="test_center_page draw_canvas">
		<view class="page_item flex draw_canvas" v-for="(quest,quIndex) in person.itemExam.Questions" :key="quIndex"
		:style="{
		top:quest.Y*person.scaleWidth +'px;',
		left:quest.X*person.scaleWidth+'px;',
		width:quest.Width*person.scaleWidth+'px;',
		height:quest.Height*person.scaleWidth+'px;'}">
		   <view class="text_flex flex draw_canvas">
			   <text class="color_red draw_canvas">{{quest.score}}</text>/
			   <text class="color_blue draw_canvas">{{quest.totalScore}}</text>
		   </view>
		</view>
	</view>
</view>

</template>
<script setup>
import { reactive, ref, watch } from 'vue'
import { onLoad, onShow } from "@dcloudio/uni-app";
const person=reactive({
	itemExam:{
		PageIndex:1,
		ImageUrl:"https://minio.23544.com:9010/mk-sys-test/origin-paper/432531489095806/2023-06-26-15-42-38/9d43c15bb1834cacb0a8900b5e45dfb2/1.jpg",
		Height:1680.0,
		Width:1200.0,
		Questions:[
			{"QuestionNum":"1-2","X":140.00000450195313,"Y":515.989620895996,"Width":149.77778,"Height":54.77778,"score":1.00,"totalScore":2.00},
			{"QuestionNum":"1111","X":113.10765335144043,"Y":756.3195006567382,"Width":799.77778,"Height":199.77778,"score":0.0,"totalScore":0.0},
			{"QuestionNum":"2222","X":100.0000025946045,"Y":822.2222792822265,"Width":799.77778,"Height":199.77778,"score":0.0,"totalScore":0.0},
			{"QuestionNum":"12","X":95.9895980078125,"Y":1260.989620895996,"Width":1022.77778,"Height":305.77778,"score":1.00,"totalScore":14.00},
		]
	},
	scaleWidth:0,
	scaleHeight:0,
	sharePoster:'',
	isShowExam:false
})

onLoad(()=>{
	// 获取屏幕宽
	uni.getSystemInfo({
		success:(res)=> {
			person.scaleWidth = res.windowWidth/person.itemExam.Width
			person.scaleHeight = res.windowHeight/person.itemExam.Height
		}
	})
})
// 保存照片
const saveFile=()=>{
	person.isShowExam=true
	uni.getImageInfo({
		src: person.itemExam.ImageUrl,
		success(res) {
			let context = uni.createCanvasContext('postCanvars')

			// 绘制图片
			context.drawImage(res.path, 0, 0, person.itemExam.Width*person.scaleWidth, person.itemExam.Height*person.scaleWidth)
			context.stroke()

			person.itemExam.Questions.forEach((quest,itIndex)=>{
				// 绘制矩形
				context.setStrokeStyle('red')
				context.rect(quest.X*person.scaleWidth, quest.Y*person.scaleWidth, quest.Width*person.scaleWidth, quest.Height*person.scaleWidth)
				context.textAlign ='right'
				context.stroke()
				// 红色文字
				context.setFontSize(16)
				context.setFillStyle('red')
				context.fillText(quest.score+'', quest.X*person.scaleWidth+24, quest.Y*person.scaleWidth+20)
				context.textAlign ='right'
				// 分割斜线
				context.setFillStyle('#000')
				context.fillText('/', quest.X*person.scaleWidth+32, quest.Y*person.scaleWidth+20)
				// 蓝色文字
				context.setFillStyle('blue')
				context.fillText(quest.totalScore, quest.X*person.scaleWidth+50, quest.Y*person.scaleWidth+20)
				context.textAlign='right'
				context.stroke()

				return context
			})

			// 生成照片保存
			context.draw(true, () => {
				uni.canvasToTempFilePath({
					canvasId: 'postCanvars',
					success: (res) => {
						uni.previewImage({
							// 需要预览的图片链接列表
							urls: [res.tempFilePath],
							// 为当前显示图片的链接/索引值
							current: res.tempFilePath,
							// 图片指示器样式
							indicator:'default',
							// 是否可循环预览
							loop:false
						});
					},
					fail: (res) => {
						uni.showToast({
							title:'生成照片失败'
						})
					}
				})
			})
		}
	})
}

</script>

<style lang="scss" scoped>
.test_center{
	width: 99%;
	height: calc(100vh - 310rpx);
	position: relative;
	overflow: hidden;
	image{
		width: 100%;
		height: 100%;
	}
	.page_item{
		position: absolute;
		border: 2rpx solid red;
		.text_flex{
			position: absolute;
			right: 20rpx;
			top: 0;
			text{
				font-size: 36rpx;
				font-weight: 600;
			}
		}
	}
}
.color_red{
	color: #FF2929;
}
.color_blue{
	color: #6B86FF;
}
</style>希望我的愚见能够帮助你哦~,若有不足之处,还望指出,你们有更好的解决方法,欢迎大家在评论区下方留言支持,大家一起相互学习参考呀~文章来源地址https://www.toymoban.com/news/detail-675148.html
到了这里,关于VX小程序 实现区域转图片预览的文章就介绍完了。如果您还想了解更多内容,请在右上角搜索TOY模板网以前的文章或继续浏览下面的相关文章,希望大家以后多多支持TOY模板网!


![uniapp - [微信小程序] 实现点击预览各种文件 pdf文档、视频mp4、mp3音乐、图片图像、word/excel/ppt 等,uniapp小程序文件预览功能(详细示例代码,一键复制开箱即用)](https://imgs.yssmx.com/Uploads/2024/02/755973-1.png)


