笔记内容转载自 AcWing 的 Django 框架课讲义,课程链接:AcWing Django 框架课。
1. 统一长度单位
多人模式中每个玩家所看到的地图相对来说应该是一样的,因此需要固定地图的长宽比,一般固定为16:9。我们需要在游戏窗口的长宽中取最小值,然后将地图渲染为16:9的大小。
我们在 AcGamePlayground 类中实现一个 resize 函数用于将长宽比调整为16:9并且达到最大:
class AcGamePlayground {
    constructor(root) {
        this.root = root;
        this.$playground = $(`
            <div class='ac_game_playground'>
            </div>
        `);
        this.root.$ac_game.append(this.$playground);

        this.start();
    }

    get_random_color() {
        ...
    }

    start() {
        this.hide();  // 初始化时需要先关闭playground界面

        let outer = this;
        $(window).resize(function() {
            outer.resize();
        });  // 用户改变窗口大小时改函数会触发
    }

    // 将长宽比调整为16:9
    resize() {
        this.width = this.$playground.width();
        this.height = this.$playground.height();
        let unit = Math.min(this.width / 16, this.height / 9);
        this.width = unit * 16;
        this.height = unit * 9;
        this.scale = this.height;  // 当窗口大小改变时所有目标的相对大小和位置也要改变

        if (this.game_map) this.game_map.resize();  // 如果地图存在需要调用地图的resize函数
    }

    // 显示playground界面
    show() {
        this.$playground.show();

        // 将界面的宽高先存下来
        this.width = this.$playground.width();
        this.height = this.$playground.height();

        this.game_map = new GameMap(this);  // 创建游戏画面

        this.resize();  // 界面打开后需要resize一次,需要将game_map也resize

        ...
    }

    // 关闭playground界面
    hide() {
        this.$playground.hide();
    }
}
现在需要将窗口大小的修改效果作用到黑色背景上,因此我们在 GameMap 类中也实现一个 resize 函数用于修改背景大小:
class GameMap extends AcGameObject {
    constructor(playground) {  // 需要将AcGamePlayground传进来
        super();  // 调用基类构造函数,相当于将自己添加到了AC_GAME_OBJECTS中
        this.playground = playground;
        this.$canvas = $(`<canvas></canvas>`);  // 画布,用来渲染画面
        this.ctx = this.$canvas[0].getContext('2d');  // 二维画布
        this.ctx.canvas.width = this.playground.width;  // 设置画布宽度
        this.ctx.canvas.height = this.playground.height;  // 设置画布高度
        this.playground.$playground.append(this.$canvas);  // 将画布添加到HTML中
    }

    start() {
    }

    resize() {
        this.ctx.canvas.width = this.playground.width;
        this.ctx.canvas.height = this.playground.height;
        this.ctx.fillStyle = 'rgba(0, 0, 0, 1)';  // 每次调整大小后直接涂一层不透明的背景
        this.ctx.fillRect(0, 0, this.ctx.canvas.width, this.ctx.canvas.height);
    }

    update() {
        this.render();  // 每一帧都要画一次
    }

    render() {
        this.ctx.fillStyle = 'rgba(0, 0, 0, 0.2)';  // 黑色背景
        // 左上角坐标(0, 0),右下角坐标(w, h)
        this.ctx.fillRect(0, 0, this.ctx.canvas.width, this.ctx.canvas.height);
    }
}
我们修改一下 game.css 文件,添加以下内容,实现将地图居中:
.ac_game_playground > canvas {
    position: relative;
    top: 50%;
    left: 50%;
    transform: translate(-50%, -50%);
}
现在我们还需要修改地图里面的目标,一共有三种分别是玩家、火球、被击中的粒子效果。
首先修改一下 AcGamePlayground 类中的玩家初始化代码:
class AcGamePlayground {
    constructor(root) {
        ...
    }

    get_random_color() {
        ...
    }

    start() {
        ...
    }

    // 将长宽比调整为16:9
    resize() {
        ...
    }

    // 显示playground界面
    show() {
        this.$playground.show();

        // 将界面的宽高先存下来
        this.width = this.$playground.width();
        this.height = this.$playground.height();

        this.game_map = new GameMap(this);  // 创建游戏画面

        this.resize();  // 界面打开后需要resize一次,需要将game_map也resize

        this.players = [];  // 所有玩家
        this.players.push(new Player(this, this.width / 2 / this.scale, 0.5, 0.05, 'white', 0.15, true));  // 创建自己

        // 创建敌人
        for (let i = 0; i < 8; i++) {
            this.players.push(new Player(this, this.width / 2 / this.scale, 0.5, 0.05, this.get_random_color(), 0.15, false));
        }
    }

    // 关闭playground界面
    hide() {
        this.$playground.hide();
    }
}
然后我们修改 Player 类,将所有绝对变量替换为相对变量:
class Player extends AcGameObject {
    constructor(playground, x, y, radius, color, speed, is_me) {
        ...
        this.eps = 0.01;  // 误差小于0.01认为是0
        ...
    }

    start() {
        if (this.is_me) {
            this.add_listening_events();
        } else {
            // Math.random()返回一个0~1之间的数,随机初始化AI的位置
            let tx = Math.random() * this.playground.width / this.playground.scale;
            let ty = Math.random() * this.playground.height / this.playground.scale;
            this.move_to(tx, ty);
        }
    }

    add_listening_events() {
        let outer = this;
        this.playground.game_map.$canvas.on('contextmenu', function() {
            return false;
        });  // 取消右键的菜单功能
        this.playground.game_map.$canvas.mousedown(function(e) {
            const rect = outer.ctx.canvas.getBoundingClientRect();
            if (e.which === 3) {  // 1表示左键,2表示滚轮,3表示右键
                outer.move_to((e.clientX - rect.left) / outer.playground.scale, (e.clientY - rect.top) / outer.playground.scale);  // e.clientX/Y为鼠标点击坐标
            } else if (e.which === 1) {
                if (outer.cur_skill === 'fireball') {
                    outer.shoot_fireball((e.clientX - rect.left) / outer.playground.scale, (e.clientY - rect.top) / outer.playground.scale);
                }

                outer.cur_skill = null;  // 释放完一次技能后还原
            }
        });
        $(window).keydown(function(e) {
            if (e.which === 81) {  // Q键
                outer.cur_skill = 'fireball';
                return false;
            }
        });
    }

    // 计算两点之间的欧几里得距离
    get_dist(x1, y1, x2, y2) {
        ...
    }

    // 向(tx, ty)位置发射火球
    shoot_fireball(tx, ty) {
        let x = this.x, y = this.y;
        let radius = 0.01;
        let theta = Math.atan2(ty - this.y, tx - this.x);
        let vx = Math.cos(theta), vy = Math.sin(theta);
        let color = 'orange';
        let speed = 0.5;
        let move_length = 0.8;
        new FireBall(this.playground, this, x, y, radius, vx, vy, color, speed, move_length, 0.01);
    }

    move_to(tx, ty) {
        ...
    }

    is_attacked(theta, damage) {  // 被攻击到
        // 创建粒子效果
        for (let i = 0; i < 10 + Math.random() * 5; i++) {
            let x = this.x, y = this.y;
            let radius = this.radius * Math.random() * 0.2;
            let theta = Math.PI * 2 * Math.random();
            let vx = Math.cos(theta), vy = Math.sin(theta);
            let color = this.color;
            let speed = this.speed * 10;
            let move_length = this.radius * Math.random() * 10;
            new Particle(this.playground, x, y, radius, vx, vy, color, speed, move_length);
        }

        this.radius -= damage;
        this.speed *= 1.08;  // 血量越少移动越快
        if (this.radius < this.eps) {  // 半径小于eps认为已死
            this.destroy();
            return false;
        }
        this.damage_vx = Math.cos(theta);
        this.damage_vy = Math.sin(theta);
        this.damage_speed = damage * 90;
    }

    // 更新移动
    update_move() {
        this.spent_time += this.timedelta / 1000;
        // AI敌人随机向玩家射击,游戏刚开始前三秒AI不能射击
        if (this.spent_time > 3 && !this.is_me && Math.random() < 1 / 360.0) {
            let player = this.playground.players[0];
            this.shoot_fireball(player.x, player.y);
        }

        if (this.damage_speed > this.eps) {  // 有击退效果时玩家无法移动
            this.vx = this.vy = 0;
            this.move_length = 0;
            this.x += this.damage_vx * this.damage_speed * this.timedelta / 1000;
            this.y += this.damage_vy * this.damage_speed * this.timedelta / 1000;
            this.damage_speed *= this.friction;
        } else {
            if (this.move_length < this.eps) {
                this.move_length = 0;
                this.vx = this.vy = 0;
                if (!this.is_me) {  // AI敌人不能停下来
                    let tx = Math.random() * this.playground.width / this.playground.scale;
                    let ty = Math.random() * this.playground.height / this.playground.scale;
                    this.move_to(tx, ty);
                }
            } else {
                // 计算真实移动距离,与一帧的移动距离取min防止移出界
                let true_move = Math.min(this.move_length, this.speed * this.timedelta / 1000);
                this.x += this.vx * true_move;
                this.y += this.vy * true_move;
                this.move_length -= true_move;
            }
        }
    }

    update() {
        this.update_move();
        this.render();
    }

    render() {
        let scale = this.playground.scale;  // 要将相对值恢复成绝对值
        if (this.is_me) {
            this.ctx.save();
            this.ctx.beginPath();
            this.ctx.arc(this.x * scale, this.y * scale, this.radius * scale, 0, Math.PI * 2, false);
            this.ctx.stroke();
            this.ctx.clip();
            this.ctx.drawImage(this.img, (this.x - this.radius) * scale, (this.y - this.radius) * scale, this.radius * 2 * scale, this.radius * 2 * scale);
            this.ctx.restore();
        } else {  // AI
            this.ctx.beginPath();
            // 角度从0画到2PI,是否逆时针为false
            this.ctx.arc(this.x * scale, this.y * scale, this.radius * scale, 0, Math.PI * 2, false);
            this.ctx.fillStyle = this.color;
            this.ctx.fill();
        }
    }
}
然后修改 FireBall 类,只需要修改 eps 以及 render 函数即可:
class FireBall extends AcGameObject {
    // 火球需要标记是哪个玩家发射的,且射出后的速度方向与大小是固定的,射程为move_length
    constructor(playground, player, x, y, radius, vx, vy, color, speed, move_length, damage) {
        ...
        this.eps = 0.01;
    }

    start() {
    }

    update() {
        ...
    }

    get_dist(x1, y1, x2, y2) {
        ...
    }

    is_collision(player) {
        ...
    }

    attack(player) {
        ...
    }

    render() {
        let scale = this.playground.scale;
        this.ctx.beginPath();
        this.ctx.arc(this.x * scale, this.y * scale, this.radius * scale, 0, Math.PI * 2, false);
        this.ctx.fillStyle = this.color;
        this.ctx.fill();
    }
}
最后修改 Particle 类,同样也是只需要修改 eps 以及 render 函数即可:
class Particle extends AcGameObject {
    constructor(playground, x, y, radius, vx, vy, color, speed, move_length) {
        ...
        this.eps = 0.01;
        this.friction = 0.9;
    }

    start() {
    }

    update() {
        ...
    }

    render() {
        let scale = this.playground.scale;
        this.ctx.beginPath();
        this.ctx.arc(this.x * scale, this.y * scale, this.radius * scale, 0, Math.PI * 2, false);
        this.ctx.fillStyle = this.color;
        this.ctx.fill();
    }
}
2. 增加联机对战模式
我们先修改 AcGameMenu 类,实现多人模式按钮的逻辑:
class AcGameMenu {
    constructor(root) {  // root用来传AcGame对象
        ...
    }

    start() {
        this.hide();
        this.add_listening_events();
    }

    // 给按钮绑定监听函数
    add_listening_events() {
        let outer = this;
        // 注意在function中调用this指的是function本身,因此需要先将外面的this存起来
        this.$single.click(function() {
            outer.hide();  // 关闭menu界面
            outer.root.playground.show('single mode');  // 显示playground界面,加入参数用于区分
        });
        this.$multi.click(function() {
            outer.hide();
            outer.root.playground.show('multi mode');  // 多人模式
        });
        this.$settings.click(function() {
            outer.root.settings.logout_on_remote();
        });
    }

    // 显示menu界面
    show() {
        this.$menu.show();
    }

    // 关闭menu界面
    hide() {
        this.$menu.hide();
    }
}
然后修改 AcGamePlayground 类,区分两种模式,且需要进一步区分玩家类别,之前使用 True/False 表示是否是玩家本人,现在可以用字符串区分玩家本人(me)、其他玩家(enemy)以及人机(robot):
class AcGamePlayground {
    constructor(root) {
        ...
    }

    get_random_color() {
        ...
    }

    start() {
        ...
    }

    // 将长宽比调整为16:9
    resize() {
        ...
    }

    // 显示playground界面
    show(mode) {
        this.$playground.show();

        // 将界面的宽高先存下来
        this.width = this.$playground.width();
        this.height = this.$playground.height();

        this.game_map = new GameMap(this);  // 创建游戏画面

        this.resize();  // 界面打开后需要resize一次,需要将game_map也resize

        this.players = [];  // 所有玩家
        this.players.push(new Player(this, this.width / 2 / this.scale, 0.5, 0.05, 'white', 0.15, 'me', this.root.settings.username, this.root.settings.avatar));  // 创建自己,自己的用户名和头像从settings中获得

        // 单人模式下创建AI敌人
        if (mode === 'single mode'){
            for (let i = 0; i < 8; i++) {
                this.players.push(new Player(this, this.width / 2 / this.scale, 0.5, 0.05, this.get_random_color(), 0.15, 'robot'));
            }
        } else if (mode === 'multi mode') {
        }
    }

    // 关闭playground界面
    hide() {
        this.$playground.hide();
    }
}
然后还需要修改一下 Player 类,将原本的 this.is_me 判断进行修改:
class Player extends AcGameObject {
    constructor(playground, x, y, radius, color, speed, character, username, avatar) {
        ...
        this.character = character;
        this.username = username;
        this.avatar = avatar;
        ...
        if (this.character !== 'robot') {  // 只有AI不用渲染图片
            this.img = new Image();
            this.img.src = this.avatar;
        }
    }

    start() {
        if (this.character === 'me') {  // 只给自己添加监听函数
            this.add_listening_events();
        } else if (this.character === 'robot') {  // 机器人才会随机动
            ...
        }
    }

    add_listening_events() {
        ...
    }

    // 计算两点之间的欧几里得距离
    get_dist(x1, y1, x2, y2) {
        ...
    }

    // 向(tx, ty)位置发射火球
    shoot_fireball(tx, ty) {
        ...
    }

    move_to(tx, ty) {
        ...
    }

    is_attacked(theta, damage) {  // 被攻击到
        ...
    }

    // 更新移动
    update_move() {
        this.spent_time += this.timedelta / 1000;
        // AI敌人随机向玩家射击,游戏刚开始前三秒AI不能射击
        if (this.character === 'robot' && this.spent_time > 3 && Math.random() < 1 / 360.0) {
            ...
        }

        if (this.damage_speed > this.eps) {  // 有击退效果时玩家无法移动
            ...
        } else {
            if (this.move_length < this.eps) {
                ...
                if (this.character === 'robot') {  // AI敌人不能停下来
                    ...
                }
            } else {
                // 计算真实移动距离,与一帧的移动距离取min防止移出界
                ...
            }
        }
    }

    update() {
        this.update_move();
        this.render();
    }

    render() {
        let scale = this.playground.scale;  // 要将相对值恢复成绝对值
        if (this.character !== 'robot') {
            ...
        } else {  // AI
            ...
        }
    }
}
3. 配置Django Channels
假设有三名玩家编号为1、2、3进行多人游戏,那么每个玩家都有自己的一个窗口,且窗口中都能看到三名玩家。如果当前玩家1、2在进行游戏,3加入了游戏,那么需要告诉1、2两名玩家3来了,且还要告诉3当前已经有玩家1、2了。
要实现这一点,可以通过一个中心服务器 Server(可以就是自己租的云服务器),即3向服务器发送他来了,服务器给1、2发送消息,且服务器给3发送消息说之前已经有1、2两名玩家了。因此服务器中需要存储每个地图中的玩家信息,用于完成第一个同步事件:生成玩家事件。
我们之后一共需要实现四个同步函数:create_player、move_to、shoot_fireball、attack。前三个函数顾名思义,最后的 attack 函数是因为服务器存在延迟,比如3发射一个火球在本地看打中了1,但是由于延迟在1那边可能是没被打中的。
攻击判断是一个权衡问题,一般的游戏都是选择在本地进行攻击判断,而不是云服务器,即以发起攻击的玩家窗口进行判断,如果击中了则通过 attack 函数在服务器上广播信息。
在此之前我们使用的是 HTTP 协议,该协议为单向的,即客户端需要先向服务器请求信息后服务器才会返回信息,而服务器是不会主动向客户端发送信息的。
因此此处我们需要使用 WebSocket 协议(WS),同理该协议也有对应的加密协议 WSS,Django Channels 即为 Django 支持 WSS 协议的一种实现方式。
(1)安装 channels_redis:
pip install channels_redis
(2)配置 djangoapp/djangoapp/asgi.py 文件:
文件内容如下(注意 djangoapp 需要改成自己项目的名称):
import os

from channels.auth import AuthMiddlewareStack
from channels.routing import ProtocolTypeRouter, URLRouter
from django.core.asgi import get_asgi_application
from game.routing import websocket_urlpatterns

os.environ.setdefault('DJANGO_SETTINGS_MODULE', 'djangoapp.settings')

application = ProtocolTypeRouter({
    "http": get_asgi_application(),
    "websocket": AuthMiddlewareStack(URLRouter(websocket_urlpatterns))
})
(3)配置 djangoapp/djangoapp/settings.py 文件:
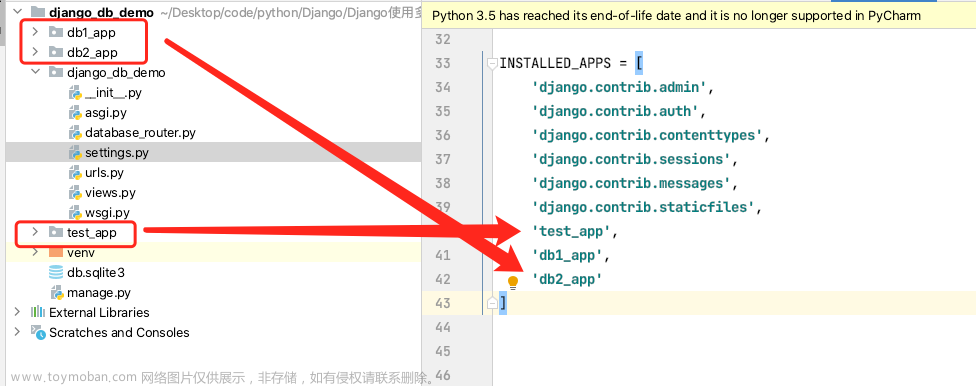
在 INSTALLED_APPS 中添加 channels,添加后如下所示(注意 djangoapp 需要改成自己项目的名称):
INSTALLED_APPS = [
    'channels',  # 添加此行
    'game.apps.GameConfig',
    'django.contrib.admin',
    'django.contrib.auth',
    'django.contrib.contenttypes',
    'django.contrib.sessions',
    'django.contrib.messages',
    'django.contrib.staticfiles',
]
然后在文件末尾添加:
ASGI_APPLICATION = 'djangoapp.asgi.application'
CHANNEL_LAYERS = {
    "default": {
        "BACKEND": "channels_redis.core.RedisChannelLayer",
        "CONFIG": {
            "hosts": [("127.0.0.1", 6379)],
        },
    },
}
(4)配置 game/routing.py 文件:
这一部分的作用相当于 HTTP 的 urls,文件内容如下:
from django.urls import path

websocket_urlpatterns = [
]
(5)编写 game/consumers,这一部分的作用相当于 HTTP 的 views。
在 game 目录下创建 consumers 目录,然后进入该目录,先创建好 __init__.py 文件。由于我们未来会使用 WSS 协议支持联机对战和聊天室,因此我们需要再创建两个目录,先创建 multiplayer 目录,进入该目录创建 __init__.py 文件,然后编写 index.py:
from channels.generic.websocket import AsyncWebsocketConsumer
import json

class MultiPlayer(AsyncWebsocketConsumer):
    async def connect(self):
        await self.accept()
        print('accept')

        self.room_name = "room"
        await self.channel_layer.group_add(self.room_name, self.channel_name)  # 将当前连接加到组里

    async def disconnect(self, close_code):
        print('disconnect')
        await self.channel_layer.group_discard(self.room_name, self.channel_name)


    async def receive(self, text_data):
        data = json.loads(text_data)
        print(data)
(6)启动 django_channels:
首先安装 daphne:
pip install daphne
输入 daphne 查看是否可用,如果不可用说明应该是没有配置环境变量,按如下方式修改环境变量(需要重启系统):
sudo vim /etc/environment
在 PATH='xxx' 后面添加 ':/home/<用户名>/.local/bin'
即: 'xxx:/home/<用户名>/.local/bin'
HTTP 有 uwsgi 启动服务,WS 同样也需要启动,使用的是 asgi,在 ~/djangoapp 目录下执行(注意 djangoapp 需要改成自己项目的名称):
daphne -b 0.0.0.0 -p 5015 djangoapp.asgi:application
项目进行到这里已经需要启动多个服务了,顺序是:
NginX: sudo /etc/init.d/nginx start
Redis-server: sudo redis-server /etc/redis/redis.conf
uWSGI: uwsgi --ini scripts/uwsgi.ini
Django_channels: daphne -b 0.0.0.0 -p 5015 djangoapp.asgi:application
4. 前端创建连接
前端(Playground)需要跟后端(WS)连接,我们需要在每个客户端中建立一个和服务器的连接,一般是使用 Web Socket 连接。
首先配置一下 /djangoapp/game 目录下的路由 routing.py:
from django.urls import path
from game.consumers.multiplayer.index import MultiPlayer

websocket_urlpatterns = [
    path('wss/multiplayer/', MultiPlayer.as_asgi(), name='wss_multiplayer'),
]
我们在 /djangoapp/game/static/js/src/playground 目录下创建 socket 目录,Socket 也分为两个模块,分别为联机模式和聊天室,还是先实现联机模式,在 socket 目录中创建 multiplayer 目录,进入该目录后创建 zbase.js:
class MultiPlayerSocket {
    constructor(playground) {
        this.playground = playground;

        // 直接将网站链接复制过来,将https改成wss,如果没有配置https那就改成ws,然后最后加上wss的路由
        this.ws = new WebSocket('wss://app4007.acapp.acwing.com.cn/wss/multiplayer/');

        this.start();
    }

    start() {
    }
}
当前端创建连接,即执行 new WebSocket 时,会调用 consumers 的 MultiPlayer 类(之后直接称为 MultiPlayer)中的 connect 函数;当前端断开连接(刷新或者关闭页面)时,会调用 disconnect 函数;receive 函数用于接收前端向后端发送的请求。
由于服务器需要向多个客户端群发消息,Django Channels 中有一个概念叫做组(group),可以将多个不同的连接放到同一个组里,可以使用相关函数统一操作组里的连接,例如 group_send 群发消息。
现在在 AcGamePlayground 类中添加我们刚实现的 MultiPlayerSocket:
class AcGamePlayground {
    constructor(root) {
        ...
    }

    get_random_color() {
        ...
    }

    start() {
        ...
    }

    // 将长宽比调整为16:9
    resize() {
        ...
    }

    // 显示playground界面
    show(mode) {
        ...

        // 单人模式下创建AI敌人
        if (mode === 'single mode'){
            for (let i = 0; i < 8; i++) {
                this.players.push(new Player(this, this.width / 2 / this.scale, 0.5, 0.05, this.get_random_color(), 0.15, 'robot'));
            }
        } else if (mode === 'multi mode') {
            this.mps = new MultiPlayerSocket(this);
        }
    }

    // 关闭playground界面
    hide() {
        this.$playground.hide();
    }
}
然后我们打包静态文件并同步到发行版本,复习一下:
cd ~/djangoapp
./scripts/compress_game_js.sh
python3 manage.py collectstatic
重启一下服务,现在我们每次都需要重启两个服务,即 HTTPS 和 WSS:
uwsgi --ini scripts/uwsgi.ini
daphne -b 0.0.0.0 -p 5015 djangoapp.asgi:application
打开游戏进入多人模式,即可在后端的 WSS 服务看到输出信息。
5. 前端发送请求
有玩家进来时,需要两个函数,一个是实现客户端向服务器发送 create_player 请求,另一个是实现服务器从客户端接收请求的功能。
先实现发送请求功能,在 MultiPlayerSocket 类中编写 send_create_player 函数:
class MultiPlayerSocket {
    constructor(playground) {
        this.playground = playground;

        // 直接将网站链接复制过来,将https改成wss,如果没有配置https那就改成ws,然后最后加上wss的路由
        this.ws = new WebSocket('wss://app4007.acapp.acwing.com.cn/wss/multiplayer/');

        this.start();
    }

    start() {
    }

    send_create_player() {
        // stringify可以将JSON变为字符串
        this.ws.send(JSON.stringify({
            'message': 'hello world!'
        }));
    }

    receive_create_player() {
    }
}
然后在 AcGamePlayground 类中调用:
class AcGamePlayground {
    constructor(root) {
        ...
    }

    get_random_color() {
        ...
    }

    start() {
        ...
    }

    // 将长宽比调整为16:9
    resize() {
        ...
    }

    // 显示playground界面
    show(mode) {
        let outer = this;
        ...

        // 单人模式下创建AI敌人
        if (mode === 'single mode'){
            for (let i = 0; i < 8; i++) {
                this.players.push(new Player(this, this.width / 2 / this.scale, 0.5, 0.05, this.get_random_color(), 0.15, 'robot'));
            }
        } else if (mode === 'multi mode') {
            this.mps = new MultiPlayerSocket(this);

            this.mps.ws.onopen = function() {
                outer.mps.send_create_player();
            };
        }
    }

    // 关闭playground界面
    hide() {
        this.$playground.hide();
    }
}
没有修改过后端代码,因此不需要重启服务,直接重新打包一下静态文件即可,然后进入多人模式即可看到后端的输出信息,说明现在连接就已经创建成功了。
6. 编写同步函数create_player
我们每一个地图的所有信息都会有一个备份,比如1号玩家在2、3号窗口都会有一个备份,在不同的地图里我们需要能够判断出来谁是谁,比如在1号窗口中玩家1击中了玩家2,那么把信息发送到第二个窗口后,需要知道谁是2。
因此我们需要给所有信息一个唯一的编号(可以使用一个随机的八位数,如果怕重复可以使用更多位数),使得我们未来知道需要同步哪些东西。在 AcGameObject 类中进行修改:
let AC_GAME_OBJECTS = [];  // 将所有对象加到一个全局数组里,之后可以遍历每个对象刷新一次

class AcGameObject {
    constructor() {
        AC_GAME_OBJECTS.push(this);

        this.has_called_start = false;  // 是否执行过start函数
        this.timedelta = 0;  // 当前帧距离上一帧的时间间隔,因为如果用帧来衡量的话不同浏览器可能帧数不一样会导致不同的效果
        this.uuid = this.create_uuid();
    }

    create_uuid() {  // 创建唯一编号
        let res = '';
        for (let i = 0; i < 8; i++) {
            let x = parseInt(Math.floor(Math.random() * 10));  // Math.random()返回[0, 1)之间的数
            res += x;
        }
        return res;
    }

    start() {  // 只会在第一帧执行一次
    }

    update() {  // 每一帧都会执行一次
    }

    on_destroy() {  // 在被删除前执行一次

    }

    destroy() {  // 删掉该对象
        ...
    }
}

let last_timestamp;  // 上一帧的时间戳

let AC_GAME_ANIMATION = function(timestamp) {  // timestamp表示在哪个时刻调用的这个函数
    ...
}

requestAnimationFrame(AC_GAME_ANIMATION);
现在又有一个问题,每次有一名新玩家进入时都会创建若干个编号,但是和之前其它窗口中的编号不一致,我们需要用通信的方式将他们保持一致,原则为谁创建的对象就用谁那边产生的编号,比如1号窗口创建了1号玩家,那么其它玩家窗口中的1号玩家的编号就由1号窗口发送过来。
由于某个客户端(假设是1号窗口)向服务器发送消息后服务器会转播给所有客户端,也就是会发给自己(1号窗口),这种情况1号窗口应该要 Pass 掉这条信息,因此我们需要判断信息是哪个客户端发的。这边我们就可以用每个玩家的唯一编号,这样就可以保证每个窗口不一样,我们在 AcGamePlayground 中修改:
class AcGamePlayground {
    constructor(root) {
        ...
    }

    get_random_color() {
        ...
    }

    start() {
        ...
    }

    // 将长宽比调整为16:9
    resize() {
        ...
    }

    // 显示playground界面
    show(mode) {
        let outer = this;
        ...

        // 单人模式下创建AI敌人
        if (mode === 'single mode'){
            for (let i = 0; i < 8; i++) {
                this.players.push(new Player(this, this.width / 2 / this.scale, 0.5, 0.05, this.get_random_color(), 0.15, 'robot'));
            }
        } else if (mode === 'multi mode') {
            this.mps = new MultiPlayerSocket(this);
            this.mps.uuid = this.players[0].uuid;  // 用每名玩家的唯一编号区分不同的窗口

            this.mps.ws.onopen = function() {
                outer.mps.send_create_player();
            };
        }
    }

    // 关闭playground界面
    hide() {
        this.$playground.hide();
    }
}
现在客户端向服务器端发送消息的时候就要带上自己的 uuid:
class MultiPlayerSocket {
    constructor(playground) {
        this.playground = playground;

        // 直接将网站链接复制过来,将https改成wss,如果没有配置https那就改成ws,然后最后加上wss的路由
        this.ws = new WebSocket('wss://app4007.acapp.acwing.com.cn/wss/multiplayer/');

        this.start();
    }

    start() {
    }

    send_create_player() {
        let outer = this;
        // stringify可以将JSON变为字符串
        this.ws.send(JSON.stringify({
            'event': 'create_player',
            'uuid': outer.uuid,
        }));
    }

    receive_create_player() {
    }
}
现在再测试一下即可在后端看到服务器接收到的客户端信息。
接下来我们需要同步 create_player 这个事件,即当有新玩家来的时候,在所有窗口里创建这个玩家,同时将已有的玩家渲染到当前窗口里。
首先我们需要在服务器端存下每一个游戏房间的信息,可以存在 Redis 里,我们可以用房间(room)的概念。每个房间有人数上限,这是一个通用配置,可以写在 settings.py 里,我们往该文件里添加一行:
ROOM_CAPACITY = 3
然后修改后端文件(/djangoapp/game/consumers/multiplayer 目录中的 index.py):
from channels.generic.websocket import AsyncWebsocketConsumer
import json
from django.conf import settings
from django.core.cache import cache

class MultiPlayer(AsyncWebsocketConsumer):
    async def connect(self):
        self.room_name = None

        for i in range(1000):  # 假设暂定最多1000个房间
            name = 'room-%d' % (i)
            if not cache.has_key(name) or len(cache.get(name)) < settings.ROOM_CAPACITY:  # 判断当前房间是否可用
                self.room_name = name
                break

        if not self.room_name:  # 房间不足
            return

        await self.accept()
        print('accept')

        if not cache.has_key(self.room_name):  # 如果没有该房间需要创建房间
            cache.set(self.room_name, [], 3600)  # 每局时长设置为1小时

        for player in cache.get(self.room_name):  # 发送房间所有玩家的信息到当前的本地客户端
            await self.send(text_data=json.dumps({  # dumps将字典变为字符串
                'event': 'create_player',
                'uuid': player['uuid'],
                'username': player['username'],
                'avatar': player['avatar'],
            }))

        await self.channel_layer.group_add(self.room_name, self.channel_name)

    async def disconnect(self, close_code):
        print('disconnect')
        await self.channel_layer.group_discard(self.room_name, self.channel_name)


    async def receive(self, text_data):
        data = json.loads(text_data)
        print(data)
现在我们需要在 AcGamePlayground 中传送用户名和头像参数:
class AcGamePlayground {
    constructor(root) {
        ...
    }

    get_random_color() {
        ...
    }

    start() {
        ...
    }

    // 将长宽比调整为16:9
    resize() {
        ...
    }

    // 显示playground界面
    show(mode) {
        let outer = this;
        ...

        // 单人模式下创建AI敌人
        if (mode === 'single mode'){
            ...
        } else if (mode === 'multi mode') {
            this.mps = new MultiPlayerSocket(this);
            this.mps.uuid = this.players[0].uuid;  // 用每名玩家的唯一编号区分不同的窗口

            this.mps.ws.onopen = function() {
                outer.mps.send_create_player(outer.root.settings.username, outer.root.settings.avatar);
            };
        }
    }

    // 关闭playground界面
    hide() {
        this.$playground.hide();
    }
}
然后在 MultiPlayerSocket 中接收信息并向服务器后端发送请求:
class MultiPlayerSocket {
    constructor(playground) {
        this.playground = playground;

        // 直接将网站链接复制过来,将https改成wss,如果没有配置https那就改成ws,然后最后加上wss的路由
        this.ws = new WebSocket('wss://app4007.acapp.acwing.com.cn/wss/multiplayer/');

        this.start();
    }

    start() {
    }

    send_create_player(username, avatar) {
        let outer = this;
        // stringify可以将JSON变为字符串
        this.ws.send(JSON.stringify({  // 向后台发送请求
            'event': 'create_player',
            'uuid': outer.uuid,
            'username': username,
            'avatar': avatar,
        }));
    }

    receive_create_player() {
    }
}
现在编写后端接收到信息后的处理逻辑,接收到创建玩家的信息后需要将该玩家添加到房间中,并给房间中其他连接群发消息,组内各个连接接收到消息后再发送给前端即可:
from channels.generic.websocket import AsyncWebsocketConsumer
import json
from django.conf import settings
from django.core.cache import cache

class MultiPlayer(AsyncWebsocketConsumer):
    async def connect(self):
        self.room_name = None

        for i in range(1000):  # 假设暂定最多1000个房间
            name = 'room-%d' % (i)
            if not cache.has_key(name) or len(cache.get(name)) < settings.ROOM_CAPACITY:  # 判断当前房间是否可用
                self.room_name = name
                break

        if not self.room_name:  # 房间不足
            return

        await self.accept()
        print('accept')

        if not cache.has_key(self.room_name):  # 如果没有该房间需要创建房间
            cache.set(self.room_name, [], 3600)  # 每局时长设置为1小时

        for player in cache.get(self.room_name):  # 发送房间所有玩家的信息到当前的本地客户端
            await self.send(text_data=json.dumps({  # dumps将字典变为字符串
                'event': 'create_player',
                'uuid': player['uuid'],
                'username': player['username'],
                'avatar': player['avatar'],
            }))

        await self.channel_layer.group_add(self.room_name, self.channel_name)

    async def disconnect(self, close_code):
        print('disconnect')
        await self.channel_layer.group_discard(self.room_name, self.channel_name)


    async def create_player(self, data):  # async表示异步函数
        players = cache.get(self.room_name)  # 获得房间信息
        players.append({  # 将当前玩家添加到房间里
            'uuid': data['uuid'],
            'username': data['username'],
            'avatar': data['avatar'],
        })
        cache.set(self.room_name, players, 3600)  # 存入Redis
        await self.channel_layer.group_send(  # 群发消息,有两个参数,一个是room_name,一个是需要发送的信息
            self.room_name,
            {
                'type': 'group_send_event',  # 很重要,表示将消息发送给组内的所有人,接收消息的函数就是type
                'event': 'create_player',
                'uuid': data['uuid'],
                'username': data['username'],
                'avatar': data['avatar'],
            }
        )

    async def group_send_event(self, data):  # 组内的每个连接接收到消息后直接发给前端即可
        await self.send(text_data=json.dumps(data))


    async def receive(self, text_data):
        data = json.loads(text_data)
        print(data)

        event = data['event']
        if event == 'create_player':  # 做一个路由
            await self.create_player(data)
现在我们需要在前端处理接收 WSS 协议的信息,修改一下 MultiPlayerSocket 类:文章来源:https://www.toymoban.com/news/detail-677056.html
class MultiPlayerSocket {
    constructor(playground) {
        this.playground = playground;

        // 直接将网站链接复制过来,将https改成wss,如果没有配置https那就改成ws,然后最后加上wss的路由
        this.ws = new WebSocket('wss://app4007.acapp.acwing.com.cn/wss/multiplayer/');

        this.start();
    }

    start() {
        this.receive();
    }

    receive() {
        let outer = this;

        this.ws.onmessage = function(e) {
            let data = JSON.parse(e.data);  // 将字符串变回JSON
            let uuid = data.uuid;
            if (uuid === outer.uuid) return false;  // 如果是给自己发送消息就直接过滤掉

            let event = data.event;
            if (event === 'create_player') {
                outer.receive_create_player(uuid, data.username, data.avatar);
            }
        };
    }

    send_create_player(username, avatar) {
        let outer = this;
        // stringify可以将JSON变为字符串
        this.ws.send(JSON.stringify({  // 向后台发送请求
            'event': 'create_player',
            'uuid': outer.uuid,
            'username': username,
            'avatar': avatar,
        }));
    }

    receive_create_player(uuid, username, avatar) {
        let player = new Player(this.playground, this.playground.width / 2 / this.playground.scale, 0.5, 0.05, 'white', 0.15, 'enemy', username, avatar);
        player.uuid = uuid;  // 每个Player的uuid为创建他的窗口的uuid
        this.playground.players.push(player);
    }
}
现在我们多开窗口即可看到多名玩家同步到一个地图上了。文章来源地址https://www.toymoban.com/news/detail-677056.html
到了这里,关于Django学习笔记-实现联机对战的文章就介绍完了。如果您还想了解更多内容,请在右上角搜索TOY模板网以前的文章或继续浏览下面的相关文章,希望大家以后多多支持TOY模板网!