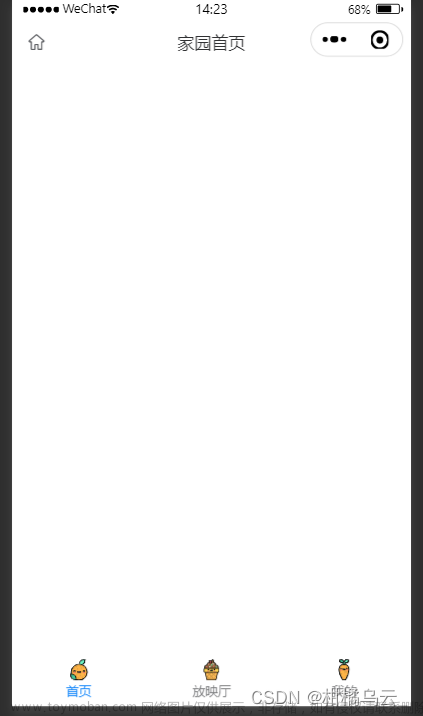
简单适配小程序胶囊和APP
首先把要用的API搞一起,封装一手
主要用到两个,设备系统信息和胶囊按钮信息
uni.getSystemInfoSync()
uni.getMenuButtonBoundingClientRect()
这里胶囊宽度我是直接用windowWidth减去left文章来源:https://www.toymoban.com/news/detail-678645.html
	// 小程序胶囊/占位宽
	getMenuButtonWidth() {
		let menuButtonWidth = 0;
		// #ifdef MP-WEIXIN
		let menuButtonInfo = uni.getMenuButtonBoundingClientRect().left
		let systemInfo = uni.getSystemInfoSync().windowWidth
		menuButtonWidth = systemInfo - menuButtonInfo
		// #endif
		return menuButtonWidth;
	},
	// 导航栏
	getSystemInfo() {
		let globalData = {
			statusBarHeight: 0, // 状态导航栏高度
			navWidth: 0, //宽度
			navHeight: 100, // 总体高度
			navigationBarHeight: 0, // 导航栏高度(标题栏高度)
			windowHeight: 0
		};
		// 状态栏高度
		globalData.statusBarHeight = uni.getSystemInfoSync().statusBarHeight
		globalData.navWidth = uni.getSystemInfoSync().windowWidth
		// #ifdef APP-PLUS
		globalData.navHeight = 50 + globalData.statusBarHeight
		// #endif
		// #ifdef MP-WEIXIN
		// 获取微信胶囊的位置信息 width,height,top,right,left,bottom
		const custom = wx.getMenuButtonBoundingClientRect()
		// 导航栏高度(标题栏高度) = 胶囊高度 + (顶部距离 - 状态栏高度) * 2
		globalData.navHeight = custom.height + (custom.top - globalData.statusBarHeight) * 2
		console.log("导航栏高度:"+globalData.navHeight)
		// #endif
		globalData.windowHeight = uni.getSystemInfoSync().windowHeight - globalData.navHeight - globalData
			.statusBarHeight
		return globalData
	}
}
然后整个导航栏开始封装
<template>
	<view class="">
		<view class="myNavBox">
			<view class="statusBox" :style="{height:statusHeight +'px'}"></view>
			<view class="customBar" :style="{height:customHeight+'px',paddingRight:menuButtonWidth+'px'}">
				<view class="left">
					<u-icon v-if="isBack" name='arrow-left' size='28' color="#666666"></u-icon>
					<slot v-else name='left'></slot>
				</view>
				<view class="center" :style="{left:customWidth+'px'}">
					<view v-if="title!==''" class="">
						{{title}}
					</view>
					<slot v-else name='center'>
					</slot>
				</view>
				<view class="right">
					<slot name='right'></slot>
				</view>
			</view>
		</view>

	</view>
</template>

<script>
	export default {
		props: {
			isBack: { //是否显示返回按钮
				type: [Boolean, String],
				default: false
			},
			rIsNull: { //右侧占位
				type: [Boolean, String],
				default: false
			},
			title: {
				type: [Boolean, String],
				default: ''
			}
		},
		data() {
			return {
				statusHeight: 20,
				customHeight: 0,
				customWidth: 375,
				menuButtonWidth: 0
			}
		},
		mounted() {
			this.statusHeight = this.$utils.getSystemInfo().statusBarHeight;
			this.customHeight = this.$utils.getSystemInfo().navHeight;
			this.customWidth = this.$utils.getSystemInfo().navWidth / 2;
			this.menuButtonWidth = this.$utils.getMenuButtonWidth();
		}
	}
</script>

<style lang="scss" scoped>
	.myNavBox {
		width: 100%;
		background: $my-nav-bgColor;

		.statusBox {
			width: 100%;
		}

		.customBar {
			width: 100%;
			/* #ifdef MP */
			box-sizing: border-box;
			/* #endif */
			position: relative;
			@include flexContent('', between);

			.left,
			.right {
				height: 100%;
				display: flex;
				align-items: center;
				box-sizing: border-box;
			}

			.center {
				position: absolute;
				transform: translateX(-50%);
				font-size: 36rpx;
				font-family: PingFang SC-Bold, PingFang SC;
				font-weight: bold;
				color: #333333;
			}

		}


	}
</style>
我这里直接把全部代码扔上去了,主要思路就是flex布局,然后中间的模块通过定位居中,这样就不会被胶囊影响到,导航栏高度就等于状态栏+胶囊高度,APP的就是状态栏+自己给个固定高度。文章来源地址https://www.toymoban.com/news/detail-678645.html
到了这里,关于uniapp 封装自定义导航栏的文章就介绍完了。如果您还想了解更多内容,请在右上角搜索TOY模板网以前的文章或继续浏览下面的相关文章,希望大家以后多多支持TOY模板网!


