参考:
http://springfox.github.io/springfox/
https://github.com/springfox/springfox
http://springfox.github.io/springfox/docs/current/
https://github.com/springfox/springfox-demos
https://github.com/springfox/springfox-demos/tree/2.9.2
https://github.com/springfox/springfox-demos/tree/3.0.0


1.引入依赖


        <!-- (io.springfox):springfox-swagger2, springfox-swagger-ui -->
        <dependency>
            <groupId>io.springfox</groupId>
            <artifactId>springfox-swagger2</artifactId>
            <version>2.10.5</version>
        </dependency>
        <dependency>
            <groupId>io.springfox</groupId>
            <artifactId>springfox-swagger-ui</artifactId>
            <version>2.10.5</version>
        </dependency>
        <!-- 2.10.5 版本需要该依赖:springfox-spring-webmvc -->
        <dependency>
            <groupId>io.springfox</groupId>
            <artifactId>springfox-spring-webmvc</artifactId>
            <version>2.10.5</version>
        </dependency>


2.配置类

import org.springframework.context.annotation.Bean;
import org.springframework.context.annotation.Configuration;
import springfox.documentation.builders.ApiInfoBuilder;
import springfox.documentation.builders.PathSelectors;
import springfox.documentation.builders.RequestHandlerSelectors;
import springfox.documentation.service.ApiInfo;
import springfox.documentation.service.Contact;
import springfox.documentation.spi.DocumentationType;
import springfox.documentation.spring.web.plugins.Docket;
import springfox.documentation.swagger2.annotations.EnableSwagger2WebMvc;


/**
 * 访问:http://localhost:8080/swagger-ui.html#/
 */
@Configuration
@EnableSwagger2WebMvc
public class Swagger2Config {
@Value("${spring.profiles.active}")
private String active;
private String basePackage = "com.xxx.xxx.controller";
@Bean
public Docket createRestApi() {
return new Docket(DocumentationType.SWAGGER_2)
.enable(!"prod".equals(active))
.apiInfo(apiInfo())
.select()
.apis(RequestHandlerSelectors.basePackage(basePackage))
.paths(PathSelectors.any())
.build();
}
private ApiInfo apiInfo() {
return new ApiInfoBuilder()
.title("Redis API 接口文档")
.description("Redis REST API 接口文档")
.termsOfServiceUrl("")
.contact(new Contact("维护人xxx","维护人url","维护人email"))
.license("xxx License Version 2.0")
.licenseUrl("http://www.xxx.xxx/licenses/LICENSE-2.0")
.version("1.0")
.build();
}
}
3.Controller层与入参实体类编写:
实体类:
@ApiModel
@NoArgsConstructor
@AllArgsConstructor
@Data
public class MapVo {
@ApiModelProperty(value = "key")
private String key;
@ApiModelProperty(value = "value")
private String value;
}
处理控制器:
@Api(value = "xxx接口", tags = "xxx 接口操作")
@Controller
@RequestMapping("/string")
public class TestConroller {
@Autowired
private RedisTemplate<String, String> redisTemplate;
@ApiOperation("set 操作 - 实体类")
@ResponseBody
@RequestMapping(value = "/setvo", method = RequestMethod.POST)
public String setValues(@RequestBody MapVo mapVo) {
redisTemplate.opsForValue().set(mapVo.getKey(), mapVo.getValue());
return "success";
}
@ApiOperation("get 操作")
@ResponseBody
@RequestMapping(value = "/get", method = RequestMethod.GET, produces = MediaType.APPLICATION_JSON_VALUE)
public String getValue(String key) {
String result = redisTemplate.opsForValue().get(key);
return result;
}
@ApiOperation("set 操作")
@ResponseBody
@RequestMapping(value = "/set", method = RequestMethod.GET)
public String setValue(String key, String value) {
redisTemplate.opsForValue().set(key, value);
return "success";
}
@ApiOperation("set value 操作")
@ResponseBody
@RequestMapping(value = "/set", method = RequestMethod.POST)
public String setVal(String key, String value) {
redisTemplate.opsForValue().set(key, value);
return "success set val";
}
}
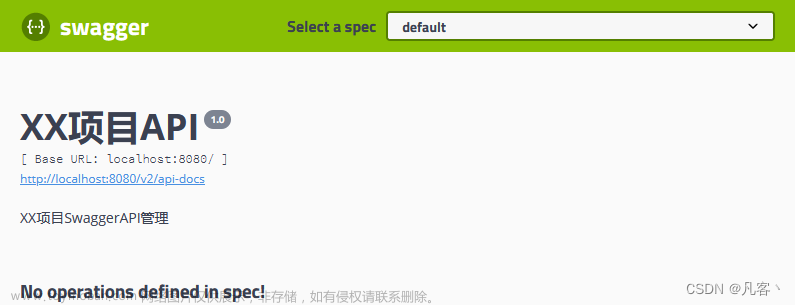
4.访问:http://localhost:8080/swagger-ui.html#/
5.常用注解
@EnableSwagger2WebMvc
@Api
@ApiOperation
@ApiModel 和 @ApiModelProperty
@ApiParam
@ApiImplicitParams 和 @ApiImplicitParam
@ApiResponses 和 @ApiResponse
文章来源地址https://www.toymoban.com/news/detail-681964.html
文章来源:https://www.toymoban.com/news/detail-681964.html
到了这里,关于swagger 2.10.5 整合 spring boot的文章就介绍完了。如果您还想了解更多内容,请在右上角搜索TOY模板网以前的文章或继续浏览下面的相关文章,希望大家以后多多支持TOY模板网!