前几天博主接到一个任务:5台HTCVIVEPro设备,其中一台设备进行演示,另外四台设备画面同步。
在设备没到之前,博主进行了一下前期准本工作:同一局域网 一台主机控制多台主机
PS:博主参考了其它博主大大的文章,感觉很有用!!!!!!
如果需要其它的一些TCP操作流程,请看这个博主大大的文章,很详细
【Unity】Socket网络通信(TCP) - 最基础的C#服务端通信流程_unity的tcp发送消息_IM雾凇的博客-CSDN博客
【Unity】Socket网络通信(TCP) - 实现简单的多人聊天功能_unity socket通信_IM雾凇的博客-CSDN博客
以下开始了博主操作的具体流程,希望对你有所帮助
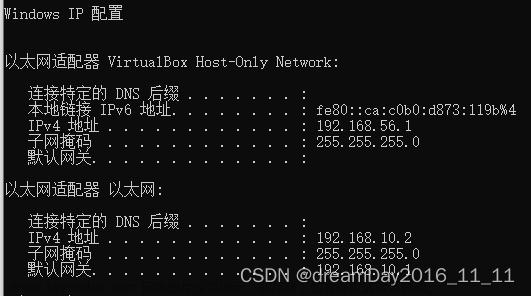
一:5台设备同一局域网下,且所有主机的防火墙需要关闭,要保证每台电脑都能互相ping通
1.如何关闭防火墙:


2.ping他人电脑
win+R打开cmd, ping 192.168.2.5 按下enter键之后,出现数据即为ping通
二.创建服务器,我们需要一台主机作为服务器(消息发送方)
1.打开VS,创建控制台应用程序
2.封装服务端ServerSocket
using System;
using System.Collections.Generic;
using System.Net;
using System.Net.Sockets;
using System.Text;
using System.Threading;

namespace TCPServer
{
    public class ServerSocket
    {
        private Socket socket;
        private bool isClose;
        private List<ClientSocket> clientList = new List<ClientSocket>();

        public void Start(string ip, int port, int clientNum)
        {
            isClose = false;
            socket = new Socket(AddressFamily.InterNetwork, SocketType.Stream, ProtocolType.Tcp);
            IPEndPoint iPEndPoint = new IPEndPoint(IPAddress.Parse(ip), port);
            socket.Bind(iPEndPoint);
            Console.WriteLine("服务器启动成功...IP:{0},端口:{1}", ip, port);
            Console.WriteLine("开始监听客户端连接...");
            socket.Listen(clientNum);

            ThreadPool.QueueUserWorkItem(AcceptClientConnect);
            ThreadPool.QueueUserWorkItem(ReceiveMsg);
        }

        /// <summary>
        /// 等待客户端连接
        /// </summary>
        /// <param name="obj"></param>
        private void AcceptClientConnect(object obj)
        {
            Console.WriteLine("等待客户端连入..."+ (!isClose));
            while (!isClose)
            {
                Socket clientSocket = socket.Accept();
                ClientSocket client = new ClientSocket(clientSocket, this);
                Console.WriteLine("客户端{0}连入...", clientSocket.RemoteEndPoint.ToString());
                client.SendMsg(Encoding.UTF8.GetBytes("欢迎连入服务端..."));
                clientList.Add(client);
            }
        }

        /// <summary>
        /// 接收消息
        /// </summary>
        /// <param name="obj"></param>
        private void ReceiveMsg(object obj)
        {
            int i;
            while (!isClose)
            {
                if (clientList.Count > 0)
                {
                    for(i = 0; i < clientList.Count; i++)
                    {
                        try
                        {
                            clientList[i].ReceiveClientMsg();
                        }
                        catch(Exception e)
                        {
                            Console.WriteLine(e.Message);
                        }
                    }
                }
            }
        }

        /// <summary>
        /// 发送消息
        /// </summary>
        /// <param name="msg"></param>
        /// <param name="clientID"></param>
        public void BroadcastMsg(byte[] msg, int clientID)
        {
            if (isClose)
                return;

            for(int i = 0; i < clientList.Count; i++)
            {
                if (clientList[i].clientID != clientID)
                {
                    clientList[i].SendMsg(msg);
                }
            }
        }

        /// <summary>
        /// 释放连接
        /// </summary>
        public void Close()
        {
            isClose = true;
            for(int i = 0; i < clientList.Count; i++)
            {
                clientList[i].Close();
            }

            clientList.Clear();

            socket.Shutdown(SocketShutdown.Both);
            socket.Close();
            socket = null;
        }
    }
}
3.封装客户端连入时返回的ClientSocket
using System;
using System.Net.Sockets;
using System.Text;
using System.Threading;

namespace TCPServer
{
    public class ClientSocket
    {
        public static int CLIENT_BEGIN_ID = 1;
        public int clientID;
        public string IP;
        private Socket socket;
        private ServerSocket serverSocket;

        public ClientSocket(Socket clientSocket, ServerSocket serverSocket)
        {
            socket = clientSocket;
            this.serverSocket = serverSocket;
            IP = clientSocket.RemoteEndPoint.ToString();

            clientID = CLIENT_BEGIN_ID;
            ++CLIENT_BEGIN_ID;
        }

        /// <summary>
        /// 发送消息
        /// </summary>
        /// <param name="msg"></param>
        public void SendMsg(byte[] msg)
        {
            if(socket != null)
                socket.Send(msg);
        }

        /// <summary>
        /// 接收消息
        /// </summary>
        public void ReceiveClientMsg()
        {
            if (socket == null)
                return;

            if(socket.Available > 0)
            {
                byte[] msgBytes = new byte[1024*1024];
                int msgLength = socket.Receive(msgBytes);

                byte[] tempMsg = new byte[msgLength];
                Buffer.BlockCopy(msgBytes, 0, tempMsg, 0, msgLength);
                serverSocket.BroadcastMsg(tempMsg, clientID);

            }
        }


        /// <summary>
        /// 释放连接
        /// </summary>
        public void Close()
        {
            socket.Shutdown(SocketShutdown.Both);
            socket.Close();
            socket = null;
        }
    }
}
3.主函数,用来读取配置文件的IP,以及传参,(配置文件我在这里放到了C盘,因为考虑到开机自启的项目,文件格式txt的)

using System;
using System.IO;
using System.Text;

namespace TCPServer
{
    class Program
    {
        private static ServerSocket serverSocket;
        static void Main(string[] args)
        {
            string path = @"C:\config.txt";
            string IP = "127.0.0.1";
            int PORT = 8080;
            if (File.Exists(path))
            {
                string[] str = File.ReadAllLines(path);
                if (str[0].StartsWith("主设备IP"))
                {
                    IP = str[0].Split('=')[1];
                }
                if (str[1].StartsWith("主设备PORT"))
                {
                    PORT = int.Parse(str[1].Split('=')[1]);
                }
            }
            serverSocket = new ServerSocket();
            serverSocket.Start(IP, PORT, 1024);

            while (true)
            {
                string inputStr = Console.ReadLine();
                if (inputStr == "Quit")
                {
                    serverSocket.Close();
                    break;
                }
                else if (inputStr.Substring(0, 2) == "B:")
                {
                    Console.WriteLine("发送..." + inputStr.Substring(2));
                    serverSocket.BroadcastMsg(Encoding.UTF8.GetBytes(inputStr.Substring(2)), -1);
                }
            }
        }

    }
}
4.打包控制台.exe运行程序(详细步骤请看这位大大的博客,按照方法二即可)
C# 控制台程序的开发和打包为一个exe文件_c# 生成exe_西凉的悲伤的博客-CSDN博客
这是我打包之后的文件
三,开始搭建五台设备客户端Unity运行程序
1.搭建如下图UI界面,并在父物体上挂载脚本MainManager.cs
备注:
1.主控制机既是服务器又是客户端;
2.主控制机作为发送方发送指令到另外4台主机上
3.另外4台设备只负责接收指令即可
4.需要把上述配置文件config.txt复制一份放在Asset目录下的StreamingAssets文件夹里(因为客户端需要连接服务器,金主爸爸们的主机IP我们也不晓得,只能做配置文件啦)
PS:在Mainmaneger这里我做了一个判断,若当前运行程序的主机IP与服务器IP一致,那么即为发送方;反之即为接收方
PS:如何获取本地主机的IP
下面直接上MainManager代码:
using System;
using System.Net.NetworkInformation;
using System.Net.Sockets;
using UnityEngine;
using UnityEngine.UI;

public class MainManager : MonoBehaviour
{
    public Button sendBtn;
    public InputField inputField;
    public Text NameText;
    public ScrollRect sr;
    private string curDeviceIP = String.Empty;

    void Start()
    {
        sendBtn.onClick.AddListener(SendMsg);
        curDeviceIP = GetLocalIP();
        if (curDeviceIP == NetManager.Instance.IP)
        {
            inputField.gameObject.SetActive(true);
            sendBtn.gameObject.SetActive(true);
            NameText.text = "发送方:" + curDeviceIP;
            NameText.color = Color.red;
        }
        else
        {
            inputField.gameObject.SetActive(false);
            sendBtn.gameObject.SetActive(false);
            NameText.text = "接收方:" + curDeviceIP;
            NameText.color = Color.blue;
        }

        NetManager.Instance.ConnectServer();
    }

    // Update is called once per frame
    void Update()
    {

    }

    void SendMsg()
    {
        if (inputField.text != "")
        {
            ChatMsg chatMsg = new ChatMsg();
            chatMsg.chatStr = inputField.text;
            NetManager.Instance.Send<ChatMsg>(chatMsg);
            UpdateChatInfo(chatMsg);
            inputField.text = "";
        }
    }
    /// <summary>
    /// 获取本地ip
    /// </summary>
    /// <returns></returns>
    string GetLocalIP()
    {
        NetworkInterface[] adapters = NetworkInterface.GetAllNetworkInterfaces();
        foreach (NetworkInterface adater in adapters)
        {
            if (adater.Supports((NetworkInterfaceComponent.IPv4)))
            {
                UnicastIPAddressInformationCollection uniCast = adater.GetIPProperties().UnicastAddresses;
                if (uniCast.Count > 0)
                {
                    foreach (UnicastIPAddressInformation uni in uniCast)
                    {
                        if (uni.Address.AddressFamily == AddressFamily.InterNetwork)
                        {
                            return uni.Address.ToString();
                        }
                    }
                }
            }
        }

        return "127.0.0.1";
    }
    public void UpdateChatInfo(ChatMsg msgInfo)
    {
        Text chatInfoText = Instantiate(Resources.Load<Text>("UI/MsgInfoText"), sr.content);
        chatInfoText.text = NameText.text + ":" + msgInfo.chatStr;
    }
}
2.创建NetManager.cs用来连接服务器等
在这里需注意连接服务器时的IP和PORT
直接上NetManager.cs代码
using System.Collections;
using System.Collections.Generic;
using System.Net;
using System.Net.Sockets;
using System.Text;
using System.Threading;
using UnityEngine;
using System;
using System.IO;
using System.Net.NetworkInformation;

public class NetManager : MonoBehaviour
{
    public static NetManager Instance => instance;
    private static NetManager instance;

    private Socket socket;

    private bool isConnect;

    private Queue<byte[]> sendQueue = new Queue<byte[]>();
    private Queue<byte[]> receiveQueue = new Queue<byte[]>();

    private byte[] receiveBytes = new byte[1024 * 1024];

    private MainManager mainManager;

    public string path = String.Empty;
    public string IP = String.Empty;
    public int PORT = 8080;

    private void Awake()
    {
        if (instance == null)
        {
            instance = this;
            DontDestroyOnLoad(gameObject);
        }
        path = Application.streamingAssetsPath + "/config.txt";
        IP = "127.0.0.1";
        PORT = 8080;
        if (File.Exists(path))
        {
            string[] str = File.ReadAllLines(path);
            if (str[0].StartsWith("主设备IP"))
            {
                IP = str[0].Split('=')[1];
            }
            if (str[1].StartsWith("主设备PORT"))
            {
                PORT = int.Parse(str[1].Split('=')[1]);
            }
        }
    }

    private void Start()
    {
        GameObject chatPanelObj = GameObject.Find("MainManager");
        mainManager = chatPanelObj.GetComponent<MainManager>();
    }

    // Update is called once per frame
    void Update()
    {
        if (receiveQueue.Count > 0)
        {
            ReadingMsgType(receiveQueue.Dequeue());
        }
    }

    /// <summary>
    /// 连接服务器
    /// </summary>
    /// <param name="ip">服务器IP地址</param>
    /// <param name="port">服务器程序端口号</param>
    public void ConnectServer()
    {
        //如果在连接状态,就不执行连接逻辑了
        if (isConnect)
            return;

        //避免重复创建socket
        if (socket == null)
            socket = new Socket(AddressFamily.InterNetwork, SocketType.Stream, ProtocolType.Tcp);

        //连接服务器
        IPEndPoint ipEndPoint = new IPEndPoint(IPAddress.Parse(IP), PORT);

        try
        {
            socket.Connect(ipEndPoint);
        }
        catch (SocketException e)
        {
            print(e.ErrorCode + e.Message);
            return;
        }

        isConnect = true;

        //开启发送消息线程
        ThreadPool.QueueUserWorkItem(SendMsg_Thread);
        //开启接收消息线程
        ThreadPool.QueueUserWorkItem(ReceiveMsg_Thread);
    }

    /// <summary>
    /// 发送消息
    /// </summary>
    /// <typeparam name="T"></typeparam>
    /// <param name="msg"></param>
    public void Send<T>(T msg) where T : BaseMsg
    {
        //将消息放入到消息队列中
        sendQueue.Enqueue(msg.SerializeData());
    }

    private void SendMsg_Thread(object obj)
    {
        while (isConnect)
        {
            //如果消息队列中有消息,则发送消息
            if (sendQueue.Count > 0)
            {
                socket.Send(sendQueue.Dequeue());
            }
        }
    }

    /// <summary>
    /// 接收消息
    /// </summary>
    /// <param name="obj"></param>
    private void ReceiveMsg_Thread(object obj)
    {
        int msgLength;
        while (isConnect)
        {
            if (socket.Available > 0)
            {
                msgLength = socket.Receive(receiveBytes);
                receiveQueue.Enqueue(receiveBytes);
            }
        }
    }

    private void ReadingMsgType(byte[] msg)
    {
        int msgId = BitConverter.ToInt32(msg, 0);
        switch (msgId)
        {
            case 1001:
                ReadingChatMsg(msg);
                break;
        }
    }

    private void ReadingChatMsg(byte[] msg)
    {
        ChatMsg chatMsg = new ChatMsg();
        chatMsg.ReadingData(msg, 4);
        mainManager.UpdateChatInfo(chatMsg);
    }

    public void Close()
    {
        if (socket != null && isConnect)
        {
            socket.Shutdown(SocketShutdown.Both);
            socket.Close();

            isConnect = false;
        }
    }

    private void OnDestroy()
    {
        Close();
    }
}
以上是两个主要的函数,其它的可自行看下方源文件
运行顺序:先打开服务器,在每台电脑上依次打开unity运行程序即可。
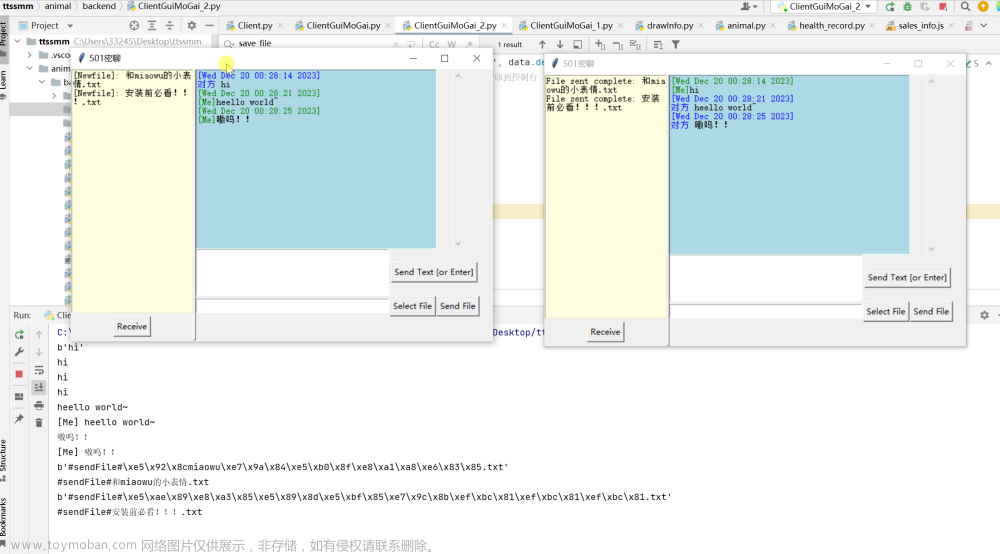
下面是我最终的运行效果图
源文件链接:链接:https://pan.baidu.com/s/1pTwGj37ozMlq58OHcIJPIg
提取码:1234
--来自百度网盘超级会员V5的分享文章来源:https://www.toymoban.com/news/detail-686730.html
https://gitee.com/various-tool-scripts/tcptest.githttps://gitee.com/various-tool-scripts/tcptest.git谨以此文记录博主自己的个人历程,希望对大家有所帮助文章来源地址https://www.toymoban.com/news/detail-686730.html
到了这里,关于【Unity】(Socket)TCP 实现同一局域网 一台主机控制多台主机的文章就介绍完了。如果您还想了解更多内容,请在右上角搜索TOY模板网以前的文章或继续浏览下面的相关文章,希望大家以后多多支持TOY模板网!


