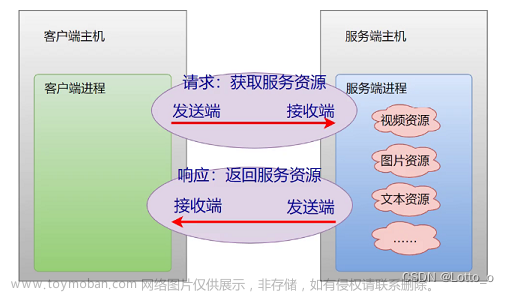
我们知道一般我们的请求都是http请求,由客户端发起,然后待服务端返回数据之后,这一个请求就结束了。但是,有些情况下,服务端需要主动给客户端发消息(比如推送一些消息),服务端与客户端需要进行双向交流,此时,http就显得有些无能为力了。所以就有了全双工的websocket:即客户端与服务端建立连接之后,就可以双向通信了。服务端无需等待客户端发送请求消息,也可以通过websocket的连接主动给客户端发送消息了。接下来,记录一下我今天的用python实现websocket的打怪升级之旅
python提供了一个高级库websockets来实现websocket。官网链接:
https://websockets.readthedocs.io/en/stable/
它需要借助asyncio这个异步框架来实现。官网上有一个服务端和客户端的例子:
服务端Server代码
import asyncio
import websockets

async def echo(websocket, path):
    #fetch msg
    async for message in websocket:
        print("got a message:{}".format(message))
        await websocket.send(message)

async def main():
    # start a websocket server
    async with websockets.serve(echo, "localhost", 8765):
        await asyncio.Future()  # run forever

asyncio.run(main())
客户端Client代码
import asyncio
import websockets

async def hello():
    async with websockets.connect("ws://localhost:8765") as websocket:
        await websocket.send("Hello world!")
        await websocket.recv()

asyncio.run(hello())
介绍一下上面的两段代码:
首先是服务端,一个重要的方法serv,有三个重要的参数:ws_handler,host,port
await websockets.server.serve(ws_handler, host=None, port=None)ws_handler:函数名称,该函数用来处理一个连接,它必须是一个协程函数,接收2个参数:WebSocketServerProtocol、path。host:socket绑定的ip地址port:socket绑定的端口
websockets提供了一个serv方法用来开启一个websocket服务,即绑定一个ip和地址,然后开始监听数据。一旦有客户端连接上来的话,它就创建一个WebSocketServerProtocol,该对象可以用来处理这个连接。然后会把它代理给ws_handler函数。
ws_handler就相当于是serv()函数的代理方法。它维护着一个connection。WebSocketServerProtocol可以用来收发数据。path代表着访问路径(后面会说)。上面的echo函数就是serv的ws_handler。它的参数websocket实际上就是一个WebSocketServerProtocol对象。
可以通过for循环遍历WebSocketServerProtocol对象获取msg,通过WebSocketServerProtocol的send()方法发送数据
然后是客户端,websockets提供了一个connect的方法连接服务端并会得到一个websocket(即一个WebSocketClientProtocol对象),这个对象提供了send()和recv()方法分别来发送和接收数据。
分别运行上面的两段代码,你就能看到服务端与客户端实现了互相发送数据了。但是好像少了点什么,上面我们直接通过ip和port进行连接,并没有uri。我们打印path,现实为“/".我们在访问链接后面可以任意加内容,它也照常能连接访问。但是通常我们会为不同的操作定义不同的uri。一个函数里面处理一种类型的消息。比如我希望开灯的uri为/light/on",关灯为/light/off,其它的uri全都不能无效,返回错误。这里就需要用到路由了。
最傻的办法就是在wshandler函数里面对path进行判断,然后分别去执行不同的方法。这样就一点也不优雅了。我们可以使用装饰器,将wshandler函数包裹起来。其实python已经有相应的库支持uri的路由了。这里我使用的是websockets-routes,它的实现原理就是装饰器。
websockets-routes官网:https://pypi.org/project/websockets-routes/
首先我们通过pip安装websockets-routes。
pip install websockets-routes
然后我们以开关灯为例,看下服务端和客户端的实现
服务端Server代码:
import asyncio
import websockets
import websockets_routes

# 初始化一个router对象
router = websockets_routes.Router()


@router.route("/light/{status}") #添加router的route装饰器,它会路由uri。
async def light_status(websocket, path):
    async for message in websocket:
        print("got a message:{}".format(message))
        print(path.params['status'])
        await asyncio.sleep(2)  # 假装模拟去操作开关灯
        if (path.params['status'] == 'on'):
            await  websocket.send("the light has turned on")
        elif path.params["status"] == 'off':
            await  websocket.send("the light has turned off")
        else:
            await  websocket.send("invalid params")


async def main():
    # rooter是一个装饰器,它的__call__函数有三个参数,第一个参数是self。
    # 所以这里我们需要使用lambda进行一个转换操作,因为serv的wshander函数只能接收2个参数
    async with websockets.serve(lambda x, y: router(x, y), "127.0.0.1", 8765):
        print("======")
        await  asyncio.Future()  # run forever


if __name__ == "__main__":
    asyncio.run(main())
客户端client代码:
import asyncio
import websockets

async def hello():
    try:
        async with websockets.connect('ws://127.0.0.1:8765/light/on') as websocket:
            light_addr = '00-12-4b-01'
            await websocket.send(light_addr)
            recv_msg = await websocket.recv()
            print(recv_msg)
    except websockets.exceptions.ConnectionClosedError as e:
        print("connection closed error")
    except Exception as e:
        print(e)
await hello()
运行服务端之后,我们可以尝试修改不同的url看结果:
ws://127.0.0.1:8765/light/on #连接正常,收到消息:the light has turned on
ws://127.0.0.1:8765/light/off#连接正常,收到消息:the light has turned off
ws://127.0.0.1:8765/light/1#连接正常,收到消息:invalid params
ws://127.0.0.1:8765/switch/on#连接异常,收到异常消息:connection closed error
websocket_router的实现原理是装饰器。首先需要初始化一个router对象,它的route方法返回一个装饰器,所以通过在需要路由的函数上面加上router.route(path)进行装饰即可。它会帮我们实现对uri的路由,如果有多个方法,只要在每个方法上都加上它的装饰器即可。如果找不到对应的uri,它就会关闭连接,返回一个4040错误。
path可以带参数,参数部分在we'bsocket_router中是RoutePath对象。
websocket_router还可以用来装饰类。暂时还没弄懂它装饰类的操作,待续...文章来源:https://www.toymoban.com/news/detail-686782.html
作者:倔犟的贝壳
链接:https://www.jianshu.com/p/b7df44b7c7f7
来源:简书
著作权归作者所有。商业转载请联系作者获得授权,非商业转载请注明出处。文章来源地址https://www.toymoban.com/news/detail-686782.html
到了这里,关于python网络编程之websocket的文章就介绍完了。如果您还想了解更多内容,请在右上角搜索TOY模板网以前的文章或继续浏览下面的相关文章,希望大家以后多多支持TOY模板网!


