Neo4 j概览

相关版本信息
jdk 1.8

neo4j-enterprise-3.5.35

idea 2021

maven 3.6.3
SpringBoot整合neo4j实操
1、配置文件
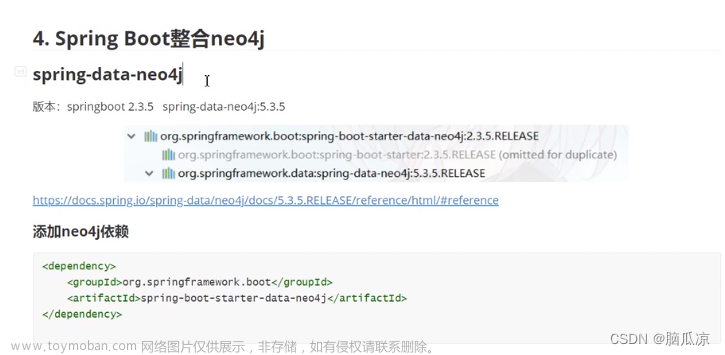
Pom文件中引入依赖 Spring生态中Spring-data部分不仅仅提供了Spring-data-jpa , 也提供了Spring-data-neo4j 支持spring和 neo4j的完美融合,pom.xml 文件中依赖
        <dependency>
            <groupId>org.springframework.boot</groupId>
            <artifactId>spring-boot-starter-data-neo4j</artifactId>
        </dependency>
yml文件中配置连接属性
spring: data: neo4j: uri: bolt://localhost:7687 username: neo4j password: 123 #打印neo4j生成的Cypher logging: level: org: neo4j: ogm: drivers: bolt: request: BoltRequest: DEBUG
2、实体类(NodeEntity)
/**
*部门节点实体类
*/
@NodeEntity(label = "Dept")
@Data
@Builder
public class Dept {
@Id
@GeneratedValue
private Long id;
@Property(name = "deptName")
private String deptName;
}
/**
*关系 实体类
*/
@RelationshipEntity(type = "relationShip")
@Data
@Builder
public class RelationShip {
@Id
@GeneratedValue
private Long id;
@StartNode
private Dept parent;
@EndNode
private Dept child;
}
@NodeEntity: 标明是一个节点实体@RelationshipEntity:标明是一个关系实体@Id:实体主键@Property:实体属性@GeneratedValue:实体属性值自增@StartNode:开始节点(可以理解为父节点)@EndNode:结束节点(可以理解为子节点)、
3、创建repositories类(类似于封装过的dao)
@Repository
public interface DeptRepository extends Neo4jRepository<Dept,Long> {
@Query("MATCH (d:dept) WHERE d.deptName CONTAINS $title RETURN d")
List<Dept> findByTitle(@Param("title") String title);
}
@Query:编写neo4j 的Cypher语句, 变量格式为$
源码解析:Neo4jRepository.class
@NoRepositoryBean
public interface Neo4jRepository<T, ID extends Serializable> extends PagingAndSortingRepository<T, ID> {
<S extends T> S save(S var1, int var2);
<S extends T> Iterable<S> save(Iterable<S> var1, int var2);
Optional<T> findById(ID var1, int var2);
Iterable<T> findAll();
Iterable<T> findAll(int var1);
Iterable<T> findAll(Sort var1);
Iterable<T> findAll(Sort var1, int var2);
Iterable<T> findAllById(Iterable<ID> var1);
Iterable<T> findAllById(Iterable<ID> var1, int var2);
Iterable<T> findAllById(Iterable<ID> var1, Sort var2);
Iterable<T> findAllById(Iterable<ID> var1, Sort var2, int var3);
Page<T> findAll(Pageable var1);
Page<T> findAll(Pageable var1, int var2);
}
Neo4jRepository已经经过多层封装,包含了实现了crud基本功能外,再集成了分页功能,之后提炼了常用查询的方法,提高了代码复用性。
4、创建Neo4jConfig配置
package io.fredia.femicro.graph.config;
import org.springframework.context.annotation.Configuration;
import org.springframework.data.neo4j.repository.config.EnableNeo4jRepositories;
import org.springframework.transaction.annotation.EnableTransactionManagement;
@Configuration
@EnableNeo4jRepositories(basePackages = "com.example.demo.repository")
@EnableTransactionManagement // 激活隐式事务
public class Neo4jConfig {
}
注解解析:@Configuration: springboot声明配置类,一般为单例模式@EnableNeo4jRepositories: Neo4j扫描Repositories所在包,可以理解为mybatis扫描mapper包@EnableTransactionManagement: Neo4j完整的支持ACID,所以此处开启事务功能。
5、编写Service类
@Service
public class DeptService {
@Autowired
private DeptRepository deptRepository;
public Iterable<Dept> saveAll(List<Dept> depts) {
return deptRepository.saveAll(depts);
}
public void deleteById(Long id) {
deptRepository.deleteById(id);
}
public void deleteAll() {
deptRepository.deleteAll();
}
public List<Dept> findByTitle(String title) {
return deptRepository.findByTitle(title);
}
}
6、编写Controller类
@RestController
public class TestController {
@Autowired
private DeptService deptService;
@Autowired
private RelationShipService relationShipService;
/**
* CEO
* -设计部
* - 设计1组
* - 设计2组
* -技术部
* - 前端技术部
* - 后端技术部
* - 测试技术部
*/
@GetMapping("/create")
public void create(){
Dept CEO = Dept.builder().deptName("CEO").build();
Dept dept1 = Dept.builder().deptName("设计部").build();
Dept dept11 = Dept.builder().deptName("设计1组").build();
Dept dept12 = Dept.builder().deptName("设计2组").build();
Dept dept2 = Dept.builder().deptName("技术部").build();
Dept dept21 = Dept.builder().deptName("前端技术部").build();
Dept dept22 = Dept.builder().deptName("后端技术部").build();
Dept dept23 = Dept.builder().deptName("测试技术部").build();
List<Dept> depts = new ArrayList<>(Arrays.asList(CEO,dept1,dept11,dept12,dept2,dept21,dept22,dept23));
deptService.saveAll(depts);
RelationShip relationShip1 = RelationShip.builder().parent(CEO).child(dept1).build();
RelationShip relationShip2 = RelationShip.builder().parent(CEO).child(dept2).build();
RelationShip relationShip3 = RelationShip.builder().parent(dept1).child(dept11).build();
RelationShip relationShip4 = RelationShip.builder().parent(dept1).child(dept12).build();
RelationShip relationShip5 = RelationShip.builder().parent(dept2).child(dept21).build();
RelationShip relationShip6 = RelationShip.builder().parent(dept2).child(dept22).build();
RelationShip relationShip7 = RelationShip.builder().parent(dept2).child(dept23).build();
List<RelationShip> relationShips = new ArrayList<>(Arrays.asList(relationShip1,relationShip2,relationShip3,relationShip4,relationShip5
,relationShip6,relationShip7));
relationShipService.saveAll(relationShips);
}
@GetMapping("getById")
public RelationShip getById(Long id){
Optional<RelationShip> byId = relationShipService.findById(id);
return byId.orElse(null);
}
@GetMapping("deleteRelationShip")
public void deleteRelationShip(Long id){
relationShipService.deleteById(id);
}
@GetMapping("deleteDept")
public void deleteDept(Long id){
deptService.deleteById(id);
}
@GetMapping("deleteAll")
public void deleteAll(){
deptService.deleteAll();
relationShipService.deleteAll();
}
@GetMapping("getByTitle")
public List<Dept> getByTitle(@RequestParam("title") String title){
return deptService.findByTitle(title);
}
}
测试结果
启动项目 访问本地地址:实现新增功能
http://localhost:8088/create
登录本机的Neo4j :localhost:7474
查看Neo4j 数据库内容: 
访问本地地址:通过Cypher语句实现查询功能
http://localhost:8088/getByTitle?title=技术
控制台打印日志:  文章来源:https://www.toymoban.com/news/detail-693532.html
查看Neo4j 数据库内容:  文章来源地址https://www.toymoban.com/news/detail-693532.html
到了这里,关于Spring Boot整合neo4j的文章就介绍完了。如果您还想了解更多内容,请在右上角搜索TOY模板网以前的文章或继续浏览下面的相关文章,希望大家以后多多支持TOY模板网!


