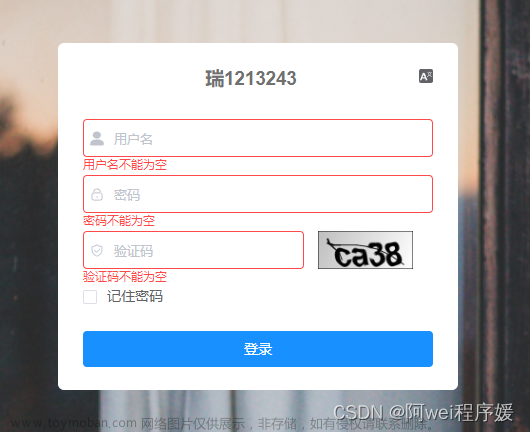
ps: 效果图放前面,符合的往下看,不符合的出门右转,希望多多点赞评论支持。

- 三种语言模式,分别是中文、英文、日文

- 批量翻译

- 最后的结果

配置vue-i18n
1、下载安装vue-i18n,@9以上的版本。
2、创建对应文件夹
3、对应文件夹中代码如下
helper.ts
import type { LocaleType } from '@/types/i18n';
import { set } from 'lodash-es';

export const loadLocalePool: LocaleType[] = [];

export function setHtmlPageLang(locale: LocaleType) {
    document.querySelector('html')?.setAttribute('lang', locale);
}

export function setLoadLocalePool(cb: (loadLocalePool: LocaleType[]) => void) {
    cb(loadLocalePool);
}
export function genMessage(langs: Record<string, Record<string, any>>, prefix = 'lang') {
    const obj: Recordable = {};

    Object.keys(langs).forEach((key) => {
        const langFileModule = langs[key].default;
        let fileName = key.replace(`./${prefix}/`, '').replace(/^\.\//, '');
        const lastIndex = fileName.lastIndexOf('.');
        fileName = fileName.substring(0, lastIndex);
        const keyList = fileName.split('/');
        const moduleName = keyList.shift();
        const objKey = keyList.join('.');

        if (moduleName) {
            if (objKey) {
                set(obj, moduleName, obj[moduleName] || {});
                set(obj[moduleName], objKey, langFileModule);
            } else {
                set(obj, moduleName, langFileModule || {});
            }
        }
    });
    return obj;
}
setupI18n.ts
import type { App } from 'vue';
import type { I18n, I18nOptions } from 'vue-i18n';
import { createI18n } from 'vue-i18n';
import { setHtmlPageLang, setLoadLocalePool } from './helper';
import { useLocaleStore } from '@/store/modules/locale'

export let i18n: ReturnType<typeof createI18n>;
async function createI18nOptions(): Promise<I18nOptions> {
    const store = useLocaleStore()
    const locale = store.getLocalInfo
    const defaultLocal = await import(`./lang/${locale}.ts`);
    const message = defaultLocal.default?.message ?? {};

    setHtmlPageLang(locale);
    setLoadLocalePool((loadLocalePool) => {
        loadLocalePool.push(locale);
    });
    return {
        legacy: false, //false:新版API
        locale,//当前语言
        fallbackLocale: 'zh_CN', //找不到语言环境,回滚到中文
        messages: {
            [locale]: message, //对应的语言环境具体值
        },
        availableLocales: ['zh_CN', 'en'],//包含的语言种类
        sync: true,  //是否从全局继承语言环境
        silentTranslationWarn: true, //true:关闭翻译警告
        missingWarn: false,//是否显示缺失翻译的警告信息
        silentFallbackWarn: true,//忽略回退警告
    };
}
export async function setupI18n(app: App) {
    const options = await createI18nOptions();
    i18n = createI18n(options) as I18n;
    app.use(i18n);
}
useLocale.ts
import type { LocaleType } from '@/types/i18n';
import { i18n } from './setupI18n';
import { unref, computed } from 'vue';
import { useLocaleStore } from '@/store/modules/locale'
import { loadLocalePool, setHtmlPageLang } from './helper';
interface LangModule {
    message: Recordable;
    dateLocale: Recordable;
    dateLocaleName: string;
}

function setI18nLanguage(locale: LocaleType) {
    const store = useLocaleStore()
    if (i18n.mode === 'legacy') {
        i18n.global.locale = locale;
    } else {
        (i18n.global.locale as any).value = locale;
    }
    store.setLocaleInfo({ locale })
    setHtmlPageLang(locale);
}

export function useLocale() {
    const store = useLocaleStore()
    const getLocale = computed(() => store.getLocalInfo);
    const getShowLocalePicker = computed(() => store.getShowPicker);
    const getAntdLocale = computed((): any => {
        return i18n.global.getLocaleMessage(store.getAntdLocale);
    });
    async function changeLocale(locale: LocaleType) {
        const globalI18n = i18n.global;
        const currentLocale = unref(globalI18n.locale);
        if (currentLocale === locale) {
            return locale;
        }
        if (loadLocalePool.includes(locale)) {
            setI18nLanguage(locale);
            return locale;
        }
        const langModule = ((await import(`./lang/${locale}.ts`)) as any).default as LangModule;
        if (!langModule) return;
        const { message } = langModule;

        globalI18n.setLocaleMessage(locale, message);
        loadLocalePool.push(locale);
        setI18nLanguage(locale);
        return locale;
    }
    return {
        getLocale,
        getShowLocalePicker,
        changeLocale,
        getAntdLocale,
    };
}
4、创建全局当前语言类型值,如果需要刷新保持,还应将值保存到localStorage中。
locale.ts
import { defineStore } from 'pinia';
import type { LocaleType } from '@/types/i18n'
type LocaleState = {
    localInfo: LocaleType,
    availableLocales: LocaleType[],
    showPicker: boolean,
    antdLocale: LocaleType
}
type SetLocalInfoOpt = {
    locale: LocaleType,
}
export const useLocaleStore = defineStore({
    id: 'app-locale',
    state: (): LocaleState => ({
        localInfo: 'zh_CN',
        showPicker: false,
        availableLocales: [],
        antdLocale: 'zh_CN'
    }),
    getters: {
        getLocalInfo(): LocaleType {
            return this.localInfo
        },
        getShowPicker(): boolean {
            return this.showPicker
        },
        getAntdLocale(): LocaleType{
            return this.antdLocale
        }
    },
    actions: {
        setLocaleInfo({ locale }: SetLocalInfoOpt) {
            this.localInfo = locale
        },
    }
})
5、lang文件夹下创建对应翻译的入口en.ts\ja.ts\zh_CH.ts
import { genMessage } from '../helper';
import antdLocale from 'ant-design-vue/es/locale/en_US';//更改对应的类型

const modules:Record<string, Record<string, any>> = import.meta.globEager('./en/**/*.json'); //更改对应的类型
export default {
  message: {
    ...genMessage(modules, 'en'),//更改对应的类型
    antdLocale,
  },
  dateLocale: null,
  dateLocaleName: 'en',//更改对应的类型
};
5、main.ts中引入
import { setupI18n } from '@/locales/setupI18n';
await setupI18n(app);
6、页面中引入
<template>
    <p>
        <a-button @click="onChange('zh_CN')">中文</a-button>
        <a-button @click="onChange('en')">英文</a-button>
        <a-button @click="onChange('ja')">日文</a-button>
    </p>
    <div>{{ t('common.a') }}</div>
    <div>{{ t('common.b') }}</div>
    <div>{{ t('common.c') }}</div>
    <div>{{ t('common.d') }}</div>
    <div>{{ t('common.e') }}</div>
</template>
<script lang="ts">
import { defineComponent } from 'vue'
import { useI18n } from '@/hooks/web/useI18n';
import type { LocaleType } from '@/types/i18n';
import { useLocale } from '@/locales/useLocale';
export default defineComponent({
    setup() {

        const { changeLocale } = useLocale();
        const { t } = useI18n();
        async function onChange(local: LocaleType) {
            await changeLocale(local as LocaleType);
        }
        return {
            t,
            onChange
        }
    }
})
</script>
<style lang="less"></style>
至此,页面上的语言切换可以了。接下来是如何自动翻译
VSCODE插件I18n Ally
1、插件市场下载
2、在.vscode下新建settings.json文件
3、在配置文件中新增关于i18n的设置。
{
    "i18n-ally.localesPaths": [
        "src/locales/lang"
    ], // 翻译文件路径 (自动生成) 相对于项目根目录的语言环境目录路径
    "i18n-ally.pathMatcher": "{locale}/{namespaces}.{ext}",
    "i18n-ally.enabledParsers": [
        "json"
    ],
    "i18n-ally.sourceLanguage": "zh-CN",
    "i18n-ally.displayLanguage": "zh-CN",
    "i18n-ally.enabledFrameworks": [
        "vue",
        "react"
    ],
    // 如下须要手动配置
    "i18n-ally.keystyle": "nested", // 翻译路径格式 (翻译后变量格式 nested:嵌套式  flat:扁平式)
    "i18n-ally.sortKeys": true,
    "i18n-ally.namespace": true,
    "i18n-ally.translate.engines": [
        "google",
        "deepl"
    ], // 翻译器
    "i18n-ally.extract.keygenStyle": "camelCase", // 翻译字段命名样式采用驼峰
}
备注“i18n-ally.localesPaths”这个是你翻译文件的路径、“i18n-ally.translate.engines”翻译器,需要科学上网(fq)。
4、配置成功后,鼠标移动上去会显示当前翻译结果,失败的可以关闭编译器重启。
5、批量翻译,点击编译器左下角翻译的图标,然后再翻译进度中找到,未翻译的语言。空值右边对应有个地球图标。单击翻译即可。
 文章来源:https://www.toymoban.com/news/detail-696951.html
有些人写的翻译是json文件有的是TS文件,注意配置的时候和lang文件夹下面的入口文件
不要写错了。
写在最后,有问题可评论,可私聊。欢迎讨论。文章来源地址https://www.toymoban.com/news/detail-696951.html
到了这里,关于Vue3+Vue-i18n+I18N ALLY+VSCODE 自动翻译多国语言的文章就介绍完了。如果您还想了解更多内容,请在右上角搜索TOY模板网以前的文章或继续浏览下面的相关文章,希望大家以后多多支持TOY模板网!


