我们知道两台Linux服务器机器之间如果使用ssh命令登录或scp/rsync命令传输文件每一次都需要输入用户名相对应的密码,如果要免密码,则需要对两台Linux服务器机器之间进行SSH互信。
一.SSH介绍
1.SSH互信原理
虽然这是废话,也希望大家了解一下。
SSH(Secure Shell)是一种安全的传输协议,它可以让Linux系统中的服务器和客户端之间进行安全可靠的通讯,它常被用于在本地网络中的多台计算机之间实现远程登录,文件传输和系统管理。
SSH使用“加密”的传输方式,以保证客户端和服务器之间的通讯安全。具体而言,SSH使用加密技术(默认加密技术:rsa,加密位:2048位)将用户数据和控制指令加密,以保护数据不被第三方拦截。
SSH可以验证客户端的身份,确保只有授权的用户才能访问服务器。
要在Linux系统中运行SSH,需要两个软件:一个是服务器端的软件,另一个是客户端的软件。服务器端的软件叫做OpenSSH-Server,主要实现SSH服务器功能。它可以处理SSH消息并执行用户指令,以实现远程登录功能。客户端的软件叫做SSH-Client,会根据服务器端提供的信息将用户指令加密,并且可以认证服务器的身份。
2.SSH RPM包
OpenSSH所对应的RPM包共有5个,
[root@rhel77 ~]# ls /mnt/Packages/openssh*
/mnt/Packages/openssh-7.4p1-21.el7.x86_64.rpm
/mnt/Packages/openssh-askpass-7.4p1-21.el7.x86_64.rpm
/mnt/Packages/openssh-clients-7.4p1-21.el7.x86_64.rpm
/mnt/Packages/openssh-keycat-7.4p1-21.el7.x86_64.rpm
/mnt/Packages/openssh-server-7.4p1-21.el7.x86_64.rpm
说明如下:
| Packages名 | 说明 |
| openssh-7.4p1-21.el7.x86_64.rpm | openssh核心文件 |
| openssh-askpass-7.4p1-21.el7.x86_64.rpm | ⽀持对话框窗⼝ 显示 X系统 |
| openssh-clients-7.4p1-21.el7.x86_64.rpm | 客户端软件包 |
| openssh-keycat-7.4p1-21.el7.x86_64.rpm | openssh公钥,私钥文件 |
| openssh-server-7.4p1-21.el7.x86_64.rpm | 服务器端软件包 |
3. SSH秘钥文件介绍
目录路径:/root/.ssh/
[root@rhel77 .ssh]# cd ../.ssh/
[root@rhel77 .ssh]# pwd
/root/.ssh
[root@rhel77 .ssh]# ls -la
total 28
drwx------   2 root root   80 Jun  8 15:32 .
drwxrwxrwx. 17 root root 8192 Jun  9 08:33 ..
-rw-------   1 root root  395 Jun  8 15:32 authorized_keys
-rw-------   1 root root 1675 Jun  8 15:18 id_rsa
-rw-r--r--   1 root root  393 Jun  8 15:18 id_rsa.pub
-rw-r--r--   1 root root  346 Jun  8 15:31 known_hosts
[root@rhel77 .ssh]#
其中:
id_rsa:私钥,相当于"锁"。文件权限:600,不能更改。
id_rsa.pub:公钥,相当于"钥匙"。文件权限:644,不能更改。
authorized_keys:认证文件,记录"别人"(即:对端)给你的公钥“钥匙”。文件权限:600,不能更改。
known_hosts:“指纹”文件,记录首次SSH互信认证"别人"(即:对端)留给你的“指纹”信息。文件权限:600,不能更改。
4.ssh配置文件sshd_config
目录路径:/etc/ssh
sshd日志默认保存在/var/log/secure中
(cat /etc/ssh/sshd_config):
SyslogFacility AUTHPRIV
(cat /etc/rsyslog.conf):
authpriv.* /var/log/secure
二.问题重现
1.环境信息
VMware CentOS7.9(IP:192.168.10.135)、RHEL7.7(IP:192.168.10.110)
防火墙及selinux关闭,参考(Chapter1):
Linux常规基础配置_小黑要上天的博客-CSDN博客
2.两台机器实现openssh rpm安装
-->RHEL7.7(ip:192.168.10.110)机器
[root@rhel77 /]# yum install -y openssh*
Loaded plugins: langpacks, product-id, search-disabled-repos, subscription-manager
This system is not registered with an entitlement server. You can use subscription-manager to register.
rhel7.7                                                                             | 2.8 kB  00:00:00
Package openssh-server-7.4p1-21.el7.x86_64 already installed and latest version
Package openssh-7.4p1-21.el7.x86_64 already installed and latest version
Package openssh-clients-7.4p1-21.el7.x86_64 already installed and latest version
Package openssh-askpass-7.4p1-21.el7.x86_64 already installed and latest version
Package openssh-keycat-7.4p1-21.el7.x86_64 already installed and latest version
Nothing to do
[root@rhel77 /]#
-->CentOS7.9(ip:192.168.10.135)机器
[root@centos79 ~]# yum install -y openssh*
已加载插件:fastestmirror
Loading mirror speeds from cached hostfile
 * base: mirrors.bupt.edu.cn
 * extras: mirror.lzu.edu.cn
 * updates: mirror.lzu.edu.cn
base                                                                                | 3.6 kB  00:00:00
docker-ce-stable                                                                    | 3.5 kB  00:00:00
extras                                                                              | 2.9 kB  00:00:00
updates                                                                             | 2.9 kB  00:00:00
软件包 openssh-cavs-7.4p1-22.el7_9.x86_64 已安装并且是最新版本
软件包 openssh-server-7.4p1-22.el7_9.x86_64 已安装并且是最新版本
软件包 openssh-7.4p1-22.el7_9.x86_64 已安装并且是最新版本
软件包 openssh-clients-7.4p1-22.el7_9.x86_64 已安装并且是最新版本
软件包 openssh-askpass-7.4p1-22.el7_9.x86_64 已安装并且是最新版本
软件包 openssh-ldap-7.4p1-22.el7_9.x86_64 已安装并且是最新版本
软件包 openssh-server-sysvinit-7.4p1-22.el7_9.x86_64 已安装并且是最新版本
软件包 openssh-keycat-7.4p1-22.el7_9.x86_64 已安装并且是最新版本
无须任何处理
[root@centos79 ~]#
3.两台机器机器实现ssh互信
-->RHEL7.7(ip:192.168.10.110)机器
命令:
cd ~
ssh-keygen
cd .ssh/
ls
ssh-copy-id 192.168.10.135
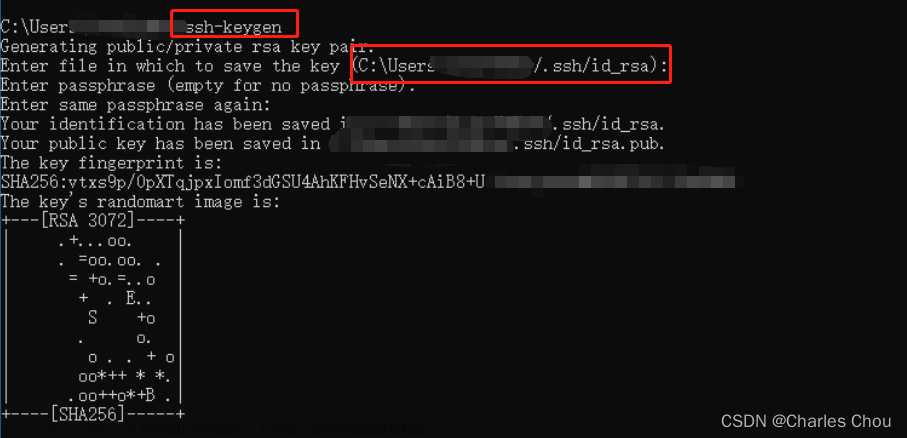
[root@rhel77 ~]# ssh-keygen
Generating public/private rsa key pair.
Enter file in which to save the key (/root/.ssh/id_rsa): #强烈建议直接回车使用默认路径
/root/.ssh/id_rsa already exists.
Overwrite (y/n)? y
Enter passphrase (empty for no passphrase): #密钥的密码短语(建议留空则直接回车)
Enter same passphrase again:            #密钥的密码短语确认(建议留空则直接回车)
Your identification has been saved in /root/.ssh/id_rsa.
Your public key has been saved in /root/.ssh/id_rsa.pub.
The key fingerprint is:
SHA256:jHTGpurRdAzUvx4haQJJRFR5bZiS3j5TNyuB85/SXWc root@rhel77
The key's randomart image is:
+---[RSA 2048]----+
|   ==oo+ +       |
|    o.+.= o      |
|     oo+==       |
|     .oXB = o    |
|      ++S= = o   |
|     + .+ = .   E|
|    o .  + = o o.|
|   . .    o + .  |
|    .      .     |
+----[SHA256]-----+
[root@rhel77 ~]# cd .ssh/
[root@rhel77 .ssh]# ls
id_rsa  id_rsa.pub  known_hosts
[root@rhel77 .ssh]# ssh-copy-id 192.168.10.135
/usr/bin/ssh-copy-id: INFO: Source of key(s) to be installed: "/root/.ssh/id_rsa.pub"
/usr/bin/ssh-copy-id: INFO: attempting to log in with the new key(s), to filter out any that are already installed
/usr/bin/ssh-copy-id: INFO: 1 key(s) remain to be installed -- if you are prompted now it is to install the new keys
root@192.168.10.135's password:

Number of key(s) added: 1

Now try logging into the machine, with:   "ssh '192.168.10.135'"
and check to make sure that only the key(s) you wanted were added.

[root@rhel77 .ssh]#
-->CentOS7.9(ip:192.168.10.135)机器
命令:
cd ~
ssh-keygen
cd .ssh/
ls
ssh-copy-id 192.168.10.110
[root@centos79 ~]# ssh-keygen
Generating public/private rsa key pair.
Enter file in which to save the key (/root/.ssh/id_rsa): #同上
Enter passphrase (empty for no passphrase): #同上
Enter same passphrase again: #同上
Your identification has been saved in /root/.ssh/id_rsa.
Your public key has been saved in /root/.ssh/id_rsa.pub.
The key fingerprint is:
SHA256:nK6khtCnoJB2o1aVfqVlTNpJHMug4QQ/3orcPqAgda4 root@centos79
The key's randomart image is:
+---[RSA 2048]----+
|   ..o ....      |
|    + o o+.      |
|     =. *o.      |
|  . oooo O       |
| + oo. .S        |
|B.o==..+         |
|*o=Booo .        |
|.+E o+ .         |
|.  ...o          |
+----[SHA256]-----+
[root@centos79 ~]# cd .ssh/
[root@centos79 .ssh]# ls
authorized_keys  id_rsa  id_rsa.pub  known_hosts
[root@centos79 .ssh]# ssh-copy-id 192.168.10.110
/usr/bin/ssh-copy-id: INFO: Source of key(s) to be installed: "/root/.ssh/id_rsa.pub"
/usr/bin/ssh-copy-id: INFO: attempting to log in with the new key(s), to filter out any that are already installed
/usr/bin/ssh-copy-id: INFO: 1 key(s) remain to be installed -- if you are prompted now it is to install the new keys
root@192.168.10.110's password:

Number of key(s) added: 1

Now try logging into the machine, with:   "ssh '192.168.10.110'"
and check to make sure that only the key(s) you wanted were added.

[root@centos79 .ssh]#
4.ssh互信验证-问题重现
-->从RHEL7.7(ip:192.168.10.110)机器 ssh 到 CentOS7.9(ip:192.168.10.135)机器

-->从CentOS7.9(ip:192.168.10.135)机器 ssh 到 RHEL7.7(ip:192.168.10.110)机器

三. 问题解决梳理
1.两台机器文件权限验证(id_rsa,id_rsa.pub,authorized_keys,known_hosts)
-->RHEL7.7(ip:192.168.10.110)机器
[root@rhel77 /]# cd
[root@rhel77 ~]# cd .ssh/
[root@rhel77 .ssh]# pwd
/root/.ssh
[root@rhel77 .ssh]# ls -l
total 16
-rw------- 1 root root  395 Jun  9 09:26 authorized_keys
-rw------- 1 root root 1679 Jun  9 09:26 id_rsa
-rw-r--r-- 1 root root  393 Jun  9 09:26 id_rsa.pub
-rw-r--r-- 1 root root  176 Jun  9 09:27 known_hosts
[root@rhel77 .ssh]#
结论:文件权限无误
-->CentOS7.9(ip:192.168.10.135)机器
[root@centos79 .ssh]# cd
[root@centos79 ~]# cd .ssh/
[root@centos79 .ssh]# pwd
/root/.ssh
[root@centos79 .ssh]# ls -l
总用量 16
-rw------- 1 root root  393 6月   9 09:27 authorized_keys
-rw------- 1 root root 1679 6月   9 09:23 id_rsa
-rw-r--r-- 1 root root  395 6月   9 09:23 id_rsa.pub
-rw-r--r-- 1 root root  176 6月   9 09:26 known_hosts
[root@centos79 .ssh]#
结论:文件权限无误
2.两台机器.ssh目录权限验证
-->RHEL7.7(ip:192.168.10.110)机器
[root@rhel77 ~]# pwd
/root
[root@rhel77 ~]# ls -ld .ssh/
drwx------ 2 root root 80 Jun  9 09:27 .ssh/
[root@rhel77 ~]#
结论:.ssh目录权限为700,权限无误
-->CentOS7.9(ip:192.168.10.135)机器
[root@centos79 ~]# pwd
/root
[root@centos79 ~]# ls -ld .ssh/
drwx------ 2 root root 80 6月   9 09:27 .ssh/
[root@centos79 ~]#
结论:.ssh目录权限为700,权限无误
3.两台机器更改/etc/ssh/sshd_config文件配置
添加如下信息:
RSAAuthentication yes #允许RSA密钥
PubkeyAuthentication yes #启用公告密钥配对认证方式
################################################
添加位置:
RSAAuthentication yes
PubkeyAuthentication yes
# The default is to check both .ssh/authorized_keys and .ssh/authorized_keys2
# but this is overridden so installations will only check .ssh/authorized_keys
AuthorizedKeysFile .ssh/authorized_keys
################################################
重启sshd,发现问题仍旧存在。
命令:
systemctl restart sshd
systemctl status sshd
4.问题点定位
最后,通过查看/var/log/secure,发现了问题的点
命令:
tail /var/log/secure -n 20
-->RHEL7.7(ip:192.168.10.110)机器
Jun  9 10:17:28 rhel77 sshd[12271]: Server listening on :: port 22.
Jun  9 10:17:28 rhel77 polkitd[948]: Unregistered Authentication Agent for unix-process:12264:668614 (system bus name :1.316, object path /org/freedesktop/PolicyKit1/AuthenticationAgent, locale en_US.UTF-8) (disconnected from bus)
Jun  9 10:24:34 rhel77 sshd[12868]: Authentication refused: bad ownership or modes for directory /root
Jun  9 10:24:36 rhel77 sshd[12868]: Connection closed by 192.168.10.135 port 36168 [preauth]
[root@rhel77 ~]#
-->CentOS7.9(ip:192.168.10.135)机器
Jun  9 10:16:58 centos79 polkitd[728]: Unregistered Authentication Agent for unix-process:5517:669130 (system bus name :1.203, object path /org/freedesktop/PolicyKit1/AuthenticationAgent, locale zh_CN.UTF-8) (disconnected from bus)
Jun  9 10:17:33 centos79 sshd[5534]: Authentication refused: bad ownership or modes for directory /root
Jun  9 10:17:37 centos79 sshd[5534]: Connection closed by 192.168.10.110 port 38882 [preauth]
Jun  9 10:24:02 centos79 sshd[5599]: Authentication refused: bad ownership or modes for directory /root
Jun  9 10:24:03 centos79 sshd[5599]: Connection closed by 192.168.10.110 port 38884 [preauth]
[root@centos79 ~]#
问题点:
-->RHEL7.7(ip:192.168.10.110)机器
Jun 9 10:24:34 rhel77 sshd[12868]: Authentication refused: bad ownership or modes for directory /root
-->CentOS7.9(ip:192.168.10.135)机器
Jun 9 10:24:02 centos79 sshd[5599]: Authentication refused: bad ownership or modes for directory /root
通过google搜索排查定位,被告知:/root目录权限过大(排查发现root目录权限为777),最多(建议)设置为700权限
/root目录权限
更改前:
-->RHEL7.7(ip:192.168.10.110)机器
[root@rhel77 ~]# cd /
[root@rhel77 /]# pwd
/
[root@rhel77 /]# ls -ld root
drwxrwxrwx. 17 root root 8192 Jun  9 08:33 root
[root@rhel77 /]#
-->CentOS7.9(ip:192.168.10.135)机器
[root@centos79 ~]# cd /
[root@centos79 /]# pwd
/
[root@centos79 /]# ls -ld root
drwxrwxrwx. 25 root root 4096 6月   9 09:37 root
[root@centos79 /]#
权限更改,更改后:
-->RHEL7.7(ip:192.168.10.110)机器
[root@rhel77 /]# pwd
/
[root@rhel77 /]# chmod 700 root/
[root@rhel77 /]# ls -ld root
drwx------. 17 root root 8192 Jun  9 08:33 root
[root@rhel77 /]#
-->CentOS7.9(ip:192.168.10.135)机器
[root@centos79 /]# pwd
/
[root@centos79 /]# chmod 700 root
[root@centos79 /]# ls -ld root
drwx------. 25 root root 4096 6月   9 09:37 root
[root@centos79 /]#
5.ssh互信登录验证
-->RHEL7.7(ip:192.168.10.110)机器
[root@rhel77 /]# ssh 192.168.10.135
Last login: Fri Jun  9 09:55:34 2023 from rhel77

IPAddress: 	172.17.0.1
Memory Used: 	17.9%
Swap Used: 	0%
Disk Used: 	27%
Disk Size: 	38G
Services: 	46
系统内核: 	3.10.0-1160.90.1.el7.x86_64
yum源已配置,能正常使用
[root@centos79 ~]# hostname
centos79
[root@centos79 ~]# exit
logout
Connection to 192.168.10.135 closed.
[root@rhel77 /]#
-->CentOS7.9(ip:192.168.10.135)机器
[root@centos79 ~]# ssh 192.168.10.110
Last login: Fri Jun  9 10:33:32 2023 from gateway

IPAddress: 	192.168.10.110
Cpu Used: 	1.00%
Memory Used: 	5.3%
Swap Used: 	0%
Disk Used: 	8%
Disk Size: 	69G
Services: 	40
system core: 	3.10.0-1062.el7.x86_64
yum already installation
[root@rhel77 ~]# hostname
rhel77
[root@rhel77 ~]# exit
登出
Connection to 192.168.10.110 closed.
[root@centos79 ~]#
至此,问题解决。
四.总结梳理
Linux服务器之前进行ssh互信免密登录时,文件及目录的权限有严格控制,不能过渡授权,主要点:
1./root目录权限为:700
2..ssh目录权限为:700
3.文件权限(id_rsa,id_rsa.pug,authorized_keys,known_hosts):
-->id_rsa:私钥,相当于"锁"。文件权限:600,不能更改。
-->id_rsa.pub:公钥,相当于"钥匙"。文件权限:644,不能更改。
-->authorized_keys:认证文件,记录"别人"(即:对端)给你的公钥“钥匙”。文件权限:600,不能更改。
-->known_hosts:“指纹”文件,记录首次SSH互信认证"别人"(即:对端)留给你的“指纹”信息。文件权限:600,不能更改。
4.养成看ssh服务日志/var/log/secure的习惯
以上是我的一次真实的Linux服务器配置SSH免密码登录后,登录仍提示输入密码的问题排查解决记录。希望各位有所帮助。
创作不易,如果对你有所帮助或喜欢,请一键三连!文章来源:https://www.toymoban.com/news/detail-697781.html
谢谢!文章来源地址https://www.toymoban.com/news/detail-697781.html
到了这里,关于Linux服务器配置SSH免密码登录后,登录仍提示输入密码(一次真实的问题排查解决记录)的文章就介绍完了。如果您还想了解更多内容,请在右上角搜索TOY模板网以前的文章或继续浏览下面的相关文章,希望大家以后多多支持TOY模板网!


