整体思路阅读
	Scene scene(1280, 960);

    auto sph1 = std::make_unique<Sphere>(Vector3f(-1, 0, -12), 2);
    sph1->materialType = DIFFUSE_AND_GLOSSY;
    sph1->diffuseColor = Vector3f(0.6, 0.7, 0.8);

    auto sph2 = std::make_unique<Sphere>(Vector3f(0.5, -0.5, -8), 1.5);
    sph2->ior = 1.5;
    sph2->materialType = REFLECTION_AND_REFRACTION;

    scene.Add(std::move(sph1));
    scene.Add(std::move(sph2));

    Vector3f verts[4] = {{-5,-3,-6}, {5,-3,-6}, {5,-3,-16}, {-5,-3,-16}};
    uint32_t vertIndex[6] = {0, 1, 3, 1, 2, 3};
    Vector2f st[4] = {{0, 0}, {1, 0}, {1, 1}, {0, 1}};
    auto mesh = std::make_unique<MeshTriangle>(verts, vertIndex, 2, st);
    mesh->materialType = DIFFUSE_AND_GLOSSY;

    scene.Add(std::move(mesh));
    scene.Add(std::make_unique<Light>(Vector3f(-20, 70, 20), 0.5));
    scene.Add(std::make_unique<Light>(Vector3f(30, 50, -12), 0.5));

    Renderer r;
    r.Render(scene);
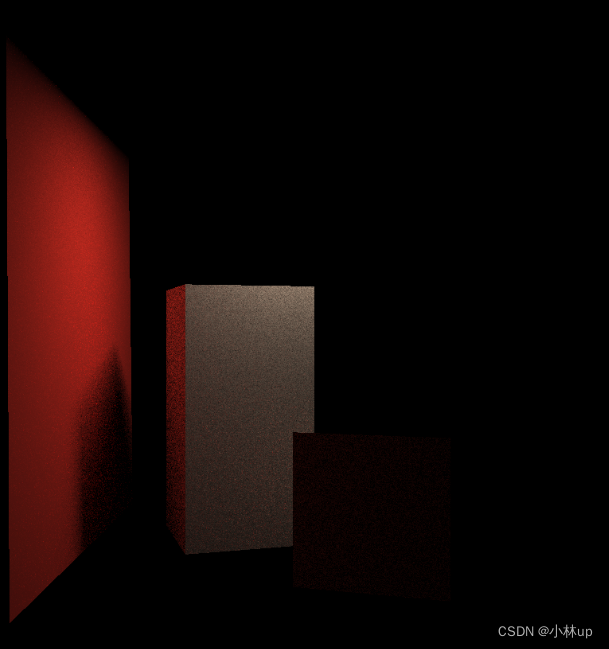
在scene中加入两个球一个地板和两个点光源
Render
在Render中我们从eye_pos向屏幕打出一根一根的ray与场景相交
framebuffer[m++] = castRay(eye_pos, dir, scene, 0);
if (payload)
    {
        Vector3f hitPoint = orig + dir * payload->tNear;
        Vector3f N; // normal
        Vector2f st; // st coordinates
        payload->hit_obj->getSurfaceProperties(hitPoint, dir, payload->index, payload->uv, N, st);
        switch (payload->hit_obj->materialType) {
            case REFLECTION_AND_REFRACTION:
            {
                Vector3f reflectionDirection = normalize(reflect(dir, N));
                Vector3f refractionDirection = normalize(refract(dir, N, payload->hit_obj->ior));

                Vector3f reflectionRayOrig = (dotProduct(reflectionDirection, N) < 0) ?
                                             hitPoint - N * scene.epsilon :
                                             hitPoint + N * scene.epsilon;
                Vector3f refractionRayOrig = (dotProduct(refractionDirection, N) < 0) ?
                                             hitPoint - N * scene.epsilon :
                                             hitPoint + N * scene.epsilon;
                Vector3f reflectionColor = castRay(reflectionRayOrig, reflectionDirection, scene, depth + 1);
                Vector3f refractionColor = castRay(refractionRayOrig, refractionDirection, scene, depth + 1);
                float kr = fresnel(dir, N, payload->hit_obj->ior);
                hitColor = reflectionColor * kr + refractionColor * (1 - kr);
                break;
            }
            case REFLECTION:
            {
                float kr = fresnel(dir, N, payload->hit_obj->ior);
                Vector3f reflectionDirection = reflect(dir, N);
                Vector3f reflectionRayOrig = (dotProduct(reflectionDirection, N) < 0) ?
                                             hitPoint - N * scene.epsilon :
                                             hitPoint + N * scene.epsilon;
                if (dotProduct(reflectionDirection, N) < 0 == true)
                {
                    std::cout << 1;
                }

                hitColor = castRay(reflectionRayOrig, reflectionDirection, scene, depth + 1) * kr;
                break;
            }
            default:
            {
                // [comment]
                // We use the Phong illumation model int the default case. The phong model
                // is composed of a diffuse and a specular reflection component.
                // [/comment]
                Vector3f lightAmt = 0, specularColor = 0;
                Vector3f shadowPointOrig = (dotProduct(dir, N) < 0) ?
                                           hitPoint + N * scene.epsilon :
                                           hitPoint - N * scene.epsilon;
                // [comment]
                // Loop over all lights in the scene and sum their contribution up
                // We also apply the lambert cosine law
                // [/comment]
                for (auto& light : scene.get_lights()) {
                    Vector3f lightDir = light->position - hitPoint;
                    // square of the distance between hitPoint and the light
                    float lightDistance2 = dotProduct(lightDir, lightDir);
                    lightDir = normalize(lightDir);
                    float LdotN = std::max(0.f, dotProduct(lightDir, N));
                    // is the point in shadow, and is the nearest occluding object closer to the object than the light itself?
                    auto shadow_res = trace(shadowPointOrig, lightDir, scene.get_objects());
                    bool inShadow = shadow_res && (shadow_res->tNear * shadow_res->tNear < lightDistance2);

                    lightAmt += inShadow ? 0 : light->intensity * LdotN;
                    Vector3f reflectionDirection = reflect(-lightDir, N);

                    specularColor += powf(std::max(0.f, -dotProduct(reflectionDirection, dir)),
                        payload->hit_obj->specularExponent) * light->intensity;
                }

                hitColor = lightAmt * payload->hit_obj->evalDiffuseColor(st) * payload->hit_obj->Kd + specularColor * payload->hit_obj->Ks;
                break;
            }
        }
    }
第一步先与场景的求交,如果光线打到了物体,就继续判断打到的物体的材质,根据不同的材质进行不同的处理,这里重点说下REFLECTION和default
在REFLECTION中,这一段代码有点问题,应该是如下代码
找到和物体的交点,然后往外走一点,走一点的目的(防止再次和该物体相交)
reflectionDir和N点乘如果大于0应该进行hitPoint + N * scene.epsilon

default的条件
主要讲讲shadow是怎么做的
第一步,找到光线和物体的交点,然后往外走一点,这里为什么是Vector3f shadowPointOrig = (dotProduct(dir, N) < 0) ?
hitPoint + N * scene.epsilon :
hitPoint - N * scene.epsilon;
自己思考一下文章来源:https://www.toymoban.com/news/detail-702558.html
第二步,从shadowPoint中,往光源方向打一根光线,如果没照到物体,或者照到了物体比光远,说明光源可以打到物体,则没阴影。 文章来源地址https://www.toymoban.com/news/detail-702558.html
到了这里,关于Games101作业5解读的文章就介绍完了。如果您还想了解更多内容,请在右上角搜索TOY模板网以前的文章或继续浏览下面的相关文章,希望大家以后多多支持TOY模板网!


