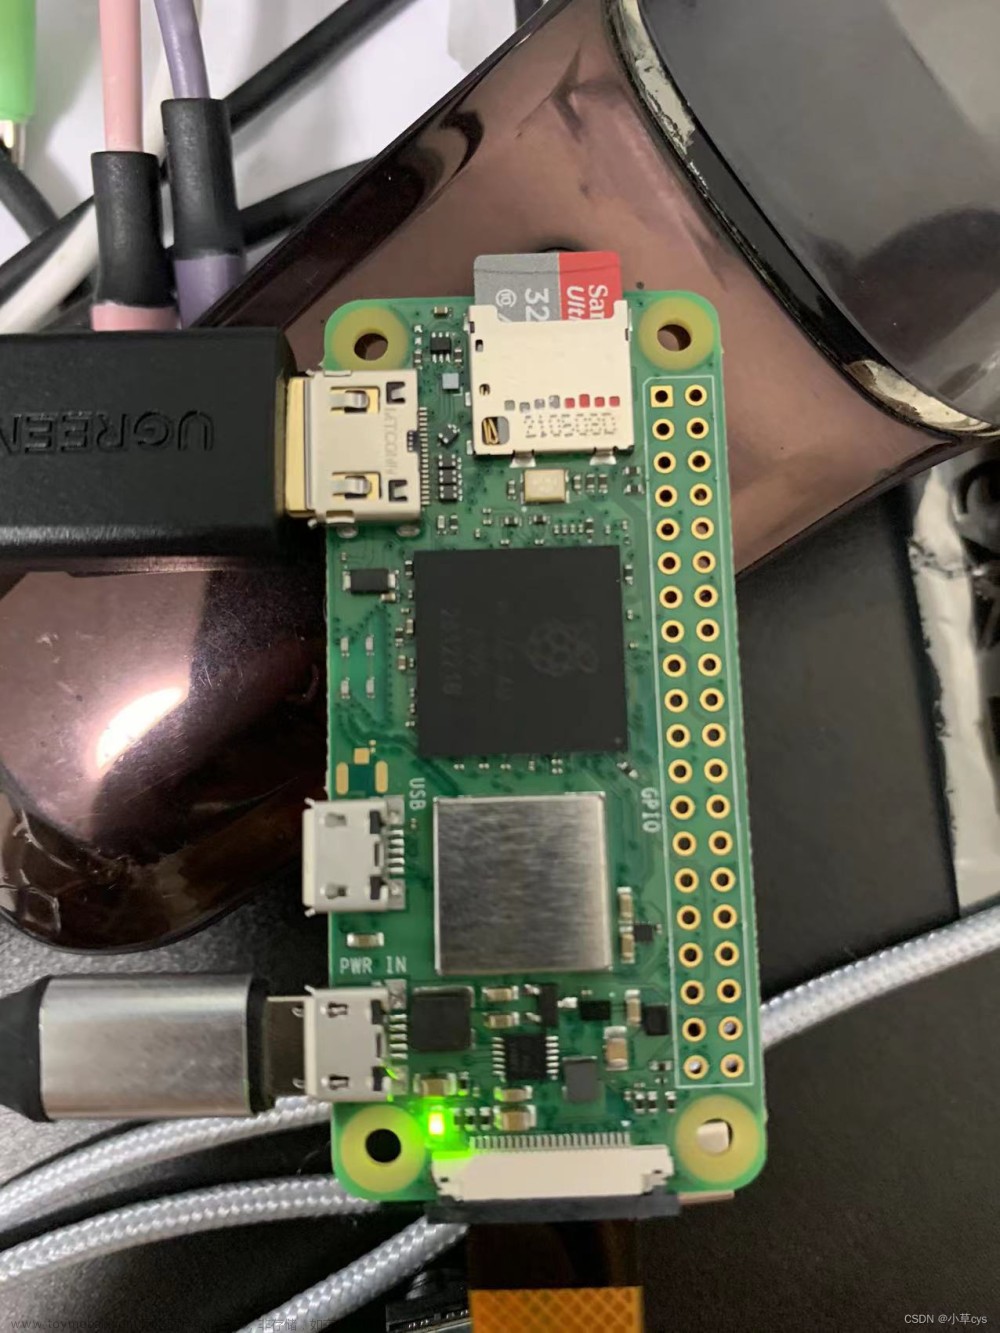
笔者在树莓派上开发OpenGL ES之前,特地从网上做了些功课。当前,无论是Raspberry Pi 3还是Zero,倘若要开启博通的Video Core GPU硬件加速,那么只能使用官方提供的 Raspbian OS 系统,并且需要使用存放在 /opt/vc/ 下的私有库。因此,我们只能通过EGL结合树莓派特定的DispManX运行时环境来使用OpenGL ES。在 /opt/vc/src/hello_pi/ 目录下放有官方提供的各种demo,其中包括OpenGL ES程序、OpenVG程序以及利用Video Core硬件视频编解码能力对视频进行处理的demo等。
由于 /opt/vc/lib/ 目录下已经包含了OpenGL ES所需要的所有基本库,包括OpenGL ES以及EGL的实现等,因此我们无需再使用 apt-get 去下载安装其他OpenGL ES相关的库了。其中,bcm_host这个库就是博通公司私有的、用于驱动Video Core GPU的库,并且要在使用Video Core GPU之前,必须调用 bcm_host_init 这个函数。
方便起见,笔者做了一个编译shell文件,名为 build.sh。其内容如下:
gcc main.c -o rectangle -std=gnu11 -DSTANDALONE -D__STDC_CONSTANT_MACROS -D__STDC_LIMIT_MACROS -DTARGET_POSIX -D_LINUX -D_REENTRANT -D_LARGEFILE64_SOURCE -D_FILE_OFFSET_BITS=64 -U_FORTIFY_SOURCE -Wall -g -DHAVE_LIBOPENMAX=2 -DOMX -DOMX_SKIP64BIT -ftree-vectorize -pipe -DUSE_EXTERNAL_OMX -DHAVE_LIBBCM_HOST -DUSE_EXTERNAL_LIBBCM_HOST -DUSE_VCHIQ_ARM -Wno-psabi -L/opt/vc/lib/ -lbrcmGLESv2 -lbrcmEGL -lopenmaxil -lbcm_host -lvcos -lvchiq_arm -lpthread -lrt -lm -L/opt/vc/src/hello_pi/libs/ilclient -L/opt/vc/src/hello_pi/libs/vgfont -I/opt/vc/include/ -I/opt/vc/include/interface/vcos/pthreads -I/opt/vc/include/interface/vmcs_host/linux -I./ -I/opt/vc/src/hello_pi/libs/ilclient -I/opt/vc/src/hello_pi/libs/vgfont
各位在使用时,只需要把源文件名 main.c 以及 rectangle 这一输出文件名进行修改即可,其他都不需要动。我们编辑好main.c源文件之后,直接用 bash build.sh 这个编译脚本即可。
下面给出main.c的代码:文章来源:https://www.toymoban.com/news/detail-704435.html
#include <stdio.h>
#include <stdbool.h>
#include <stdlib.h>
#include <string.h>
#include <math.h>
#include <assert.h>
#include <unistd.h>
#include <termio.h>
#include <fcntl.h>

#include <bcm_host.h>

#include <GLES/gl.h>
#include <EGL/egl.h>
#include <EGL/eglext.h>

#include <X11/Xlib.h>
#include <X11/Xutil.h>

static EGL_DISPMANX_WINDOW_T sNativewindow;
static DISPMANX_DISPLAY_HANDLE_T sDispmanDisplay;
static DISPMANX_ELEMENT_HANDLE_T sDispmanElement;
static EGLDisplay sDisplay;
static EGLSurface sSurface;
static EGLContext sContext;

static uint32_t screen_width = 0, screen_height = 0;

/// Object rotation angle
static int sRotateAngle = 0;

/// Indicate whether animation should be paused
static bool sShouldPauseAnimation = false;

/// Indicate whether the current program should exit the message run loop.
static bool sShouldTerminate = false;

/// Rectangle vertex coordinates
static const GLfloat sRectVertices[] = {
    // top left
    -0.4f, 0.4f,

    // bottom left
    -0.4f, -0.4f,

    // top right
    0.4f, 0.4f,

    // bottom right
    0.4f, -0.4f
};

/// Triangle vertex coordinates
static const GLfloat sTriangleVertices[] = {
    // top left
    0.0f, 0.4f,

    // bottom left
    -0.4f, -0.4f,

    // bottom right
    0.4f, -0.4f
};

static const GLfloat sColors[] = {
    // red
    1.0f, 0.0f, 0.0f, 1.0f,

    // green
    0.0f, 1.0f, 0.0f, 1.0f,

    // blue
    0.0f, 0.0f, 1.0f, 1.0f,

    // white
    1.0f, 1.0f, 1.0f, 1.0f
};

/// Setup OpenGL ES context and the models
static void SetupOGLStates(void)
{
    glViewport(0, 0, screen_width, screen_height);

    // Set background color and clear buffers
    glClearColor(0.15f, 0.25f, 0.35f, 1.0f);

    // Use smooth shade model, which is the default configuration
    glShadeModel(GL_SMOOTH);

    // Config the front face is in the counter clock-wise direction
    glFrontFace(GL_CCW);

    // Cull the back faces
    glCullFace(GL_BACK);

    // Enable back face culling.
    glEnable(GL_CULL_FACE);

    glEnableClientState(GL_VERTEX_ARRAY);
    glEnableClientState(GL_COLOR_ARRAY);

    // Setup projection transformation
    glMatrixMode(GL_PROJECTION);
    glLoadIdentity();
    float scale;
    if(screen_width < screen_height)
    {
        scale = (float)screen_width / (float)screen_height;
        glOrthof(-scale, scale, -1.0f, 1.0f, 1.0f, 3.0f);
    }
    else
    {
        scale = (float)screen_height / (float)screen_width;
        glOrthof(-1.0f, 1.0f, -scale, scale, 1.0f, 3.0f);
    }

    // The following steps are based on model view transformation
    glMatrixMode(GL_MODELVIEW);
}

/// EGL attribute list for context configuration
static const EGLint attribute_list[] =
{
    EGL_RED_SIZE, 8,
    EGL_GREEN_SIZE, 8,
    EGL_BLUE_SIZE, 8,
    EGL_ALPHA_SIZE, 8,
    EGL_SURFACE_TYPE, EGL_WINDOW_BIT,

    // In this demo, use OpenGL ES 1.x version
    EGL_RENDERABLE_TYPE, EGL_OPENGL_ES_BIT,

    // We will use multisample anti-aliasing
    EGL_SAMPLE_BUFFERS, 1,
    // Here specifies 4x samples
    EGL_SAMPLES, 4,

    // config complete
    EGL_NONE
};

/// Initialize the EGL context and do some other OpenGL ES configuration
static void InitializeEGLContext(void)
{
    // get an EGL display connection
    sDisplay = eglGetDisplay(EGL_DEFAULT_DISPLAY);
    assert(sDisplay != EGL_NO_DISPLAY);

    // initialize the EGL display connection
    EGLBoolean result = eglInitialize(sDisplay, NULL, NULL);
    assert(EGL_FALSE != result);

    // get an appropriate EGL frame buffer configuration
    EGLConfig config;
    EGLint num_config;
    result = eglChooseConfig(sDisplay, attribute_list, &config, 1, &num_config);
    assert(EGL_FALSE != result);

    // create an EGL rendering context
    sContext = eglCreateContext(sDisplay, config, EGL_NO_CONTEXT, NULL);
    assert(sContext != EGL_NO_CONTEXT);

    // create an EGL window surface
    int success = graphics_get_display_size(0 /* LCD */, &screen_width, &screen_height);
    assert( success >= 0 );

    printf("Current screen resolution: %ux%u\n", screen_width, screen_height);

    VC_RECT_T dst_rect;
    dst_rect.x = 0;
    dst_rect.y = 0;
    dst_rect.width = screen_width;
    dst_rect.height = screen_height;

    VC_RECT_T src_rect;
    src_rect.x = 0;
    src_rect.y = 0;
    src_rect.width = screen_width << 16;
    src_rect.height = screen_height << 16;

    sDispmanDisplay = vc_dispmanx_display_open( 0 /* LCD */);
    DISPMANX_UPDATE_HANDLE_T dispman_update = vc_dispmanx_update_start( 0 );

    sDispmanElement = vc_dispmanx_element_add(dispman_update, sDispmanDisplay,
    0/*layer*/, &dst_rect, 0/*src*/,
    &src_rect, DISPMANX_PROTECTION_NONE, 0 /*alpha*/, 0/*clamp*/, 0/*transform*/);

    sNativewindow.element = sDispmanElement;
    sNativewindow.width = screen_width;
    sNativewindow.height = screen_height;
    vc_dispmanx_update_submit_sync( dispman_update );

    sSurface = eglCreateWindowSurface(sDisplay, config, &sNativewindow, NULL);
    assert(sSurface != EGL_NO_SURFACE);

    // connect the context to the surface
    result = eglMakeCurrent(sDisplay, sSurface, sSurface, sContext);
    assert(EGL_FALSE != result);

    const char* vendor = (const char*)glGetString(GL_VENDOR);
    const char* renderer = (const char*)glGetString(GL_RENDERER);
    const char* version = (const char*)glGetString(GL_VERSION);
    printf("The vendor is: %s\n", vendor);
    printf("The renderer is: %s\n", renderer);
    printf("The GL version is: %s\n", version);

    // Setup EGL swap interval as 60 FPS
    if(eglSwapInterval(sDisplay, 1))
        puts("Swap interval succeeded!");
}

static void redraw_scene(void)
{
    // Start with a clear screen
    glClear( GL_COLOR_BUFFER_BIT );

    // Draw rectangle
    glVertexPointer(2, GL_FLOAT, 0, sRectVertices);
    glColorPointer(4, GL_FLOAT, 0, sColors);

    glLoadIdentity();
    glTranslatef(-0.5f, 0.0f, -2.0f);
    glRotatef(sRotateAngle, 0.0f, 0.0f, 1.0f);

    glDrawArrays(GL_TRIANGLE_STRIP, 0, 4);

    // Draw triangle
    glVertexPointer(2, GL_FLOAT, 0, sTriangleVertices);
    glColorPointer(4, GL_FLOAT, 0, sColors);

    glLoadIdentity();
    glTranslatef(0.5f, 0.0f, -2.0f);
    glRotatef(-sRotateAngle, 0.0f, 0.0f, 1.0f);

    glDrawArrays(GL_TRIANGLES, 0, 3);

    // Update the rotation angle
    if(!sShouldPauseAnimation)
    {
        if(++sRotateAngle == 360)
            sRotateAngle = 0;
    }

    eglSwapBuffers(sDisplay, sSurface);
}

static void DestroyEGLContext(void)
{
    DISPMANX_UPDATE_HANDLE_T dispman_update;

    // clear screen
    glClear( GL_COLOR_BUFFER_BIT );
    eglSwapBuffers(sDisplay, sSurface);

    eglDestroySurface(sDisplay, sSurface);

    dispman_update = vc_dispmanx_update_start( 0 );
    int s = vc_dispmanx_element_remove(dispman_update, sDispmanElement);
    assert(s == 0);
    vc_dispmanx_update_submit_sync( dispman_update );
    s = vc_dispmanx_display_close(sDispmanDisplay);
    assert (s == 0);

    // Release OpenGL resources
    eglMakeCurrent(sDisplay, EGL_NO_SURFACE, EGL_NO_SURFACE, EGL_NO_CONTEXT );
    eglDestroyContext(sDisplay, sContext);
    eglTerminate(sDisplay);
}

/// File handle for keyboard events
static int stdin_fd = -1;
static struct termios sTermOriginal;

/// Fetch the character if there's any key is pressed.
/// @return If any key is pressed, return the relevant character; Otherwise, return -1.
static int KeyPressed(void)
{
    // If this is the first time the function is called, change the stdin
    // stream so that we get each character when the keys are pressed and
    // and so that character aren't echoed to the screen when the keys are
    // pressed.
    if (stdin_fd == -1)
    {
        // Get the file descriptor associated with stdin stream.
        stdin_fd = fileno(stdin);

        // Get the terminal (termios) attritubets for stdin so we can
        // modify them and reset them before exiting the program.
        tcgetattr(stdin_fd, &sTermOriginal);

        // Copy the termios attributes so we can modify them.
        struct termios term;
        memcpy(&term, &sTermOriginal, sizeof(term));

        // Unset ICANON and ECHO for stdin. When ICANON is not set the
        // input is in noncanonical mode. In noncanonical mode input is
        // available as each key is pressed. In canonical mode input is
        // only available after the enter key is pressed. Unset ECHO so that
        // the characters aren't echoed to the screen when keys are pressed.
        // See the termios(3) man page for more information.
        term.c_lflag &= ~(ICANON|ECHO);
        tcsetattr(stdin_fd, TCSANOW, &term);

        // Turn off buffering for stdin. We want to get the characters
        // immediately. We don't want the characters to be buffered.
        setbuf(stdin, NULL);
    }

    int character = -1;

    // Get the number of characters that are waiting to be read.
    int characters_buffered = 0;
    ioctl(stdin_fd, FIONREAD, &characters_buffered);

    if (characters_buffered == 1)
    {
        // There is only one character to be read. Read it in.
        character = fgetc(stdin);
    }
    else if (characters_buffered > 1)
    {
        // There is more than one character to be read.
        // In this situation, just get the last read character
        while (characters_buffered != 0)
        {
            character = fgetc(stdin);
            --characters_buffered;
        }
    }

    return character;
}

/// If keyPressed() has been called,
/// the terminal input has been changed for the stdin stream.
/// Put the attributes back the way we found them.
static void KeyboardReset(void)
{
    if(stdin_fd != -1)
        tcsetattr(stdin_fd, TCSANOW, &sTermOriginal);
}

//==============================================================================

int main (void)
{
    // Initialize VideoCore GPU
    bcm_host_init();

    InitializeEGLContext();

    SetupOGLStates();

    while (!sShouldTerminate)
    {
        redraw_scene();

        const int code = KeyPressed();
        if(code == 0x20)
            sShouldPauseAnimation = !sShouldPauseAnimation;

        sShouldTerminate = code == '\n' || code == 0x1b;
    }

    KeyboardReset();

    DestroyEGLContext();

    puts("\nApplication closed");

    return 0;
}
在这个demo中,我们必须通过命令行来开启,否则它无法侦听键盘按键消息。我们按下回车或ESC退出程序,按下空格暂停旋转动画。文章来源地址https://www.toymoban.com/news/detail-704435.html
到了这里,关于Raspberry Pi(树莓派)基于Raspbian操作系统开发OpenGL ES应用的文章就介绍完了。如果您还想了解更多内容,请在右上角搜索TOY模板网以前的文章或继续浏览下面的相关文章,希望大家以后多多支持TOY模板网!


