前言
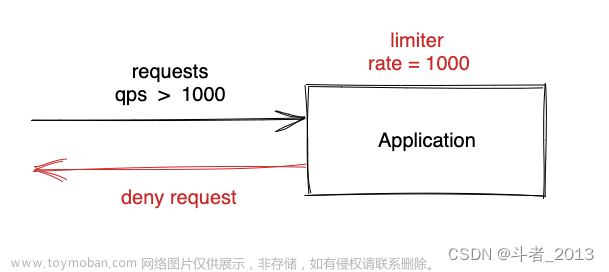
- 很多时候,由于种种不可描述的原因,我们需要针对单个接口实现接口限流,防止访问次数过于频繁。这里就用 redis+aop 实现一个限流接口注解
@RedisLimit 代码
点击查看RedisLimit注解代码
import java.lang.annotation.*;

/**
 * 功能:分布式接口限流注解
 * @author love ice
 * @create 2023-09-18 15:43
 */
@Target({ElementType.TYPE,ElementType.METHOD})
@Documented
@Retention(RetentionPolicy.RUNTIME)
public @interface RedisLimit {
    /**
     * redis中唯一key,一般用方法名字做区分
     * 作用: 针对不同接口,做不同的限流控制
     */
    String key() default "";

    /**
     * 限流时间内允许访问次数 默认1
     */
    long permitsPerSecond() default 1;

    /**
     * 限流时间,单位秒 默认60秒
     */
    long expire() default 60;

    /**
     * 限流提示信息
     */
    String msg() default "接口限流,请稍后重试";
}
AOP代码
点击查看aop代码
import com.aliyuncs.utils.StringUtils;
import com.test.redis.Infrastructure.annotation.RedisLimit;
import lombok.extern.slf4j.Slf4j;
import org.aspectj.lang.JoinPoint;
import org.aspectj.lang.annotation.Aspect;
import org.aspectj.lang.annotation.Before;
import org.aspectj.lang.annotation.Pointcut;
import org.aspectj.lang.reflect.MethodSignature;
import org.springframework.beans.factory.annotation.Autowired;
import org.springframework.core.io.ClassPathResource;
import org.springframework.data.redis.core.StringRedisTemplate;
import org.springframework.data.redis.core.script.DefaultRedisScript;
import org.springframework.scripting.support.ResourceScriptSource;
import org.springframework.stereotype.Component;
import javax.annotation.PostConstruct;
import java.lang.reflect.Method;
import java.util.ArrayList;
import java.util.Collections;
import java.util.List;

/**
 * redis限流切面
 *
 * @author love ice
 * @create 2023-09-18 15:44
 */
@Slf4j
@Aspect
@Component
public class RedisLimitAop {
    @Autowired
    private StringRedisTemplate stringRedisTemplate;
    private DefaultRedisScript<Long> redisScript;

    @PostConstruct
    public void init() {
        redisScript = new DefaultRedisScript<>();
        redisScript.setResultType(Long.class);
        // 执行 lua 脚本
        ResourceScriptSource resourceScriptSource = new ResourceScriptSource(new ClassPathResource("rateLimiter.lua"));
        redisScript.setScriptSource(resourceScriptSource);
    }

    @Pointcut("@annotation(com.test.redis.Infrastructure.annotation.RedisLimit)")
    private void check() {

    }

    @Before("check()")
    private void before(JoinPoint joinPoint) {
        MethodSignature signature = (MethodSignature) joinPoint.getSignature();
        Method method = signature.getMethod();

        // 拿到 RedisLimit 注解,如果存在则说明需要限流
        RedisLimit redisLimit = method.getAnnotation(RedisLimit.class);

        if (redisLimit != null) {
            // 获取 redis 的 key
            String key = redisLimit.key();
            String className = method.getDeclaringClass().getName();
            String name = method.getName();
            String limitKey = key + className + name;
            log.info("限流的key:{}", limitKey);

            if (StringUtils.isEmpty(key)) {
                // 这里是自定义异常,为了方便写成了 RuntimeException
                throw new RuntimeException("code:101,msg:接口中 key 参数不能为空");
            }

            long limit = redisLimit.permitsPerSecond();
            long expire = redisLimit.expire();
            // 把 key 放入 List 中
            List<String> keys = new ArrayList<>(Collections.singletonList(key));
            Long count = stringRedisTemplate.execute(redisScript, keys, String.valueOf(limit), String.valueOf(expire));
            log.info("Access try count is {} for key ={}", count, keys);

            if (count != null && count == 0) {
                log.debug("令牌桶={}, 获取令牌失效,接口触发限流", key);
                throw new RuntimeException("code:10X, redisLimit.msg()");
            }
        }
    }
}
lua脚本代码
注意:脚本代码是放在 resources 文件下的,它的类型是 txt,名称后缀是lua。如果你不想改名称,就使用我写好的全名--> rateLimiter.lua文章来源:https://www.toymoban.com/news/detail-712235.html
点击查看脚本代码
--获取KEY
local key = KEYS[1]

local limit = tonumber(ARGV[1])

local curentLimit = tonumber(redis.call('get', key) or "0")

if curentLimit + 1 > limit
    then return 0
else
    -- 自增长 1
    redis.call('INCRBY', key, 1)
    -- 设置过期时间
    redis.call('EXPIRE', key, ARGV[2])
    return curentLimit + 1
end
最后为了照顾纯小白,给大家看一下我的目录结构
 文章来源地址https://www.toymoban.com/news/detail-712235.html
到了这里,关于使用 redis 实现分布式接口限流注解 RedisLimit的文章就介绍完了。如果您还想了解更多内容,请在右上角搜索TOY模板网以前的文章或继续浏览下面的相关文章,希望大家以后多多支持TOY模板网!


