1.安装tensorflow-gpu
Building wheels for collected packages: tensorflow-gpu
  Building wheel for tensorflow-gpu (setup.py): started
  Building wheel for tensorflow-gpu (setup.py): finished with status 'error'
  Running setup.py clean for tensorflow-gpu
  error: subprocess-exited-with-error

  × python setup.py bdist_wheel did not run successfully.
  │ exit code: 1
  ╰─> [18 lines of output]
      Traceback (most recent call last):
        File "<string>", line 2, in <module>
        File "<pip-setuptools-caller>", line 34, in <module>
        File "/tmp/pip-install-i6frcfa8/tensorflow-gpu_2cea358528754cc596c541f9c2ce45ca/setup.py", line 37, in <module>
          raise Exception(TF_REMOVAL_WARNING)
      Exception:

      =========================================================
      The "tensorflow-gpu" package has been removed!

      Please install "tensorflow" instead.

      Other than the name, the two packages have been identical
      since TensorFlow 2.1, or roughly since Sep 2019. For more
      information, see: pypi.org/project/tensorflow-gpu
      =========================================================


      [end of output]

  note: This error originates from a subprocess, and is likely not a problem with pip.
  ERROR: Failed building wheel for tensorflow-gpu
Failed to build tensorflow-gpu
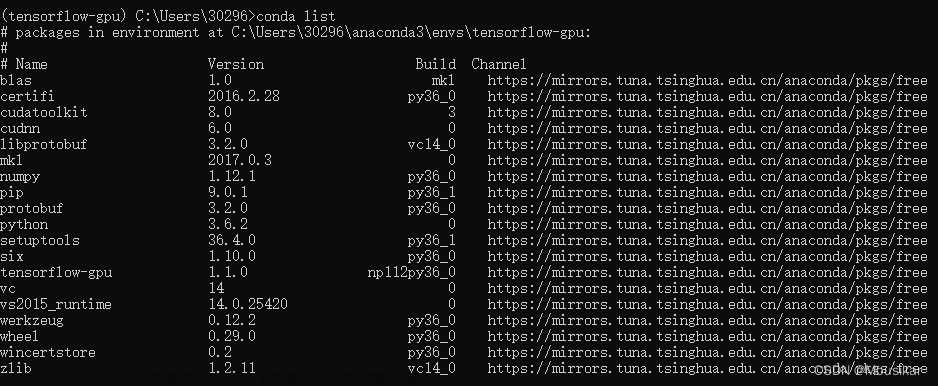
Other than the name, the two packages have been identical since TensorFlow 2.1 也就是说安装2.1版本的已经自带GPU支持。
2.Docker使用GPU
不同型号的GPU及驱动版本有所区别,环境驱动及CUDA版本如下:
[root@localhost ~]# nvidia-smi
# 查询结果
+-----------------------------------------------------------------------------+
| NVIDIA-SMI 460.27.04    Driver Version: 460.27.04    CUDA Version: 11.2     |
|-------------------------------+----------------------+----------------------+
2.1 Could not find cuda drivers
# 报错
I tensorflow/tsl/cuda/cudart_stub.cc:28] Could not find cuda drivers on your machine, GPU will not be used.
在Docker容器中的程序无法识别CUDA环境变量,可以尝试以下步骤来解决这个问题:
- 检查CUDA版本:首先,需要确认宿主机上已经正确安装了CUDA。在宿主机上运行
nvcc --version命令来检查CUDA版本。 - 使用NVIDIA Docker镜像:NVIDIA提供了一些预先配置好的Docker镜像,这些镜像已经包含了CUDA和其他必要的库。可以使用这些镜像作为Dockerfile的基础镜像。
- 设置环境变量:在Dockerfile中,可以使用
ENV指令来设置环境变量。例如,如果CUDA安装在/usr/local/cuda目录下,可以添加以下行到Dockerfile中:ENV PATH /usr/local/cuda/bin:$PATH。 - 使用nvidia-docker:nvidia-docker是一个用于运行GPU加速的Docker容器的工具。
检测CUDA版本是必要的,由于使用的是导出的镜像文件,2和3的方法无法使用,最终使用-e进行环境变量设置:
# 添加cuda的环境变量
-e PATH=/usr/local/cuda-11.2/bin:$PATH -e LD_LIBRARY_PATH=/usr/local/cuda-11.2/lib64:$LD_LIBRARY_PATH

# 启动命令
nvidia-docker run --name deepface --privileged=true --restart=always --net="host" -e PATH=/usr/local/cuda-11.2/bin:$PATH -e LD_LIBRARY_PATH=/usr/local/cuda-11.2/lib64:$LD_LIBRARY_PATH -v /root/.deepface/weights/:/root/.deepface/weights/ -v /usr/local/cuda-11.2/:/usr/local/cuda-11.2/ -d deepface_image
2.2 was unable to find libcuda.so DSO
I tensorflow/compiler/xla/stream_executor/cuda/cuda_diagnostics.cc:168] retrieving CUDA diagnostic information for host: localhost.localdomain
I tensorflow/compiler/xla/stream_executor/cuda/cuda_diagnostics.cc:175] hostname: localhost.localdomain
I tensorflow/compiler/xla/stream_executor/cuda/cuda_diagnostics.cc:199] libcuda reported version is: NOT_FOUND: was unable to find libcuda.so DSO loaded into this program
I tensorflow/compiler/xla/stream_executor/cuda/cuda_diagnostics.cc:203] kernel reported version is: 460.27.4
在Linux环境下,Docker可以支持将宿主机上的目录挂载到容器里。这意味着,如果宿主机上的目录包含软链接,那么这些软链接也会被挂载到容器中。然而,需要注意的是,这些软链接指向的路径必须在Docker容器中是可访问的。也就是说,如果软链接指向的路径没有被挂载到Docker容器中,那么在容器中访问这个软链接可能会失败。
原文链接:https://blog.csdn.net/u013546508/article/details/88637434,当前环境下问题解决步骤:
# 1.查找 libcuda.so 文件位置
find / -name libcuda.so*
# 查找结果
/usr/lib/libcuda.so
/usr/lib/libcuda.so.1
/usr/lib/libcuda.so.460.27.04
/usr/lib64/libcuda.so
/usr/lib64/libcuda.so.1
/usr/lib64/libcuda.so.460.27.04

# 2.查看LD_LIBRARY_PATH
echo $LD_LIBRARY_PATH
# 查询结果
/usr/local/cuda/lib64

# 3.将64位的libcuda.so.460.27.04复制到LD_LIBRARY_PATH路径下【libcuda.so和libcuda.so.1都是软连接】
cp /usr/lib64/libcuda.so.460.27.04 /usr/local/cuda-11.2/lib64/

# 4.创建软连接
ln -s libcuda.so.460.27.04 libcuda.so.1
ln -s libcuda.so.1 libcuda.so
2.3 Could not find TensorRT&&Cannot dlopen some GPU libraries
I tensorflow/core/platform/cpu_feature_guard.cc:182] This TensorFlow binary is optimized to use available CPU instructions in performance-critical operations.
To enable the following instructions: AVX2 AVX512F FMA, in other operations, rebuild TensorFlow with the appropriate compiler flags.

W tensorflow/compiler/tf2tensorrt/utils/py_utils.cc:38] TF-TRT Warning: Could not find TensorRT
W tensorflow/core/common_runtime/gpu/gpu_device.cc:1960] Cannot dlopen some GPU libraries. Please make sure the missing libraries mentioned above are installed properly if you would like to use GPU. Follow the guide at https://www.tensorflow.org/install/gpu for how to download and setup the required libraries for your platform.
Skipping registering GPU devices...
这个问题实际上是Docker镜像文件未安装TensorRT导致的,可以在Dockerfile里添加安装命令后重新构建镜像:
RUN pip install tensorrt -i https://pypi.tuna.tsinghua.edu.cn/simple
以下操作不推荐,进入容器进行安装:
# 1.查询容器ID
docker ps

# 2.在running状态进入容器
docker exec -it ContainerID /bin/bash

# 3.安装软件
pip install tensorrt -i https://pypi.tuna.tsinghua.edu.cn/simple

# 4.提交新的镜像【可以将新的镜像导出使用】
docker commit ContainerID imageName:version
安装后的现象:
root@localhost:/app# python
Python 3.8.18 (default, Sep 20 2023, 11:41:31)
[GCC 12.2.0] on linux
Type "help", "copyright", "credits" or "license" for more information.

# 使用tensorflow报错
>>> import tensorflow as tf
2023-10-09 10:15:55.482545: I tensorflow/core/platform/cpu_feature_guard.cc:182] This TensorFlow binary is optimized to use available CPU instructions in performance-critical operations.
To enable the following instructions: AVX2 AVX512F FMA, in other operations, rebuild TensorFlow with the appropriate compiler flags.
2023-10-09 10:15:56.498608: W tensorflow/compiler/tf2tensorrt/utils/py_utils.cc:38] TF-TRT Warning: Could not find TensorRT

# 先导入tensorrt后使用tensorflow看我用
>>> import tensorrt as tr
>>> import tensorflow as tf
>>> tf.test.is_gpu_available()
WARNING:tensorflow:From <stdin>:1: is_gpu_available (from tensorflow.python.framework.test_util) is deprecated and will be removed in a future version.
Instructions for updating:
Use `tf.config.list_physical_devices('GPU')` instead.
2023-10-09 10:16:41.452672: I tensorflow/core/common_runtime/gpu/gpu_device.cc:1639] Created device /device:GPU:0 with 11389 MB memory:  -> device: 0, name: Tesla T4, pci bus id: 0000:2f:00.0, compute capability: 7.5
True
尝试解决,在容器启动要执行的py文件内加入以下代码,我将以下代码加入到app.py文件内:
import tensorrt as tr
import tensorflow as tf

if __name__ == "__main__":
    available = tf.config.list_physical_devices('GPU')
    print(f"available:{available}")
加入代码后的文件为:
# 3rd parth dependencies
import tensorrt as tr
import tensorflow as tf
from flask import Flask
from routes import blueprint

def create_app():
    available = tf.config.list_physical_devices('GPU')
    print(f"available:{available}")
    app = Flask(__name__)
    app.register_blueprint(blueprint)
    return app
启动容器:
nvidia-docker run --name deepface --privileged=true --restart=always --net="host" -e PATH=/usr/local/cuda-11.2/bin:$PATH -e LD_LIBRARY_PATH=/usr/local/cuda-11.2/lib64:$LD_LIBRARY_PATH -v /root/.deepface/weights/:/root/.deepface/weights/ -v /usr/local/cuda-11.2/:/usr/local/cuda-11.2/ -v /opt/xinan-facesearch-service-public/deepface/api/app.py:/app/app.py -d deepface_image
2.4 Could not create cudnn handle: CUDNN_STATUS_NOT_INITIALIZED
E tensorflow/compiler/xla/stream_executor/cuda/cuda_dnn.cc:437] Could not create cudnn handle: CUDNN_STATUS_NOT_INITIALIZED
E tensorflow/compiler/xla/stream_executor/cuda/cuda_dnn.cc:441] Memory usage: 1100742656 bytes free, 15843721216 bytes total.
E tensorflow/compiler/xla/stream_executor/cuda/cuda_dnn.cc:451] Possibly insufficient driver version: 460.27.4
W tensorflow/core/framework/op_kernel.cc:1828] OP_REQUIRES failed at conv_ops_impl.h:770 : UNIMPLEMENTED: DNN library is not found.
未安装cuDNN导致的问题,安装即可。文章来源:https://www.toymoban.com/news/detail-713328.html
2.5 CuDNN library needs to have matching major version and equal or higher minor version
安装版本跟编译项目的版本不匹配,调整版本后成功使用GPU。文章来源地址https://www.toymoban.com/news/detail-713328.html
E tensorflow/compiler/xla/stream_executor/cuda/cuda_dnn.cc:425] Loaded runtime CuDNN library: 8.1.1 but source was compiled with: 8.6.0. CuDNN library needs to have matching major version and equal or higher minor version. If using a binary install, upgrade your CuDNN library. If building from sources, make sure the library loaded at runtime is compatible with the version specified during compile configuration.
到了这里,关于Docker【部署 05】docker使用tensorflow-gpu安装及调用GPU踩坑记录的文章就介绍完了。如果您还想了解更多内容,请在右上角搜索TOY模板网以前的文章或继续浏览下面的相关文章,希望大家以后多多支持TOY模板网!


![[conda]tf_agents和tensorflow-gpu安装傻瓜式教程](https://imgs.yssmx.com/Uploads/2024/02/508977-1.png)