一、创建Maven项目
 文章来源地址https://www.toymoban.com/news/detail-714381.html
二、添加依赖
- 在
pom.xml文件里添加hadoop和junit依赖
<dependencies>
        <dependency>
            <!--hadoop客户端-->
            <groupId>org.apache.hadoop</groupId>
            <artifactId>hadoop-client</artifactId>
            <version>3.3.4</version>
        </dependency>
        <!--单元调试框架-->
        <dependency>
            <groupId>junit</groupId>
            <artifactId>junit</artifactId>
            <version>4.13.2</version>
        </dependency>
    </dependencies>
三、创建日志属性文件
- 在
resources目录里创建log4j.properties文件

- 代码
log4j.rootLogger=stdout, logfile
log4j.appender.stdout=org.apache.log4j.ConsoleAppender
log4j.appender.stdout.layout=org.apache.log4j.PatternLayout
log4j.appender.stdout.layout.ConversionPattern=%d %p [%c] - %m%n
log4j.appender.logfile=org.apache.log4j.FileAppender
log4j.appender.logfile.File=target/hdfs.log
log4j.appender.logfile.layout=org.apache.log4j.PatternLayout
log4j.appender.logfile.layout.ConversionPattern=%d %p [%c] - %m%n
四、在HDFS上创建文件
- 在
/ied01目录创建hadoop2.txt文件 - 创建
net.xxr.hdfs包,在包里创建CreateFileOnHDFS类

- 编写
create1()方法
package net.xxr.hdfs;

import org.apache.hadoop.conf.Configuration;
import org.apache.hadoop.fs.FileSystem;
import org.apache.hadoop.fs.Path;
import org.junit.Test;

import java.net.URI;

public class CreateFileOnHDFS {
    public void create1() throws Exception{
        // 创建配置对象
        Configuration conf = new Configuration();
        // 定义统一资源标识符
        String uri = "hdfs://master:9000";
        // 创建文件系统对象(基于HDFS的文件系统)
        FileSystem fs = FileSystem.get(new URI(uri), conf);
        // 创建路径对象(指向文件)
        Path path = new Path(uri + "/ied01/hadoop2.txt");
        // 基于路径对象创建文件
        boolean result = fs.createNewFile(path);
        // 根据返回值判断文件是否创建成功
        if (result) {
            System.out.println("文件[" + path + "]创建成功!");
        }else {
            System.out.println("文件[" + path + "]创建失败!");
        }
    }
}
- 结果

- 利用HDFS集群WebUI查看

- 编写
create2()方法,实现判断文件是否存在
 @Test
    public void create2() throws Exception{
        // 创建配置对象
        Configuration conf = new Configuration();
        // 定义统一资源标识符
        String uri = "hdfs://master:9000";
        // 创建文件系统对象(基于HDFS的文件系统)
        FileSystem fs = FileSystem.get(new URI(uri), conf);
        // 创建路径对象(指向文件)
        Path path = new Path(uri + "/ied01/hadoop2.txt");
        // 判断路径对象指向的文件是否存在
        if (fs.exists(path)) {
            // 提示用户文件已存在
            System.out.println("文件[" + path + "]已存在!");
        }else{
            // 基于路径对象创建文件
            boolean result = fs.createNewFile(path);
            // 根据返回值判断文件是否创建成功
            if (result) {
                System.out.println("文件[" + path + "]创建成功!");
            }else {
                System.out.println("文件[" + path + "]创建失败!");
            }

        }
    }
- 结果

五、写入HDFS文件
- 在
net.xxr.hdfs包里创建WriteFileOnHDFS类
1、将数据直接写入HDFS文件
package net.xxr.hdfs;

import org.apache.hadoop.conf.Configuration;
import org.apache.hadoop.fs.FSDataOutputStream;
import org.apache.hadoop.fs.FileSystem;
import org.apache.hadoop.fs.Path;
import org.junit.Test;

import java.net.URI;

/*
功能:写入HDFS文件
作者:小小榕
日期:2022年11月30日
 */

public class WriteFileOnHDFS {
    @Test
    public void write1() throws Exception{
        // 创建配置对象
        Configuration conf = new Configuration();
        conf.set("dfs.client.use.datanode.hostname","true");
        // 定义统一资源标识符
        String uri = "hdfs://master:9000";
        // 创建文件系统对象(基于HDFS的文件系统)
        FileSystem fs = FileSystem.get(new URI(uri), conf,"root");
        // 创建路径对象(指向文件)
        Path path = new Path(uri + "/ied01/hadoop2.txt");
        // 创建文件系统数据字节输出流
        FSDataOutputStream out = fs.create(path);
        // 通过字节输出流向文件写数据
        out.write("Hello Hadoop World".getBytes());
        // 关闭输出流
        out.close();
        // 关闭文件系统对象
        fs.close();
        System.out.println("文件[" + path + "]写入成功");
    }
}
- 结果

- 利用HDFS集群WebUI查看

2、将本地文件写入HDFS文件
- 在项目根目录创建一个文本文件
test.txt
- 创建
create2()方法
@Test
    public void write2() throws Exception {
        // 创建配置对象
        Configuration conf = new Configuration();
        // 设置数据节点主机名属性
        conf.set("dfs.client.use.datanode.hostname", "true");
        // 定义uri字符串
        String uri = "hdfs://master:9000";
        // 创建文件系统对象
        FileSystem fs = FileSystem.get(new URI(uri), conf, "root");
        // 创建路径对象(指向目录或文件)
        Path path = new Path(uri + "/ied01/exam2.txt");
        // 创建文件系统数据字节输出流对象
        FSDataOutputStream out = fs.create(path);
        // 创建文件字符输入流对象
        FileReader fr = new FileReader("test.txt");
        // 创建缓冲字符输入流对象
        BufferedReader br = new BufferedReader(fr);
        // 定义行字符串
        String nextLine = "";
        // 通过循环读取缓冲字符输入流
        while ((nextLine = br.readLine()) != null) {
            // 在控制台输出读取的行
            System.out.println(nextLine);
            // 通过文件系统数据字节输出流对象写入指定文件
            out.write(nextLine.getBytes());
        }
        // 关闭文件系统字节输出流
        out.close();
        // 关闭缓冲字符输入流
        br.close();
        // 关闭文件字符输入流
        fr.close();
        // 提示用户写入文件成功
        System.out.println("本地文件[test.txt]成功写入[" + path + "]!");
    }
- 结果

- 其实这个方法的功能就是将本地文件复制(上传)到HDFS,有没有更简单的处理方法呢?有的,通过使用一个工具类IOUtils来完成文件的相关操作
- 编写
create2_()方法
@Test
    public void write2_() throws Exception {
        // 创建配置对象
        Configuration conf = new Configuration();
        // 设置数据节点主机名属性
        conf.set("dfs.client.use.datanode.hostname", "true");
        // 定义uri字符串
        String uri = "hdfs://master:9000";
        // 创建文件系统对象
        FileSystem fs = FileSystem.get(new URI(uri), conf, "root");
        // 创建路径对象(指向目录或文件)
        Path path = new Path(uri + "/ied01/test2.txt");
        // 创建文件系统数据字节输出流对象
        FSDataOutputStream out = fs.create(path);
        // 创建文件字节输入流对象
        FileInputStream in = new FileInputStream("test.txt");
        // 利用IOUtils类提供的字节拷贝方法来复制文件
        IOUtils.copyBytes(in, out, conf);
        // 关闭文件字节输入流
        in.close();
        // 关闭文件系统数据字节输出流
        out.close();
        // 关闭文件系统
        fs.close();
        // 提示用户写入文件成功
        System.out.println("本地文件[test.txt]成功写入[" + path + "]!");
    }
- 结果

- 查看
/ied01/test.txt内容
六、读取HDFS文件
- 在
net.xxr.hdfs包里创建ReadFileOnHDFS类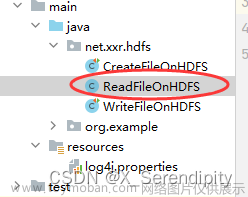
1、读取HDFS文件直接在控制台显示
- 编写
read1()方法
package net.xxr.hdfs;

import org.apache.hadoop.conf.Configuration;
import org.apache.hadoop.fs.FSDataInputStream;
import org.apache.hadoop.fs.FSDataOutputStream;
import org.apache.hadoop.fs.FileSystem;
import org.apache.hadoop.fs.Path;
import org.junit.Test;

import java.io.BufferedReader;
import java.io.InputStreamReader;
import java.net.URI;

/*
功能:读取HDFS文件
作者:小小榕
日期:2022年11月30日
 */

public class ReadFileOnHDFS {
    @Test
    public void read1() throws Exception {
        // 创建配置对象
        Configuration conf = new Configuration();
        // 设置数据节点主机名属性
        conf.set("dfs.client.use.datanode.hostname", "true");
        // 定义uri字符串
        String uri = "hdfs://master:9000";
        // 创建文件系统对象
        FileSystem fs = FileSystem.get(new URI(uri), conf, "root");
        // 创建路径对象(指向目录或文件)
        Path path = new Path(uri + "/ied01/test2.txt");
        // 创建文件系统数据字节输入流对象
        FSDataInputStream in = fs.open(path);
        // 创建缓冲字符输入流对象,提高读取效率(字节流-->字符流-->缓冲流)
        BufferedReader br = new BufferedReader(new InputStreamReader(in));
        // 定义行字符串
        String nextLine = "";
        // 通过循环读取缓冲字符输入流
        while ((nextLine = br.readLine()) != null) {
            // 在控制台输出读取的行内容
            System.out.println(nextLine);
        }
        // 关闭缓冲字符输入流
        br.close();
        // 关闭文件系统数据字节输入流
        in.close();
        // 关闭文件系统
        fs.close();
    }
}
- 结果

- 利用
IOUtils类简化代码 - 创建
read1_()测试方法
2、读取HDFS文件,保存为本地文件
- 任务:将/ied01/test2.txt下载到项目下download目录里
- 创建download目录

- 创建
read2()方法
@Test
    public void read2() throws Exception {
        // 创建配置对象
        Configuration conf = new Configuration();
        // 设置数据节点主机名属性
        conf.set("dfs.client.use.datanode.hostname", "true");
        // 定义uri字符串
        String uri = "hdfs://master:9000";
        // 创建文件系统对象
        FileSystem fs = FileSystem.get(new URI(uri), conf, "root");
        // 创建路径对象(指向目录或文件)
        Path path = new Path(uri + "/ied01/test2.txt");
        // 创建文件系统数据字节输入流对象
        FSDataInputStream in = fs.open(path);
        // 创建文件字节输出流
        FileOutputStream out = new FileOutputStream("download/exam.txt");
        // 读取HDFS文件(靠输入流),写入本地文件(靠输出流)
        IOUtils.copyBytes(in, out, conf);
        // 关闭文件系统数据字节输入流
        in.close();
        // 关闭文件字节输出流
        out.close();
        // 关闭文件系统
        fs.close();
        // 提示用户文件下载成功
        System.out.println("文件[" + path + "]下载到本地文件[download/exam.txt]!");
    }
- 结果


文章来源:https://www.toymoban.com/news/detail-714381.html
到了这里,关于大数据学习:使用Java API操作HDFS的文章就介绍完了。如果您还想了解更多内容,请在右上角搜索TOY模板网以前的文章或继续浏览下面的相关文章,希望大家以后多多支持TOY模板网!