目录
第一步,创建新项目
第二步,设计UI
第三步,实现计算逻辑
第四步,测试应用程序
随着移动互联网的普及,手机应用程序已经成为人们生活中不可或缺的一部分。计算器是一类被广泛使用的应用程序之一,因此学习如何开发一款简易的计算器应用程序是学习Android Studio开发的一个很好的开始。
Android Studio是一款Google开发的用于创建安卓应用的集成开发环境(IDE), 它可以帮助开发者快速设计、开发和测试应用程序。接下来我将为大家介绍如何使用Android Studio创建一个简易的计算器应用程序。
第一步,创建新项目
打开Android Studio并创建一个新项目。

选择"Empty Activity"模板,然后为项目命名,选择存储项目的位置。
第二步,设计UI
我们需要设计一个简单的计算器界面。添加两个EditText元素用于显示计算器输入和输出结果。接着,在XML文件中依次添加多个Button元素,这些元素将作为计算器中需要用到的各种计算操作进行排列。这些Button元素使用GridLayout布局将它们排列在一起。
<?xml version="1.0" encoding="utf-8"?>
<GridLayout xmlns:android="http://schemas.android.com/apk/res/android"
    xmlns:app="http://schemas.android.com/apk/res-auto"
    xmlns:tools="http://schemas.android.com/tools"
    android:layout_width="match_parent"
    android:layout_height="match_parent"
    tools:context=".MainActivity"
    android:orientation="vertical">

    <GridLayout
        android:layout_width="match_parent"
        android:layout_height="wrap_content"
        android:orientation="vertical">
        <EditText
            android:id="@+id/ed_srk"
            android:layout_width="match_parent"
            android:layout_height="100dp"
            android:hint="输入框"/>
        <EditText
            android:id="@+id/ed_sck"
            android:layout_width="match_parent"
            android:layout_height="100dp"
            android:hint="输出框"/>
    </GridLayout>

   <GridLayout
       android:layout_width="match_parent"
       android:layout_height="wrap_content"
       android:layout_gravity="center|top"
       android:orientation="horizontal"
       android:rowCount="5"
       android:columnCount="4">
       <Button
           android:id="@+id/btn_c"
           android:layout_width="160dp"
           android:layout_height="60dp"
           android:layout_columnSpan="2"
           android:text="c"/>
       <Button
           android:id="@+id/btn_del"
           android:layout_width="80dp"
           android:layout_height="60dp"
           android:text="DEL"/>
       <Button
           android:id="@+id/btn_chu"
           android:layout_width="80dp"
           android:layout_height="60dp"
           android:text="/"/>
       <Button
           android:id="@+id/btn7"
           android:layout_width="80dp"
           android:layout_height="60dp"
           android:text="7"/>
       <Button
           android:id="@+id/btn8"
           android:layout_width="80dp"
           android:layout_height="60dp"
           android:text="8"/>
       <Button
           android:id="@+id/btn9"
           android:layout_width="80dp"
           android:layout_height="60dp"
           android:text="9"/>
       <Button
           android:id="@+id/btn_che"
           android:layout_width="80dp"
           android:layout_height="60dp"
           android:text="*"/>
       <Button
           android:id="@+id/btn4"
           android:layout_width="80dp"
           android:layout_height="60dp"
           android:text="4"/>
       <Button
           android:id="@+id/btn5"
           android:layout_width="80dp"
           android:layout_height="60dp"
           android:text="5"/>
       <Button
           android:id="@+id/btn6"
           android:layout_width="80dp"
           android:layout_height="60dp"
           android:text="6"/>
       <Button
           android:id="@+id/btn_jih"
           android:layout_width="80dp"
           android:layout_height="60dp"
           android:text="-"/>
       <Button
           android:id="@+id/btn1"
           android:layout_width="80dp"
           android:layout_height="60dp"
           android:text="1"/>
       <Button
           android:id="@+id/btn2"
           android:layout_width="80dp"
           android:layout_height="60dp"
           android:text="2"/>
       <Button
           android:id="@+id/btn3"
           android:layout_width="80dp"
           android:layout_height="60dp"
           android:text="3"/>
       <Button
           android:id="@+id/btn_jah"
           android:layout_width="80dp"
           android:layout_height="60dp"
           android:text="+"/>
       <Button
           android:id="@+id/btn_yl"
           android:layout_width="80dp"
           android:layout_height="60dp"
           android:text="预留"/>
       <Button
           android:id="@+id/btn0"
           android:layout_width="80dp"
           android:layout_height="60dp"
           android:text="0"/>
       <Button
           android:id="@+id/btn_dian"
           android:layout_width="80dp"
           android:layout_height="60dp"
           android:text="."/>
       <Button
           android:id="@+id/btn_dy"
           android:layout_width="80dp"
           android:layout_height="60dp"
           android:text="="/>
   </GridLayout>
</GridLayout>
第三步,实现计算逻辑
在Java文件中定义一个类,继承自Activity,并实现OnClickListener接口。这一步的目的是为每个Button元素定义单独的事件处理程序。在这个类中,将实现查找所有Button元素并为它们设置事件处理程序,接收用户的输入,根据不同的计算操作,计算出应该显示的结果并显示在输出区域中。
public class MainActivity extends AppCompatActivity implements View.OnClickListener {
    //创建对象
    private Button mBtn1, mBtn2, mBtn3, mBtn4, mBtn5,
            mBtn6, mBtn7, mBtn8, mBtn9, mBtn0,
            mBtnc, mBtndel, mBtnchu, mBtnche, mBtnjia,
            mBtnjian, mBtndian, mBtndy, mBtnyl;
    private EditText edsrk, edsck;

    //判断文本框是否清空
    private boolean deng_flag;

    @Override
    protected void onCreate(Bundle savedInstanceState) {
        super.onCreate(savedInstanceState);
        setContentView(R.layout.activity_main);

        mBtn1 = findViewById(R.id.btn1);
        mBtn2 = findViewById(R.id.btn2);
        mBtn3 = findViewById(R.id.btn3);
        mBtn4 = findViewById(R.id.btn4);
        mBtn5 = findViewById(R.id.btn5);
        mBtn6 = findViewById(R.id.btn6);
        mBtn7 = findViewById(R.id.btn7);
        mBtn8 = findViewById(R.id.btn8);
        mBtn9 = findViewById(R.id.btn9);
        mBtn0 = findViewById(R.id.btn0);
        mBtnc = findViewById(R.id.btn_c);
        mBtndel = findViewById(R.id.btn_del);
        mBtnchu = findViewById(R.id.btn_chu);
        mBtnjia = findViewById(R.id.btn_jah);
        mBtnjian = findViewById(R.id.btn_jih);
        mBtndian = findViewById(R.id.btn_dian);
        mBtndy = findViewById(R.id.btn_dy);
        mBtnyl = findViewById(R.id.btn_yl);
        mBtnche = findViewById(R.id.btn_che);

        //按钮设置点击事件
        mBtn1.setOnClickListener(this);
        mBtn2.setOnClickListener(this);
        mBtn3.setOnClickListener(this);
        mBtn4.setOnClickListener(this);
        mBtn5.setOnClickListener(this);
        mBtn6.setOnClickListener(this);
        mBtn7.setOnClickListener(this);
        mBtn8.setOnClickListener(this);
        mBtn9.setOnClickListener(this);
        mBtn0.setOnClickListener(this);
        mBtnc.setOnClickListener(this);
        mBtndel.setOnClickListener(this);
        mBtnchu.setOnClickListener(this);
        mBtnjia.setOnClickListener(this);
        mBtnjian.setOnClickListener(this);
        mBtndian.setOnClickListener(this);
        mBtndy.setOnClickListener(this);
        mBtnyl.setOnClickListener(this);
        mBtnche.setOnClickListener(this);

        edsrk = findViewById(R.id.ed_srk);
        edsck = findViewById(R.id.ed_sck);
    }

    @Override
    public void onClick(View view) {
        String input = edsrk.getText().toString();
        String output = edsck.getText().toString();

        switch (view.getId()) {
            case R.id.btn1:
            case R.id.btn2:
            case R.id.btn3:
            case R.id.btn4:
            case R.id.btn5:
            case R.id.btn6:
            case R.id.btn7:
            case R.id.btn8:
            case R.id.btn9:
            case R.id.btn0:

            case R.id.btn_dian:
                if (deng_flag) {
                    deng_flag = false;
                    edsrk.setText(null);
                    edsrk.setText(((Button) view).getText());
                } else {
                    edsrk.setText(input + ((Button) view).getText());
                }
                break;

            case R.id.btn_che:
            case R.id.btn_jah:
            case R.id.btn_jih:
            case R.id.btn_chu:
                edsrk.setText(input + " " + ((Button) view).getText() + " ");
                break;

            case R.id.btn_dy:
                //调用下方方法计算结果
                getResult();
                break;

            case R.id.btn_yl:
            case R.id.btn_c:
                edsrk.setText(null);
                edsck.setText(null);
                break;

            case R.id.btn_del:
                //判断是否为空再进行删除
                if (deng_flag) {
                    deng_flag = false;
                    edsrk.setText("");
                } else if (input != null && !input.equals("")) {
                    edsrk.setText(input.substring(0, input.length() - 1));
                }
                break;
        }
    }

    private void getResult() {
        String input = edsrk.getText().toString();

        deng_flag = true;

        double dResult = 0;
        int iResult = 0;

        //截取运算符前面的字符串
        String s1 = input.substring(0, input.indexOf(" "));
        //截取运算符
        String op = input.substring(input.indexOf(" ") + 1, input.indexOf(" ") + 2);
        //截取运算符后面的字符串
        String s2 = input.substring(input.indexOf(" ") + 3);

        //根据s1,s2转换 字符串转换数值
        double d1 = Double.parseDouble(s1);
        double d2 = Double.parseDouble(s2);

        //根据输入的运算符号获得计算结果,将结果返回到输出框
        if (op.equals("+")) {
            dResult = d1 + d2;
        } else if (op.equals("-")) {
            dResult = d1 - d2;
        } else if (op.equals("*")) {
            dResult = d1 * d2;
        } else if (op.equals("/")) {
            if (d1 == 0) {
                dResult = 0;
            } else {
                dResult = d1 / d2;
            }
        } else {
            edsck.setText(dResult + "");
        }

        //如果输入框数值中含有点小数点或者运算符为除号则结果返回double值
        if (s1.contains(".") || s2.contains(".") || op.equals("/")) {
            edsck.setText(dResult + "");
        } else {
            iResult = (int) dResult;
            edsck.setText(iResult + "");
        }
    }
}
第四步,测试应用程序
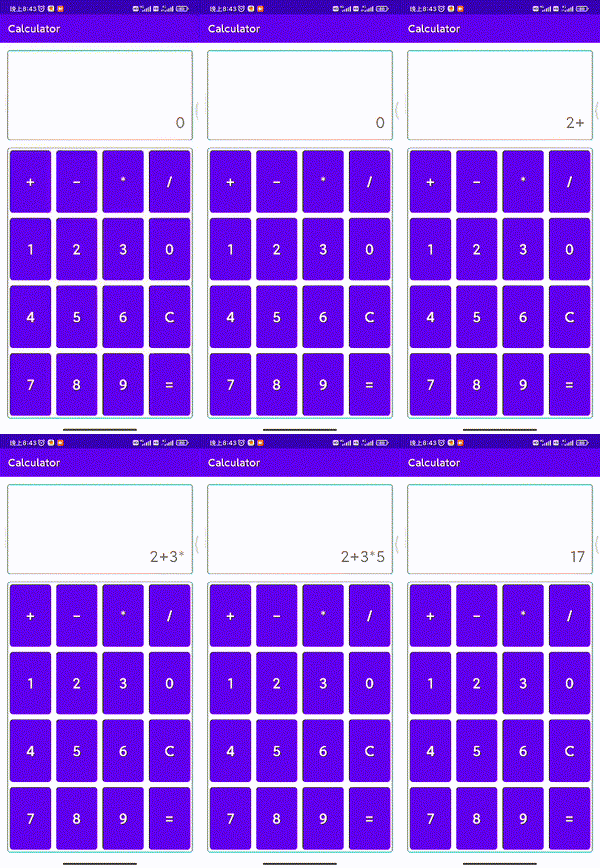
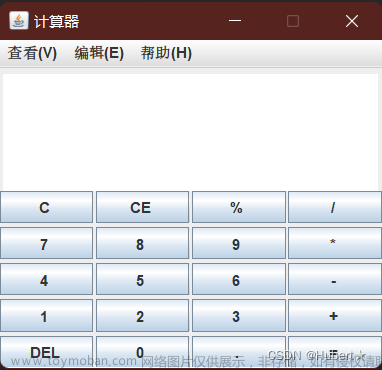
(实现效果)

以上就是使用Android Studio创建一个简易计算器应用程序的步骤。文章来源:https://www.toymoban.com/news/detail-714404.html
本文以简易计算器为例,简要介绍了使用Android Studio进行应用程序开发的基本流程,包括创建新项目、添加用户接口元素、定义事件处理程序、测试应用程序和发布应用程序等步骤。只要遵循这些基本步骤,就可以在短短的时间内构建出一个简单但功能齐全的计算器应用程序。文章来源地址https://www.toymoban.com/news/detail-714404.html
到了这里,关于Android Studio简易计算器的文章就介绍完了。如果您还想了解更多内容,请在右上角搜索TOY模板网以前的文章或继续浏览下面的相关文章,希望大家以后多多支持TOY模板网!


