🎉🎉欢迎来到我的CSDN主页!🎉🎉
🏅我是Java方文山,一个在CSDN分享笔记的博主。📚📚
🌟推荐给大家我的专栏《微信小程序开发实战》。🎯🎯
👉点击这里,就可以查看我的主页啦!👇👇
Java方文山的个人主页
🎁如果感觉还不错的话请给我点赞吧!🎁🎁
💖期待你的加入,一起学习,一起进步!💖💖

一、微信授权登录流程
小程序登录
小程序可以通过微信官方提供的登录能力方便地获取微信提供的用户身份标识,快速建立小程序内的用户体系。

👇👇图解👇👇

步骤流程:
1.小程序调用wx.login() 获取 临时登录凭证code ,并回传到开发者服务器
2.开发者服务器以appid+appsecret+code换取 用户唯一标识openid和会话密钥session_key。
3.开发者服务器根据用户标识来生成自定义登录态用于后续业务逻辑中前后端交互时识别用户身份
4.客户端保存后端生成的自定义登录态,并在下一次发送请求的时候带上这个自定义登录态。
注意:临时登录凭证code只能使用一次
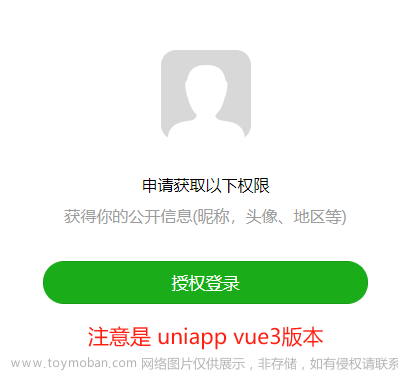
二、微信用户授权
下面我以两种方式的代码来给大家论证一下微信用户授权登录的流程,第一种不需要用户确认即可完成用户授权登录在开发中并不是那么的安全,第二种则是需要用户确认方可进行授权登录。
前期准备工作
wxml代码展示
<!--pages/index/index.wxml-->
<view>
  <button wx:if="{{canIUseGetUserProfile}}" type="primary" class="wx-login-btn" bindtap="getUserProfile">微信直接登录1</button>
  <button wx:else open-type="getUserInfo" type="primary" class="wx-login-btn" bindgetuserinfo="wxLogin">微信直接登录2</button>
  <image mode="scaleToFill" src="{{userInfo.avatarUrl}}" />
  <text>昵称:{{userInfo.nickName}}</text>
</view>
1.wx.login
JS代码展示
 wxLogin: function(e) {
    debugger
    console.log('wxLogin')
    console.log(e.detail.userInfo);
    this.setData({
      userInfo: e.detail.userInfo
    })
    if (e.detail.userInfo == undefined) {
      app.globalData.hasLogin = false;
      util.showErrorToast('微信登录失败');
      return;
    }
效果展示:

看得出确实是走的这个方法并获取用户信息的,我们继续看一下另一个方法。
2.wx.getUserProfile
JS代码展示
  getUserProfile(e) {
    console.log('getUserProfile')
    // 推荐使用 wx.getUserProfile 获取用户信息,开发者每次通过该接口获取用户个人信息均需用户确认
    // 开发者妥善保管用户快速填写的头像昵称,避免重复弹窗
    wx.getUserProfile({
      desc: '用于完善会员资料', // 声明获取用户个人信息后的用途,后续会展示在弹窗中,请谨慎填写
      success: (res) => {
        console.log(res);
        this.setData({
          userInfo: res.userInfo,
          hasUserInfo: true
        })
      }
    })
  }
效果展示: 
3.用户授权完成后端交互
我们使用用户授权后将用户信息保存到数据库方便下次用户发送请求的时候做身份认证。
封装的代码
utils/util.js
function formatTime(date) {
  var year = date.getFullYear()
  var month = date.getMonth() + 1
  var day = date.getDate()

  var hour = date.getHours()
  var minute = date.getMinutes()
  var second = date.getSeconds()

  return [year, month, day].map(formatNumber).join('-') + ' ' + [hour, minute, second].map(formatNumber).join(':')
}

function formatNumber(n) {
  n = n.toString()
  return n[1] ? n : '0' + n
}


/**
 * 封封微信的的request
 */
function request(url, data = {}, method = "GET") {
  return new Promise(function (resolve, reject) {
    wx.request({
      url: url,
      data: data,
      method: method,
      timeout:3000,
      header: {
        'Content-Type': 'application/json',
        'X-OA-Token': wx.getStorageSync('token')
      },
      success: function (res) {
        if (res.statusCode == 200) {
          if (res.data.errno == 501) {
            // 清除登录相关内容
            try {
              wx.removeStorageSync('userInfo');
              wx.removeStorageSync('token');
            } catch (e) {
              // Do something when catch error
            }
            // 切换到登录页面
            wx.navigateTo({
              url: '/pages/auth/login/login'
            });
          } else {
            resolve(res.data);
          }
        } else {
          reject(res.errMsg);
        }

      },
      fail: function (err) {
        reject(err)
      }
    })
  });
}

function redirect(url) {
  //判断页面是否需要登录
  if (false) {
    wx.redirectTo({
      url: '/pages/auth/login/login'
    });
    return false;
  } else {
    wx.redirectTo({
      url: url
    });
  }
}

function showErrorToast(msg) {
  wx.showToast({
    title: msg,
    image: '/static/images/icon_error.png'
  })
}

function jhxLoadShow(message) {
  if (wx.showLoading) { // 基础库 1.1.0 微信6.5.6版本开始支持,低版本需做兼容处理
    wx.showLoading({
      title: message,
      mask: true
    });
  } else { // 低版本采用Toast兼容处理并将时间设为20秒以免自动消失
    wx.showToast({
      title: message,
      icon: 'loading',
      mask: true,
      duration: 20000
    });
  }
}

function jhxLoadHide() {
  if (wx.hideLoading) { // 基础库 1.1.0 微信6.5.6版本开始支持,低版本需做兼容处理
    wx.hideLoading();
  } else {
    wx.hideToast();
  }
}

module.exports = {
  formatTime,
  request,
  redirect,
  showErrorToast,
  jhxLoadShow,
  jhxLoadHide
}
config/api.js
// 以下是业务服务器API地址
 // 本机开发API地址
var WxApiRoot = 'http://localhost:8080/oapro/wx/';
// 测试环境部署api地址
// var WxApiRoot = 'http://192.168.191.1:8080/oapro/wx/';
// 线上平台api地址
//var WxApiRoot = 'https://www.oa-mini.com/demo/wx/';

module.exports = {
  IndexUrl: WxApiRoot + 'home/index', //首页数据接口
  SwiperImgs: WxApiRoot+'swiperImgs',
  MettingInfos: WxApiRoot+'meeting/list',
  AuthLoginByWeixin: WxApiRoot + 'auth/login_by_weixin', //微信登录
  UserIndex: WxApiRoot + 'user/index', //个人页面用户相关信息
  AuthLogout: WxApiRoot + 'auth/logout', //账号登出
  AuthBindPhone: WxApiRoot + 'auth/bindPhone' //绑定微信手机号
};
JS代码
// pages/auth/login/login.js
var util = require('../../../utils/util.js');
var user = require('../../../utils/user.js');
const app = getApp();
Page({

    /**
     * 页面的初始数据
     */
    data: {
        canIUseGetUserProfile: false, // 用于向前兼容
        lock:false
    },
    onLoad: function(options) {
        // 页面初始化 options为页面跳转所带来的参数
        // 页面渲染完成
        if (wx.getUserProfile) {
          this.setData({
            canIUseGetUserProfile: true
          })
        }
        //console.log('login.onLoad.canIUseGetUserProfile='+this.data.canIUseGetUserProfile)
    },

    /**
     * 生命周期函数--监听页面初次渲染完成
     */
    onReady() {

    },

    /**
     * 生命周期函数--监听页面显示
     */
    onShow() {

    },
    getUserProfile(e) {
        console.log('getUserProfile');
        // 推荐使用wx.getUserProfile获取用户信息,开发者每次通过该接口获取用户个人信息均需用户确认
        // 开发者妥善保管用户快速填写的头像昵称,避免重复弹窗
        wx.getUserProfile({
            desc: '用于完善会员资料', // 声明获取用户个人信息后的用途,后续会展示在弹窗中,请谨慎填写
            success: (res) => {
                //console.log(res);
                user.checkLogin().catch(() => {
                    user.loginByWeixin(res.userInfo).then(res => {
                      app.globalData.hasLogin = true;
                      wx.navigateBack({
                        delta: 1
                      })
                    }).catch((err) => {
                      app.globalData.hasLogin = false;
                      if(err.errMsg=="request:fail timeout"){
                        util.showErrorToast('微信登录超时');
                      }else{
                        util.showErrorToast('微信登录失败');
                      }
                      this.setData({
                        lock:false
                      })
                    });
                  });
            },
            fail: (res) => {
                app.globalData.hasLogin = false;
                console.log(res);
                util.showErrorToast('微信登录失败');
            }
        });
    },
    wxLogin: function(e) {
        console.log('wxLogin');
        if (e.detail.userInfo == undefined) {
          app.globalData.hasLogin = false;
          util.showErrorToast('微信登录失败');
          return;
        }
        user.checkLogin().catch(() => {
            user.loginByWeixin(e.detail.userInfo).then(res => {
              app.globalData.hasLogin = true;
              wx.navigateBack({
                delta: 1
              })
            }).catch((err) => {
              app.globalData.hasLogin = false;
              if(err.errMsg=="request:fail timeout"){
                util.showErrorToast('微信登录超时');
              }else{
                util.showErrorToast('微信登录失败');
              }
            });

          });
    },
    accountLogin() {
        console.log('开发中....')
    }

})
WXML代码
<view class="container">
  <view class="login-box">
    <button wx:if="{{canIUseGetUserProfile}}" type="primary" class="wx-login-btn" bindtap="getUserProfile">微信直接登录</button>
    <button wx:else open-type="getUserInfo" type="primary" class="wx-login-btn" bindgetuserinfo="wxLogin">微信直接登录</button>
    <button type="primary" class="account-login-btn" bindtap="accountLogin">账号登录</button>
  </view>
</view>
后端配置appid+appsecret与数据库连接
后端代码
 /**
     * 微信登录
     *
     * @param wxLoginInfo
     *            请求内容,{ code: xxx, userInfo: xxx }
     * @param request
     *            请求对象
     * @return 登录结果
     */
    @PostMapping("login_by_weixin")
    public Object loginByWeixin(@RequestBody WxLoginInfo wxLoginInfo, HttpServletRequest request) {

        //客户端需携带code与userInfo信息
        String code = wxLoginInfo.getCode();
        UserInfo userInfo = wxLoginInfo.getUserInfo();
        if (code == null || userInfo == null) {
            return ResponseUtil.badArgument();
        }
        //调用微信sdk获取openId及sessionKey
        String sessionKey = null;
        String openId = null;
        try {
            long beginTime = System.currentTimeMillis();
            //
            WxMaJscode2SessionResult result = this.wxService.getUserService().getSessionInfo(code);
//            Thread.sleep(6000);
            long endTime = System.currentTimeMillis();
            log.info("响应时间:{}",(endTime-beginTime));
            sessionKey = result.getSessionKey();//session id
            openId = result.getOpenid();//用户唯一标识 OpenID
        } catch (Exception e) {
            e.printStackTrace();
        }

        if (sessionKey == null || openId == null) {
            log.error("微信登录,调用官方接口失败:{}", code);
            return ResponseUtil.fail();
        }else{
            log.info("openId={},sessionKey={}",openId,sessionKey);
        }
        //根据openId查询wx_user表
        //如果不存在,初始化wx_user,并保存到数据库中
        //如果存在,更新最后登录时间
        WxUser user = userService.queryByOid(openId);

        if (user == null) {
            user = new WxUser();
            user.setUsername(openId);
            user.setPassword(openId);
            user.setWeixinOpenid(openId);
            user.setAvatar(userInfo.getAvatarUrl());
            user.setNickname(userInfo.getNickName());
            user.setGender(userInfo.getGender());
            user.setUserLevel((byte) 0);
            user.setStatus((byte) 0);
            user.setLastLoginTime(new Date());
            user.setLastLoginIp(IpUtil.client(request));
            user.setShareUserId(1);

            userService.add(user);

        } else {
            user.setLastLoginTime(new Date());
            user.setLastLoginIp(IpUtil.client(request));
            if (userService.updateById(user) == 0) {
                log.error("修改失败:{}", user);
                return ResponseUtil.updatedDataFailed();
            }
        }
        // token
        UserToken userToken = null;
        try {
            userToken = UserTokenManager.generateToken(user.getId());
        } catch (Exception e) {
            log.error("微信登录失败,生成token失败:{}", user.getId());
            e.printStackTrace();
            return ResponseUtil.fail();
        }
        userToken.setSessionKey(sessionKey);
        log.info("SessionKey={}",UserTokenManager.getSessionKey(user.getId()));
        Map<Object, Object> result = new HashMap<Object, Object>();
        result.put("token", userToken.getToken());
        result.put("tokenExpire", userToken.getExpireTime().toString());
        userInfo.setUserId(user.getId());
        if (!StringUtils.isEmpty(user.getMobile())) {// 手机号存在则设置
            userInfo.setPhone(user.getMobile());
        }
        try {
            DateFormat df = new SimpleDateFormat("yyyy-MM-dd");
            String registerDate = df.format(user.getAddTime() != null ? user.getAddTime() : new Date());
            userInfo.setRegisterDate(registerDate);
            userInfo.setStatus(user.getStatus());
            userInfo.setUserLevel(user.getUserLevel());// 用户层级
            userInfo.setUserLevelDesc(UserTypeEnum.getInstance(user.getUserLevel()).getDesc());// 用户层级描述
        } catch (Exception e) {
            log.error("微信登录:设置用户指定信息出错:"+e.getMessage());
            e.printStackTrace();
        }
        result.put("userInfo", userInfo);


        log.info("【请求结束】微信登录,响应结果:{}", JSONObject.toJSONString(result));

        return ResponseUtil.ok(result);
    }
数据库展示

效果演示

三、微信手机号授权
手机授权原理也是如此只不过调用的接口不同罢了。
JS代码
var util = require('../../../utils/util.js');
var api = require('../../../config/api.js');
var user = require('../../../utils/user.js');
var app = getApp();
Page({

  /**
   * 页面的初始数据
   */
  data: {
    userInfo: {},
    hasLogin: false,
    userSharedUrl: ''
  },

  /**
      * 生命周期函数--监听页面加载
   */
  onLoad: function (options) {

  },
  onShow: function () {
    let that = this;
    //获取用户的登录信息
    let userInfo = wx.getStorageSync('userInfo');
    this.setData({
      userInfo: userInfo,
      hasLogin: true
    });

  },
  getPhoneNumber: function (e) {
      console.log(e);
    let that = this;
    if (e.detail.errMsg !== "getPhoneNumber:ok") {
      // 拒绝授权
      return;
    }

    if (!this.data.hasLogin) {
      wx.showToast({
        title: '绑定失败:请先登录',
        icon: 'none',
        duration: 2000
      });
      return;
    }

    util.request(api.AuthBindPhone, {
      iv: e.detail.iv,
      encryptedData: e.detail.encryptedData
    }, 'POST').then(function (res) {
      if (res.errno === 0) {
        let userInfo = wx.getStorageSync('userInfo');
        userInfo.phone = res.data.phone;//设置手机号码
        wx.setStorageSync('userInfo', userInfo);
        that.setData({
          userInfo: userInfo,
          hasLogin: true
        });
        wx.showToast({
          title: '绑定手机号码成功',
          icon: 'success',
          duration: 2000
        });
      }
    });
  },
  exitLogin: function () {
    wx.showModal({
      title: '',
      confirmColor: '#b4282d',
      content: '退出登录?',
      success: function (res) {
        if (!res.confirm) {
          return;
        }

        util.request(api.AuthLogout, {}, 'POST');
        app.globalData.hasLogin = false;
        wx.removeStorageSync('token');
        wx.removeStorageSync('userInfo');
        wx.reLaunch({
          url: '/pages/index/index'
        });
      }
    })
  }
})
WXML代码
<!--pages/ucenter/user/user.wxml-->
<form bindsubmit="formSubmit">
    <view class='personal-data'>
        <view class='list'>
            <view class='item acea-row row-between-wrapper'>
                <view>头像</view>
                <view class='pictrue'>
                    <image src='{{userInfo.avatarUrl}}'></image>
                </view>
            </view>
            <view class='item acea-row row-between-wrapper'>
                <view>名字</view>
                <view class='input'><input type='text' disabled='true' name='nickname' value='{{userInfo.nickName}}'></input></view>
            </view>
            <view class='item acea-row row-between-wrapper'>
                <view>手机号码</view>
                <button name='phone' class='phoneW' value='{{userInfo.phone}}' wx:if="{{!userInfo.phone}}" bindgetphonenumber="getPhoneNumber" hover-class='none' open-type='getPhoneNumber'>
                    点击获取
                </button>
                <view class='input acea-row row-between-wrapper' wx:else>
                    <input type='text' disabled='true' name='phone' value='{{userInfo.phone}}' class='id'></input>
                    <text class='iconfont icon-suozi'></text>
                </view>
            </view>

            <view class='item acea-row row-between-wrapper'>
                <view>ID号</view>
                <view class='input acea-row row-between-wrapper'>
                    <input type='text' value='1000{{userInfo.userId}}' disabled='true' class='id'></input>
                    <text class='iconfont icon-suozi'></text>
                </view>
            </view>
        </view>
        <button class='modifyBnt' bindtap="exitLogin">退 出</button>
    </view>
</form>
后端代码
 /**
     * 绑定手机号码
     *
     * @param userId
     * @param body
     * @return
     */
    @PostMapping("bindPhone")
    public Object bindPhone(@LoginUser Integer userId, @RequestBody String body) {
        log.info("【请求开始】绑定手机号码,请求参数,body:{}", body);

        String sessionKey = UserTokenManager.getSessionKey(userId);
        String encryptedData = JacksonUtil.parseString(body, "encryptedData");
        String iv = JacksonUtil.parseString(body, "iv");
        WxMaPhoneNumberInfo phoneNumberInfo = null;
        try {
            phoneNumberInfo = this.wxService.getUserService().getPhoneNoInfo(sessionKey, encryptedData, iv);
        } catch (Exception e) {
            log.error("绑定手机号码失败,获取微信绑定的手机号码出错:{}", body);
            e.printStackTrace();
            return ResponseUtil.fail();
        }
        String phone = phoneNumberInfo.getPhoneNumber();
        WxUser user = userService.selectByPrimaryKey(userId);
        user.setMobile(phone);
        if (userService.updateById(user) == 0) {
            log.error("绑定手机号码,更新用户信息出错,id:{}", user.getId());
            return ResponseUtil.updatedDataFailed();
        }
        Map<Object, Object> data = new HashMap<Object, Object>();
        data.put("phone", phone);

        log.info("【请求结束】绑定手机号码,响应结果:{}", JSONObject.toJSONString(data));
        return ResponseUtil.ok(data);
    }
效果展示

四、注销登录
注销登录的前端代码同上,后端代码如下:
后端代码
 /**
     * 注销登录
     */
    @PostMapping("logout")
    public Object logout(@LoginUser Integer userId) {
        log.info("【请求开始】注销登录,请求参数,userId:{}", userId);
        if (userId == null) {
            return ResponseUtil.unlogin();
        }
        try {
            UserTokenManager.removeToken(userId);
        } catch (Exception e) {
            log.error("注销登录出错:userId:{}", userId);
            e.printStackTrace();
            return ResponseUtil.fail();
        }

        log.info("【请求结束】注销登录成功!");
        return ResponseUtil.ok();
    }
效果演示

到这里我的分享就结束了,欢迎到评论区探讨交流!!
💖如果觉得有用的话还请点个赞吧 💖文章来源:https://www.toymoban.com/news/detail-719433.html
 文章来源地址https://www.toymoban.com/news/detail-719433.html
到了这里,关于微信小程序三种授权登录以及授权登录流程讲解的文章就介绍完了。如果您还想了解更多内容,请在右上角搜索TOY模板网以前的文章或继续浏览下面的相关文章,希望大家以后多多支持TOY模板网!