前言
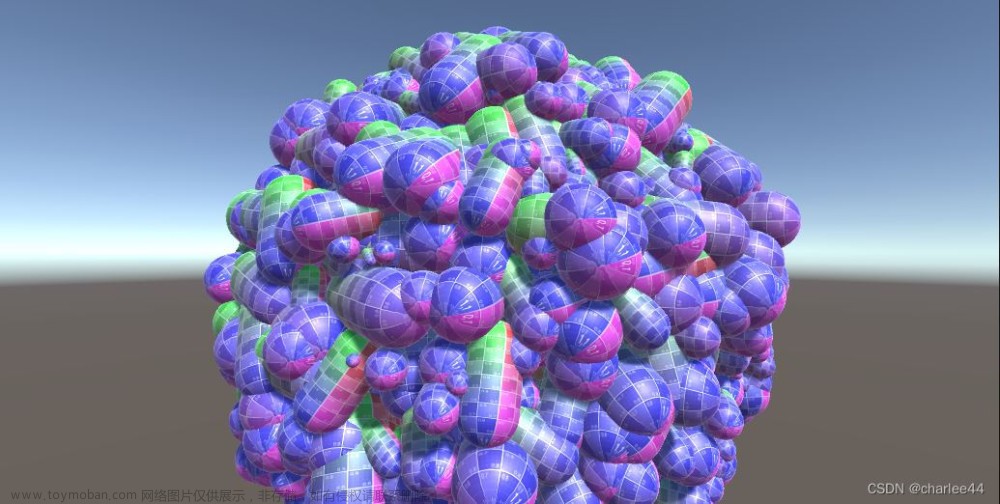
开放世界游戏中植被和物件的数量往往是巨大, 而传统组织大量植被渲染的方式是利用QuadTree/Octree/Kd-Tree等数据结构对植被Intance数据进行预先生成一个个Cluster,然后在运行时进行FrustumCull,收集可视的所有Cluster,最后进行DrawInstance.
这种方式往往存在两个缺点:
[1]Cluster粒度和DrawInstance渲染的粒度冲突,也就是单个Cluster粒度很大时,很多位于视椎体外的Instance是浪费的绘制(VS/PS上的浪费)。而当Cluster粒度比较小时, DrawInstance渲染批次可能会明显上升。
[2]第二个缺点是完全依赖CPU的剔除, 从效率上很难做到单个Instance的高效剔除。

对于上面两点,基于GPU剔除的方案可以很好解决这个问题.
CPU Cull + GPU Cull
CPU Cull(QuadTree)
以四叉树组织Instance数据

static class QuadTreeUtil
{
    public const int QUAD_TREE_NODE_MAX_NUM = 128;
}

[Serializable]
public struct InstanceData
{
    public Vector4 instance;
    public InstanceData(Vector3 inPos, int clusterId)
    {
        instance = new Vector4(inPos.x, inPos.y, inPos.z, (float)clusterId);
    }
}


[Serializable]
public class QuadTree
{
    [NonSerialized]
    public Vector3[] alllTreePos;

    [HideInInspector]
    public InstanceData[] instanceDatas;
    private int[] treeCullFlags;
    public TreeNode rootNode;
    public int leafId;

    public QuadTree(Vector3[] inAllTreePos, Vector2 regionMin, Vector2 regionMax)
    {
        List<int> indices = inAllTreePos.Select((item, index) => index).ToList();
        alllTreePos = inAllTreePos;
        leafId = 0;
        rootNode = new TreeNode(this, indices, regionMin, regionMax);
        BuildTreeClusterData();
    }
}
默认下每个叶子节点最大数量为128个Instance

Instance数据得记录所在的Cluster(leafNodeId)
所以CPU阶段的QuadTree主要是两个作用:
[1]收集InstanceDatas


[2]在CPU每帧进行QuadTree的粗粒度Frustum剔除,求出可见的leafNode Id集合。这里的leafNode Id集合用固定大小数组int[] 来表示, 1代表被剔除,0代表可见,用于后续的GPU剔除。

GPU Cull
GPU Cull是利用ComputeShader针对单个Instance进行的剔除,主要分为三步:
[1]基于CPU的粗粒度QuadTree剔除的结果,在GPU可以直接进行第一轮剔除

[2]在GPU针对Instance进行 SphereFrustumCull 进行第二轮剔除


[3]基于HZB(Hierarchical Z-Buffering 分层 Z 缓冲)的遮挡剔除, 就是根据当前物体的渲染深度和它的在上一帧渲染的HZB的深度作对比来判断物体是否被遮挡。


HZB的原理和生成推荐 这篇博客 Compute Shader 进阶应用:结合Hi-Z 剔除海量草渲染 - 知乎
文章介绍的HZB生成方法质量比较不错,HZB各级Mip 像素偏移和丢失的现象较少。
最终GPU 剔除的ComputeShader如下:
// Each #kernel tells which function to compile; you can have many kernels
#pragma kernel CSMain
#pragma enable_d3d11_debug_symbols
//#pragma use_dxc
// Create a RenderTexture with enableRandomWrite flag and set it
// with cs.SetTexture

StructuredBuffer<float4> instanceDatas;
StructuredBuffer<int> treeNodeCullFlag; // 1 mean culled, 0 mean visible
RWStructuredBuffer<float3> posVisibleBuffer;
RWStructuredBuffer<int> bufferWithArgs;

int allCount;
float4 bounds; // center + radius
float4 frustumPlanes[6];
float3 cameraWorldDirection;
float4x4 worldToViewProject;
Texture2D<float4> hizTexture;
float hizMapSize;
int maxHizMapLevel;


float GetDistance(float3 pos, float4 plane)
{
    return plane.x * pos.x + plane.y * pos.y +  plane.z * pos.z + plane.w;
}

int IsOutOfFrustum(float3 pos, float radius, float4 frustum[6])
{
    for(int i = 0; i < 6; i++)
    {
        float distance = GetDistance(pos, frustum[i]);
        if(distance >= radius)
        {
            return 1;
        }
    }

    return 0;
}


float3 TransformToNdc(float3 worldPos)
{
    float4 worldAlignPos = float4(worldPos, 1.0);
    float4 ndc = mul(worldToViewProject, worldAlignPos);
    ndc.xyz /= ndc.w;
    ndc.xy = ndc.xy * 0.5 + 0.5;
    return ndc.xyz;
}

int GetHizMapIndex(float2 boundMin, float2  boundMax)
{
    float2 uv = (boundMax - boundMin) * hizMapSize;
    uint2 coord = ceil(log2(uv));
    uint index =  max(coord.x, coord.y);
    return min((int)index, maxHizMapLevel);
}

bool IsCullByHizMap(float3 pos, float boxWidth)
{
    float3 offsetPos = pos;
    float3 ndc1 = TransformToNdc(pos + float3(boxWidth, boxWidth, boxWidth));
    float3 ndc2 = TransformToNdc(pos + float3(boxWidth, -boxWidth, boxWidth));
    float3 ndc3 = TransformToNdc(pos + float3(boxWidth, boxWidth, -boxWidth));
    float3 ndc4 = TransformToNdc(pos + float3(boxWidth, -boxWidth, -boxWidth));
    float3 ndc5 = TransformToNdc(pos + float3(-boxWidth, boxWidth, boxWidth));
    float3 ndc6 = TransformToNdc(pos + float3(-boxWidth, -boxWidth, boxWidth));
    float3 ndc7 = TransformToNdc(pos + float3(-boxWidth, boxWidth, -boxWidth));
    float3 ndc8 = TransformToNdc(pos + float3(-boxWidth, -boxWidth, -boxWidth));

    float3 min0 = min(min(ndc1, ndc2), min(ndc3, ndc4));
    float3 min1 = min(min(ndc5, ndc6), min(ndc7, ndc8));
    float3 boundsMin = min(min0, min1);

    float3 max0 = max(max(ndc1, ndc2), max(ndc3, ndc4));
    float3 max1 = max(max(ndc5, ndc6), max(ndc7, ndc8));
    float3 boundsMax = max(max0, max1);
    uint mip = GetHizMapIndex(boundsMin, boundsMax);

    float currentHizMapWidth = hizMapSize / pow(2, mip);
    float2 uv0 = min(currentHizMapWidth - 1, floor(boundsMin.xy * currentHizMapWidth));
    float2 uv1 = min(currentHizMapWidth - 1, floor(boundsMax.xy * currentHizMapWidth));

    float d0 = hizTexture.mips[mip][uv0].r;
    float d1 = hizTexture.mips[mip][uv1].r;
    return boundsMax.z < d0 && boundsMax.z < d1;
}


[numthreads(16, 16,1)]
void CSMain (uint3 id : SV_DispatchThreadID)
{
    uint instanceId = id.x * 1500 + id.y;
    if(instanceId >= allCount)
        return;

    float4 instance = instanceDatas[instanceId];
    int clusterId = (int)instance.w;
    if(treeNodeCullFlag[clusterId] == 1)
        return;

    float3 worldPos = instance.xyz;
    float3 pos =  worldPos + bounds.xyz;
    if(IsOutOfFrustum(pos, bounds.w, frustumPlanes) == 0 && (!IsCullByHizMap(pos, bounds.w)))
    {
        int currentIndex;
        InterlockedAdd(bufferWithArgs[0], 1, currentIndex);
        posVisibleBuffer[currentIndex] = worldPos;
    }
}
Draw Instance Indirect
利用GPU剔除得到的RWStructuredBuffer<float3> posVisibleBuffer 和 RWStructuredBuffer<int> bufferWithArgs 进行DrawInstanceIndirect。
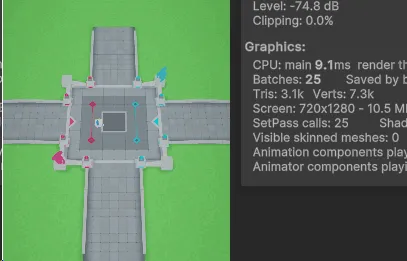
Graphics.DrawMeshInstancedIndirect(treeMesh, 0, treeMaterial, drawIndirectBounds, bufferWithArgs, 0, null, ShadowCastingMode.Off, false);Demo效果:
CPU:AMD 锐龙7950X
GPU: RTX3060Ti
植被数量:200W
Cpu cull + GPU Cull: 2ms左右
Draw Instance Indirect :4.5ms左右

Unity GPU Cull
项目Git链接
https://github.com/2047241149/GPUFoliageCull
参考资料
[1]Compute Shader 进阶应用:结合Hi-Z 剔除海量草渲染 - 知乎
[2]https://www.cnblogs.com/mmc1206x/p/15542745
[3]Hierarchical-Z map based occlusion culling – RasterGrid
[4]Mobile hierarchical z buffer occlusion culling - 知乎
[5]Mobile GpuCulling for Unreal - 知乎
[6]Unity中使用ComputeShader做视锥剔除(View Frustum Culling) - 知乎
[7]LearnOpenGL - Frustum Culling
[8]视锥体剔除AABB和OBB包围盒的优化方法 - 知乎
[9]有没有较完善高效的视锥剔除算法? - 知乎文章来源:https://www.toymoban.com/news/detail-725681.html
[10]AABB-Plane · 3DCollisions文章来源地址https://www.toymoban.com/news/detail-725681.html
到了这里,关于Unity实现GPU Cull渲染的文章就介绍完了。如果您还想了解更多内容,请在右上角搜索TOY模板网以前的文章或继续浏览下面的相关文章,希望大家以后多多支持TOY模板网!