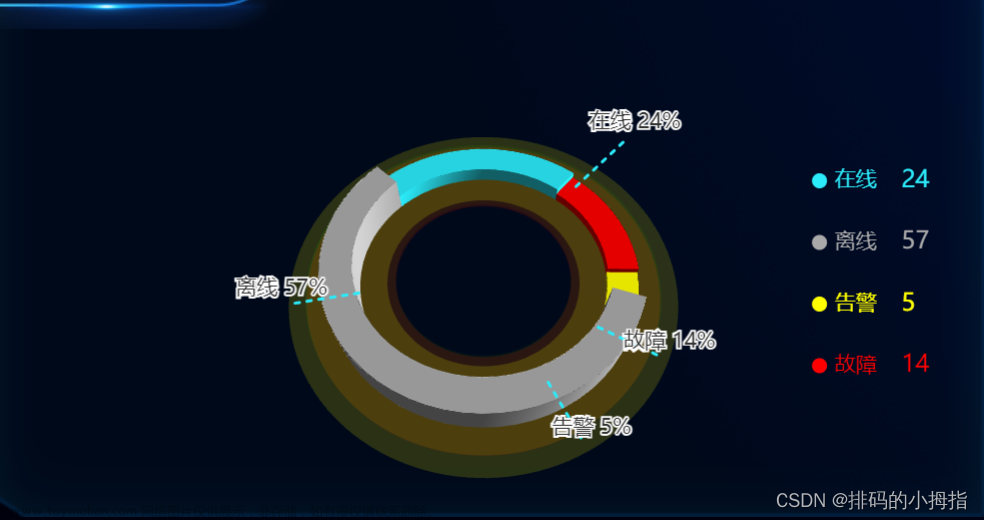
需求

关键代码
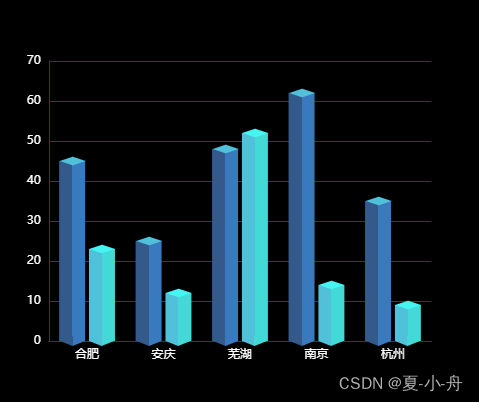
使用插件vchart+echarts5.x按需引入实现
<template>
<v-chart class="chart" autoresize :option="curveOption" />
</template>
<script setup lang="ts">
import { ref, reactive, watch, h, nextTick, onMounted } from "vue";
import VChart from "vue-echarts";
// echarts按需引入
import { use, graphic } from "echarts/core";
import { CanvasRenderer } from "echarts/renderers";
import { BarChart, PictorialBarChart } from "echarts/charts";
import { TooltipComponent, LegendComponent, GridComponent } from "echarts/components";
use([CanvasRenderer, BarChart, PictorialBarChart, TooltipComponent, LegendComponent, GridComponent]);
// echarts
const curveOption = ref({
  color: ["#00B09C", "#93cc79", "#f9c761", "#ec6468", "#18a3a0"],
  tooltip: {
    trigger: "axis",
  },
  legend: {
    textStyle: {
      color: "#ffffff",
    },
    icon: "rect",
    itemWidth: 14,
    itemHeight: 3,
  },
  xAxis: {
    data: ["一月", "二月", "三月", "四月", "五月", "六月", "七月", "八月", "九月", "十月", "十一月", "十二月"],
    type: "category",
    nameLocation: "middle",
    //刻度线
    axisLine: {
      lineStyle: {
        color: "#cbcbcb",
      },
    },
    axisTick: {
      lineStyle: {
        color: "#cbcbcb",
      },
      alignWithLabel: true,
    },
    axisLabel: {
      color: "#999999",
    },
    // 鼠标悬浮阴影
    axisPointer: {
      type: "shadow",
    },
  },
  yAxis: {
    scale: true,
    splitLine: {
      lineStyle: {
        color: "rgba(30,163,255,0.3)",
      },
    },
    axisTick: {
      show: false,
    },
    axisLine: {
      lineStyle: {
        color: "#cbcbcb",
      },
    },
    axisLabel: {
      color: "#999999",
    },
  },
  grid: {
    left: "2%",
    right: "2%",
    bottom: 10,
    containLabel: true,
  },
  series: [
    // 第一个圆柱顶部的椭圆形
    {
      type: "pictorialBar", //pictorialBar(象形柱图)
      symbolSize: [14, 8], //椭圆的大小[宽,高]
      symbolOffset: [-10.5, -4], //图形偏移[x轴,y轴],不确定的话,可以微调,本实例x轴叠加了柱状之间的间距[-7+(间距7/2),y轴]
      z: 12, //图形的层级,控制图形的前后顺序,z值小的图形会被z值大的图形覆盖
      symbolPosition: "end", //椭圆位置,默认'start',在最底下,end是最上面
      itemStyle: {
        color: "#9AC8EC",
      },
      data: [54, 43.98, 31.03, 43.23, 87.19, 47.52, 35.9, 15.68, 89.51, 72.39, 76.73, 91.71],
    },
    {
      name: "数据名称",
      data: [54, 43.98, 31.03, 43.23, 87.19, 47.52, 35.9, 15.68, 89.51, 72.39, 76.73, 91.71],
      type: "bar",
      barWidth: 14,
      barGap: "50%", //柱状图间距,此处为14*50%=7
      itemStyle: {
        // 图形样式
        color: new graphic.LinearGradient(0, 0, 0, 1, [
          {
            offset: 0, // 0%处的颜色
            color: "rgba(21, 147, 197,1)",
          },
          {
            offset: 1, // 100%处的颜色
            color: "rgba(12, 97, 162,1)",
          },
        ]),
      },
    },
    // 第一个圆柱底部的椭圆形
    {
      type: "pictorialBar",
      symbolSize: [14, 8],
      symbolOffset: [-10.5, 4],
      z: 12,
      itemStyle: {
        color: "#0E6EB8",
      },
      data: [54, 43.98, 31.03, 43.23, 87.19, 47.52, 35.9, 15.68, 89.51, 72.39, 76.73, 91.71],
    },
    // 第二个圆柱顶部的椭圆形
    {
      type: "pictorialBar",
      symbolSize: [14, 8],
      symbolOffset: [10.5, -4],
      z: 12,
      symbolPosition: "end",
      itemStyle: {
        color: "#76D6DD",
      },
      data: [31.09, 12.82, 52.43, 4.5, 19.18, 54.36, 17.92, 5.26, 30.49, 1.05, 17.54, 16.55],
    },
    {
      name: "计划数据",
      data: [31.09, 12.82, 52.43, 4.5, 19.18, 54.36, 17.92, 5.26, 30.49, 1.05, 17.54, 16.55],
      type: "bar",
      barWidth: 14,
      itemStyle: {
        // 图形样式
        color: new graphic.LinearGradient(0, 0, 0, 1, [
          {
            offset: 0, // 0%处的颜色
            color: "rgba(42, 181, 222,1)",
          },
          {
            offset: 1, // 100%处的颜色
            color: "rgba(23, 167, 205,1)",
          },
        ]),
      },
    },
    // 第二个圆柱底部的椭圆形
    {
      type: "pictorialBar",
      symbolSize: [14, 8],
      symbolOffset: [10.5, 4],
      z: 12,
      itemStyle: {
        color: "#0E95B8",
      },
      data: [31.09, 12.82, 52.43, 4.5, 19.18, 54.36, 17.92, 5.26, 30.49, 1.05, 17.54, 16.55],
    },
  ],
});
</script>
需要注意下,底下的椭圆,是在柱子底下“透”出来,颜色应该暗一点,才能视觉上看着有立体感。文章来源:https://www.toymoban.com/news/detail-735369.html
成品,还原了大部分设计效果 文章来源地址https://www.toymoban.com/news/detail-735369.html
到了这里,关于vue3 echarts实现3D立体柱状图效果,多柱状图的文章就介绍完了。如果您还想了解更多内容,请在右上角搜索TOY模板网以前的文章或继续浏览下面的相关文章,希望大家以后多多支持TOY模板网!


