Vue2下使用neovis.js实现neo4j知识图谱可视化
neovis.js安装下载
// 下载依赖
 npm install -save neovis.js
在vue中导入
// 依赖导入
 import NeoVis from 'neovis.js';
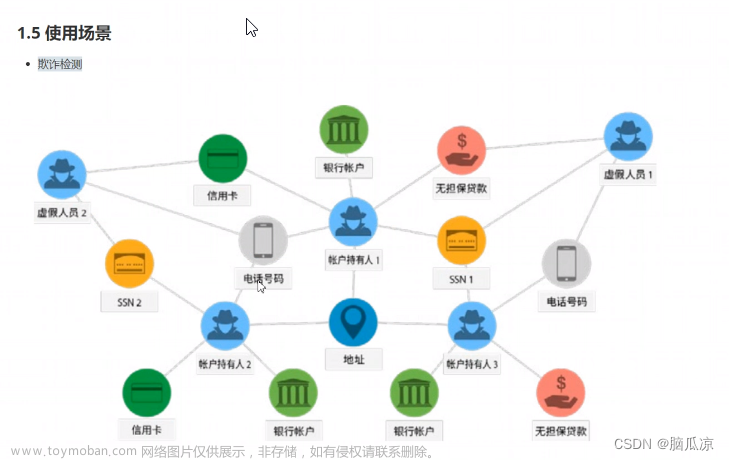
知识图谱展示: 文章来源:https://www.toymoban.com/news/detail-736205.html
vue项目代码
// 依赖导入
 <template>
  <el-row class="MainArea">
    <el-col :span="24" class="Mainleft" v-loading="fullscreenLoading">
      <div class="left" id="viz1" ref="viz1"></div>
      <el-divider></el-divider>
      <div>
        请输入查询语句: <textarea rows="4" cols=50 id="cypher"></textarea><br>
        <el-button type="success" id="reload" @click="submit">提交</el-button>
        <el-button type="warning" id="stabilize" @click="stabilize">锁定</el-button>
      </div>
    </el-col>

  </el-row>

</template>
<script>
import NeoVis from 'neovis.js';

export default {

  data() {
    return {
      viz: {},

      SQL: "MATCH p=()-->() RETURN p limit 100", //写自己的Cypher

      driver: null,
      cypherkeyword: false,
      graphtable: false,
      records: [],
      clearAll: false,

      currentGraph: {
        nodes: {},
        links: {},
      },
      nodeMap: {},
      network: '',

      fullscreenLoading: false
    }
  },
  created() {
  },

  mounted() {
    this.draw();
  },
  watch: {
    SQL: {
      handler(newData) {
        this.draw();
      },
      immediate: true,
      deep: true
    },
  },
  methods: {
    draw(sql) {
      //  this.canvas = document.getElementById("js-canvas");
      var viz1 = this.$refs.viz1;
      var viz;
      console.log(viz1);

      var config = {
        container_id: "viz1",
        server_url: "bolt://localhost:7687", //一般是这个
        server_user: "neo4j",   //默认neo4j
        server_password: "123456",  //写自己的密码

        labels: {
          "名称": {caption: "name", community: "#b8ff54", size: 200, font: {size: 35, color: "#d9960e",},}, //根据自己的来
          "属性": {caption: "value", community: "#c61625", size: 200, font: {size: 35, color: "#901540",},},  //根据自己的来
        },
        relationships: {
          // "待遇政策": { thickness: 1, caption: true, font: { size: 15, color: "#606266", }, },
        },
        arrows: true,


        initial_cypher: this.SQL,
      };

      viz = new NeoVis(config);
      viz._container = viz1;
      viz.render();
    },

    queryInfo() {
      // this.basePolicyDeviationList()
    },
    submit() {
      const cypher = $("#cypher").val();
      if (cypher.length > 3) {
        this.viz.renderWithCypher(cypher);
      } else {
        console.log("reload");
        this.viz.reload();

      }
    },
    stabilize() {
      this.viz.stabilize();
    },

  }
}
</script>
<style scoped>
.LayOutBody {
  width: 100%;
  height: 100%;
  border: 10px solid #EAECEF;
}

/* 头部搜索条件 */
.SearchHeader {
  height: 82px;
  border-bottom: 8px solid #EAECEF;
  background: #ffffff;
  padding: 9px 22px;
}

/* 主体部分 */
.MainArea {
  height: 600px;
  border-bottom: 10px solid #EAECEF;
  background: #EAECEF;
}

.Mainleft {
  /* width: 66%; */
  height: 100%;
  background: #ffffff;
}

.Vis {
  position: relative;
}

.menu {
  /*这个样式不写,右键弹框会一直显示在画布的左下角*/
  position: absolute;
  background: rgba(3, 3, 3, 0.6);
  border-radius: 5px;
  left: -99999px;
  top: -999999px;
  color: #fff;
  padding: 5px;
}

.LayOutBody {
  overflow-x: visible !important;
}

.headerTop {
  display: flex;
  justify-content: space-between;
}

.el-header,
.el-footer {
  background-color: #B3C0D1;
  color: #333;
  text-align: center;
  line-height: 60px;
}

.el-aside {
  background-color: #D3DCE6;
  color: #333;
  text-align: center;
  line-height: 200px;
}

.el-main {
  background-color: #E9EEF3;
  color: #333;
  text-align: center;
  line-height: 160px;
}

body > .el-container {
  margin-bottom: 90px;
}

.el-container:nth-child(5) .el-aside,
.el-container:nth-child(6) .el-aside {
  line-height: 260px;
}

.el-container:nth-child(7) .el-aside {
  line-height: 320px;
}

.WordExplains {
  display: flex;
  justify-content: left;
  font-size: 0.8rem;
}

.Wordname {
  white-space: nowrap;
}

.WordContent {
  margin-left: 5px;
}

.left {
  width: 100%;
  height: 100%;
  /* margin-bottom: 1.5vh; */
  border-top: 1px solid rgb(212, 212, 212);
  border-bottom: 1px solid rgb(202, 202, 202);
  background-color: #fff;
  /* padding: 0 10px 0 10px; */
  overflow: hidden;
}

.myDiv {
  width: 800px;
  height: 800px;
}

textarea {
  border: 1px solid lightgray;
  margin: 5px;
  border-radius: 5px;
}

#viz {
  width: 100%;
  height: 80%;
  border: 1px solid #f1f3f4;
  font: 22pt arial;
}

input {
  border: 1px solid #ccc;
}

</style>
但目前查询功能还有BUG,不能使用,有大佬的话请教一下文章来源地址https://www.toymoban.com/news/detail-736205.html
到了这里,关于Vue2下使用neovis.js实现neo4j知识图谱可视化的文章就介绍完了。如果您还想了解更多内容,请在右上角搜索TOY模板网以前的文章或继续浏览下面的相关文章,希望大家以后多多支持TOY模板网!


