背景
由于项目之前在生产环境出现过OOM的问题,并且没有及时发现,导致生产环境出现了在一定时间内不可用的情况,故决定搭建JVM监控对微服务24小时监听,以便于出现问题能够及时通知相关人员进行服务降级或解决问题。
监控平台的选择
经过可行性分析,得到目前较为适合的微服务监控为Springboot Admin或者Prometheus,两者的主要区别如下:
| 框架 | 可监控对象 | 是否支持集群 |
|---|---|---|
| Springboot Admin | Springboot微服务 | 是 |
| Prometheus | 开源监控,不仅仅能够监控微服务 | 是 |
考虑到未来还会有慢SQL、Git等其他类型监控,并且Grafana能够提供优秀的监控数据统计与展示,因此最终选择了以Prometheus + Grafana的方式搭建监控。
搭建微服务监控

Prometheus下载与安装
下载地址:Prometheus下载
选择对应的操作系统下载压缩包即可(因目前为调研阶段,本文以windows举例,未来正式部署会补充linux的)。
安装包解压后的目录如下图所示,其中,prometheus.yml是Prometheus启动时读取的配置文件,有关监听配置(scrape_configs)全部写在此文件中,关于监听配置本文将在微服务监控配置时一起讲述。
注:关于配置文件的解读可以参考另外一位大神的文章:prometheus.yml解读

# my global config
global:
  scrape_interval: 15s # Set the scrape interval to every 15 seconds. Default is every 1 minute.
  evaluation_interval: 15s # Evaluate rules every 15 seconds. The default is every 1 minute.
  # scrape_timeout is set to the global default (10s).

# Alertmanager configuration
alerting:
  alertmanagers:
    - static_configs:
        - targets:
          # - alertmanager:9093

# Load rules once and periodically evaluate them according to the global 'evaluation_interval'.
rule_files:
  # - "first_rules.yml"
  # - "second_rules.yml"

# A scrape configuration containing exactly one endpoint to scrape:
# Here it's Prometheus itself.
scrape_configs:
  # The job name is added as a label `job=<job_name>` to any timeseries scraped from this config.
  - job_name: "prometheus"

    # metrics_path defaults to '/metrics'
    # scheme defaults to 'http'.

    static_configs:
      - targets: ["localhost:9090"]
  # The job name is added as a label `job=<job_name>` to any timeseries scraped from this config.
  - job_name: "eunomia"
    # metrics_path defaults to '/metrics'
    # scheme defaults to 'http'.
    metrics_path: /actuator/prometheus
    static_configs:
      - targets: ["localhost:8000"]
  - job_name: "apollo-monitor"
    # metrics_path defaults to '/metrics'
    # scheme defaults to 'http'.
    metrics_path: /actuator/prometheus
    static_configs:
      - targets: ["localhost:8001"]
Springboot微服务添加监控配置
Prometheus对于Springboot微服务的监听数据源来自于Springboot的actuator,但是1.X版本和2.X版本的监听配置还是有一些区别的,本文将分别以Springboot 1.4.0和Springboot 2.3.7为例,阐述监听配置过程
Springboot 1.4.0监听配置
pom文件添加如下依赖:
		<dependency>
            <groupId>org.springframework.boot</groupId>
            <artifactId>spring-boot-starter-actuator</artifactId>
        </dependency>

        <dependency>
            <groupId>io.micrometer</groupId>
            <artifactId>micrometer-registry-prometheus</artifactId>
            <version>1.0.9</version>
        </dependency>

        <dependency>
            <groupId>io.micrometer</groupId>
            <artifactId>micrometer-spring-legacy</artifactId>
            <version>1.0.9</version>
        </dependency>
因为版本缘故,经过多次尝试发现,Springboot1.4.0可使用Prometheus最高版本为1.0.9,再高版本服务无法启动。spring-legacy版本与Prometheus版本对应即可,yml文件新增配置如下:
server:
  port: 8001 #服务端口,若management没有配置监听端口,则默认采用服务端口作为监听端口

spring:
  application:
    name: apollo-monitor
management:
  context-path: /actuator #监听服务上下文配置
  endpoint:
    metrics:
      enabled: true #支持metrics
    prometheus:
      enabled: true #支持Prometheus
  metrics:
    export:
      prometheus:
        enabled: true
    tags:
      application: apollo-monitor #可自定义tag,这里目前只配了实例名
  endpoints:
    web:
      exposure:
        include: '*' #开放所有端口
Springboot1.X版本需要将实例名以metrics的形式发出,才能被Prometheus获取(2.X可直接读yml文件),故需要添加如下配置:
	@Value("${spring.application.name}")
    private String applicationName;

    @Bean
    MeterRegistryCustomizer<MeterRegistry> metricsCommonTags() {

        return registry -> registry.config().commonTags("application", applicationName);
    }
Springboot 2.3.7 监听配置
对于Springboot2.X版本来说,Prometheus的接入可友好太多了,Metrics可以直接配置在yml文件中,并且无需单独引入spring-legency即可完成数据采集。
pom文件添加如下依赖:
		<dependency>
            <groupId>org.springframework.boot</groupId>
            <artifactId>spring-boot-starter-actuator</artifactId>
        </dependency>
        <dependency>
            <groupId>io.micrometer</groupId>
            <artifactId>micrometer-registry-prometheus</artifactId>
            <scope>runtime</scope>
        </dependency>
Springboot2.3.7默认对应Prometheus版本为1.5.9,pom依赖无需指定版本。yml文件新增配置如下,其中,实例名采集必须配置,否则JVM监控数据抓取不到实例名,Grafana提供的JVM监控模板中有些Metric Query是需要以实例名作为条件的。
management:
  endpoint:
    metrics:
      enabled: true #支持metrics
    prometheus:
      enabled: true #支持Prometheus
  metrics:
    export:
      prometheus:
        enabled: true
    tags:
      application: eunomia #实例名采集
  endpoints:
    web:
      exposure:
        include: '*' #开放所有端口
Prometheus配置微服务注册
完成Springboot的监听基本配置后,需要将其以Job的形式注册到Prometheus,让我们再回到Prometheus的配置文件中:
scrape_configs:
  # The job name is added as a label `job=<job_name>` to any timeseries scraped from this config.
  - job_name: "prometheus"

    # metrics_path defaults to '/metrics'
    # scheme defaults to 'http'.

    static_configs:
      - targets: ["localhost:9090"]
  # The job name is added as a label `job=<job_name>` to any timeseries scraped from this config.
  - job_name: "eunomia"
    # metrics_path defaults to '/metrics'
    # scheme defaults to 'http'.
    metrics_path: /actuator/prometheus
    static_configs:
      - targets: ["localhost:8000"]
  - job_name: "apollo-monitor"
    # metrics_path defaults to '/metrics'
    # scheme defaults to 'http'.
    metrics_path: /actuator/prometheus
    static_configs:
      - targets: ["localhost:8001"]
其中,job_name为apollo-monitor的即为上文的Springboot1.4.0服务,将其以配置的形式引入,主要属性如下表所示:
| 属性 | 作用 |
|---|---|
| job_name | 服务注册名 |
| metrics_path | 服务监听路径,一般为 “/actuator/实例名”的形式 |
| static_configs | 静态配置目录 |
| targets | 监听目标地址 |
完成Prometheus的配置后,便可以启动Springboot服务和Prometheus,验证以上配置是否正确。
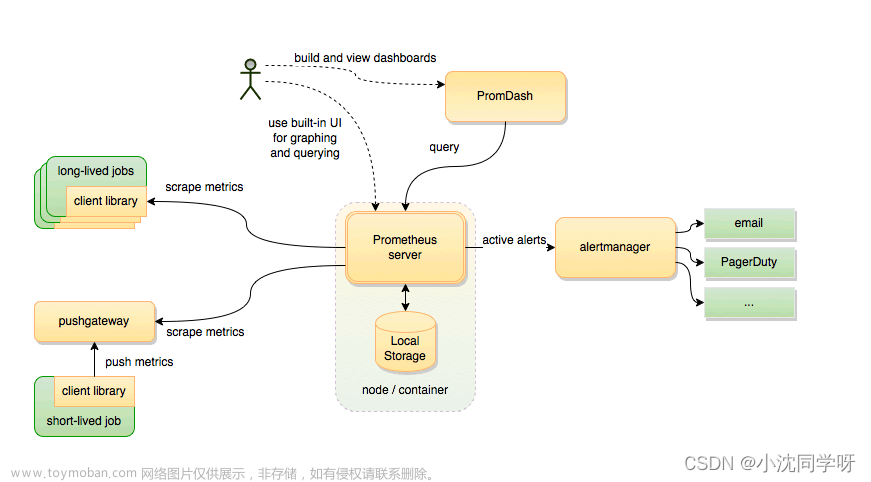
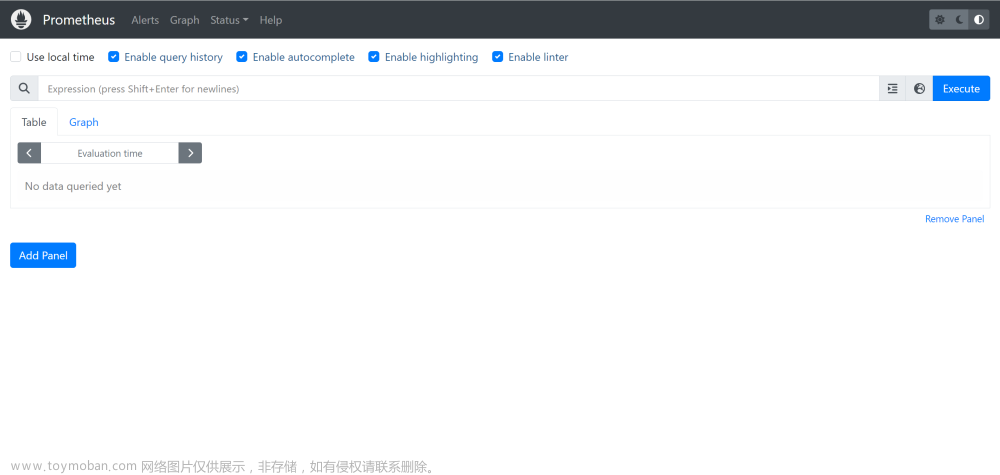
Prometheus启动器在{Prometheus}/bin目录下,prometheus.exe,启动后的界面如下图所示:

两者均启动后,可访问Prometheus平台页面查看服务的注册情况。
默认地址为:http://127.0.0.1:9090/
进入页面后,Status -> Target,结果如下图所示,可以看到服务名为apollo-monitor的服务已经注册在Prometheus上,说明Prometheus已经在对其进行实时监听。

确认服务注册成功后,可访问127.0.0.1:serverport/actuator/prometheus页面,查看服务是否报送相关可监控数据,如下图所示,监控数据已经全部报送,只是可读性非常差,无法在短时间内获取到有效的监控信息,这时便需要Grafana将监控数据进行统计、分类与可视化。

Prometheus接入Grafana
Grafana
Grafana 是一跨平台的开源的可视化分析工具。目前网络架构和应用分析中最流行的时序数据展示工具,主要用于大规模指标数据的可视化展示。其主要作用如下:
1. 将监控数据以不同维度、不同效果进行展示与统计。
2. 关联Alert Management以实现阈值告警功能。
3. 支持多种数据源的监控数据收集,如:Prometheus,Mysql,Oracle,ES,ZipKin,Git,Jira等热门应用。
Grafana下载与安装
官网下载:Grafana官网
如下图所示,进入下载页面后,选择对应的操作系统,本文以windows举例,点击下载按钮即可下载安装包,下载后本地直接安装即可。

安装后Grafana是默认启动的,端口是3000,我们可直接访问页面:http://127.0.0.1:3000/login,默认用户名密码为admin/admin,首次登录会强制修改密码,登录后进入Home界面,因为本文的最终目的是实现微服务的JVM监控,而Grafana官网有较为全面的JVM监控数据面板,故直接选择import的方式导入即可,模板ID可去官方仓库查询,可先访问Grafana官方仓库:Grafana模板仓库地址,搜索栏输入“JVM”,结果中第一个就是我们想要的模板,如下图所示:

点击后进入模板详情页面,如下图所示,两种方式都可以,分别对应Grafana两种导入方式即可,本文以ID举例。

获取到ID后,回到Grafana主页面,点击DataSource新建数据源,选择Prometheus,填入之前搭好的Prometheus监控地址,Save即可。接下来是最后一步,导入监控面板,Home页面选择Import Dashboard,其中A方式为Json导入方式,B方式为ID导入方式,分别对应Grafana仓库的两种模板下载方式,本文选择ID导入方式,输入4701,点击Load,完成导入并进入数据源选择界面,JVM监控模板固定数据源类型是Prometheus,因此只需选择之前添加的Prometheus数据源即可完成JVM监控面板的搭建,成品如最后所示。
关于JVM面板各项监控指标的解读,可参考文章:Grafana-JVM监控面板-4701指标详细解读


 文章来源:https://www.toymoban.com/news/detail-737890.html
总结
本文讲述以Prometheus+Grafana搭建微服务JVM监控的主要流程,其实这仅仅是Prometheus和Grafana的冰山一角,不仅是JVM监控,还可以做服务数据采集进行运营(如ip、登录端、API调用与耗时等多维度、多方面监控)、运维相关(服务器监控、慢SQL监控)的统计,并且,微服务接入方式也值得深入研究,尽可能地使得业务无感知去完成Metric数据捕捉。文章来源地址https://www.toymoban.com/news/detail-737890.html
到了这里,关于【经验案例】Springboot微服务搭建JVM监控(Springboot + Prometheus + Grafana)的文章就介绍完了。如果您还想了解更多内容,请在右上角搜索TOY模板网以前的文章或继续浏览下面的相关文章,希望大家以后多多支持TOY模板网!


