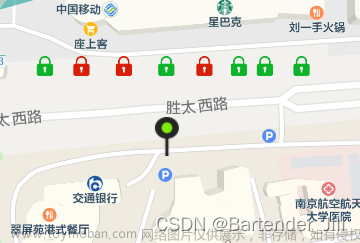
此文章是为了说明使用微信小程序在腾讯地图上绘制多个marker地图点;然后点击某一个marker进行导航的信息;具体的功能演示如下:
一、功能演示

二、前端布局代码
<view style="display: flex;flex-direction: column;">
//地图的布局文件信息
<map class="mapUI" id="myMap" scale="13" bindmarkertap="bindmarkertap" data-index="{{index}}" show-location markers="{{markers}}" latitude="{{latitude}}" longitude="{{longitude}}" show-location></map>
//以下是点击地图marker之后,下方显示的内容信息
<view class="topshowinfor">
<view class="tipInforTop" style="position: fixed;width: 100%;top: 0px;">
<view class="zoomtop">
<view class="inputInfor" bindtap="looksearch" style="display: flex;flex-direction: row;justify-content: center;align-items: center;">
<view>
企业名称搜索
</view>
</view>
</view>
</view>
</view>
<view class="ALLinputInfor">
<view wx:if="{{isAll==false}}">
<view class="image-parent" bindtap="showAllAddress">
<image class='allImg' mode='widthFix' src='/pages/image/yuanadd.png'></image>
<view class="child">显示全部</view>
</view>
</view>
</view>
</view>
<view class="bottomShow">
<view class="bottomStart">
<view>
<view>{{choiceModel.name}}</view>
<view class="carAddress">
<view style="white-space: nowrap;"> 联系电话:</view>
<view class="totalInfor">15249243002</view>
</view>
<view class="carAddress">
<view style="white-space: nowrap;"> 企业地址:</view>
<view class="totalInfor">{{choiceModel.addr}}</view>
</view>
</view>
<view>
<image src="/pages/image/naivicon.png" class="naviImg" bindtap="naviListener"></image>
</view>
</view>
</view>
三、js逻辑处理代码
1:marker点击
首先是通过方法bindmarkertap监听用户的点击事件,具体方法如下;
bindmarkertap(event) {
var that = this;
var index = event.detail
console.log("log_-----queryBean-----", index.markerId)
for (var i = 0; i < this.data.companyAddress.length; i++) {
if (i == index.markerId) {
that.data.posIndex = i;
that.data.markers[i].callout.borderColor = "#FF0000";
that.data.markers[i].callout.color = "#FF0000";
} else {
that.data.markers[i].callout.borderColor = "#c3c3c3";
that.data.markers[i].callout.color = "#333333";
}
}
that.setData({
choiceModel: this.data.companyAddress[that.data.posIndex],
markers: that.data.markers
})
},文章来源:https://www.toymoban.com/news/detail-740071.html
说明一:
因为是存在多个数据,所在在用户点击的时候需要循环一下数据,然后通过点击的markerid和数据的makerid进行判断,然后对点击的marker 修改它的外边框的颜色;也就是代码:
that.data.markers[i].callout.borderColor = "#FF0000";
that.data.markers[i].callout.color = "#FF0000";
说明二:
that.setData({
choiceModel: this.data.companyAddress[that.data.posIndex],
markers: that.data.markers
})
这块的代码是为了获取用户点击的数组的指定值;这里的值需要给前端的界面进行显示
2:按钮导航
1:点击按钮
<view>
<image src="/pages/image/naivicon.png" class="naviImg" bindtap="naviListener"></image>
</view>
2:js导航代码
naviListener: function (e) {
wx.openLocation({
latitude: parseFloat(this.data.choiceModel.latitude), //维度
longitude: parseFloat(this.data.choiceModel.longitude), //经度
name: this.data.choiceModel.name, //目的地定位名称
scale: 15, //缩放比例
address: this.data.choiceModel.addr //导航详细地址
})
},
说明:这块的代码是小程序官方提供的代码;直接使用就可以了文章来源地址https://www.toymoban.com/news/detail-740071.html
到了这里,关于微信小程序之绘制多个marker以及调用手机地图软件导航的文章就介绍完了。如果您还想了解更多内容,请在右上角搜索TOY模板网以前的文章或继续浏览下面的相关文章,希望大家以后多多支持TOY模板网!


