上一篇帖子【c++】VSCode配置 c++ 环境(小白教程)_vscode配置c/c++环境_StudyWinter的博客-CSDN博客
大火,但是依旧有很多小伙伴反应没有配好环境,今天打算重新写一个教程,希望对大家有帮助。
1 MinGW下载安装
在CSDN上传了我自己的MinGW,供大家下载,已经配置好了,直接解压配置环境变量即可:(0积分)(20230806上传,审核1-2工作日):https://download.csdn.net/download/Zhouzi_heng/88176180
官网:
Downloading File /68260/mingw-get-setup.exe - MinGW - Minimalist GNU for Windows - OSDN
如果使用官网下载,具体见上一个博客(下载好像也不慢)
打开MinGW,勾选编译器软件
- mingw32-gcc.bin(c语言文件编译器)
- mingw32-gcc-g++.bin(c++语言编译器)
- mingw32-gdb.bin(调试编译后文件)
若在安装的时候报“找不到 xxx 库”的错误,可以重新勾选此库和dll文件
选择完后,点击 Installation > applychange,等待安装完就ok
配环境,选择自己MinGW的安装路径的bin文件夹
// 如
D:xxxxx\MinGW\bin”
见图(win 11)

完了之后,win+r,输出cmd,再输入gcc -v

这样子就是安装成功了
2 VS Code下载
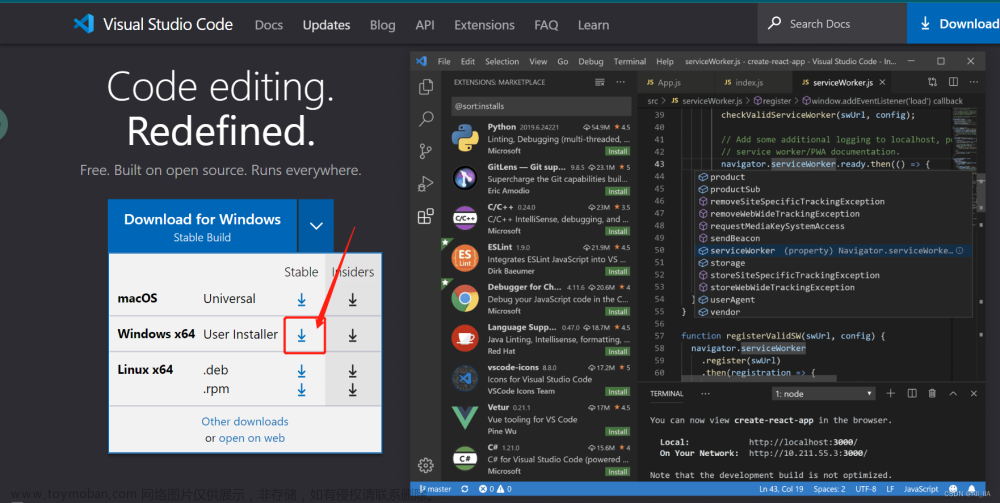
下载地址:https://code.visualstudio.com/Download

选system installer(64位电脑选x64)
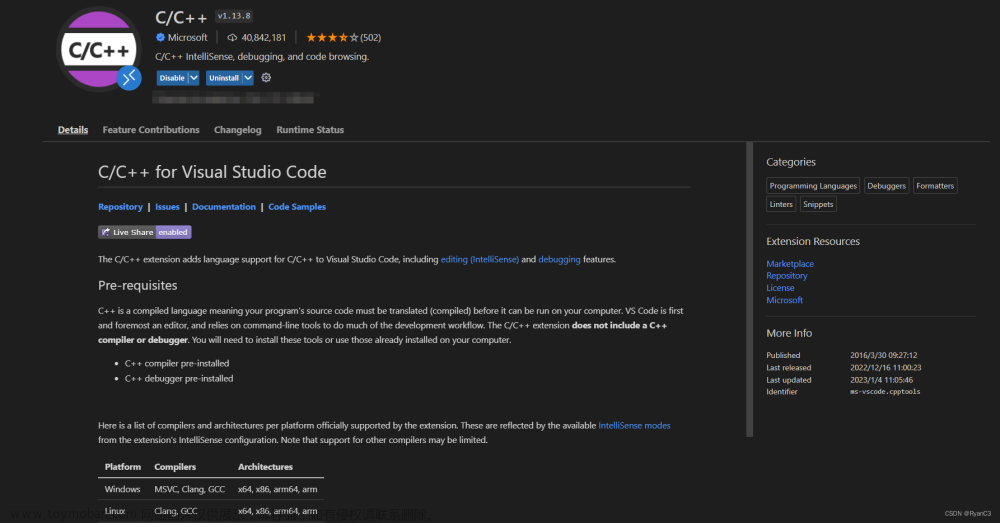
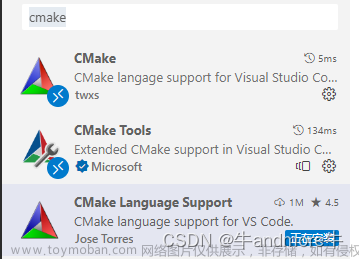
再安装这两个插件。安装完后重启VS Code

3 配环境
(1)在自己放C++代码的文件夹下新建一个文件夹,再打开

(2)新建三个目录
.vscode
cpp_cource
exe

(3)在.vscode下新建三个文件
- c_cpp_properties.json
- launch.json
- tasks.json
下面重点介绍这三个文件的配置
3.1 c_cpp_properties.json
首先查看自己的include path路径。在cmd下输入
gcc -v -E -x c++ -结果

我们需要的是我框出来这部分的路径。接下是最最重要的部分。
上图我框了6行,直接将这前5行复制出来,先存着
再查自己的MinGW安装路径。找到自己安装的mingw

照着这个路修改
 "D:/mingw64_GCC8.1/mingw64/include/**",
 "D:/mingw64_GCC8.1/mingw64/bin/../lib/gcc/x86_64-w64-mingw32/8.1.0/../../../../include",
加上这两行,一共7行路径,就修改这7行。我在下面注释了,仔细点看。
将【includePath】和【path】按照自己的路径修该。注意,这两部分是一样的。
最终修改:
{
    "configurations": [
        {
            "name": "Win32",
            "includePath": [
                "${workspaceRoot}",
                // 以下7行需要修改
                "D:/mingw64_GCC8.1/mingw64/include/**",
                "D:/mingw64_GCC8.1/mingw64/bin/../lib/gcc/x86_64-w64-mingw32/8.1.0/../../../../include",

                // 将查询结果前5行直接粘进来
                "D:/mingw64_GCC8.1/mingw64/bin/../lib/gcc/x86_64-w64-mingw32/8.1.0/include/c++",
                "D:/mingw64_GCC8.1/mingw64/bin/../lib/gcc/x86_64-w64-mingw32/8.1.0/include/c++/x86_64-w64-mingw32",
                "D:/mingw64_GCC8.1/mingw64/bin/../lib/gcc/x86_64-w64-mingw32/8.1.0/include/c++/backward",
                "D:/mingw64_GCC8.1/mingw64/bin/../lib/gcc/x86_64-w64-mingw32/8.1.0/include",
                "D:/mingw64_GCC8.1/mingw64/bin/../lib/gcc/x86_64-w64-mingw32/8.1.0/include-fixed"
            ],
            "defines": [
                "_DEBUG",
                "UNICODE",
                "__GNUC__=6",
                "__cdecl=__attribute__((__cdecl__))"
            ],
            "intelliSenseMode": "msvc-x64",
            "browse": {
                "limitSymbolsToIncludedHeaders": true,
                "databaseFilename": "",
                "path": [
                    "${workspaceRoot}",
                     // 以下7行需要修改
                    "D:/mingw64_GCC8.1/mingw64/include/**",
                    "D:/mingw64_GCC8.1/mingw64/bin/../lib/gcc/x86_64-w64-mingw32/8.1.0/../../../../include",

                    // 将查询结果前5行直接粘进来
                    "D:/mingw64_GCC8.1/mingw64/bin/../lib/gcc/x86_64-w64-mingw32/8.1.0/include/c++",
                    "D:/mingw64_GCC8.1/mingw64/bin/../lib/gcc/x86_64-w64-mingw32/8.1.0/include/c++/x86_64-w64-mingw32",
                    "D:/mingw64_GCC8.1/mingw64/bin/../lib/gcc/x86_64-w64-mingw32/8.1.0/include/c++/backward",
                    "D:/mingw64_GCC8.1/mingw64/bin/../lib/gcc/x86_64-w64-mingw32/8.1.0/include",
                    "D:/mingw64_GCC8.1/mingw64/bin/../lib/gcc/x86_64-w64-mingw32/8.1.0/include-fixed"
                ]
            }
        }
    ],
    "version": 4
}
3.2 launch.json
根据自己路径修改 "miDebuggerPath"。这里只有一处需要修改,我标出来了。
{
    "version": "0.2.0",
    "configurations": [
        {
            "name": "(gdb) Launch", // 配置名称,将会在启动配置的下拉菜单中显示
            "type": "cppdbg",       // 配置类型,这里只能为cppdbg
            "request": "launch",    // 请求配置类型,可以为launch(启动)或attach(附加)
            "program": "${workspaceFolder}/exe/${fileBasenameNoExtension}.exe",// 将要进行调试的程序的路径
            "args": [],             // 程序调试时传递给程序的命令行参数,一般设为空即可
            "stopAtEntry": false,   // 设为true时程序将暂停在程序入口处,一般设置为false
            "cwd": "${workspaceFolder}", // 调试程序时的工作目录,一般为${workspaceFolder}即代码所在目录
            "environment": [],
            "externalConsole": true, // 调试时是否显示控制台窗口,一般设置为true显示控制台
            "MIMode": "gdb",


            // 这里的路径需要修改。改成自己的路径
            "miDebuggerPath": "D:/mingw64_GCC8.1/mingw64/bin/gdb.exe",


            "preLaunchTask": "g++", // 调试会话开始前执行的任务,一般为编译程序,c++为g++, c为gcc
            "setupCommands": [
                {
		    "description": "Enable pretty-printing for gdb",
                    "text": "-enable-pretty-printing",
                    "ignoreFailures": true
                }
            ]
        }
    ]
}
3.3 tasks.json
直接粘
{
    "version": "2.0.0",
    "command": "g++",
    "args": [
        "-g",
        "${file}",
        "-o",
        "${workspaceFolder}/exe/${fileBasenameNoExtension}.exe"
    ], // 编译命令参数
    "problemMatcher": {
        "owner": "cpp",
        "fileLocation": [
            "relative",
            "\\"
        ],
        "pattern": {
            "regexp": "^(.*):(\\d+):(\\d+):\\s+(warning|error):\\s+(.*)$",
            "file": 1,
            "line": 2,
            "column": 3,
            "severity": 4,
            "message": 5
        }
    }
}
3.4 测试
#include <iostream>
using namespace std;

int main(int argc, char const *argv[])
{
    cout << "hello world" << endl;
    system("pause");
    return 0;
}
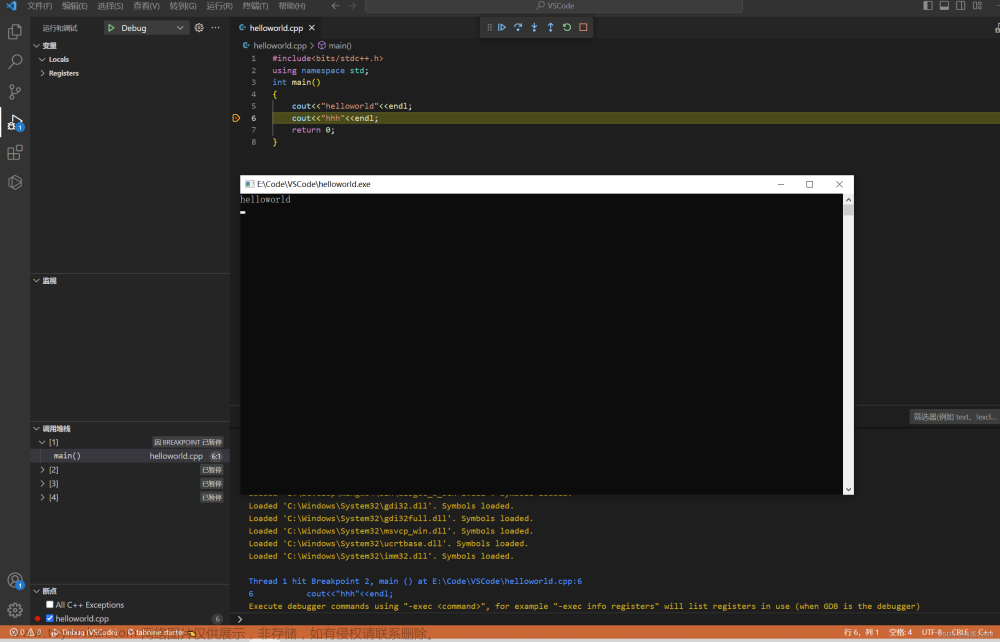
注意在test01.cpp的界面下按Fn + f5

结果
 文章来源:https://www.toymoban.com/news/detail-740801.html
以后直接复制这个工程写代码。文章来源地址https://www.toymoban.com/news/detail-740801.html
到了这里,关于【c++】VSCode配置 c++ 环境(重新制作)的文章就介绍完了。如果您还想了解更多内容,请在右上角搜索TOY模板网以前的文章或继续浏览下面的相关文章,希望大家以后多多支持TOY模板网!


