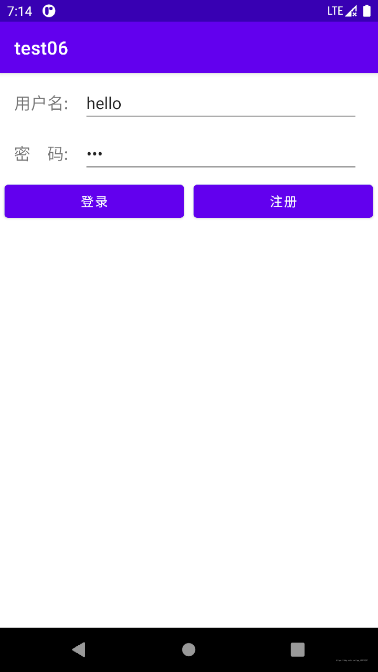
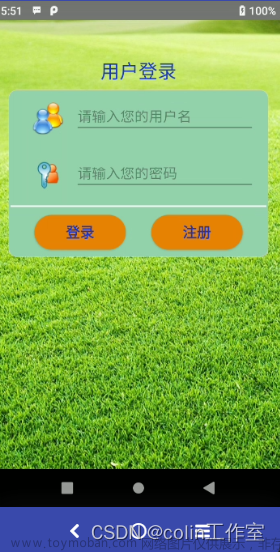
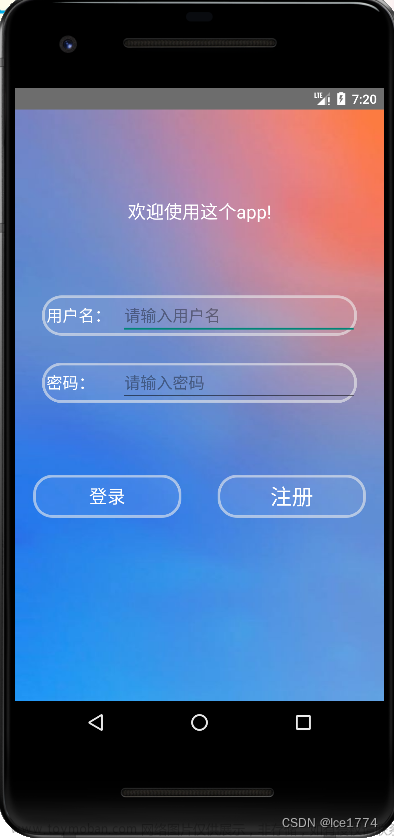
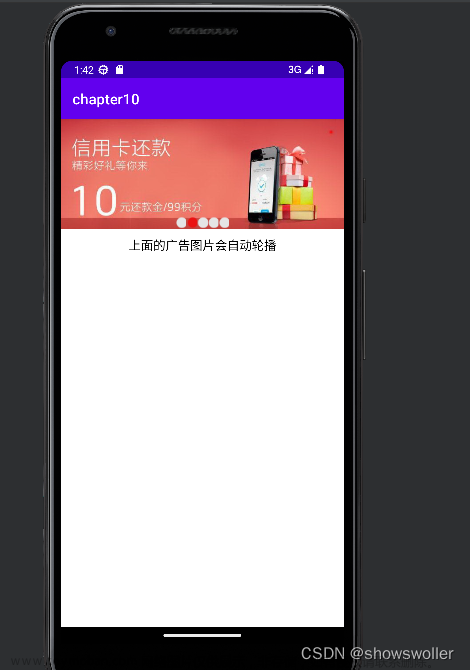
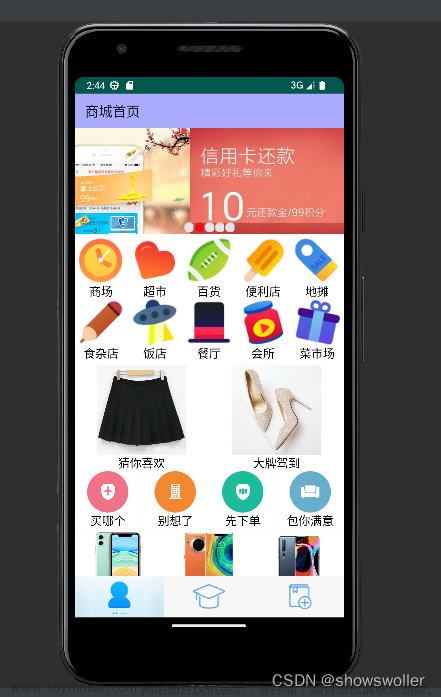
运行效果图
主界面(初始),注册界面,登录界面,主界面(注册和登录之后)


实现步骤
1.设计主界面,编写activity_main.xml
<?xml version="1.0" encoding="utf-8"?>
<LinearLayout xmlns:android="http://schemas.android.com/apk/res/android"
    xmlns:app="http://schemas.android.com/apk/res-auto"
    xmlns:tools="http://schemas.android.com/tools"
    android:layout_width="match_parent"
    android:layout_height="match_parent"
    tools:context=".MainActivity"
    android:orientation="vertical">
    <ImageView
        android:layout_width="150dp"
        android:layout_height="150dp"
        android:id="@+id/image_head"
        android:layout_gravity="center"
        android:layout_marginTop="130dp"
        android:src="@mipmap/head" />
    <TextView
        android:layout_width="match_parent"
        android:layout_height="wrap_content"
        android:id="@+id/user_name"
        android:text="@string/Point_login"
        android:layout_marginTop="40dp"
        android:gravity="center"
        android:textSize="28sp"
        android:textStyle="bold"/>
    <TextView
        android:layout_width="match_parent"
        android:layout_height="wrap_content"
        android:id="@+id/user_id"
        android:text="@string/User_id"
        android:layout_marginTop="15dp"
        android:gravity="center"
        android:textSize="19sp"/>
    <RadioGroup
        android:layout_width="wrap_content"
        android:layout_height="wrap_content"
        android:id="@+id/rg1"
        android:orientation="horizontal"
        android:gravity="center"
        android:layout_marginTop="30dp">
        <Button
            android:layout_width="wrap_content"
            android:layout_height="wrap_content"
            android:id="@+id/btn_login"
            android:text="@string/Login"
            android:textSize="22sp"
            android:ems="5"
            android:layout_marginStart="60dp"
            android:background="@drawable/btn_shape"
            android:textColor="@color/white"
            style=""/>
        <Button
            android:layout_width="wrap_content"
            android:layout_height="wrap_content"
            android:id="@+id/btn_logon"
            android:text="@string/Logon"
            android:textSize="22sp"
            android:ems="5"
            android:layout_marginStart="40dp"
            android:background="@drawable/btn_shape"
            android:textColor="@color/white"/>
    </RadioGroup>
</LinearLayout>
注:(1) 按钮的格式是自己设计的,如下


注:(2)需编写strings.xml

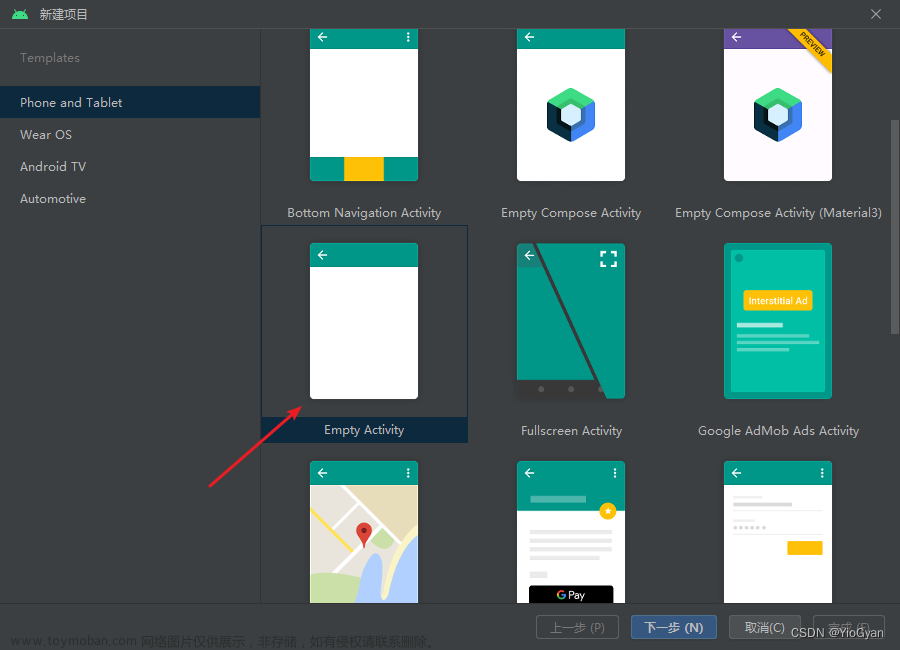
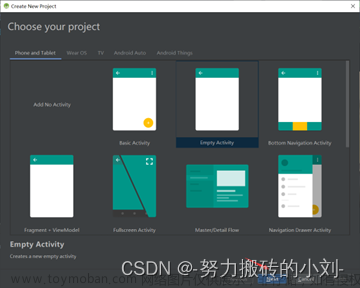
2.创建两个activity(会自动创建对应的layout布局文件)

3.设计登录和注册界面,编写activity_login.xml和activity_logon.xml
activity_login.xml :
<?xml version="1.0" encoding="utf-8"?>
<LinearLayout xmlns:android="http://schemas.android.com/apk/res/android"
    xmlns:app="http://schemas.android.com/apk/res-auto"
    xmlns:tools="http://schemas.android.com/tools"
    android:layout_width="match_parent"
    android:layout_height="match_parent"
    tools:context=".Login"
    android:orientation="vertical">

    <ImageView
        android:layout_width="wrap_content"
        android:layout_height="wrap_content"
        android:id="@+id/image_back"
        android:src="@mipmap/back"
        android:layout_marginTop="100dp"
        android:layout_marginStart="20dp"/>
    <TextView
        android:layout_width="wrap_content"
        android:layout_height="wrap_content"
        android:text="@string/Login"
        android:textSize="30sp"
        android:layout_marginTop="30dp"
        android:layout_marginStart="30dp"/>
    <EditText
        android:layout_width="wrap_content"
        android:layout_height="wrap_content"
        android:id="@+id/edit_user"
        android:hint="@string/Edit_user"
        android:ems="16"
        android:inputType="textPersonName"
        android:layout_marginTop="25dp"
        android:layout_marginStart="30dp"
        android:drawableStart="@mipmap/user"
        android:drawablePadding="20dp"/>
    <EditText
        android:layout_width="wrap_content"
        android:layout_height="wrap_content"
        android:id="@+id/edit_password"
        android:hint="@string/Edit_password"
        android:ems="16"
        android:inputType="textPassword"
        android:layout_marginTop="18dp"
        android:layout_marginStart="30dp"
        android:drawableStart="@mipmap/password"
        android:drawablePadding="20dp"/>
    <Button
        android:layout_width="wrap_content"
        android:layout_height="wrap_content"
        android:id="@+id/btn_login2"
        android:text="@string/Login"
        android:textSize="23sp"
        android:layout_marginTop="30dp"
        android:layout_gravity="center"
        android:ems="12"
        android:background="#02E674"
        android:textColor="@color/white"/>
    <TextView
        android:layout_width="match_parent"
        android:layout_height="wrap_content"
        android:id="@+id/txtResult"
        android:textSize="30sp"
        android:textColor="@android:color/holo_red_light"
        android:layout_marginTop="40dp"
        />
</LinearLayout>
activity_logon.xml :
<?xml version="1.0" encoding="utf-8"?>
<LinearLayout xmlns:android="http://schemas.android.com/apk/res/android"
    xmlns:app="http://schemas.android.com/apk/res-auto"
    xmlns:tools="http://schemas.android.com/tools"
    android:layout_width="match_parent"
    android:layout_height="match_parent"
    tools:context=".Logon"
    android:orientation="vertical">

    <ImageView
        android:layout_width="wrap_content"
        android:layout_height="wrap_content"
        android:id="@+id/image_back"
        android:src="@mipmap/back"
        android:layout_marginTop="60dp"
        android:layout_marginStart="20dp"/>
    <TextView
        android:layout_width="wrap_content"
        android:layout_height="wrap_content"
        android:text="@string/Logon"
        android:textSize="30sp"
        android:layout_marginTop="30dp"
        android:layout_marginStart="30dp"/>
    <EditText
        android:layout_width="wrap_content"
        android:layout_height="wrap_content"
        android:id="@+id/edit_name"
        android:hint="@string/Edit_name"
        android:ems="17"
        android:inputType="textPersonName"
        android:layout_marginTop="22dp"
        android:layout_marginStart="30dp"
        android:drawableStart="@mipmap/name"
        android:drawablePadding="35dp"/>
    <EditText
        android:layout_width="wrap_content"
        android:layout_height="wrap_content"
        android:id="@+id/edit_user"
        android:hint="@string/Edit_user"
        android:ems="17"
        android:inputType="textPersonName"
        android:layout_marginTop="18dp"
        android:layout_marginStart="30dp"
        android:drawableStart="@mipmap/user"
        android:drawablePadding="35dp"/>
    <EditText
        android:layout_width="wrap_content"
        android:layout_height="wrap_content"
        android:id="@+id/edit_password"
        android:hint="@string/Edit_password"
        android:ems="17"
        android:inputType="textPassword"
        android:layout_marginTop="18dp"
        android:layout_marginStart="30dp"
        android:drawableStart="@mipmap/password"
        android:drawablePadding="35dp"/>
    <EditText
        android:layout_width="wrap_content"
        android:layout_height="wrap_content"
        android:id="@+id/edit_apassword"
        android:hint="@string/Edit_apassword"
        android:ems="17"
        android:inputType="textPassword"
        android:layout_marginTop="18dp"
        android:layout_marginStart="30dp"
        android:drawableStart="@mipmap/apassword"
        android:drawablePadding="35dp"/>
    <Button
        android:layout_width="wrap_content"
        android:layout_height="wrap_content"
        android:id="@+id/btn_logon2"
        android:text="@string/Logon"
        android:textSize="23sp"
        android:layout_marginTop="30dp"
        android:layout_gravity="center"
        android:ems="12"
        android:background="#02E674"
        android:textColor="@color/white"/>
    <TextView
        android:layout_width="match_parent"
        android:layout_height="wrap_content"
        android:id="@+id/txtResult"
        android:textSize="30sp"
        android:textColor="@android:color/holo_red_light"
        android:layout_marginTop="40dp"
        />

</LinearLayout>
4. 编写三个 .java 文件(MainActivity,Login,Logon)
MainActivity.java
package com.example.work4_activity_login_logon;

import androidx.activity.result.ActivityResult;
import androidx.activity.result.ActivityResultCallback;
import androidx.activity.result.ActivityResultLauncher;
import androidx.activity.result.contract.ActivityResultContracts;
import androidx.appcompat.app.AppCompatActivity;

import android.app.Activity;
import android.content.Intent;
import android.graphics.ColorMatrix;
import android.graphics.ColorMatrixColorFilter;
import android.os.Bundle;
import android.view.View;
import android.widget.Button;
import android.widget.ImageView;
import android.widget.TextView;

public class MainActivity extends AppCompatActivity {
    //创建变量,用于接收注册的 账号id,昵称,密码
    public static String data_id, data_name, data_password;

    @Override
    protected void onCreate(Bundle savedInstanceState) {
        super.onCreate(savedInstanceState);
        setContentView(R.layout.activity_main);

        ///主界面
        //显示用户的ID和昵称
        TextView text_id = (TextView) findViewById(R.id.user_id);
        TextView text_name = (TextView) findViewById(R.id.user_name);
        //头像是否亮
        ImageView image_head = (ImageView) findViewById(R.id.image_head) ;
        ColorMatrix cm = new ColorMatrix();
        cm.setSaturation(0); // 设置饱和度
        ColorMatrixColorFilter grayColorFilter = new ColorMatrixColorFilter(cm);
        image_head.setColorFilter(grayColorFilter); // 如果想恢复彩色显示,设置为null即可

        ///注册功能
        //接收注册返回的数据
        ActivityResultLauncher<Intent> launcher_logon = registerForActivityResult(new ActivityResultContracts.StartActivityForResult(), new ActivityResultCallback<ActivityResult>() {
            @Override
            public void onActivityResult(ActivityResult result_logon) {
                if(result_logon.getResultCode() == Activity.RESULT_OK){

                    //回调过来的intent数据
                    Intent data = result_logon.getData();
                    //回调过来的结果代码
                    int resultCode = result_logon.getResultCode();
                    if (resultCode == RESULT_OK){
                        assert data != null;
                        //接受并保持注册的信息
                        data_id = data.getStringExtra("data_id_logon");
                        data_name = data.getStringExtra("data_name_logon");
                        data_password = data.getStringExtra("data_password_logon");

                    }
                }
            }
        });
        //点击注册按钮,跳转到注册界面
        Button btn_logon = (Button) findViewById(R.id.btn_logon);
        btn_logon.setOnClickListener(new View.OnClickListener() {
            @Override
            public void onClick(View view) {
                //跳转注册页面
                Intent intent = new Intent(MainActivity.this, Logon.class);
                launcher_logon.launch(intent);

            }
        });

        ///登录功能
        //接收登录返回的数据
        ActivityResultLauncher<Intent> launcher_login = registerForActivityResult(new ActivityResultContracts.StartActivityForResult(), new ActivityResultCallback<ActivityResult>() {
            @Override
            public void onActivityResult(ActivityResult result_login) {

                if(result_login.getResultCode() == Activity.RESULT_OK){
                    //回调过来的intent数据
                    Intent data = result_login.getData();
                    //回调过来的结果代码
                    int resultCode = result_login.getResultCode();
                    if (resultCode == RESULT_OK){
                        text_id.setText(data.getStringExtra("data_id")); //显示账号id
                        text_name.setText(data.getStringExtra("data_name")); //显示昵称
                        image_head.setColorFilter(null); // 设置为null,恢复彩色显示
                    }
                }
            }
        });
        //点击登录按钮,跳转登录界面
        Button btn_login = (Button) findViewById(R.id.btn_login);
        btn_login.setOnClickListener(new View.OnClickListener() {
            @Override
            public void onClick(View view) {
                Intent intent = new Intent(MainActivity.this, Login.class);
                //发送需要验证的数据(即注册的信息)
                intent.putExtra("data_id",data_id);
                intent.putExtra("data_name",data_name);
                intent.putExtra("data_password",data_password);
                launcher_login.launch(intent);
            }
        });

    }
}Login.java文章来源:https://www.toymoban.com/news/detail-743107.html
package com.example.work4_activity_login_logon;

import androidx.appcompat.app.AppCompatActivity;

import android.content.Intent;
import android.os.Bundle;
import android.view.View;
import android.widget.Button;
import android.widget.EditText;
import android.widget.ImageView;
import android.widget.TextView;

public class Login extends AppCompatActivity {

    @Override
    protected void onCreate(Bundle savedInstanceState) {
        super.onCreate(savedInstanceState);
        setContentView(R.layout.activity_login);

        ///点击返回键时,返回主界面
        ImageView image_back = (ImageView) findViewById(R.id.image_back);
        image_back.setOnClickListener(new View.OnClickListener() {
            @Override
            public void onClick(View view) {
                finish();
            }
        });

        //创建变量(用户名,密码,提示结果)
        EditText txtID = (EditText) findViewById(R.id.edit_user);
        EditText txtPassword = (EditText) findViewById(R.id.edit_password);
        TextView txtResult = (TextView) findViewById(R.id.txtResult);

        ///登录按钮
        Button btn_login = (Button) findViewById(R.id.btn_login2);
        btn_login.setOnClickListener(new View.OnClickListener() {
            @Override
            public void onClick(View view) {
                //判断是否有记录,有则登录成功,无则提示为注册
                //获取记录中的账号,昵称,密码(及注册成功的)
                Intent intent_val = getIntent();
                String data_id_login = intent_val.getStringExtra("data_id");
                String data_name_login = intent_val.getStringExtra("data_name");
                String data_password_login = intent_val.getStringExtra("data_password");

                //判断输入是否合法
                if (txtID.getText().toString().isEmpty()) {
                    txtResult.setText("请输入账号");
                } else {
                    if (txtPassword.getText().toString().isEmpty()) {
                        txtResult.setText("请输入密码");
                    } else {
                        if (txtID.getText().toString().equals(data_id_login)){
                            if(txtPassword.getText().toString().equals(data_password_login)){
                                //登录成功
                                txtResult.setText("登录成功");
                                //返回数据,使主界面图标亮及显示昵称和ID
                                Intent intent = new Intent();
                                intent.putExtra("data_id",data_id_login);
                                intent.putExtra("data_name",data_name_login);
                                setResult(RESULT_OK,intent);
                                //结束intent,返回是一个activity
                                finish();
                            }else {
                                //密码错误
                                txtResult.setText("密码有误");
                            }
                        }else {
                            //用户名不存在
                            txtResult.setText("用户名不存在");
                        }
                    }
                }
            }
        });

    }
}Logon.java文章来源地址https://www.toymoban.com/news/detail-743107.html
package com.example.work4_activity_login_logon;

import androidx.appcompat.app.AppCompatActivity;

import android.content.Intent;
import android.os.Bundle;
import android.view.View;
import android.widget.Button;
import android.widget.EditText;
import android.widget.ImageView;
import android.widget.TextView;
import android.widget.Toast;

import java.util.Map;

public class Logon extends AppCompatActivity {

    @Override
    protected void onCreate(Bundle savedInstanceState) {
        super.onCreate(savedInstanceState);
        setContentView(R.layout.activity_logon);

        //根据布局文件上的控件创建相应的变量(昵称,账号,密码,确认密码)
        EditText editName = (EditText) findViewById(R.id.edit_name);
        EditText editId = (EditText) findViewById(R.id.edit_user);
        EditText editPassword = (EditText) findViewById(R.id.edit_password);
        EditText editApassword = (EditText) findViewById(R.id.edit_apassword);
        TextView txtResult = (TextView) findViewById(R.id.txtResult);

        ///返回主界面
        ImageView image_back = (ImageView) findViewById(R.id.image_back);
        image_back.setOnClickListener(new View.OnClickListener() {
            @Override
            public void onClick(View view) {
                finish();
            }
        });

        ///注册
        Button btn_logon2 = (Button) findViewById(R.id.btn_logon2);
        btn_logon2.setOnClickListener(new View.OnClickListener() {
            @Override
            public void onClick(View view) {
                //创建变量,保存输入的注册信息(昵称,账号,密码,确认密码)
                String data_name_logon = editName.getText().toString();
                String data_id_logon = editId.getText().toString();
                String data_password_logon = editPassword.getText().toString();
                String data_apassword_logon = editApassword.getText().toString();

                //判断输入是否合法
                if (data_name_logon.isEmpty()) {
                    txtResult.setText("请输入昵称");
                }else {
                    if (data_id_logon.isEmpty()) {
                        txtResult.setText("请输入账号");
                    } else {
                        if (data_password_logon.isEmpty()) {
                            txtResult.setText("请输入密码");
                        }
                        else {
                            if (data_apassword_logon.equals(data_password_logon)) {
                                //注册成功
                                txtResult.setText("注册成功,返回主界面");
                                //并将数据返回主界面,使图标亮、昵称和ID显示
                                //返回数据,是主界面图标亮及显示昵称和ID
                                Intent intent = new Intent();
                                intent.putExtra("data_id_logon",data_id_logon);
                                intent.putExtra("data_name_logon",data_name_logon);
                                intent.putExtra("data_password_logon",data_password_logon);
                                setResult(RESULT_OK,intent);
                                finish();
                            } else {
                                txtResult.setText("两次输入的密码不一致,请重新输入");
                            }
                        }
                    }
                }
            }
        });

    }
}
到了这里,关于Android Studio —— Activity组件(课后作业:登录和注册App)的文章就介绍完了。如果您还想了解更多内容,请在右上角搜索TOY模板网以前的文章或继续浏览下面的相关文章,希望大家以后多多支持TOY模板网!