目录
1、思路
2、代码结构
3、代码运行
4、api接口代码
5、web ui界面
6、参考资料
7、代码分享
1、思路
通过搭建flask微型服务器后端,以后通过vue搭建网页前端。flask是第一个第三方库。与其他模块一样,安装时可以直接使用python的pip命令实现。flask是web开发框架,简单易学,因此用flask来搭建web服务也非常简单。
在pycharm新建一个项目,命名为web2020,然后新建一个python文件,命名为main.py。在代码中输入如下代码:
from flask import  Flask    #导入Flask类
app=Flask(__name__)         #实例化并命名为app实例
if __name__=="__main__":
    app.run(port=2020,host="127.0.0.1",debug=True)   #调用run方法,设定端口号,启动服务
路由定义:
from flask import  Flask
app=Flask(__name__)

@app.route('/')
def index():
    return 'welcome to my webpage!'

if __name__=="__main__":
    app.run(port=2020,host="127.0.0.1",debug=True)
通过这种方式,实现python调用模型,然后通过web服务器进行数据输入输出,最后通过浏览器web页面进行展示。
2、代码结构
前端代码结构

后端代码结构

3、代码运行


4、api接口代码
import datetime
import logging as rel_log
import os
import shutil
from datetime import timedelta
from flask import *
from flask import Flask, render_template, Response
from processor.AIDetector_pytorch import Detector

import core.main

# import camera driver
if os.environ.get('CAMERA'):
    Camera = import_module('camera_' + os.environ['CAMERA']).Camera
else:
    from camera import Camera


UPLOAD_FOLDER = r'./uploads'

ALLOWED_EXTENSIONS = set(['png', 'jpg'])
app = Flask(__name__)
app.secret_key = 'secret!'
app.config['UPLOAD_FOLDER'] = UPLOAD_FOLDER

werkzeug_logger = rel_log.getLogger('werkzeug')
werkzeug_logger.setLevel(rel_log.ERROR)

# 解决缓存刷新问题
app.config['SEND_FILE_MAX_AGE_DEFAULT'] = timedelta(seconds=1)


# 添加header解决跨域
@app.after_request
def after_request(response):
    response.headers['Access-Control-Allow-Origin'] = '*'
    response.headers['Access-Control-Allow-Credentials'] = 'true'
    response.headers['Access-Control-Allow-Methods'] = 'POST'
    response.headers['Access-Control-Allow-Headers'] = 'Content-Type, X-Requested-With'
    return response

#图片检测接口
def allowed_file(filename):
    return '.' in filename and filename.rsplit('.', 1)[1] in ALLOWED_EXTENSIONS


#@app.route('/')
#def hello_world():
#    return redirect(url_for('static', filename='./index.html'))
@app.route('/')
def index():
    """Video streaming home page."""
    return render_template('index.html')


@app.route('/upload', methods=['GET', 'POST'])
def upload_file():
    file = request.files['file']
    print(datetime.datetime.now(), file.filename)
    #if file and allowed_file(file.filename):
    src_path = os.path.join(app.config['UPLOAD_FOLDER'], file.filename)
    file.save(src_path)
    shutil.copy(src_path, './tmp/ct')
    image_path = os.path.join('./tmp/ct', file.filename)
    pid, image_info = core.main.c_main(
        image_path, current_app.model, file.filename.rsplit('.', 1)[1])
    return jsonify({'status': 1,
                        'image_url': 'http://127.0.0.1:5003/tmp/ct/' + pid,
                        'draw_url': 'http://127.0.0.1:5003/tmp/draw/' + pid,
                        'image_info': image_info})

    #return jsonify({'status': 0})


@app.route("/download", methods=['GET'])
def download_file():
    # 需要知道2个参数, 第1个参数是本地目录的path, 第2个参数是文件名(带扩展名)
    return send_from_directory('data', 'testfile.zip', as_attachment=True)


# show photo
@app.route('/tmp/<path:file>', methods=['GET'])
def show_photo(file):
    if request.method == 'GET':
        if not file is None:
            image_data = open(f'tmp/{file}', "rb").read()
            response = make_response(image_data)
            response.headers['Content-Type'] = 'image/png'
            return response


#视频检测接口
def gen(camera):
    """Video streaming generator function."""
    while True:
        frame = camera.get_frame()
        yield (b'--frame\r\n'
               b'Content-Type: image/jpeg\r\n\r\n' + frame + b'\r\n')


@app.route('/video_start')
def video_feed():
    """Video streaming route. Put this in the src attribute of an img tag."""
    return Response(gen(Camera()),
                    mimetype='multipart/x-mixed-replace; boundary=frame')

#视频流检测接口
#@app.route('/livestream_start')


#程序启动入口
if __name__=='__main__':
    files = [
        'uploads', 'tmp/ct', 'tmp/draw',
        'tmp/image', 'tmp/mask', 'tmp/uploads'
    ]
    for ff in files:
        if not os.path.exists(ff):
            os.makedirs(ff)
    with app.app_context():
        current_app.model = Detector()
    app.run(host='127.0.0.1', port=5003, debug=True)
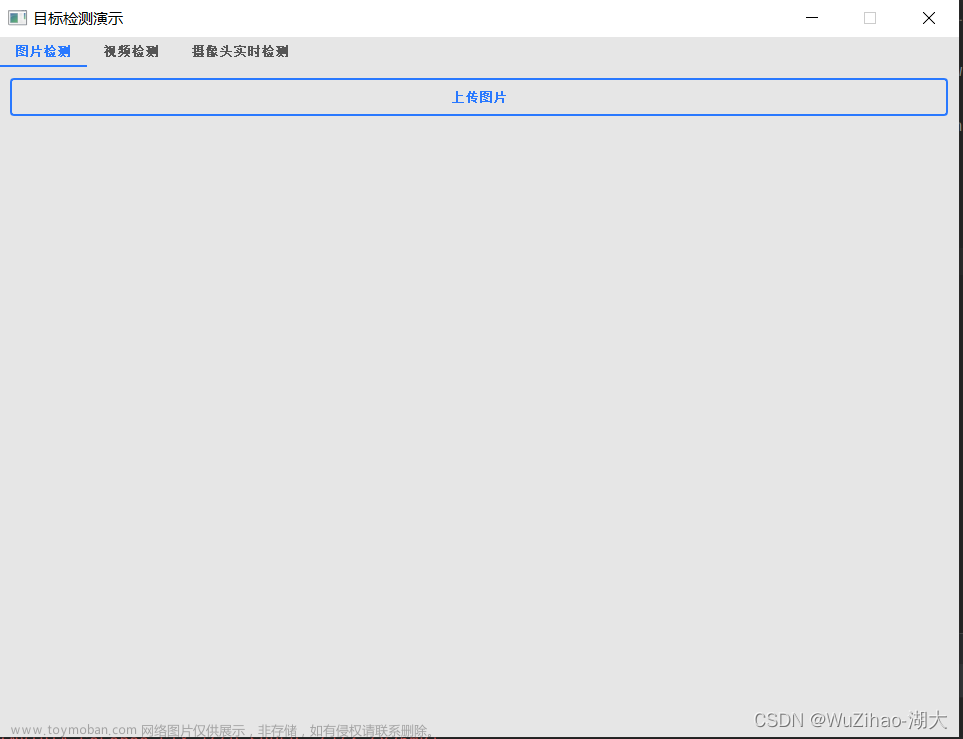
5、web ui界面
<template>
<el-tabs stretch=true v-model="activeName" type="card" @tab-click="handleClick">
<el-tab-pane label="图片检测" name="first">
<div id="Content">
<el-dialog
title="AI预测中"
:visible.sync="dialogTableVisible"
:show-close="false"
:close-on-press-escape="false"
:append-to-body="true"
:close-on-click-modal="false"
:center="true"
>
<el-progress :percentage="percentage"></el-progress>
<span slot="footer" class="dialog-footer">请耐心等待约3秒钟</span>
</el-dialog>
<div id="CT">
<div id="CT_image">
<el-card
id="CT_image_1"
class="box-card"
style="
border-radius: 8px;
width: 800px;
height: 360px;
margin-bottom: -30px;
"
>
<div class="demo-image__preview1">
<div
v-loading="loading"
element-loading-text="上传图片中"
element-loading-spinner="el-icon-loading"
>
<el-image
:src="url_1"
class="image_1"
:preview-src-list="srcList"
style="border-radius: 3px 3px 0 0"
>
<div slot="error">
<div slot="placeholder" class="error">
<el-button
v-show="showbutton"
type="primary"
icon="el-icon-upload"
class="download_bt"
v-on:click="true_upload"
>
上传图像
<input
ref="upload"
style="display: none"
name="file"
type="file"
@change="update"
/>
</el-button>
</div>
</div>
</el-image>
</div>
<div class="img_info_1" style="border-radius: 0 0 5px 5px">
<span style="color: white; letter-spacing: 6px">原始图像</span>
</div>
</div>
<div class="demo-image__preview2">
<div
v-loading="loading"
element-loading-text="处理中,请耐心等待"
element-loading-spinner="el-icon-loading"
>
<el-image
:src="url_2"
class="image_1"
:preview-src-list="srcList1"
style="border-radius: 3px 3px 0 0"
>
<div slot="error">
<div slot="placeholder" class="error">{{ wait_return }}</div>
</div>
</el-image>
</div>
<div class="img_info_1" style="border-radius: 0 0 5px 5px">
<span style="color: white; letter-spacing: 4px">检测结果</span>
</div>
</div>
</el-card>
</div>
<div id="info_patient">
<!-- 卡片放置表格 -->
<el-card style="border-radius: 8px">
<div slot="header" class="clearfix">
<span>检测目标</span>
<el-button
style="margin-left: 35px"
v-show="!showbutton"
type="primary"
icon="el-icon-upload"
class="download_bt"
v-on:click="true_upload2"
>
重新选择图像
<input
ref="upload2"
style="display: none"
name="file"
type="file"
@change="update"
/>
</el-button>
</div>
<el-tabs v-model="activeName">
<el-tab-pane label="检测到的目标" name="first">
<!-- 表格存放特征值 -->
<el-table
:data="feature_list"
height="390"
border
style="width: 750px; text-align: center"
v-loading="loading"
element-loading-text="数据正在处理中,请耐心等待"
element-loading-spinner="el-icon-loading"
lazy
>
<el-table-column label="目标类别" width="250px">
<template slot-scope="scope">
<span>{{ scope.row[2] }}</span>
</template>
</el-table-column>
<el-table-column label="目标大小" width="250px">
<template slot-scope="scope">
<span>{{ scope.row[0] }}</span>
</template>
</el-table-column>
<el-table-column label="置信度" width="250px">
<template slot-scope="scope">
<span>{{ scope.row[1] }}</span>
</template>
</el-table-column>
</el-table>
</el-tab-pane>
</el-tabs>
</el-card>
</div>
</div>
</div>
</el-tab-pane>
<el-tab-pane label="视频检测" name="second">
<h3>视频名称</h3>
<img :src="vidoedectetion">
</el-tab-pane>
<el-tab-pane label="视频流检测" name="third">
</el-tab-pane>
<el-tab-pane label="多路视频流检测" name="fourth">
</el-tab-pane>
</el-tabs>
</template>
<script>
import axios from "axios";
export default {
name: "Content",
data() {
return {
vidoedectetion:"http://127.0.0.1:5003" + "/video_start",
server_url: "http://127.0.0.1:5003",
activeName: "first",
active: 0,
centerDialogVisible: true,
url_1: "",
url_2: "",
textarea: "",
srcList: [],
srcList1: [],
feature_list: [],
feature_list_1: [],
feat_list: [],
url: "",
visible: false,
wait_return: "等待上传",
wait_upload: "等待上传",
loading: false,
table: false,
isNav: false,
showbutton: true,
percentage: 0,
fullscreenLoading: false,
opacitys: {
opacity: 0,
},
dialogTableVisible: false,
};
},
created: function () {
document.title = "Yolov5安全帽检测web推理部署";
},
methods: {
true_upload() {
this.$refs.upload.click();
},
true_upload2() {
this.$refs.upload2.click();
},
next() {
this.active++;
},
// 获得目标文件
getObjectURL(file) {
var url = null;
if (window.createObjcectURL != undefined) {
url = window.createOjcectURL(file);
} else if (window.URL != undefined) {
url = window.URL.createObjectURL(file);
} else if (window.webkitURL != undefined) {
url = window.webkitURL.createObjectURL(file);
}
return url;
},
// 上传文件
update(e) {
this.percentage = 0;
this.dialogTableVisible = true;
this.url_1 = "";
this.url_2 = "";
this.srcList = [];
this.srcList1 = [];
this.wait_return = "";
this.wait_upload = "";
this.feature_list = [];
this.feat_list = [];
this.fullscreenLoading = true;
this.loading = true;
this.showbutton = false;
let file = e.target.files[0];
this.url_1 = this.$options.methods.getObjectURL(file);
let param = new FormData(); //创建form对象
param.append("file", file, file.name); //通过append向form对象添加数据
var timer = setInterval(() => {
this.myFunc();
}, 30);
let config = {
headers: { "Content-Type": "multipart/form-data" },
}; //添加请求头
axios
.post(this.server_url + "/upload", param, config)
.then((response) => {
this.percentage = 100;
clearInterval(timer);
this.url_1 = response.data.image_url;
this.srcList.push(this.url_1);
this.url_2 = response.data.draw_url;
this.srcList1.push(this.url_2);
this.fullscreenLoading = false;
this.loading = false;
this.feat_list = Object.keys(response.data.image_info);
for (var i = 0; i < this.feat_list.length; i++) {
response.data.image_info[this.feat_list[i]][2] = this.feat_list[i];
this.feature_list.push(response.data.image_info[this.feat_list[i]]);
}
this.feature_list.push(response.data.image_info);
this.feature_list_1 = this.feature_list[0];
this.dialogTableVisible = false;
this.percentage = 0;
this.notice1();
});
},
myFunc() {
if (this.percentage + 33 < 99) {
this.percentage = this.percentage + 33;
} else {
this.percentage = 99;
}
},
drawChart() {},
notice1() {
this.$notify({
title: "预测成功",
message: "点击图片可以查看大图",
duration: 0,
type: "success",
});
},
},
mounted() {
this.drawChart();
},
};
</script>
<style>
.el-button {
padding: 12px 20px !important;
}
#hello p {
font-size: 15px !important;
/*line-height: 25px;*/
}
.n1 .el-step__description {
padding-right: 20%;
font-size: 14px;
line-height: 20px;
/* font-weight: 400; */
}
</style>
<style scoped>
* {
box-sizing: border-box;
margin: 0;
padding: 0;
}
.dialog_info {
margin: 20px auto;
}
.text {
font-size: 14px;
}
.item {
margin-bottom: 18px;
}
.clearfix:before,
.clearfix:after {
display: table;
content: "";
}
.clearfix:after {
clear: both;
}
.box-card {
width: 680px;
height: 200px;
border-radius: 8px;
margin-top: -20px;
}
.divider {
width: 50%;
}
#CT {
display: flex;
height: 100%;
width: 100%;
flex-wrap: wrap;
justify-content: center;
margin: 0 auto;
margin-right: 0px;
max-width: 1800px;
}
#CT_image_1 {
width: 90%;
height: 40%;
margin: 0px auto;
padding: 0px auto;
margin-right: 180px;
margin-bottom: 0px;
border-radius: 4px;
}
#CT_image {
margin-bottom: 60px;
margin-left: 30px;
margin-top: 5px;
}
.image_1 {
width: 275px;
height: 260px;
background: #ffffff;
box-shadow: 0 2px 12px 0 rgba(0, 0, 0, 0.1);
}
.img_info_1 {
height: 30px;
width: 275px;
text-align: center;
background-color: #21b3b9;
line-height: 30px;
}
.demo-image__preview1 {
width: 250px;
height: 290px;
margin: 20px 60px;
float: left;
}
.demo-image__preview2 {
width: 250px;
height: 290px;
margin: 20px 460px;
/* background-color: green; */
}
.error {
margin: 100px auto;
width: 50%;
padding: 10px;
text-align: center;
}
.block-sidebar {
position: fixed;
display: none;
left: 50%;
margin-left: 600px;
top: 350px;
width: 60px;
z-index: 99;
}
.block-sidebar .block-sidebar-item {
font-size: 50px;
color: lightblue;
text-align: center;
line-height: 50px;
margin-bottom: 20px;
cursor: pointer;
display: block;
}
div {
display: block;
}
.block-sidebar .block-sidebar-item:hover {
color: #187aab;
}
.download_bt {
padding: 10px 16px !important;
}
#upfile {
width: 104px;
height: 45px;
background-color: #187aab;
color: #fff;
text-align: center;
line-height: 45px;
border-radius: 3px;
box-shadow: 0 0 2px 0 rgba(0, 0, 0, 0.1), 0 2px 2px 0 rgba(0, 0, 0, 0.2);
color: #fff;
font-family: "Source Sans Pro", Verdana, sans-serif;
font-size: 0.875rem;
}
.file {
width: 200px;
height: 130px;
position: absolute;
left: -20px;
top: 0;
z-index: 1;
-moz-opacity: 0;
-ms-opacity: 0;
-webkit-opacity: 0;
opacity: 0; /*css属性——opcity不透明度,取值0-1*/
filter: alpha(opacity=0);
cursor: pointer;
}
#upload {
position: relative;
margin: 0px 0px;
}
#Content {
width: 85%;
height: 800px;
background-color: #ffffff;
margin: 15px auto;
display: flex;
min-width: 1200px;
}
.divider {
background-color: #eaeaea !important;
height: 2px !important;
width: 100%;
margin-bottom: 50px;
}
.divider_1 {
background-color: #ffffff;
height: 2px !important;
width: 100%;
margin-bottom: 20px;
margin: 20px auto;
}
.steps {
font-family: "lucida grande", "lucida sans unicode", lucida, helvetica,
"Hiragino Sans GB", "Microsoft YaHei", "WenQuanYi Micro Hei", sans-serif;
color: #21b3b9;
text-align: center;
margin: 15px auto;
font-size: 20px;
font-weight: bold;
text-align: center;
}
.step_1 {
/*color: #303133 !important;*/
margin: 20px 26px;
}
#info_patient {
margin-top: 10px;
margin-right: 160px;
}
</style>
6、参考资料
yolov5-flask-web - 知乎 (zhihu.com)
Flask部署YOLOv5 - 知乎 (zhihu.com)
https://zhuanlan.zhihu.com/p/104273184
特别感谢作者文章来源:https://www.toymoban.com/news/detail-744612.html
GitHub - Sharpiless/Yolov5-Flask-VUE: 基于Flask+VUE前后端,在阿里云公网WEB端部署YOLOv5目标检测模型文章来源地址https://www.toymoban.com/news/detail-744612.html
7、代码分享
到了这里,关于yolov5 web端部署进行图片和视频检测的文章就介绍完了。如果您还想了解更多内容,请在右上角搜索TOY模板网以前的文章或继续浏览下面的相关文章,希望大家以后多多支持TOY模板网!


