目录
1.1 关系引入
1.2 搭建mysql在docker中的环境
1.2.1 查询镜像
1.2.2 拉取镜像
1.3 mysql主从原理
1.4 mysql的主配置
1.4.1 linux创建配置文件、文件夹
1.4.2 查看文件结构
1.4.3 拷贝my.cnf文件到conf文件夹下
1.4.4 查看my.cnf文件(可省略)
1.4.5 进入my.cnf文件修改配置
1.4.6 创建运行mysql主容器(master)
1.4.7 进入容器
1.4.8 在容器中运行mysql客户端
1.4.9 开放指定端口和重新加载防火墙
1.4.10 navicat新建mysql连接并测试
1.5 mysql的从配置
1.5.1 检查binlog是否开启
1.5.2 查看当前mysql容器中的binlog日志文件
1.5.3 查看当前mysql数据库binlog情况
1.5.4 创建与从(slave)服务通信的用户
1.5.6 查询master的状态
1.5.7 获取master容器ip地址
1.5.8 新建配置文件夹
1.5.9 拷贝my.cnf文件到conf文件夹下
1.5.10 进入my.cnf文件修改配置
1.5.11 创建运行mysql从容器(slave01)
1.5.12 进入容器
1.5.13 在容器中运行mysql客户端
1.5.14 修改从(slave)服务器与master关联
1.5.15 开启slave
1.5.16 查询slave状态
1.5.17 开放指定端口和重新加载防火墙
1.5.18 navicat新建mysql连接并测试
1.5.19 测试主从
1.1 关系引入
【示意图:mysql和docker和操作系统之间的关系】

1.2 搭建mysql在docker中的环境
1.2.1 查询镜像
【命令:查询镜像】
docker search 镜像名称【示例】
[root@localhost ~]# docker search mysql
NAME                            DESCRIPTION                                      STARS     OFFICIAL   AUTOMATED
mysql                           MySQL is a widely used, open-source relation…   14273     [OK]
mariadb                         MariaDB Server is a high performing open sou…   5455      [OK]
percona                         Percona Server is a fork of the MySQL relati…   617       [OK]
phpmyadmin                      phpMyAdmin - A web interface for MySQL and M…   831       [OK]
bitnami/mysql                   Bitnami MySQL Docker Image                       90                   [OK]
circleci/mysql                  MySQL is a widely used, open-source relation…   29
bitnami/mysqld-exporter                                                          5
ubuntu/mysql                    MySQL open source fast, stable, multi-thread…   51
cimg/mysql                                                                       0
rapidfort/mysql                 RapidFort optimized, hardened image for MySQL    23
rapidfort/mysql8-ib             RapidFort optimized, hardened image for MySQ…   9
google/mysql                    MySQL server for Google Compute Engine           23                   [OK]
hashicorp/mysql-portworx-demo                                                    0
rapidfort/mysql-official        RapidFort optimized, hardened image for MySQ…   7
newrelic/mysql-plugin           New Relic Plugin for monitoring MySQL databa…   1                    [OK]
databack/mysql-backup           Back up mysql databases to... anywhere!          86
bitnamicharts/mysql                                                              0
linuxserver/mysql               A Mysql container, brought to you by LinuxSe…   38
mirantis/mysql                                                                   0
docksal/mysql                   MySQL service images for Docksal - https://d…   0
linuxserver/mysql-workbench                                                      50
vitess/mysqlctld                vitess/mysqlctld                                 1                    [OK]
eclipse/mysql                   Mysql 5.7, curl, rsync                           0                    [OK]
drupalci/mysql-5.5              https://www.drupal.org/project/drupalci          3                    [OK]
drupalci/mysql-5.7              https://www.drupal.org/project/drupalci          0
1.2.2 拉取镜像
【命令:拉取镜像】
docker pull 镜像名称
docker pull 镜像名称:版本号(注:指定版本的写法)
【命令:查询镜像检查是否已下载到本地】
docker image ls【示例】
[root@localhost ~]# docker pull mysql
Using default tag: latest
latest: Pulling from library/mysql
72a69066d2fe: Pull complete
93619dbc5b36: Pull complete
99da31dd6142: Pull complete
626033c43d70: Pull complete
37d5d7efb64e: Pull complete
ac563158d721: Pull complete
d2ba16033dad: Pull complete
688ba7d5c01a: Pull complete
00e060b6d11d: Pull complete
1c04857f594f: Pull complete
4d7cfa90e6ea: Pull complete
e0431212d27d: Pull complete
Digest: sha256:e9027fe4d91c0153429607251656806cc784e914937271037f7738bd5b8e7709
Status: Downloaded newer image for mysql:latest
docker.io/library/mysql:latest

[root@localhost ~]# docker image ls
REPOSITORY   TAG       IMAGE ID       CREATED         SIZE
mysql        latest    3218b38490ce   18 months ago   516MB
【示意图】

1.3 mysql主从原理
【示意图:mysql主从原理】


1.4 mysql的主配置
1.4.1 linux创建配置文件、文件夹
在/usr/local/中先创建software文件夹,再在software下创建mysql文件夹conf和data
【示例】
[root@localhost ~]# cd /usr/local
[root@localhost local]# cd /usr/local/software
[root@localhost software]# ls
jdk
[root@localhost software]# mkdir -p mysql/3306
[root@localhost software]# ls
jdk  mysql
[root@localhost software]# cd mysql
[root@localhost mysql]# ls
3306
[root@localhost mysql]# cd 3306
[root@localhost 3306]# ls
[root@localhost 3306]# mkdir conf
[root@localhost 3306]# mkdir data
[root@localhost 3306]# ls
conf  data
[root@localhost 3306]# cd ..
[root@localhost mysql]# ls
3306
【示意图】

1.4.2 查看文件结构
【命令:查看文件结构】
tree【示例】
[root@localhost mysql]# tree
.
└── 3306
    ├── conf
    └── data

3 directories, 0 files
[root@localhost mysql]# cd 3306
[root@localhost 3306]# tree
.
├── conf
└── data

2 directories, 1 file
【注意】如果没有tree命令, 需要先安装tree
【命令:安装tree】
yum -y install tree【示例】
[root@localhost mysql]# tree
bash: tree: 未找到命令...

[root@localhost mysql]# yum -y install tree
已加载插件:fastestmirror, langpacks
Loading mirror speeds from cached hostfile
 * base: mirrors.163.com
 * extras: mirrors.ustc.edu.cn
 * updates: mirrors.163.com
正在解决依赖关系
--> 正在检查事务
---> 软件包 tree.x86_64.0.1.6.0-10.el7 将被 安装
--> 解决依赖关系完成

依赖关系解决

===============================================================================================================================================================================================
 Package                                    架构                                         版本                                                 源                                          大小
===============================================================================================================================================================================================
正在安装:
 tree                                       x86_64                                       1.6.0-10.el7                                         base                                        46 k

事务概要
===============================================================================================================================================================================================
安装  1 软件包

总下载量:46 k
安装大小:87 k
Downloading packages:
tree-1.6.0-10.el7.x86_64.rpm                                                                                                                                            |  46 kB  00:00:00
Running transaction check
Running transaction test
Transaction test succeeded
Running transaction
  正在安装    : tree-1.6.0-10.el7.x86_64                                                                                                                                                   1/1
  验证中      : tree-1.6.0-10.el7.x86_64                                                                                                                                                   1/1

已安装:
  tree.x86_64 0:1.6.0-10.el7

完毕!
1.4.3 拷贝my.cnf文件到conf文件夹下
在下方文件区域找到文件夹/usr/local/software/mysql/3306/conf,右上角按钮上传本地文件my.cnf
【示意图:拷贝my.cnf文件到conf文件夹下】

【示例:tree查看文件结构是否拷贝成功】
[root@localhost mysql]# cd 3306
[root@localhost 3306]# tree
.
├── conf
│   └── my.cnf
├── data
1.4.4 查看my.cnf文件(可省略)
【命令:查看my.cnf文件】
cat my.cnf【示例】
[root@localhost mysql]# cd 3306
[root@localhost 3306]# cd conf
[root@localhost conf]# cat conf
cat: conf: 没有那个文件或目录
[root@localhost conf]# ls
my.cnf

[root@localhost conf]# cat my.cnf
# Copyright (c) 2017, Oracle and/or its affiliates. All rights reserved.
#
# This program is free software; you can redistribute it and/or modify
# it under the terms of the GNU General Public License as published by
# the Free Software Foundation; version 2 of the License.
#
# This program is distributed in the hope that it will be useful,
# but WITHOUT ANY WARRANTY; without even the implied warranty of
# MERCHANTABILITY or FITNESS FOR A PARTICULAR PURPOSE.  See the
# GNU General Public License for more details.
#
# You should have received a copy of the GNU General Public License
# along with this program; if not, write to the Free Software
# Foundation, Inc., 51 Franklin St, Fifth Floor, Boston, MA  02110-1301 USA

#
# The MySQL  Server configuration file.
#
# For explanations see
# http://dev.mysql.com/doc/mysql/en/server-system-variables.html

[mysqld]
pid-file        = /var/run/mysqld/mysqld.pid
socket          = /var/run/mysqld/mysqld.sock
datadir         = /var/lib/mysql
secure-file-priv= NULL
default_authentication_plugin=mysql_native_password

# Custom config should go here
!includedir /etc/mysql/conf.d/

server_id=200
1.4.5 进入my.cnf文件修改配置
【命令:进入my.cnf文件修改配置】
vim my.cnf【修改内容】
server_id=200
log_bin=mysql-bin
binlog_format=row
【示例】
[root@localhost 3306]# cd conf
[root@localhost conf]# ls
my.cnf
[root@localhost conf]# vim my.cnf
[root@localhost conf]# cat my.cnf
# Copyright (c) 2017, Oracle and/or its affiliates. All rights reserved.
#
# This program is free software; you can redistribute it and/or modify
# it under the terms of the GNU General Public License as published by
# the Free Software Foundation; version 2 of the License.
#
# This program is distributed in the hope that it will be useful,
# but WITHOUT ANY WARRANTY; without even the implied warranty of
# MERCHANTABILITY or FITNESS FOR A PARTICULAR PURPOSE.  See the
# GNU General Public License for more details.
#
# You should have received a copy of the GNU General Public License
# along with this program; if not, write to the Free Software
# Foundation, Inc., 51 Franklin St, Fifth Floor, Boston, MA  02110-1301 USA

#
# The MySQL  Server configuration file.
#
# For explanations see
# http://dev.mysql.com/doc/mysql/en/server-system-variables.html

[mysqld]
pid-file        = /var/run/mysqld/mysqld.pid
socket          = /var/run/mysqld/mysqld.sock
datadir         = /var/lib/mysql
secure-file-priv= NULL
default_authentication_plugin=mysql_native_password

# Custom config should go here
!includedir /etc/mysql/conf.d/

server_id=200                 #服务器id
log_bin=mysql-bin             #binlog名称
binlog_format=row             #binlog的格式

[root@localhost conf]#
1.4.6 创建运行mysql主容器(master)
- docker run 命令
- -i:以交互模式运行容器
- -t:为容器重新分配一个伪输入终端
- --name :容器名称
- --privileged: 设置容器公开权限(默认为true)
- -p :映射端口 linux端口: 容器内置端口(mysql默认端口为3306)
- -v : linux挂载文件夹/文件和容器内路径的映射
- -e: 容器的环境变量(设置mysql默认用户名&密码)
- -d: 后台运行容器,并返回容器ID
【命令:创建mysql的容器(docker)】
docker run -it \
--name mysql_3306 \
--privileged \
-p 3306:3306 \
-v /usr/local/software/mysql/3306/conf/my.cnf:/etc/mysql/my.cnf \
-v /usr/local/software/mysql/3306/data:/var/lib/mysql \
-v /usr/local/software/mysql/3306/mysql-files:/var/lib/mysql-files \
-e MYSQL_ROOT_PASSWORD=123456 \
-d mysql【命令:查看docker服务器中容器状态及批量获取容器基本信息】(常用)
docker ps【示例】
[root@localhost 3306]# docker run -it \
> --name mysql_3306 \
> --privileged \
> -p 3306:3306 \
> -v /usr/local/software/mysql/3306/conf/my.cnf:/etc/mysql/my.cnf \
> -v /usr/local/software/mysql/3306/data:/var/lib/mysql \
> -v /usr/local/software/mysql/3306/mysql-files:/var/lib/mysql-files \
> -e MYSQL_ROOT_PASSWORD=123321 \
> -d mysql
05231a95b9685d23c0b9145ed986861f2d89f1c906b28c23544e19040b115bc5

[root@localhost 3306]# docker ps
CONTAINER ID   IMAGE     COMMAND                   CREATED          STATUS          PORTS                                                  NAMES
05231a95b968   mysql     "docker-entrypoint.s…"   19 seconds ago   Up 18 seconds   0.0.0.0:3306->3306/tcp, :::3306->3306/tcp, 33060/tcp   mysql_3306
1.4.7 进入容器
- 进入容器实质上也是进入了一个linux环境。
- docker exec
- -it:以交互模式运行容器 ,为容器重新分配一个伪输入终端。
- bash: bash(GNU Bourne-Again Shell)是最常用的一种shell(运行在终端的互动程序)。
【命令:进入主mysql_3306容器】
docker exec -it mysql_3306 bash【示例】
[root@localhost 3306]# docker exec -it mysql_3306 bash
root@05231a95b968:/#
【注】

【注意细节】

1.4.8 在容器中运行mysql客户端
【命令1:运行mysql客户端】
mysql -u用户名 -p密码【注】

【命令2:显示所有数据库】
show databases;【命令3:退出mysql环境和容器】
exit【注】下面quit那儿也可以用exit

【示例】
[root@localhost 3306]# docker exec -it mysql_3306 bash
root@05231a95b968:/# ls
bin  boot  dev  docker-entrypoint-initdb.d  entrypoint.sh  etc  home  lib  lib64  media  mnt  opt  proc  root  run  sbin  srv  sys  tmp  usr  var
root@05231a95b968:/# cd etc
root@05231a95b968:/etc# cd mysql

root@05231a95b968:/etc/mysql# mysql -uroot -p123456
mysql: [Warning] Using a password on the command line interface can be insecure.
Welcome to the MySQL monitor.  Commands end with ; or \g.
Your MySQL connection id is 8
Server version: 8.0.27 MySQL Community Server - GPL

Copyright (c) 2000, 2021, Oracle and/or its affiliates.

Oracle is a registered trademark of Oracle Corporation and/or its
affiliates. Other names may be trademarks of their respective
owners.

Type 'help;' or '\h' for help. Type '\c' to clear the current input statement.

mysql> show databases;
+--------------------+
| Database           |
+--------------------+
| information_schema |
| mysql              |
| performance_schema |
| sys                |
+--------------------+
4 rows in set (0.01 sec)

mysql> quit
Bye
root@05231a95b968:/etc/mysql# exit
exit
[root@localhost 3306]#
1.4.9 开放指定端口和重新加载防火墙
- 开放指定端口
- firewall-cmd --zone=public --add-port=端口号/tcp --permanent
- --zone: public 公开端口
- --add-port: 端口号/协议名称
- --permanent: 永久开放
- firewall-cmd --zone=public --add-port=端口号/tcp --permanent
【命令1:开放指定端口3306】
firewall-cmd --zone=public --add-port=3306/tcp --permanent【命令2:重新加载防火墙】
firewall-cmd --reload【命令3:查看开放的端口号】
firewall-cmd --zone=public --list-ports【示例】
[root@localhost 3306]# firewall-cmd --zone=public --add-port=3306/tcp --permanent
success
[root@localhost 3306]# firewall-cmd --reload
success

[root@localhost conf]# firewall-cmd --zone=public --list-ports
3306/tcp
1.4.10 navicat新建mysql连接并测试
【示意图】

【注意】主机和端口要根据想要连接的改,用户名和密码按个人设置的填
1.5 mysql的从配置
1.5.1 检查binlog是否开启
- 进入mysql容器,输入命令: show variables LIKE ‘log_%’
- ON: 表示已开启
- 看log_bin状态是否为ON
【命令:检查binlog是否开启】
show variables LIKE ‘log_%’【示例:看log_bin状态是否为ON】
[root@localhost 3306]# docker exec -it mysql_3306 bash
root@05231a95b968:/# cd etc/mysql
root@05231a95b968:/etc/mysql# mysql -uroot -p123456
mysql: [Warning] Using a password on the command line interface can be insecure.
Welcome to the MySQL monitor.  Commands end with ; or \g.
Your MySQL connection id is 8
Server version: 8.0.27 MySQL Community Server - GPL

Copyright (c) 2000, 2021, Oracle and/or its affiliates.

Oracle is a registered trademark of Oracle Corporation and/or its
affiliates. Other names may be trademarks of their respective
owners.

Type 'help;' or '\h' for help. Type '\c' to clear the current input statement.

mysql> show variables like 'log_%';
+----------------------------------------+----------------------------------------+
| Variable_name                          | Value                                  |
+----------------------------------------+----------------------------------------+
| log_bin                                | ON                                     |
| log_bin_basename                       | /var/lib/mysql/binlog                  |
| log_bin_index                          | /var/lib/mysql/binlog.index            |
| log_bin_trust_function_creators        | OFF                                    |
| log_bin_use_v1_row_events              | OFF                                    |
| log_error                              | stderr                                 |
| log_error_services                     | log_filter_internal; log_sink_internal |
| log_error_suppression_list             |                                        |
| log_error_verbosity                    | 2                                      |                                    |
| log_output                             | FILE                                   |
| log_queries_not_using_indexes          | OFF                                    |
| log_raw                                | OFF                                    |
| log_replica_updates                    | ON                                     |
| log_slave_updates                      | ON                                     |
| log_slow_admin_statements              | OFF                                    |
| log_slow_extra                         | OFF                                    |
| log_slow_replica_statements            | OFF                                    |
| log_slow_slave_statements              | OFF                                    |
| log_statements_unsafe_for_binlog       | ON                                     |
| log_throttle_queries_not_using_indexes | 0                                      |
| log_timestamps                         | UTC                                    |
+----------------------------------------+----------------------------------------+
21 rows in set (0.00 sec)
【或者:在navicat中新建查询,直接用mysql语句查询】

1.5.2 查看当前mysql容器中的binlog日志文件
- 切换目录到 / var/lib/mysql,查看日志文件。或者,也可以查看binlog.index查看日志情况。
[root@localhost 3306]# docker exec -it mysql_3306 bash
root@05231a95b968:/# ls
bin  boot  dev  docker-entrypoint-initdb.d  entrypoint.sh  etc  home  lib  lib64  media  mnt  opt  proc  root  run  sbin  srv  sys  tmp  usr  var

root@05231a95b968:/# cd /var/lib/mysql
root@05231a95b968:/var/lib/mysql# ls
'#ib_16384_0.dblwr'   05231a95b968.err   binlog.000002   ca.pem            ib_buffer_pool   ibdata1   mysql.ibd            public_key.pem    sys
'#ib_16384_1.dblwr'   auto.cnf           binlog.index    client-cert.pem   ib_logfile0      ibtmp1    performance_schema   server-cert.pem   undo_001
'#innodb_temp'        binlog.000001      ca-key.pem      client-key.pem    ib_logfile1      mysql     private_key.pem      server-key.pem    undo_002

root@05231a95b968:/var/lib/mysql# cat binlog.index
./binlog.000001
./binlog.000002
1.5.3 查看当前mysql数据库binlog情况
- 登录mysql客户端: mysql -uroot -p123
- 使用命令: show master status;
【示例】
root@05231a95b968:/var/lib/mysql# mysql -uroot -p123321
mysql: [Warning] Using a password on the command line interface can be insecure.
Welcome to the MySQL monitor.  Commands end with ; or \g.
Your MySQL connection id is 13
Server version: 8.0.27 MySQL Community Server - GPL

Copyright (c) 2000, 2021, Oracle and/or its affiliates.

Oracle is a registered trademark of Oracle Corporation and/or its
affiliates. Other names may be trademarks of their respective
owners.

Type 'help;' or '\h' for help. Type '\c' to clear the current input statement.
【注】当前显示/var/lib/mysql/日志文件的最后一个文件,即本案例中的binlog.000002
1.5.4 创建与从(slave)服务通信的用户
- 在2.4.10中建立的navicat连接mysql_3306,在之前建立的查询,输入mysql语句:
- create user 'slave'@'%' identified by '123456';
- GRANT REPLICATION SLAVE,REPLICATION CLIENT ON . TO 'slave'@'%';
- ALTER USER 'slave'@'%' IDENTIFIED WITH mysql_native_password BY '123456';
- flush privileges;
【示意图】

【注意】或者,在docker中的mysql中输入,也是一样的
【示例:在docker中的mysql中输入】
mysql> create user 'slave'@'%' identified by '123456';
Query OK, 0 rows affected (0.00 sec)
mysql> GRANT REPLICATION SLAVE,REPLICATION CLIENT ON *.* TO 'slave'@'%';
Query OK, 0 rows affected (0.00 sec)
mysql> ALTER USER 'slave'@'%' IDENTIFIED WITH mysql_native_password BY '123456';
Query OK, 0 rows affected (0.00 sec)
mysql> flush privileges;
Query OK, 0 rows affected (0.00 sec)
1.5.6 查询master的状态
【命令:查询master的状态】
show master status;【示例】
mysql> show master status;
+---------------+----------+--------------+------------------+-------------------+
| File          | Position | Binlog_Do_DB | Binlog_Ignore_DB | Executed_Gtid_Set |
+---------------+----------+--------------+------------------+-------------------+
| binlog.000002 |      156 |              |                  |                   |
+---------------+----------+--------------+------------------+-------------------+
1 row in set (0.00 sec)

mysql> exit
Bye
root@05231a95b968:/var/lib/mysql# exit
exit
【注】

【注意】或者,也可以直接在navicat查询中直接输入show master status;查询
1.5.7 获取master容器ip地址
- 退出容器,查询master容器内部地址
【示例】
[root@localhost conf]# docker inspect mysql_3306 |grep IPA
            "SecondaryIPAddresses": null,
            "IPAddress": "172.17.0.2",
                    "IPAMConfig": null,
                    "IPAddress": "172.17.0.2",
【注】

1.5.8 新建配置文件夹
【示例】
[root@localhost ~]# cd /usr/local/software/mysql
[root@localhost mysql]# pwd
/usr/local/software/mysql
[root@localhost mysql]# mkdir -p 3310/conf 3310/data
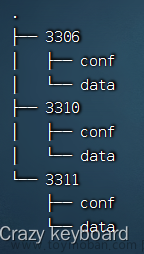
[root@localhost mysql]# mkdir -p 3311/conf 3311/data1.5.9 拷贝my.cnf文件到conf文件夹下
【示例】
[root@localhost conf]# cp my.cnf ../../3310/conf
[root@localhost conf]# cp my.cnf ../../3311/conf
【注】或者,参考1.4.3
1.5.10 进入my.cnf文件修改配置
【命令:进入my.cnf文件修改配置】
vim my.cnf【修改内容:例如3310】
server_id=210
log_bin=mysql-slave01-bin
relay_log=wnhz-relay-bin
read_only=1
【示例:3310】
[root@localhost mysql]# cd 3310
[root@localhost 3310]# cd conf
[root@localhost conf]# ls
my.cnf
[root@localhost conf]# vim my.cnf
[root@localhost conf]# cat my.cnf
# Copyright (c) 2017, Oracle and/or its affiliates. All rights reserved.
#
# This program is free software; you can redistribute it and/or modify
# it under the terms of the GNU General Public License as published by
# the Free Software Foundation; version 2 of the License.
#
# This program is distributed in the hope that it will be useful,
# but WITHOUT ANY WARRANTY; without even the implied warranty of
# MERCHANTABILITY or FITNESS FOR A PARTICULAR PURPOSE.  See the
# GNU General Public License for more details.
#
# You should have received a copy of the GNU General Public License
# along with this program; if not, write to the Free Software
# Foundation, Inc., 51 Franklin St, Fifth Floor, Boston, MA  02110-1301 USA

#
# The MySQL  Server configuration file.
#
# For explanations see
# http://dev.mysql.com/doc/mysql/en/server-system-variables.html

[mysqld]
pid-file        = /var/run/mysqld/mysqld.pid
socket          = /var/run/mysqld/mysqld.sock
datadir         = /var/lib/mysql
secure-file-priv= NULL
default_authentication_plugin=mysql_native_password

# Custom config should go here
!includedir /etc/mysql/conf.d/

server_id=210
log_bin=mysql-slave01-bin
relay_log=wnhz-relay-bin
read_only=1

[root@localhost conf]#
1.5.11 创建运行mysql从容器(slave01)
【命令:创建mysql的容器(docker)】
docker run -it \
--name mysql_3310 \
--privileged \
-p 3310:3306 \
-v /usr/local/software/mysql/3310/conf/my.cnf:/etc/mysql/my.cnf \
-v /usr/local/software/mysql/3310/data:/var/lib/mysql \
-v /usr/local/software/mysql/3310/mysql-files:/var/lib/mysql-files \
-e MYSQL_ROOT_PASSWORD=123456 \
-d mysql
【示例】
[root@localhost 3310]# docker run -it \
> --name mysql_3310 \
> --privileged \
> -p 3310:3306 \
> -v /usr/local/software/mysql/3310/conf/my.cnf:/etc/mysql/my.cnf \
> -v /usr/local/software/mysql/3310/data:/var/lib/mysql \
> -v /usr/local/software/mysql/3310/mysql-files:/var/lib/mysql-files \
> -e MYSQL_ROOT_PASSWORD=123321 \
> -d mysql
72680c742611a2b5cf31bf77d9408111ffbc4a3f6dcfc4d141d43916c9ba1814
1.5.12 进入容器
【命令:进入从mysql_3310容器】
docker exec -it mysql_3310 bash【示例】
[root@localhost 3310]# docker exec -it mysql_3310 bash
root@05231a95b968:/#
1.5.13 在容器中运行mysql客户端
【命令:运行mysql客户端】
mysql -u用户名 -p密码【示例】
[root@localhost 3310]# docker exec -it mysql_3310 bash
root@72680c742611:/# mysql -uroot -p123321
mysql: [Warning] Using a password on the command line interface can be insecure.
Welcome to the MySQL monitor.  Commands end with ; or \g.
Your MySQL connection id is 8
Server version: 8.0.27 MySQL Community Server - GPL

Copyright (c) 2000, 2021, Oracle and/or its affiliates.

Oracle is a registered trademark of Oracle Corporation and/or its
affiliates. Other names may be trademarks of their respective
owners.

Type 'help;' or '\h' for help. Type '\c' to clear the current input statement.
1.5.14 修改从(slave)服务器与master关联
【命令:修改从(slave)服务器与master关联】
change master to
master_host='172.17.0.2',
master_user='slave',
master_password='123321',
MASTER_LOG_FILE='mysql-bin.000001',
MASTER_LOG_POS=860;
【注】

【示例】
mysql> change master to
    -> master_host='172.17.0.2',
    -> master_user='slave',
    -> master_password='123321',
    -> MASTER_LOG_FILE='mysql-bin.000001',
    -> MASTER_LOG_POS=860;
Query OK, 0 rows affected, 8 warnings (0.02 sec)
1.5.15 开启slave
【命令:开启slave】
start slave;【示例】
mysql>  start slave;
Query OK, 0 rows affected, 1 warning (0.01 sec)
1.5.16 查询slave状态
【命令:查询slave状态】
show slave status \G;【示例】
mysql> show slave status \G;
*************************** 1. row ***************************
               Slave_IO_State: Waiting for source to send event
                  Master_Host: 172.17.0.2
                  Master_User: slave
                  Master_Port: 3306
                Connect_Retry: 60
              Master_Log_File: mysql-bin.000001
          Read_Master_Log_Pos: 1071
               Relay_Log_File: wnhz-relay-bin.000002
                Relay_Log_Pos: 535
        Relay_Master_Log_File: mysql-bin.000001
             Slave_IO_Running: Yes
            Slave_SQL_Running: Yes
              Replicate_Do_DB:
          Replicate_Ignore_DB:
           Replicate_Do_Table:
       Replicate_Ignore_Table:
      Replicate_Wild_Do_Table:
  Replicate_Wild_Ignore_Table:
                   Last_Errno: 0
                   Last_Error:
                 Skip_Counter: 0
          Exec_Master_Log_Pos: 1071
              Relay_Log_Space: 743
              Until_Condition: None
               Until_Log_File:
                Until_Log_Pos: 0
           Master_SSL_Allowed: No
           Master_SSL_CA_File:
           Master_SSL_CA_Path:
              Master_SSL_Cert:
            Master_SSL_Cipher:
               Master_SSL_Key:
        Seconds_Behind_Master: 0
Master_SSL_Verify_Server_Cert: No
                Last_IO_Errno: 0
                Last_IO_Error:
               Last_SQL_Errno: 0
               Last_SQL_Error:
  Replicate_Ignore_Server_Ids:
             Master_Server_Id: 200
                  Master_UUID: e408d3a4-1a1b-11ee-9318-0242ac110002
             Master_Info_File: mysql.slave_master_info
                    SQL_Delay: 0
          SQL_Remaining_Delay: NULL
      Slave_SQL_Running_State: Replica has read all relay log; waiting for more updates
           Master_Retry_Count: 86400
                  Master_Bind:
      Last_IO_Error_Timestamp:
     Last_SQL_Error_Timestamp:
               Master_SSL_Crl:
           Master_SSL_Crlpath:
           Retrieved_Gtid_Set:
            Executed_Gtid_Set:
                Auto_Position: 0
         Replicate_Rewrite_DB:
                 Channel_Name:
           Master_TLS_Version:
       Master_public_key_path:
        Get_master_public_key: 0
            Network_Namespace:
1 row in set, 1 warning (0.00 sec)

ERROR:
No query specified

mysql> exit
Bye
root@72680c742611:/# exit
exit
【注】当出现两个yes时就是配置成功了

1.5.17 开放指定端口和重新加载防火墙
【命令1:开放指定端口3310】
firewall-cmd --zone=public --add-port=3310/tcp --permanent【命令2:重新加载防火墙】
firewall-cmd --reload【命令3:查看开放的端口号】
firewall-cmd --zone=public --list-ports【示例】
mysql> exit
Bye
root@72680c742611:/# exit
exit
[root@localhost 3310]# firewall-cmd --zone=public --add-port=3310/tcp --permanent
success
[root@localhost 3310]# firewall-cmd --reload
success

[root@localhost conf]# firewall-cmd --zone=public --list-ports
3310/tcp
1.5.18 navicat新建mysql连接并测试
- 参考1.4.10
【注意】主机和端口要根据想要连接的改,用户名和密码按个人设置的填写
1.5.19 测试主从
- 在master创建库book_db,查看从(slave)是否也相应创建成功。
【示意图】
 文章来源:https://www.toymoban.com/news/detail-744673.html
 文章来源地址https://www.toymoban.com/news/detail-744673.html
到了这里,关于docker搭建MySQL主从的文章就介绍完了。如果您还想了解更多内容,请在右上角搜索TOY模板网以前的文章或继续浏览下面的相关文章,希望大家以后多多支持TOY模板网!