目录
一、前期准备
1、项目认识
2、pages.json基本配置
3、创建页面
二、tabBar
1、获取图标
2、代码配置
三、基础认识
1、页面生命周期
2、App.vue应用生命周期
四、基础组件
1、scroll-view可滚动视图区域
2、提示框
3、swiper滑块视图容器
4、form表单组件
一、前期准备
1、项目认识
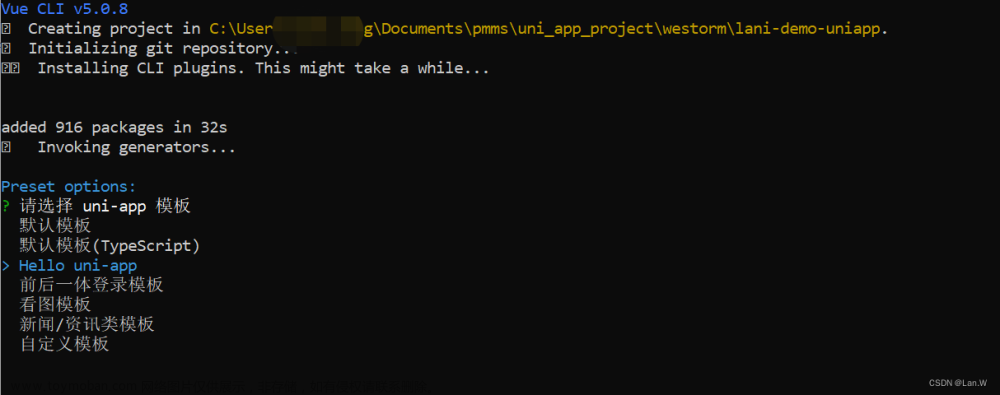
(1)新建项目

(2)启动项目
①运行到浏览器上

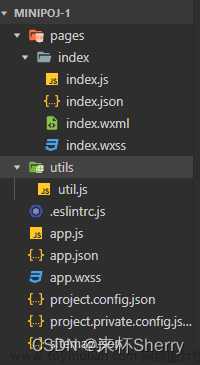
②运行到微信开发者工具

如果出现以下弹框,选择已安装好的微信开发者工具路径,确定即可

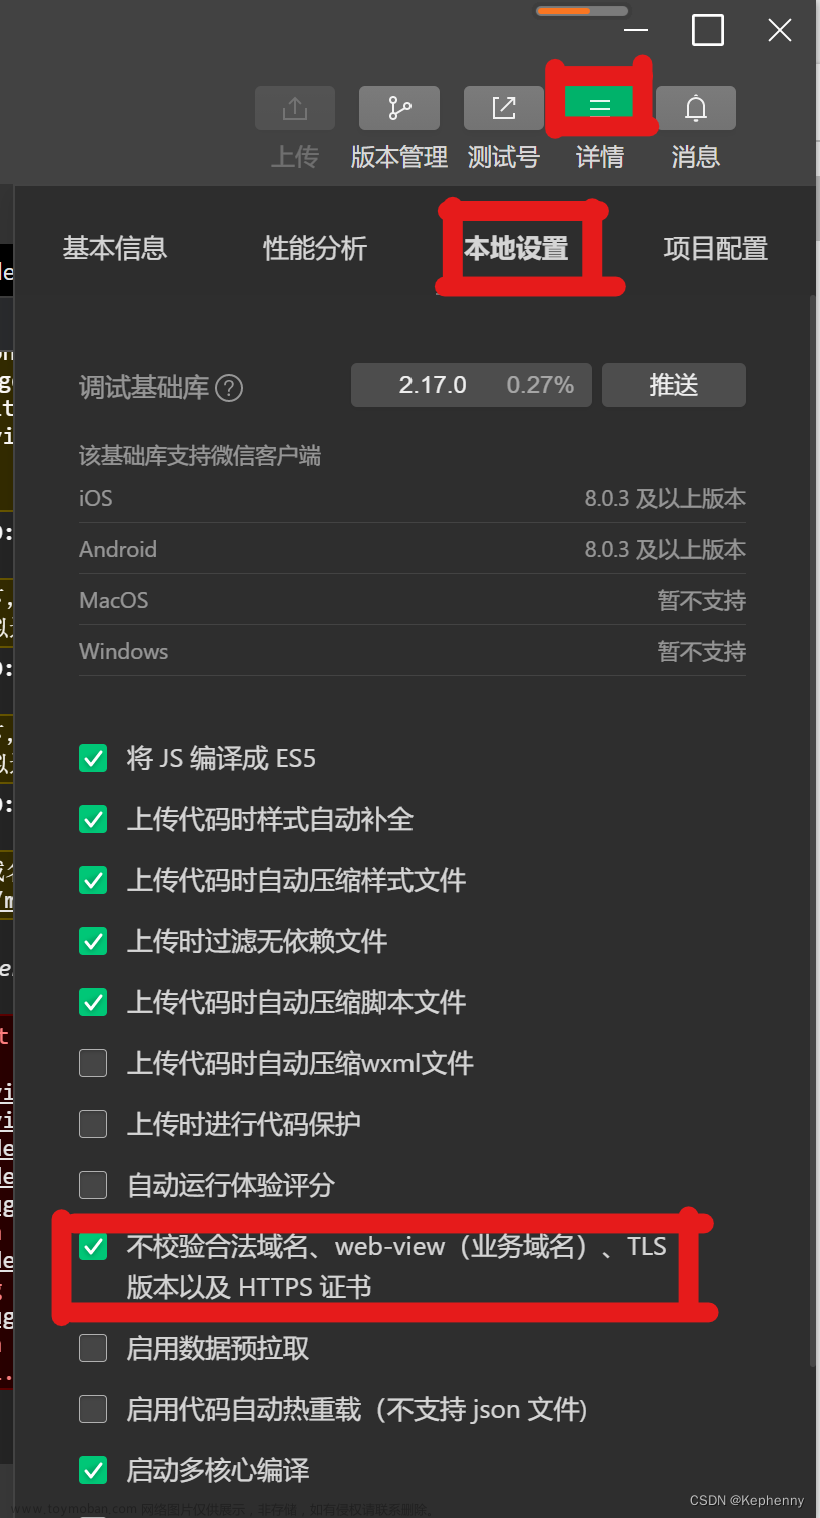
如果出现“工具的服务端口已关闭”,是因为微信开发者工具设置问题
解决如下:
随便打开微信开发者工具的一个工程=》点击设置=》通用设置=》安全=》打开服务端口


(3)中文解释

2、pages.json基本配置
(1)globalStyle全局配置
{
	"globalStyle": {
		"navigationBarTextStyle": "black",
		"navigationBarTitleText": "全局",
		"navigationBarBackgroundColor": "#F8F8F8",
		"backgroundColor": "#F8F8F8"
	},
}
(2)局部页面的配置
{
	"pages": [ //pages数组中第一项表示应用启动页,参考:https://uniapp.dcloud.io/collocation/pages
		{
			"path": "pages/index/index",
			"style": {
				"navigationBarTitleText": "首页"
			}
		}
	],
}
3、创建页面
(1)右键pages文件夹=》点击新建页面

(2)新页面配置
①如果没有自动生成需要手动添加配置
②注意:与微信小程序一样,配置时,哪个页面放在前面,就先显示哪个页面
{
	"pages": [
		{
		    "path" : "pages/about/about",
		    "style" :
		    {
		        "navigationBarTitleText": "关于",
		        "enablePullDownRefresh": false
		    }

		},
		{
			"path": "pages/index/index",
			"style": {
				"navigationBarTitleText": "首页"
			}
		}
    ],
	"globalStyle": {
		"navigationBarTextStyle": "black",
		"navigationBarTitleText": "全局",
		"navigationBarBackgroundColor": "#F8F8F8",
		"backgroundColor": "#F8F8F8"
	},
	"uniIdRouter": {}
}

二、tabBar
1、获取图标
(1)小伙伴可以在iconfont选择需要的图标
iconfont-阿里巴巴矢量图标库iconfont-国内功能很强大且图标内容很丰富的矢量图标库,提供矢量图标下载、在线存储、格式转换等功能。阿里巴巴体验团队倾力打造,设计和前端开发的便捷工具https://www.iconfont.cn/(2)将下载好的图标放到static文件夹中

2、代码配置
{
	"pages": [
		{
		    "path" : "pages/about/about",
		    "style" :
		    {
		        "navigationBarTitleText": "关于",
		        "enablePullDownRefresh": false
		    }

		},
		{
			"path": "pages/index/index",
			"style": {
				"navigationBarTitleText": "首页"
			}
		}
    ],
	"globalStyle": {
		"navigationBarTextStyle": "white",
		"navigationBarTitleText": "全局",
		"navigationBarBackgroundColor": "#000000",
		"backgroundColor": "#ffffff"
	},
	"tabBar": {
		"color": "#7A7E83",
		"selectedColor": "#1296db",
		"borderStyle": "black",
		"backgroundColor": "#000000",
		"list": [{
			"pagePath": "pages/index/index",
			"iconPath": "/static/首页2.png",
			"selectedIconPath": "/static/首页.png",
			"text": "首页"
		}, {
			"pagePath": "pages/about/about",
			"iconPath": "/static/关于2.png",
			"selectedIconPath": "/static/关于.png",
			"text": "关于"
		}]
	},
	"uniIdRouter": {}
}

三、基础认识
1、页面生命周期
(1)onLoad 监听页面加载【类似于 vue2 生命周期中的 create】
此时响应式数据、计算属性、方法、侦听器、props、slots 已设置完成,其参数为上个页面传递的数据,参数类型为 Object
2、App.vue应用生命周期
(1)globalData 全局变量,此处定义的变量,可以在任何页面获取
①App.vue
<script>
	export default {
		globalData: {
			text: 'text'
		},
		onLaunch: function() {
			console.log('App Launch')
		},
		onShow: function() {
			console.log('App Show')
		},
		onHide: function() {
			console.log('App Hide')
		}
	}
</script>
②index.vue
<script>
	export default {
		data() {
			return {}
		},
		onLoad() {
			console.log(getApp().globalData);
		},
	}
</script>
四、基础组件
1、scroll-view可滚动视图区域
<template>
	<view>
		<view class="uni-padding-wrap uni-common-mt">
			<view class="uni-title uni-common-mt">
				Vertical Scroll
				<text>\n纵向滚动</text>
			</view>
			<view>
				<!-- scroll-y="true"允许纵向滚动 -->
				<scroll-view :scroll-top="scrollTop" scroll-y="true" class="scroll-Y" @scrolltoupper="upper"
					@scrolltolower="lower" @scroll="scroll">
					<view id="demo1" class="scroll-view-item uni-bg-red">A</view>
					<view id="demo2" class="scroll-view-item uni-bg-green">B</view>
					<view id="demo3" class="scroll-view-item uni-bg-blue">C</view>
				</scroll-view>
			</view>
			<view @tap="goTop" class="uni-link uni-center uni-common-mt">
				点击这里返回顶部
			</view>
		</view>
	</view>
</template>

<script>
	export default {
		data() {
			return {
				// 设置竖向滚动条位置
				scrollTop: 0,
				old: {
					scrollTop: 0
				}
			}
		},
		onLoad() {
			console.log(getApp().globalData);
		},
		methods: {
			// 滚动到顶部/左边会触发
			upper: function(e) {
				console.log(e)
			},
			// 滚动到底部/右边会触发
			lower: function(e) {
				console.log(e)
			},
			// 滚动时触发
			scroll: function(e) {
				console.log(e)
				this.old.scrollTop = e.detail.scrollTop
			},
			// 返回顶部
			goTop: function(e) {
				// 解决view层不同步的问题
				this.scrollTop = this.old.scrollTop
				this.$nextTick(function() {
					this.scrollTop = 0
				});
				// 弹窗
				uni.showToast({
					icon: "none",
					title: "纵向滚动 scrollTop 值已被修改为 0"
				})
			}
		}
	}
</script>

<style>
.scroll-Y {
		height: 300rpx;
	}
	.scroll-view_H {
		white-space: nowrap;
		width: 100%;
	}
	.scroll-view-item {
		height: 300rpx;
		line-height: 300rpx;
		text-align: center;
		font-size: 36rpx;
	}
	.scroll-view-item_H {
		display: inline-block;
		width: 100%;
		height: 300rpx;
		line-height: 300rpx;
		text-align: center;
		font-size: 36rpx;
	}
	.uni-bg-red{
		background-color: red;
	}
	.uni-bg-green{
		background-color: green;
	}
	.uni-bg-blue{
		background-color: blue;
	}
</style>
2、提示框
(1)showToast显示消息提示框
(2)showLoading显示 loading 加载中
<template>
	<view>
			<button @click="showToast" class="btn">点击显示消息提示框</button>
			<button @click="showLoading" class="btn">点击显示Loading提示框</button>
	</view>
</template>

<script>
	export default {
		data() {
			return {

			}
		},
		methods: {
			// 显示消息提示框
			showToast: function(e) {
				uni.showToast({
					icon: "none",
					title: "显示消息内容"
				})
			},
			// 显示Loading提示框
			showLoading: function(e) {
				uni.showLoading({
					title: "加载中"
				})
				// 2秒后提示隐藏
				setTimeout(function () {
					uni.hideLoading();
				}, 2000);
			},
		}
	}
</script>

<style>
.btn{
	width: 80%;
	margin:20rpx auto;
}
</style>

3、swiper滑块视图容器
<template>
	<view>
		<view class="uni-margin-wrap">
			<swiper class="swiper" circular :indicator-dots="indicatorDots" :autoplay="autoplay" :interval="interval"
				:duration="duration">
				<swiper-item v-for="(item,index) in imgArr">
					<view class="swiper-item" :class="item.background">{{item.title}}</view>
				</swiper-item>
			</swiper>
		</view>

		<view class="swiper-list">
			<view class="uni-list-cell uni-list-cell-pd">
				<view class="uni-list-cell-db">指示点</view>
				<switch :checked="indicatorDots" @change="changeIndicatorDots" />
			</view>
			<view class="uni-list-cell uni-list-cell-pd">
				<view class="uni-list-cell-db">自动播放</view>
				<switch :checked="autoplay" @change="changeAutoplay" />
			</view>
		</view>

		<view class="uni-padding-wrap">
			<view class="uni-common-mt">
				<text>幻灯片切换时长(ms)</text>
				<text class="info">{{duration}}</text>
			</view>
			<slider @change="durationChange" :value="duration" min="500" max="2000" />
			<view class="uni-common-mt">
				<text>自动播放间隔时长(ms)</text>
				<text class="info">{{interval}}</text>
			</view>
			<slider @change="intervalChange" :value="interval" min="2000" max="10000" />
		</view>
	</view>
</template>

<script>
export default {
    data() {
        return {
						// 是否显示面板指示点
            indicatorDots: true,
						// 是否自动切换
            autoplay: true,
            interval: 2000,
            duration: 500,
						imgArr:[{
							title:"A",
							background:"uni-bg-red"
						},
						{
							title:"B",
							background:"uni-bg-green"
						},
						{
							title:"C",
							background:"uni-bg-blue"
						}]
        }
    },
    methods: {
        changeIndicatorDots(e) {
            this.indicatorDots = !this.indicatorDots
        },
        changeAutoplay(e) {
            this.autoplay = !this.autoplay
        },
        intervalChange(e) {
            this.interval = e.target.value
        },
        durationChange(e) {
            this.duration = e.target.value
        }
    }
}
</script>

<style>
	.uni-margin-wrap {
		width: 690rpx;
		width: 100%;
	}
	.swiper {
		height: 300rpx;
	}
	.swiper-item {
		display: block;
		height: 300rpx;
		line-height: 300rpx;
		text-align: center;
	}
	.swiper-list {
		margin-top: 40rpx;
		margin-bottom: 0;
	}
	.uni-common-mt {
		margin-top: 60rpx;
		position: relative;
	}
	.info {
		position: absolute;
		right: 20rpx;
	}
	.uni-padding-wrap {
		width: 550rpx;
		padding: 0 100rpx;
	}
</style>

注意:如果滑块没有背景色,是因为小编把背景色的css配置在了App.vue的全局样式

4、form表单组件
(1)说明
<form @submit="formSubmit" @reset="formReset"></form>① @submit:携带 form 中的数据,触发 submit 事件
② @reset:表单重置,触发 reset 事件
(2)代码实例
<template>
	<view>
		<view>
			<form @submit="formSubmit" @reset="formReset">
				<view class="uni-form-item uni-column">
					<view class="title">switch</view>
					<view>
						<switch name="switch" />
					</view>
				</view>
				<view class="uni-form-item uni-column">
					<view class="title">性别</view>
					<radio-group name="radio">
						<label>
							<radio value="0" /><text>男</text>
						</label>
						<label>
							<radio value="1" /><text>女</text>
						</label>
					</radio-group>
				</view>
				<view class="uni-form-item uni-column">
					<view class="title">爱好</view>
					<checkbox-group name="checkbox">
						<label>
							<checkbox value="sing" /><text>唱歌</text>
						</label>
						<label>
							<checkbox value="dance" /><text>跳舞</text>
						</label>
						<label>
							<checkbox value="other" /><text>其它</text>
						</label>
					</checkbox-group>
				</view>
				<view class="uni-form-item uni-column">
					<view class="title">slider</view>
					<slider value="50" name="slider" show-value></slider>
				</view>
				<view class="uni-form-item uni-column">
					<view class="title">input</view>
					<input class="uni-input" name="input" placeholder="这是一个输入框" />
				</view>
				<view class="uni-btn-v">
					<button form-type="submit">Submit</button>
					<button type="default" form-type="reset">Reset</button>
				</view>
			</form>
		</view>
	</view>
</template>

<script>
	export default {
		data() {
			return {
			}
		},
		methods: {
			formSubmit: function(e) {
				console.log('form发生了submit事件,携带数据为:' + JSON.stringify(e.detail.value))
				var formdata = e.detail.value
				uni.showModal({
					content: '表单数据内容:' + JSON.stringify(formdata),
					showCancel: false
				});
			},
			formReset: function(e) {
				console.log('清空数据')
			}
		}
	}
</script>

<style>
	.uni-form-item .title {
		padding: 20rpx 0;
	}
</style>
form 中的组件需要加上 name 来作为 key,使得 submit 事件会将组件中的 value 值进行提交文章来源:https://www.toymoban.com/news/detail-745772.html
 文章来源地址https://www.toymoban.com/news/detail-745772.html
到了这里,关于uni-app学习笔记的文章就介绍完了。如果您还想了解更多内容,请在右上角搜索TOY模板网以前的文章或继续浏览下面的相关文章,希望大家以后多多支持TOY模板网!