Android通信安全之HTTPS
目录
Android通信安全之HTTPS
Https
起因
问题描述
自定义X509TrustManager
自定义HostnameVerifier
修复方案
解决方案一
解决方案2
文章来源地址https://www.toymoban.com/news/detail-751350.html
本文章向大家介绍Android通信安全之HTTPS,主要内容包括Https、起因、问题描述、自定义HostnameVerifier、修复方案、解决方案2、基本概念、基础应用、原理机制和需要注意的事项等,并结合实例形式分析了其使用技巧,希望通过本文能帮助到大家理解应用这部分内容。
Https
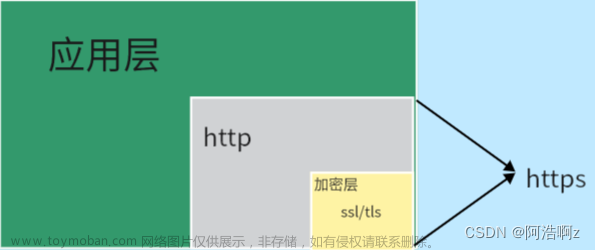
HTTPS(全称:Hyper Text Transfer Protocol over Secure Socket Layer),是以安全为目标的HTTP通道,简单讲是HTTP的安全版。即HTTP下加入SSL层,HTTPS的安全基础是SSL,因此加密的详细内容就需要SSL。 它是一个URI scheme(抽象标识符体系),句法类同http:体系。用于安全的HTTP数据传输。https:URL表明它使用了HTTP,但HTTPS存在不同于HTTP的默认端口及一个加密/身份验证层(在HTTP与TCP之间)。这个系统的最初研发由网景公司(Netscape)进行,并内置于其浏览器Netscape Navigator中,提供了身份验证与加密通讯方法。现在它被广泛用于万维网上安全敏感的通讯,例如交易支付方面。(注:本段来自百度百科)
问题描述
对于数字证书相关概念、Android 里 https 通信代码就不再复述了,直接讲问题。缺少相应的安全校验很容易导致中间人攻击,而漏洞的形式主要有以下3种:
自定义X509TrustManager
在使用HttpsURLConnection发起 HTTPS 请求的时候,提供了一个自定义的X509TrustManager,未实现安全校验逻辑,下面片段就是当时新浪微博 sdk 内部的代码片段。如果不提供自定义X509TrustManager,代码运行起来可能会报异常(原因下文解释),初学者就很容易在不明真相的情况下提供了一个自定义的X509TrustManager,却忘记正确地实现相应的方法。本文重点介绍这种场景的处理方式。这里引用部分相关代码:
TrustManager tm = new X509TrustManager() {
    public void checkClientTrusted(X509Certificate[] chain, String authType)
            throws CertificateException {
              //do nothing,接受任意客户端证书
    }

    public void checkServerTrusted(X509Certificate[] chain, String authType)
            throws CertificateException {
              //do nothing,接受任意服务端证书
    }

    public X509Certificate[] getAcceptedIssuers() {
        return null;
    }
};

sslContext.init(null, new TrustManager[] { tm }, null);
自定义HostnameVerifier
在握手期间,如果 URL 的主机名和服务器的标识主机名不匹配,则验证机制可以回调此接口的实现程序来确定是否应该允许此连接。如果回调内实现不恰当,默认接受所有域名,则有安全风险。
HostnameVerifier hnv = new HostnameVerifier() {
  @Override
  public boolean verify(String hostname, SSLSession session) {
    // Always return true,接受任意域名服务器
    return true;
  }
};
HttpsURLConnection.setDefaultHostnameVerifier(hnv);
如上,如果不做任何的教研就是有风险的。
SSLSocketFactory sf = new MySSLSocketFactory(trustStore);
sf.setHostnameVerifier(SSLSocketFactory.ALLOW_ALL_HOSTNAME_VERIFIER);
修复方案
分而治之,针对不同的漏洞点分别描述,这里就讲的修复方案主要是针对非浏览器App,非浏览器 App 的服务端通信对象比较固定,一般都是自家服务器,可以做很多特定场景的定制化校验。如果是浏览器 App,校验策略就有更通用一些。前面说到,当发起 HTTPS 请求时,可能抛起一个异常,以上面说到的代码来看:
try {
    URL url = new URL("https://certs.cac.washington.edu/CAtest/");
    URLConnection urlConnection = url.openConnection();
    InputStream in = urlConnection.getInputStream();
    copyInputStreamToOutputStream(in, System.out);
} catch (MalformedURLException e) {
    e.printStackTrace();
} catch (IOException e) {
    e.printStackTrace();
}
private void copyInputStreamToOutputStream(InputStream in, PrintStream out) throws IOException {
    byte[] buffer = new byte[1024];
    int c = 0;
    while ((c = in.read(buffer)) != -1) {
        out.write(buffer, 0, c);
    }
}
它会抛出一个SSLHandshakeException的异常。这里截取部分异常。
javax.net.ssl.SSLHandshakeException: java.security.cert.CertPathValidatorException: Trust anchor for certification path not found.
   ....//省略n多错误
    at com.android.org.conscrypt.OpenSSLSocketImpl.startHandshake(OpenSSLSocketImpl.java:318)
 ... 10 more
Caused by: java.security.cert.CertPathValidatorException: Trust anchor for certification path not found.
 ... 16 more
解决方案一
不论是权威机构颁发的证书还是自签名的,打包一份到 app 内部,比如存放在 asset 里。通过这份内置的证书初始化一个KeyStore,然后用这个KeyStore去引导生成的TrustManager来提供验证,具体代码如下:
try {
  CertificateFactory cf = CertificateFactory.getInstance("X.509");
  // uwca.crt 打包在 asset 中,该证书可以从https://itconnect.uw.edu/security/securing-computer/install/safari-os-x/下载
  InputStream caInput = new BufferedInputStream(getAssets().open("uwca.crt"));
  Certificate ca;
  try {
      ca = cf.generateCertificate(caInput);
      Log.i("Longer", "ca=" + ((X509Certificate) ca).getSubjectDN());
      Log.i("Longer", "key=" + ((X509Certificate) ca).getPublicKey();
  } finally {
      caInput.close();
  }

  // Create a KeyStore containing our trusted CAs
  String keyStoreType = KeyStore.getDefaultType();
  KeyStore keyStore = KeyStore.getInstance(keyStoreType);
  keyStore.load(null, null);
  keyStore.setCertificateEntry("ca", ca);

  // Create a TrustManager that trusts the CAs in our KeyStore
  String tmfAlgorithm = TrustManagerFactory.getDefaultAlgorithm();
  TrustManagerFactory tmf = TrustManagerFactory.getInstance(tmfAlgorithm);
  tmf.init(keyStore);

  // Create an SSLContext that uses our TrustManager
  SSLContext context = SSLContext.getInstance("TLSv1","AndroidOpenSSL");
  context.init(null, tmf.getTrustManagers(), null);

  URL url = new URL("https://certs.cac.washington.edu/CAtest/");
  HttpsURLConnection urlConnection =
          (HttpsURLConnection)url.openConnection();
  urlConnection.setSSLSocketFactory(context.getSocketFactory());
  InputStream in = urlConnection.getInputStream();
  copyInputStreamToOutputStream(in, System.out);
} catch (CertificateException e) {
  e.printStackTrace();
} catch (IOException e) {
  e.printStackTrace();
} catch (NoSuchAlgorithmException e) {
  e.printStackTrace();
} catch (KeyStoreException e) {
  e.printStackTrace();
} catch (KeyManagementException e) {
  e.printStackTrace();
} catch (NoSuchProviderException e) {
  e.printStackTrace();
}
这样访问非“UW Services CA Test Page”就会报SSLHandshakeException。也就是说对于特定证书生成的TrustManager,只能验证与特定服务器建立安全链接,这样就提高了安全性。
解决方案2
同方案1,打包一份到证书到 app 内部,但不通过KeyStore去引导生成的TrustManager,而是干脆直接自定义一个TrustManager,自己实现校验逻辑; 校验逻辑主要包括: •服务器证书是否过期 •证书签名是否合法
try {
  CertificateFactory cf = CertificateFactory.getInstance("X.509");
  // uwca.crt 打包在 asset 中,该证书可以从https://itconnect.uw.edu/security/securing-computer/install/safari-os-x/下载
  InputStream caInput = new BufferedInputStream(getAssets().open("uwca.crt"));
  final Certificate ca;
  try {
      ca = cf.generateCertificate(caInput);
      Log.i("Longer", "ca=" + ((X509Certificate) ca).getSubjectDN());
      Log.i("Longer", "key=" + ((X509Certificate) ca).getPublicKey());
  } finally {
      caInput.close();
  }
  // Create an SSLContext that uses our TrustManager
  SSLContext context = SSLContext.getInstance("TLSv1","AndroidOpenSSL");
  context.init(null, new TrustManager[]{
          new X509TrustManager() {
              @Override
              public void checkClientTrusted(X509Certificate[] chain,
                      String authType)
                      throws CertificateException {

              }

              @Override
              public void checkServerTrusted(X509Certificate[] chain,
                      String authType)
                      throws CertificateException {
                  for (X509Certificate cert : chain) {

                      // Make sure that it hasn't expired.
                      cert.checkValidity();

                      // Verify the certificate's public key chain.
                      try {
                          cert.verify(((X509Certificate) ca).getPublicKey());
                      } catch (NoSuchAlgorithmException e) {
                          e.printStackTrace();
                      } catch (InvalidKeyException e) {
                          e.printStackTrace();
                      } catch (NoSuchProviderException e) {
                          e.printStackTrace();
                      } catch (SignatureException e) {
                          e.printStackTrace();
                      }
                  }
              }

              @Override
              public X509Certificate[] getAcceptedIssuers() {
                  return new X509Certificate[0];
              }
          }
  }, null);

  URL url = new URL("https://certs.cac.washington.edu/CAtest/");
  HttpsURLConnection urlConnection =
          (HttpsURLConnection)url.openConnection();
  urlConnection.setSSLSocketFactory(context.getSocketFactory());
  InputStream in = urlConnection.getInputStream();
  copyInputStreamToOutputStream(in, System.out);
} catch (CertificateException e) {
  e.printStackTrace();
} catch (IOException e) {
  e.printStackTrace();
} catch (NoSuchAlgorithmException e) {
  e.printStackTrace();
} catch (KeyManagementException e) {
  e.printStackTrace();
} catch (NoSuchProviderException e) {
  e.printStackTrace();
}
同样上述代码只能访问 certs.cac.washington.edu 相关域名地址,如果访问 其他网址 ,则会在cert.verify(((X509Certificate) ca).getPublicKey());处抛异常,导致连接失败。
自定义HostnameVerifier,建立匹配规则;业务复杂的话,还可以结合配置中心、白名单、黑名单、正则匹配等多级别动态校验;总体来说逻辑还是比较简单的,反正只要正确地实现那个方法。
HostnameVerifier hnv = new HostnameVerifier() {
  @Override
  public boolean verify(String hostname, SSLSession session) {
    //示例
    if("yourhostname".equals(hostname)){
      return true;
    } else {
      HostnameVerifier hv =
            HttpsURLConnection.getDefaultHostnameVerifier();
      return hv.verify(hostname, session);
    }
  }
};
主机名验证策略改成严格模式:
SSLSocketFactory sf = new MySSLSocketFactory(trustStore);
sf.setHostnameVerifier(SSLSocketFactory.STRICT_HOSTNAME_VERIFIER);这样就有效的避免了Hook。文章来源:https://www.toymoban.com/news/detail-751350.html
到了这里,关于Android通信安全之HTTPS的文章就介绍完了。如果您还想了解更多内容,请在右上角搜索TOY模板网以前的文章或继续浏览下面的相关文章,希望大家以后多多支持TOY模板网!


