简介
本文将介绍如何在Spring Cloud微服务中使用Swagger网关来统一管理所有微服务的接口文档,并通过Spring Security实现登录后才能访问Swagger文档,以确保接口数据的安全访问。
在开始之前,需要假设你已经完成了Spring Cloud Gateway的相关配置,并且已经了解了基本的网关配置知识。本文将不再赘述Gateway的配置,只介绍在此基础上如何配置Swagger来管理所有微服务,并通过账号密码来管理Swagger的访问。
一.网关中需要引入swagger依赖
本教程spring boot版本为2.0.9.RELEASE,spring cloud版本为Finchley.SR4
引入swagger pom依赖:
<dependency>
	<groupId>com.spring4all</groupId>
	<artifactId>swagger-spring-boot-starter</artifactId>
	<version>2.0.2</version>
</dependency>
二.通过Swagger配置类,获取所有微服务文档
此类会在访问swagger ui时调用,来获取所有swagger resources资源,包括了所有微服务的接口文档地址。
package cn.demo.conf;

import lombok.AllArgsConstructor;
import lombok.extern.slf4j.Slf4j;
import org.springframework.beans.factory.annotation.Autowired;
import org.springframework.beans.factory.annotation.Value;
import org.springframework.cloud.gateway.route.RouteLocator;
import org.springframework.context.annotation.Primary;
import org.springframework.stereotype.Component;
import springfox.documentation.swagger.web.SwaggerResource;
import springfox.documentation.swagger.web.SwaggerResourcesProvider;

import javax.annotation.Resource;
import java.util.*;

@Slf4j
@Component
@Primary
@AllArgsConstructor
public class SwaggerResourceConfig implements SwaggerResourcesProvider {

	/**
	 * swagger2默认的url后缀(v2或v3)
	 */
	private static final String SWAGGER2URL = "/v2/api-docs";

	/**
	 * 网关路由
	 */
	@Resource
	private final RouteLocator routeLocator;


	/**
	 * 汇总所有微服务的swagger文档路径(访问swagger页面时,会调用此方法获取docs)
	 *
	 * @return
	 */
	@Override
	public List<SwaggerResource> get() {
		List<SwaggerResource> resources = new ArrayList<>();
		// 从网关路由中获取所有服务的host名
		List<String> routeHosts = new LinkedList<>();
		routeLocator.getRoutes().filter(route -> route.getUri().getHost() != null)
				.subscribe(route -> routeHosts.add(route.getUri().getHost()));
		// 将文档列表排序,服务多的时候以免显得混乱
		Collections.sort(routeHosts);
		// 不需要展示Swagger的服务列表,在swagger ui页面右上角下拉框中,将不再展示(改成你自己不需要展示的服务)
		List<String> ignoreServers = Arrays
				.asList( "sever1", "server2");
		// 记录已经添加过的微服务(有些服务部署多个节点,过滤掉重复的)
		List<String> docsUrls = new LinkedList<>();
		for (String host : routeHosts) {
			if (ignoreServers.contains(host) ) {
				//排除忽略服务名
				continue;
			}
			// 拼接swagger docs的url,示例:/server1/v2/api-docs
			String url = "/" + host + SWAGGER2URL;
			// 排除掉重复
			if (!docsUrls.contains(url)) {
				docsUrls.add(url);
				SwaggerResource swaggerResource = new SwaggerResource();
				swaggerResource.setUrl(url);
				swaggerResource.setName(host);
				resources.add(swaggerResource);
			}
		}
		return resources;
	}
}
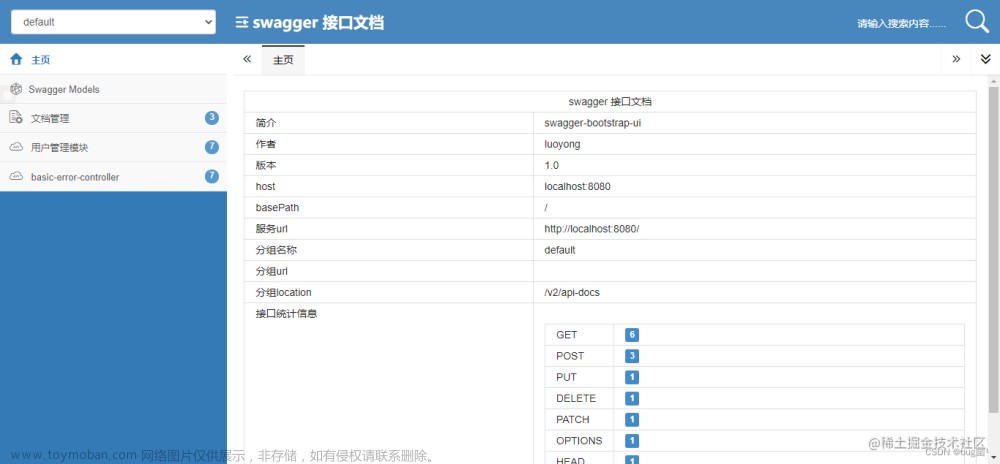
上述代码中,ignoreServers 为忽略服务的列表,我们通过网关路由,可以将所有经过网关管理甚至注册到同一个注册中心的服务都能获取到,但有些服务是不需要提供接口的,或者不需要展示swagger文档,我们可以在此列表中将其排除,排除后的服务不再显示在swagger UI 页面中,如下图:
三.通过swagger controller增加获取swagger资源和配置的接口
此类逻辑不需要修改,直接复制即可:
package cn.demo.controller;

import java.util.Optional;
import org.springframework.beans.factory.annotation.Autowired;
import org.springframework.http.HttpStatus;
import org.springframework.http.ResponseEntity;
import org.springframework.web.bind.annotation.GetMapping;
import org.springframework.web.bind.annotation.RestController;
import reactor.core.publisher.Mono;
import springfox.documentation.swagger.web.*;

@RestController
public class SwaggerHandlerController {

    @Autowired(required = false)
    private SecurityConfiguration securityConfiguration;

    @Autowired(required = false)
    private UiConfiguration uiConfiguration;

    private final SwaggerResourcesProvider swaggerResources;

    @Autowired
    public SwaggerHandlerController(SwaggerResourcesProvider swaggerResources) {
        this.swaggerResources = swaggerResources;
    }


    @GetMapping("/swagger-resources/configuration/security")
    public Mono<ResponseEntity<SecurityConfiguration>> securityConfiguration() {
        return Mono.just(new ResponseEntity<>(
                Optional.ofNullable(securityConfiguration).orElse(SecurityConfigurationBuilder.builder().build()), HttpStatus.OK));
    }

    @GetMapping("/swagger-resources/configuration/ui")
    public Mono<ResponseEntity<UiConfiguration>> uiConfiguration() {
        return Mono.just(new ResponseEntity<>(
                Optional.ofNullable(uiConfiguration).orElse(UiConfigurationBuilder.builder().build()), HttpStatus.OK));
    }

    @GetMapping("/swagger-resources")
    public Mono<ResponseEntity> swaggerResources() {
        return Mono.just((new ResponseEntity<>(swaggerResources.get(), HttpStatus.OK)));
    }

    // @GetMapping("/")
    public Mono<ResponseEntity> swaggerResourcesN() {
        return Mono.just((new ResponseEntity<>(swaggerResources.get(), HttpStatus.OK)));
    }

    //@GetMapping("/csrf")
    public Mono<ResponseEntity> swaggerResourcesCsrf() {
        return Mono.just((new ResponseEntity<>(swaggerResources.get(), HttpStatus.OK)));
    }
}
四.网关的路由配置中透传所有swagger资源地址
这个地方大家需要根据自己网关内容进行配置了,每个人的网关中,都有些URL需要透传,即不需要网关做拦截,那么把swagger 服务名进行透传即可。
举例:
swagger需要通过http://10.1.1.1:88/server1/v2/api-docs来获取server1微服务的接口文档,那么如果你网关拦截了此路径,那么swagger就无法显示此文档了。所有我们需要让网关放行此路径。默认网关是放行的,但有些网关会把所有接口返回值进行封装,所以就需要透传。
格式示例: String ignoreUrl = "/server1/**";
配置完了这些,如果你各个微服务中接口,已经加上了swagger注解的话,那么就可以启动网关,来测试下是否能访问swagger了,网关地址示例:http://10.1.1.1:88/swagger-ui/index.html,将ip和端口换成你自己的即可。
五.给Swagger增加用户名密码登陆,保证文档安全
这一步是可选的,生产环境我们一般是不允许使用swagger 的,但如果你们公司对接口文档安全要求严格的话,甚至开发环境都要加密可以继续下面的配置,来实现当你访问swagger之前,需要先登录。
1.添加Spring Security依赖和webFlux依赖
<dependency>
	<groupId>org.springframework.boot</groupId>
	<artifactId>spring-boot-starter-security</artifactId>
	<version>2.5.15</version>
</dependency>

<dependency>
	<groupId>org.springframework.boot</groupId>
	<artifactId>spring-boot-starter-webflux</artifactId>
	<exclusions>
		<exclusion>
			<groupId>org.springframework.boot</groupId>
			<artifactId>spring-boot-starter-logging</artifactId>
		</exclusion>
		<exclusion>
			<groupId>ch.qos.logback</groupId>
			<artifactId>logback-classic</artifactId>
		</exclusion>
	</exclusions>
</dependency>
2.增加Spring security配置类
由于spring cloud gateway是一个spring-boot-starter-webflux项目,不是spring-boot-starter-web项目,所以需要用webFlux实现路径拦截,写法与web项目类似。
package cn.demo.conf;

import org.springframework.beans.factory.annotation.Value;
import org.springframework.context.annotation.Bean;
import org.springframework.context.annotation.Configuration;
import org.springframework.security.config.annotation.web.reactive.EnableWebFluxSecurity;
import org.springframework.security.config.web.server.ServerHttpSecurity;
import org.springframework.security.core.userdetails.MapReactiveUserDetailsService;
import org.springframework.security.core.userdetails.User;
import org.springframework.security.core.userdetails.UserDetails;
import org.springframework.security.crypto.bcrypt.BCryptPasswordEncoder;
import org.springframework.security.crypto.password.NoOpPasswordEncoder;
import org.springframework.security.crypto.password.PasswordEncoder;
import org.springframework.security.web.server.SecurityWebFilterChain;

/**
 * @description: spring security路径拦截器
 * @author: 大脑补丁
 * @create: 2023-08-18 16:34
 */
@Configuration
@EnableWebFluxSecurity
public class SecurityConfig {

	@Value("${swagger.username}")
	private String username;
	@Value("${swagger.password}")
	private String password;

	@Bean
	public SecurityWebFilterChain securityWebFilterChain(ServerHttpSecurity http) {
		return http
				.authorizeExchange()
				.pathMatchers("/swagger-ui/index.html").authenticated()
				.pathMatchers("/swagger-resources/**").authenticated()
				.pathMatchers("/v2/api-docs").authenticated()
				.pathMatchers("/v3/api-docs").authenticated()
				.pathMatchers("/webjars/**").authenticated()
				.pathMatchers("/actuator/**").authenticated()
				.anyExchange().permitAll()
				.and()
				.formLogin()
				.and()
				.logout()
				.and()
				.csrf().disable()
				.build();
	}

	@Bean
	public PasswordEncoder passwordEncoder() {
		return  NoOpPasswordEncoder.getInstance();
	}

	@Bean
	public MapReactiveUserDetailsService userDetailsService() {
		UserDetails user = User.withUsername(username)
				.password(password)
				.roles("USER")
				.build();
		return new MapReactiveUserDetailsService(user);
	}
}
在配置文件中,配置下需要登陆的用户名密码:
#swagger登录用户名密码
swagger.username=admin
swagger.password=123456
配置完成后,当你再次访问swagger页面时,会先跳转到login页面,登陆成功后,会自动跳转到登陆页面。文章来源:https://www.toymoban.com/news/detail-753140.html
六.总结
本文讲解了Spring Cloud Gateway统一管理所有微服务Swagger文档,并支持登陆后才能访问。其中主要用到的步骤都已交代,大家可以根据自己的网关配置,将其兼容进去即可。喜欢本文请点赞收藏。文章来源地址https://www.toymoban.com/news/detail-753140.html
到了这里,关于Spring Cloud Gateway集成Swagger实现微服务接口文档统一管理及登录访问的文章就介绍完了。如果您还想了解更多内容,请在右上角搜索TOY模板网以前的文章或继续浏览下面的相关文章,希望大家以后多多支持TOY模板网!