科研论文编写神器:Vscode + latex + grammarly + github copilot
相信很多科研人都有使用latex排版及撰写论文的需求,我一开始使用的是在线编辑的overleaf,overleaf的优点是省事便捷,不用配置,并且支持版本回溯,如果图方便的话使用完全没有问题。
但是由于overleaf的服务器在国外,国内访问很慢,有时候虽然用科技编译也是非常慢,改一下编译要等半天甚至timeout,这对于一个急性子的人真的很难受,因此参考网上资料我决定使用vscode这个万能编译器配合来编写latex。
先介绍一下一通配置下来的优点吧
- 光速编译tex文件
- tex文件和pdf文件双向同步,单击任意一方另一方快速定位到相应位置
- 多端同步,多人协同,版本回溯
- AI论文辅助编写及AI对话提问
- 实时语法检查并一键修改
- TODO提示
第一步 latex环境配置
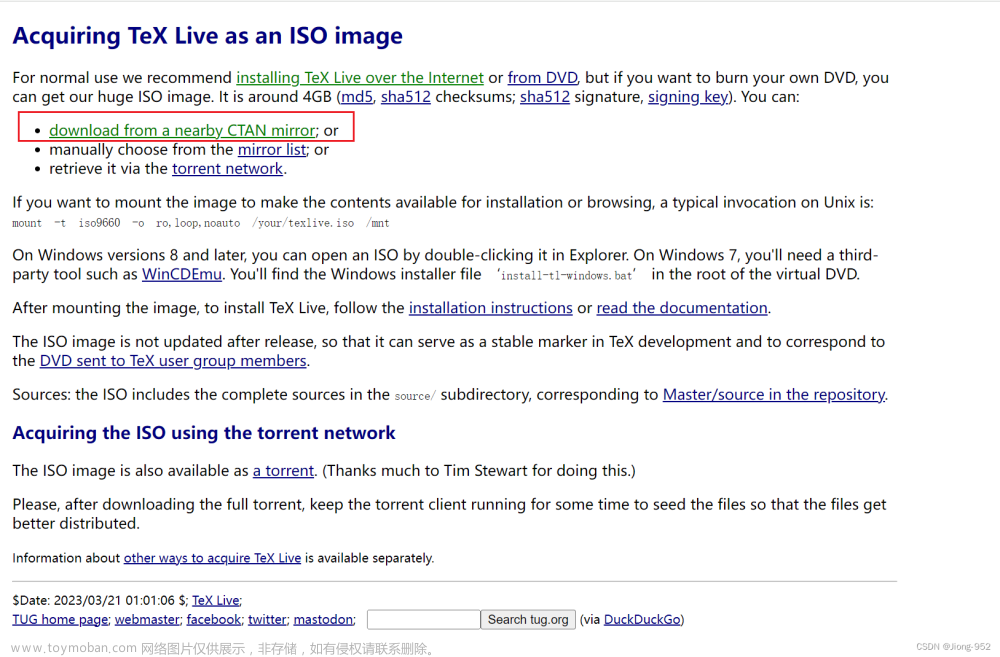
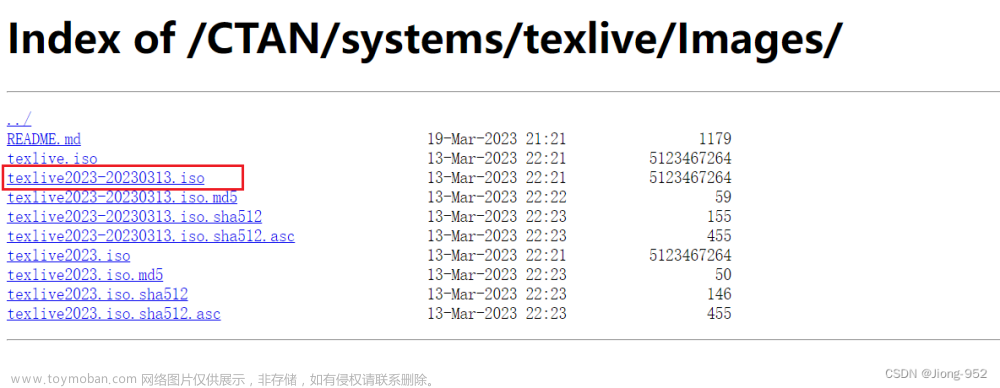
第一步是配置本地latex环境,笔者使用的是Tex Live,我们直接下载iso镜像就可以
网址:Acquiring TeX Live as an ISO image
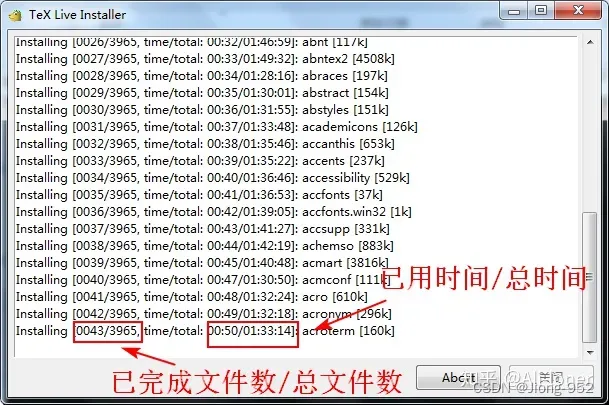
下载后右键管理员权限运行install-tl-windows.bat
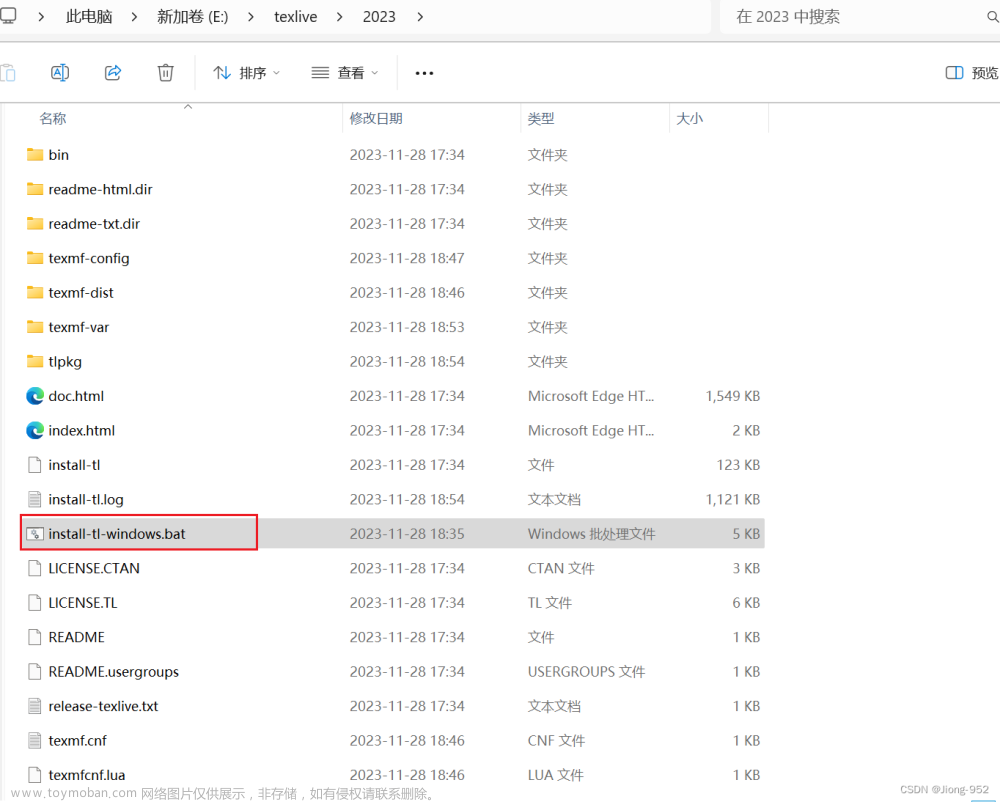
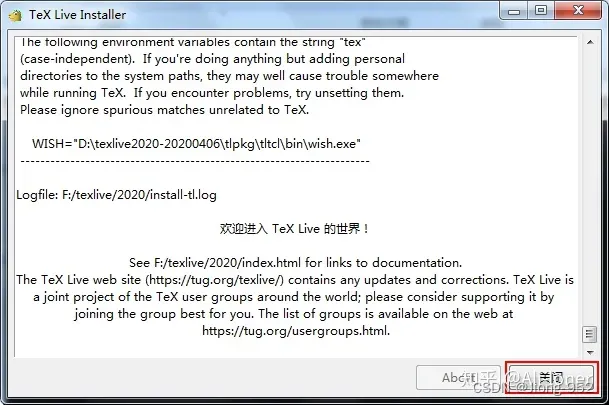
然后可以进行下载,你可以更改下载路径,texlive文件大概有7GB大小,最好别放在C盘,然后等待安装,直到出现欢迎界面才可以关闭,一定要耐心,安装过程需要一定时间
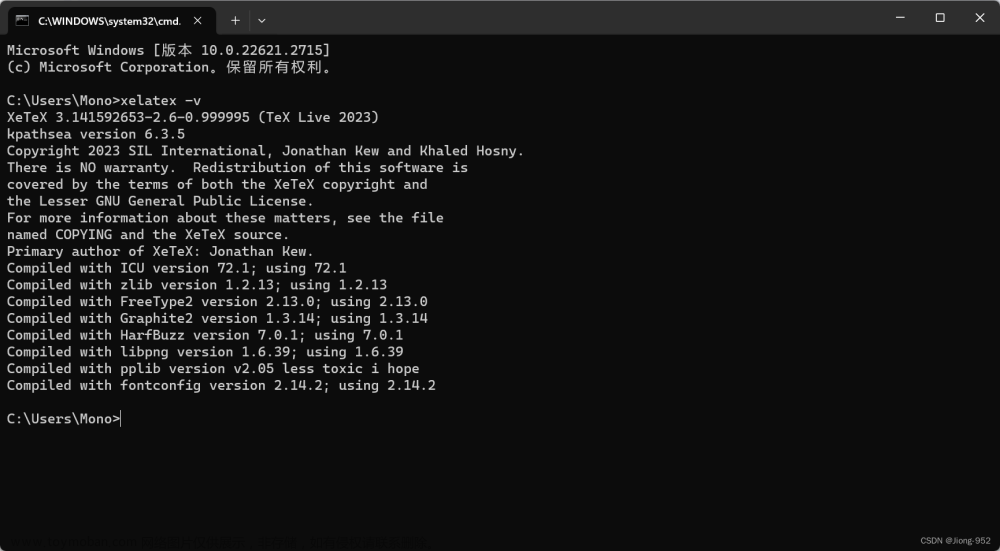
测试
下载完毕后,打开cmd,输入xelatex -v,如果出现版本信息,就是安装成功了
第二步 vscode插件
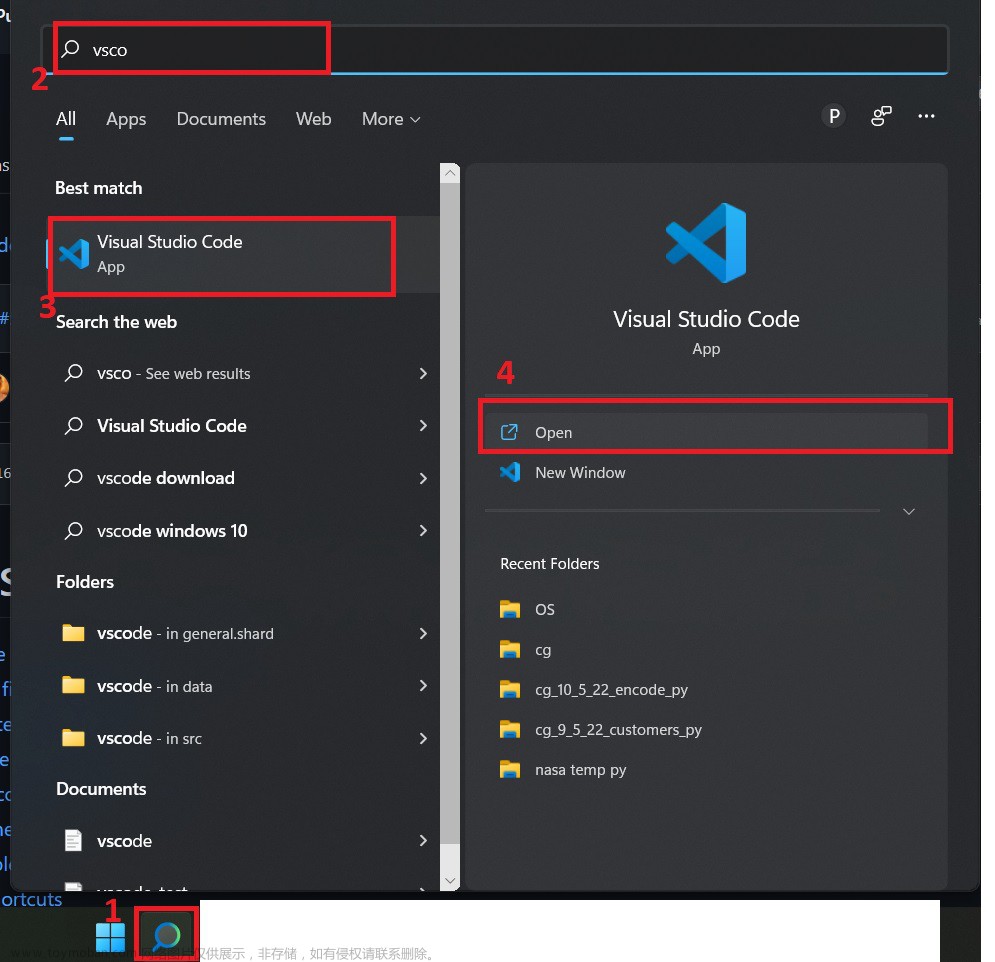
下载vscode这里就不赘述,移步网上教程
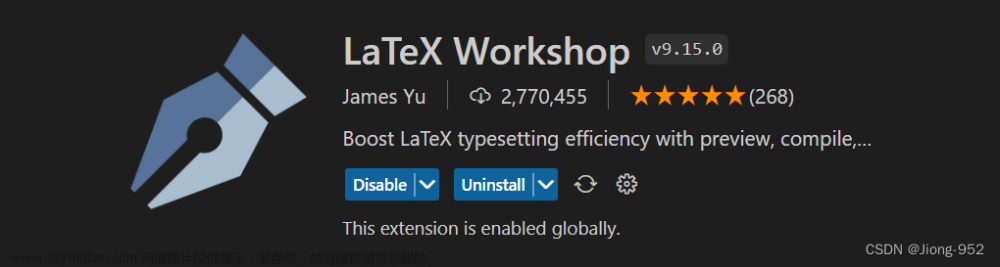
我们想在vscode中使用latex还需要配置一个插件,这里使用最常用的LaTeX Workshop插件
点击extension \ 扩展后搜索下载
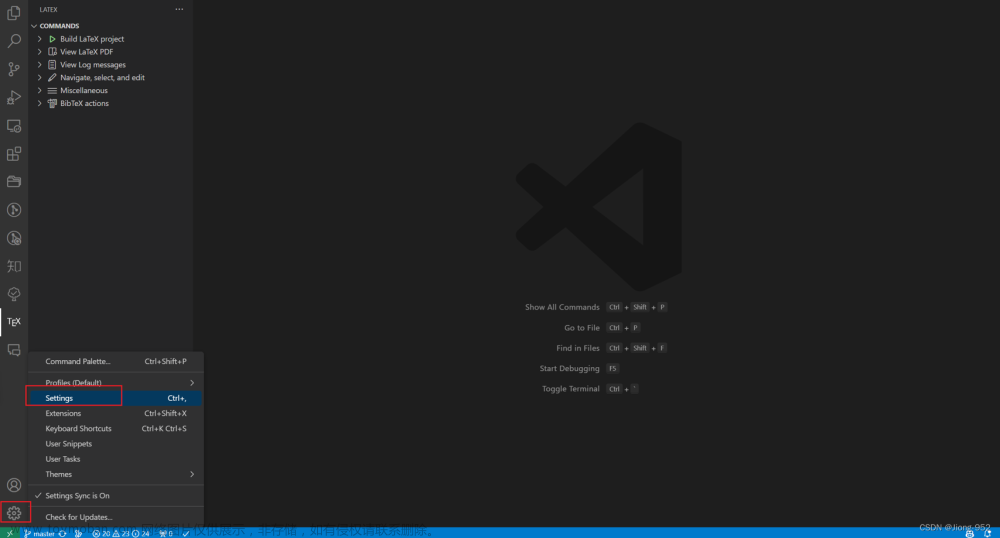
下载完毕后还需要进行配置
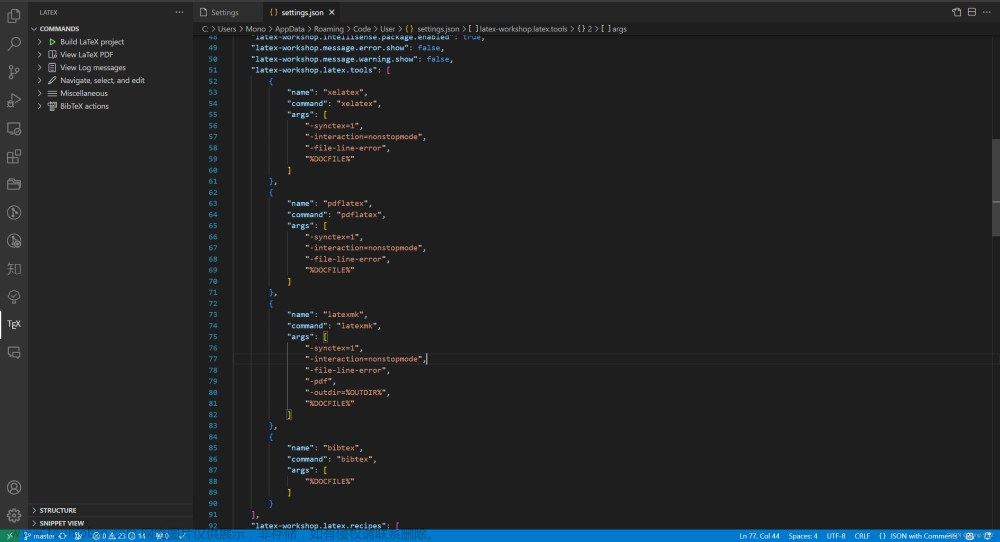
打开setting后点击右上角任务栏的文件图标会出现setting.json

加入以下配置,如果原本有内容,则在原本内容最后加 , 后加入下面内容
如果原本没有内容,则先输入,在大括号中填充下面的内容
{

}
解释一下部分配置的内容信息,其余可以查询官方文档
-
"latex-workshop.latex.autoBuild.run":设置什么时候进行自动的代码编译- “onSave”:保存时编译
- “onFileChange”:检测到有文件修改就编译
- “never”:从不自动编译
-
"latex-workshop.showContextMenu":显示latex上下文菜单,这个打开之后会有很好的作用
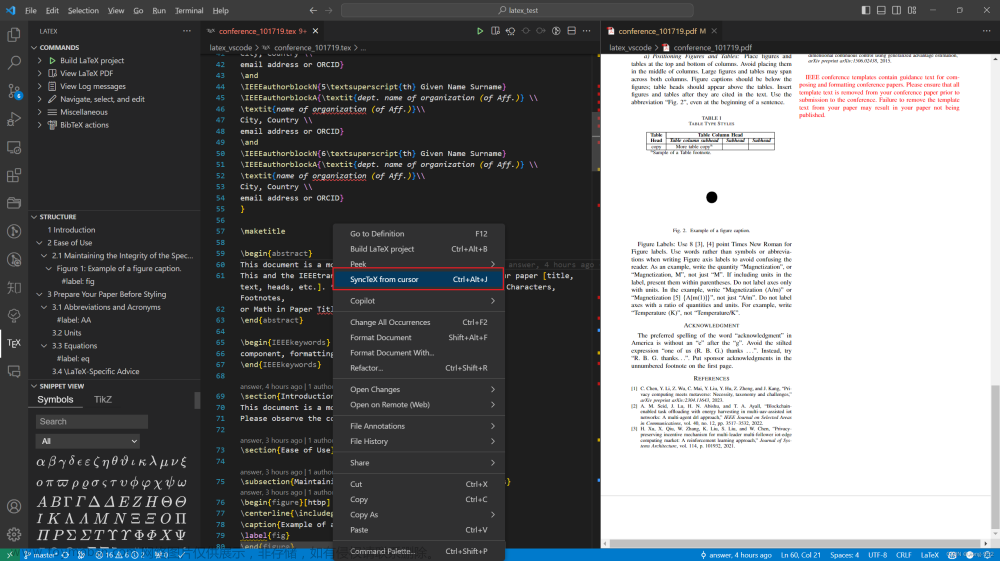
本地配置latex的一个很好作用是可以实现双向同步,在左侧tex文件右键点击SyncTeX from cursor后,右侧会自动跳转定位到左侧光标所在的编辑区
-
"latex-workshop.view.pdf.internal.synctex.keybinding"从右侧任意地方双击左侧会定位到该位置的代码区-
"double-click":和overleaf一样,双击 -
"ctrl-click":ctrl+鼠标左键
-
"latex-workshop.latex.autoBuild.run": "onSave",
    "latex-workshop.showContextMenu": true,
    "latex-workshop.intellisense.package.enabled": true,
    "latex-workshop.message.error.show": false,
    "latex-workshop.message.warning.show": false,
    "latex-workshop.latex.tools": [
        {
            "name": "xelatex",
            "command": "xelatex",
            "args": [
                "-synctex=1",
                "-interaction=nonstopmode",
                "-file-line-error",
                "%DOCFILE%"
            ]
        },
        {
            "name": "pdflatex",
            "command": "pdflatex",
            "args": [
                "-synctex=1",
                "-interaction=nonstopmode",
                "-file-line-error",
                "%DOCFILE%"
            ]
        },
        {
            "name": "latexmk",
            "command": "latexmk",
            "args": [
                "-synctex=1",
                "-interaction=nonstopmode",
                "-file-line-error",
                "-pdf",
                "-outdir=%OUTDIR%",
                "%DOCFILE%"
            ]
        },
        {
            "name": "bibtex",
            "command": "bibtex",
            "args": [
                "%DOCFILE%"
            ]
        }
    ],
    "latex-workshop.latex.recipes": [
        {
            "name": "pdflatex -> bibtex -> pdflatex*2",
            "tools": [
                "pdflatex",
                "bibtex",
                "pdflatex",
                "pdflatex"
            ]
        },
        {
            "name": "XeLaTeX",
            "tools": [
                "xelatex"
            ]
        },
        {
            "name": "PDFLaTeX",
            "tools": [
                "pdflatex"
            ]
        },
        {
            "name": "BibTeX",
            "tools": [
                "bibtex"
            ]
        },
        {
            "name": "LaTeXmk",
            "tools": [
                "latexmk"
            ]
        },
        {
            "name": "xelatex -> bibtex -> xelatex*2",
            "tools": [
                "xelatex",
                "bibtex",
                "xelatex",
                "xelatex"
            ]
        },
    ],
    "latex-workshop.latex.clean.fileTypes": [
        "*.aux",
        "*.bbl",
        "*.blg",
        "*.idx",
        "*.ind",
        "*.lof",
        "*.lot",
        "*.out",
        "*.toc",
        "*.acn",
        "*.acr",
        "*.alg",
        "*.glg",
        "*.glo",
        "*.gls",
        "*.ist",
        "*.fls",
        "*.log",
        "*.fdb_latexmk"
    ],
    "latex-workshop.latex.autoClean.run": "onFailed",
    "latex-workshop.latex.recipe.default": "lastUsed",
    "latex-workshop.view.pdf.internal.synctex.keybinding": "double-click",
    "editor.wordWrap": "on",
    "workbench.colorTheme": "Visual Studio Dark - C++",
    "workbench.preferredHighContrastColorTheme": "Visual Studio Light - C++",
    "workbench.preferredDarkColorTheme": "Visual Studio 2017 Light - C++",
    "workbench.preferredLightColorTheme": "Visual Studio 2017 Light - C++",
    "latex-workshop.linting.chktex.exec.args": [
        "-wall",
        "-n22",
        "-n30",
        "-e16",
        "-q",
    ],
测试
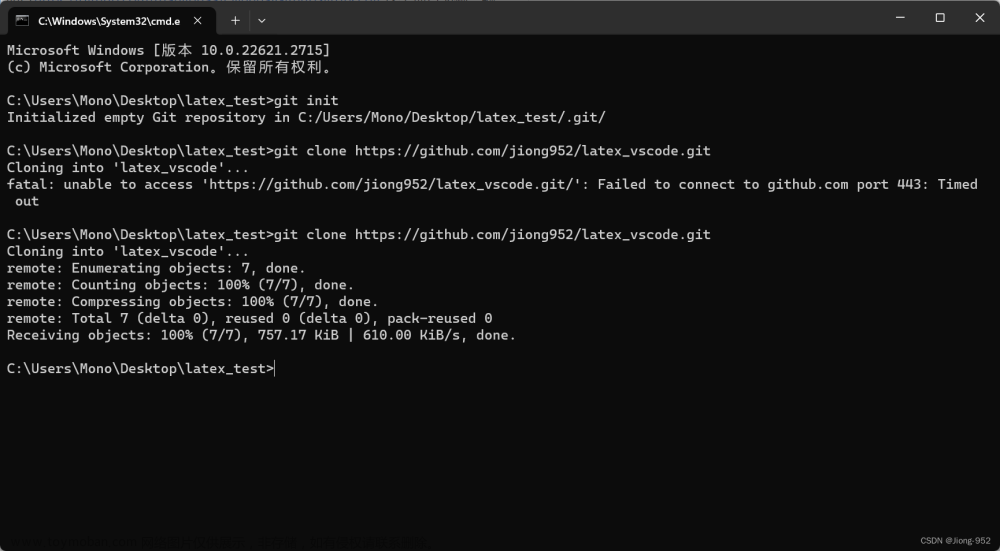
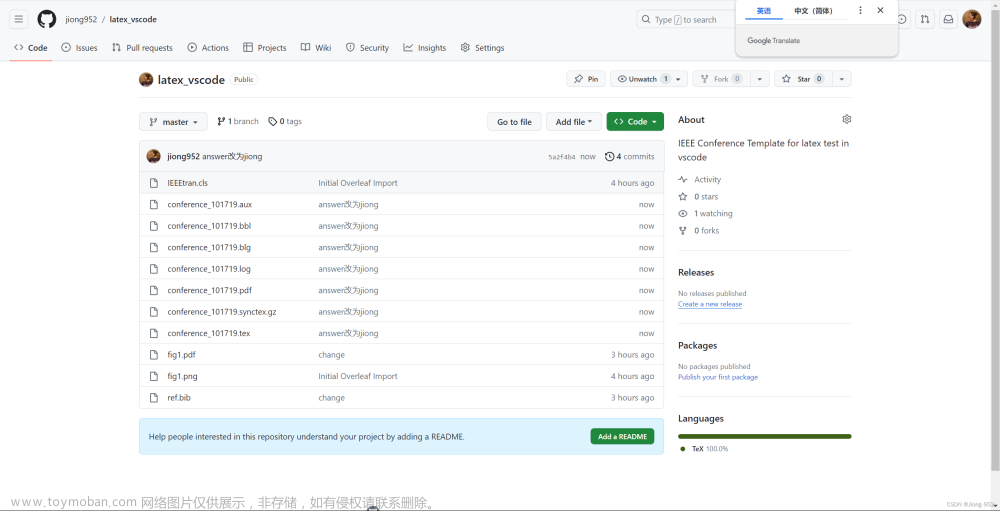
这里我们提供一个用于测试的tex文件,来自IEEE的官方模板IEEE Conference Template,我将里面的引用修改为常见的bib格式。想要的读者可以直接从我的github仓库拉取latex_vscode或者使用自己的tex文件,具体指令如下:
本地新建一个文件夹,进入cmd后输入以下命令
git init
git clone https://github.com/jiong952/latex_vscode.git
有时候网速不太行可以直接点击上面链接下载压缩包也是一样的
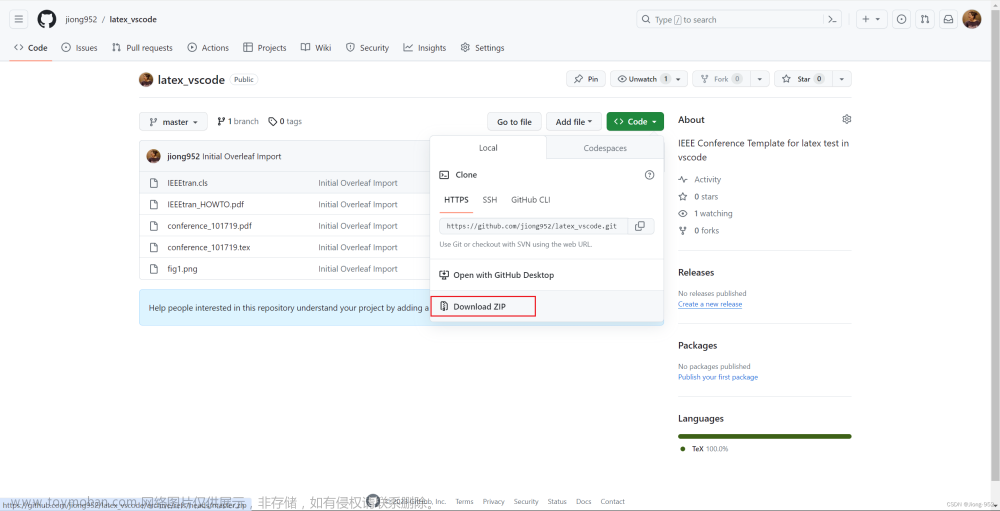
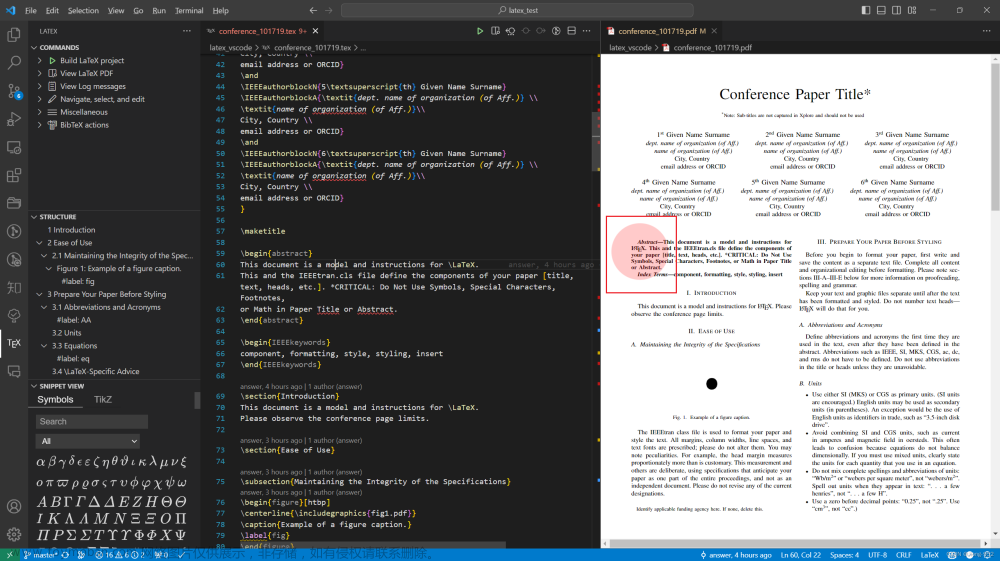
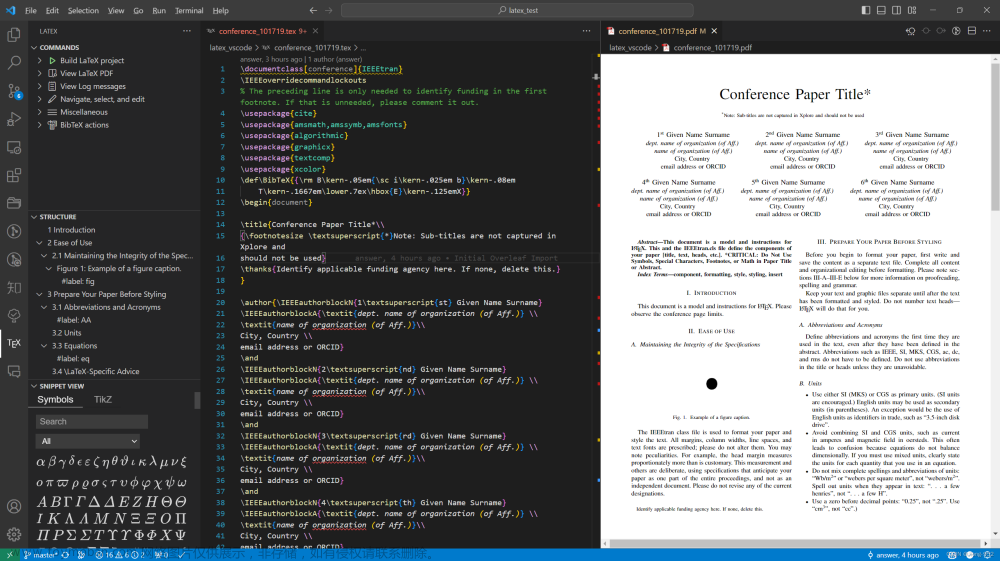
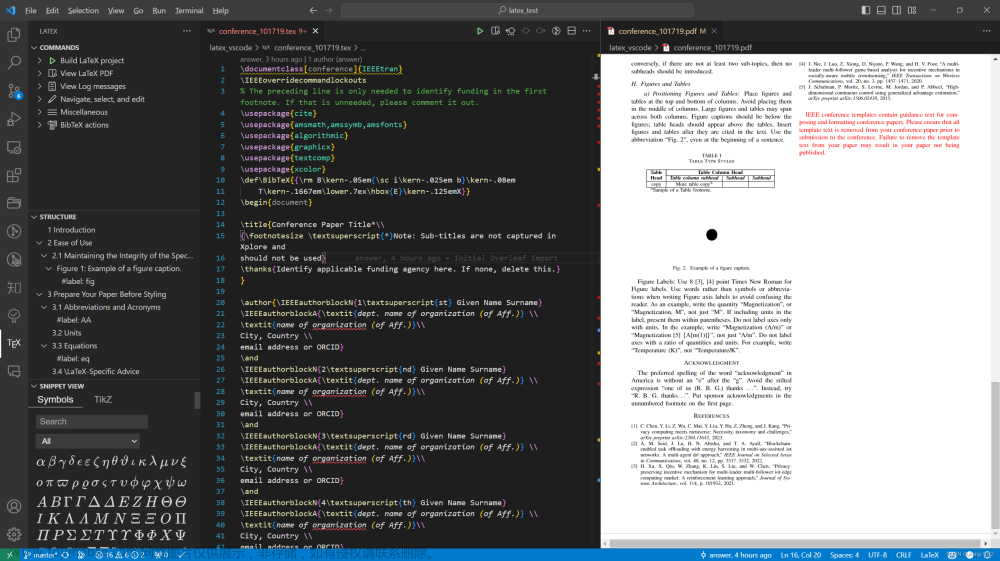
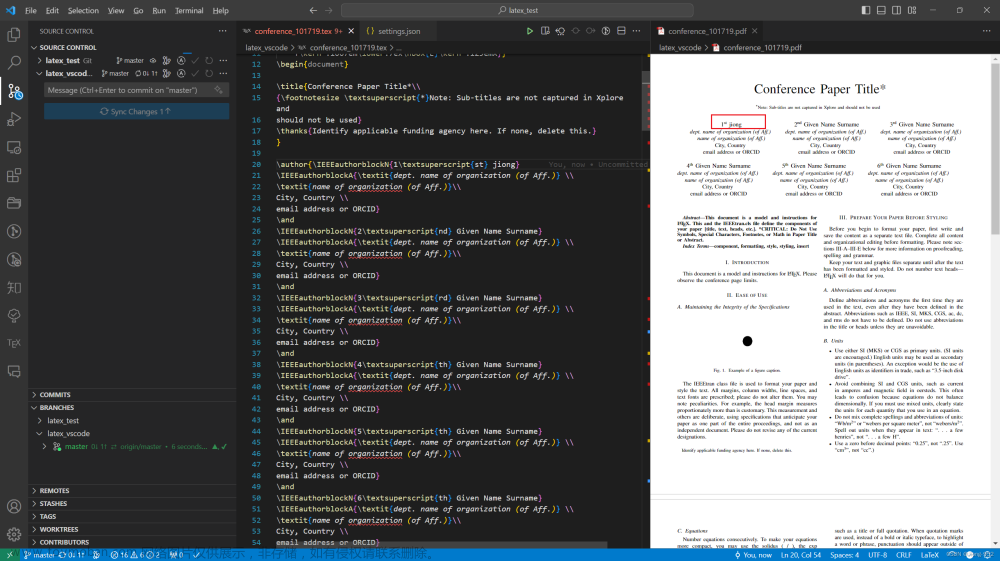
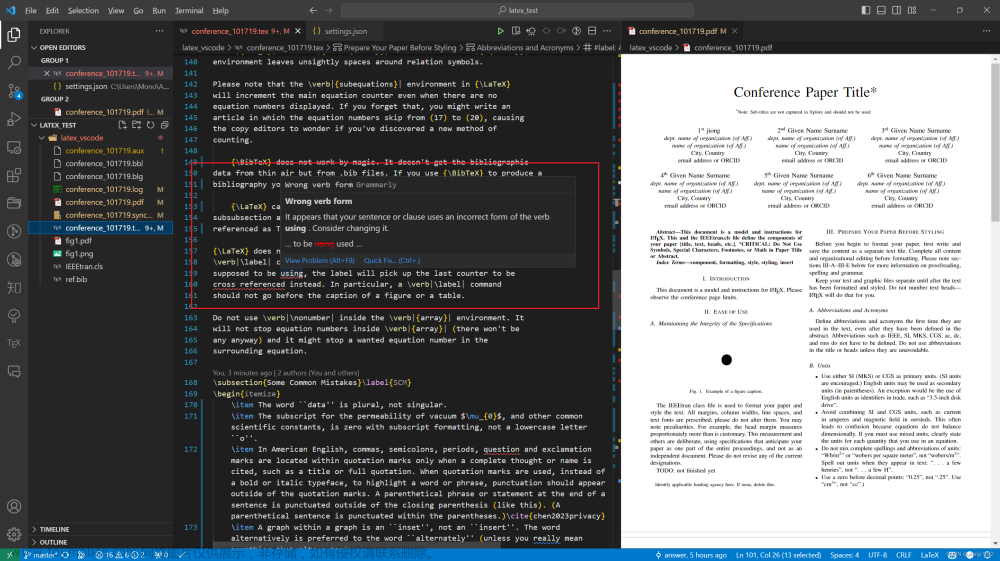
打开vscode选择下载后的文件夹,选中conference_101719.tex后左侧会出现TEX图标,点击右上角三角形运行,下方会显示运行进度,出现√就证明成功
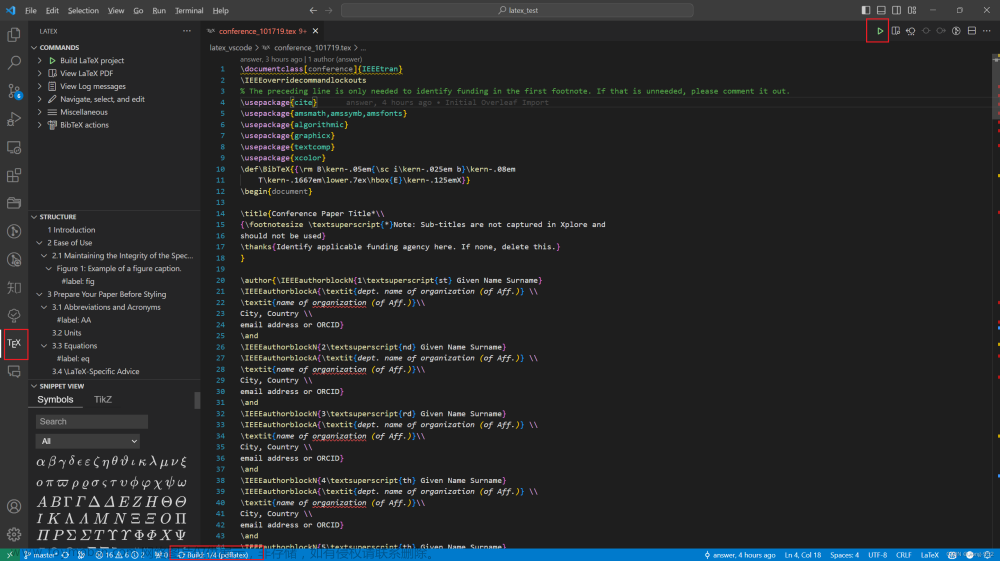
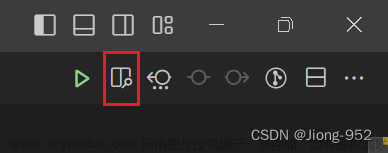
点击右上角第二个图标,如果出现的pdf显示正常则配置成功
到这里,本地的latex配置就已经完成了
第三步 github联动实现overleaf及本地vscode多端同步和协同撰写
对于有多人协作需求以及多端同步需求的用户而言,本地的latex编写无法胜任overleaf的功能,且overleaf还具备出色的历史记录回溯功能,这里我们给出一种方案,通过github作为跳板来实现多端同步以及协同
升级Overleaf Premium
现在overleaf对于普通用户已经不提供github功能,因此我们需要升级到github的Premium会员,这里提供一个免费升级的办法
具体参考这篇博客:免费升级Overleaf Premium(IEEE Collabratec)
- 进入IEEE Collabratec网址,点击create a Free Account注册账户
- 点击setting->IEEE Account setting
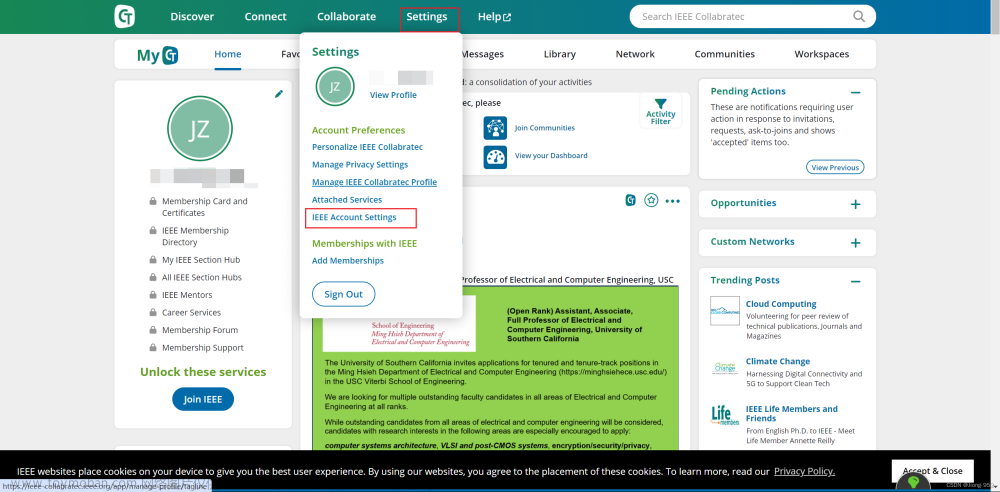
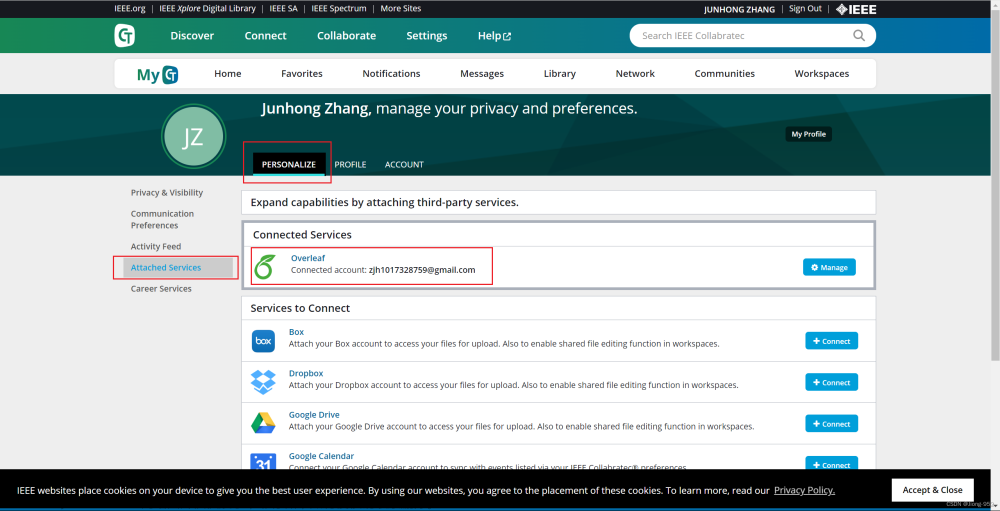
- 点击personalize->attached service 找到overleaf添加之后重新登录overleaf就可以是Premium了
latex配置github
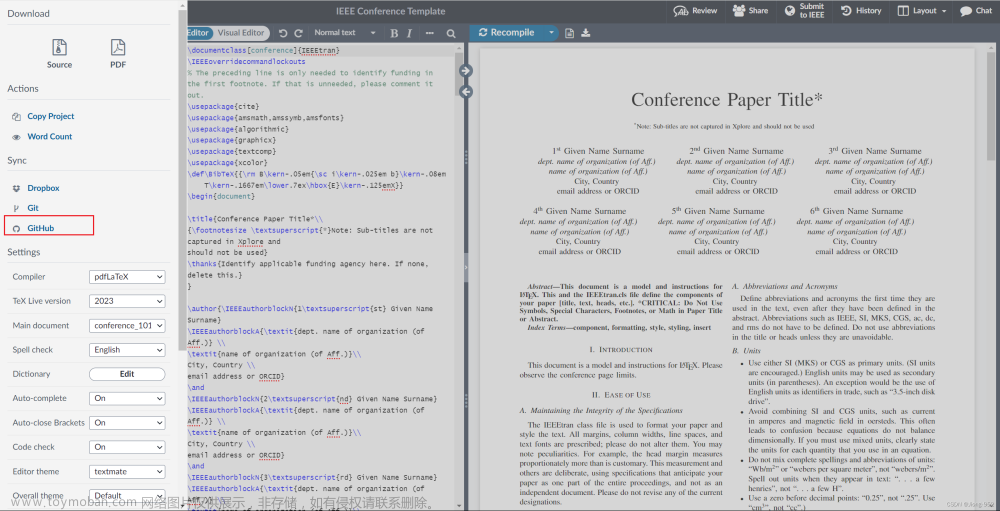
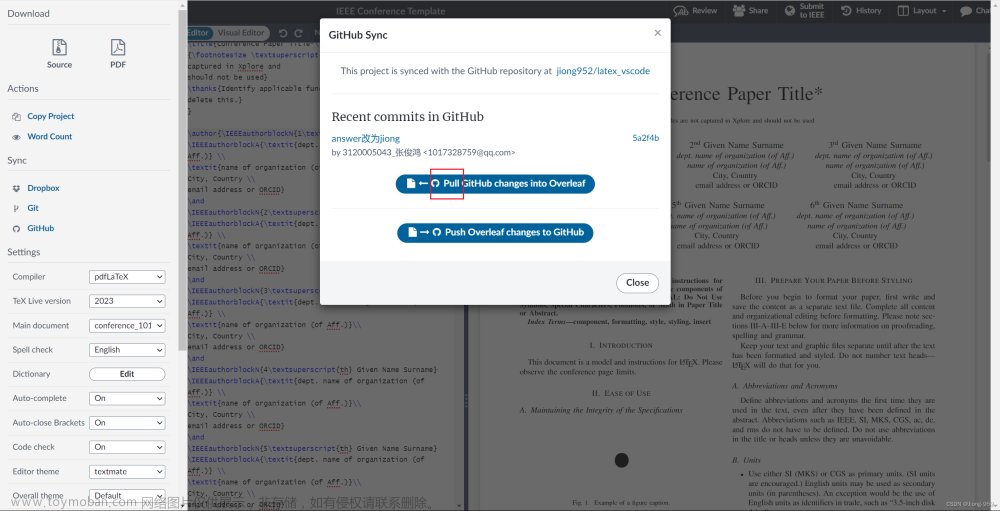
点击overleaf界面左上角的Menu->点击Github
会提示你创建github仓库,注意设置private
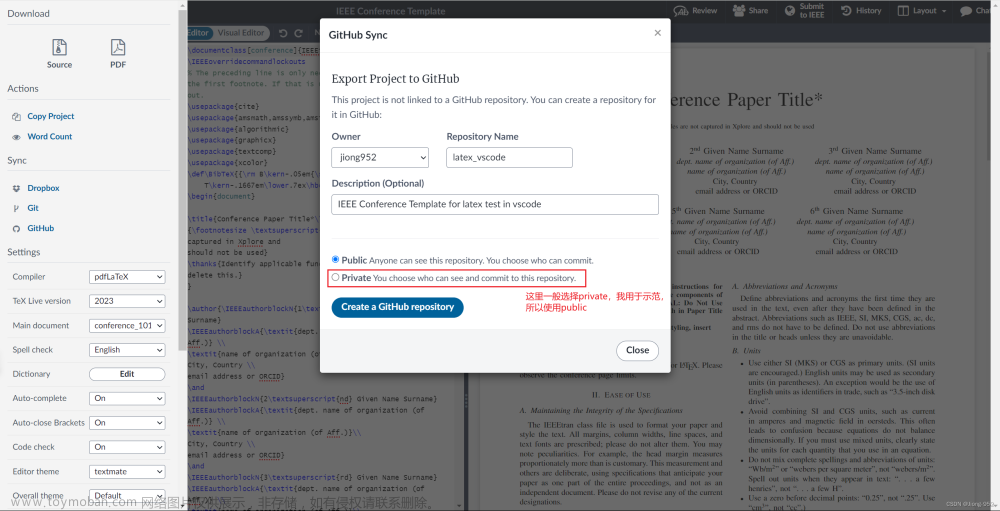
点击create后出现下面界面
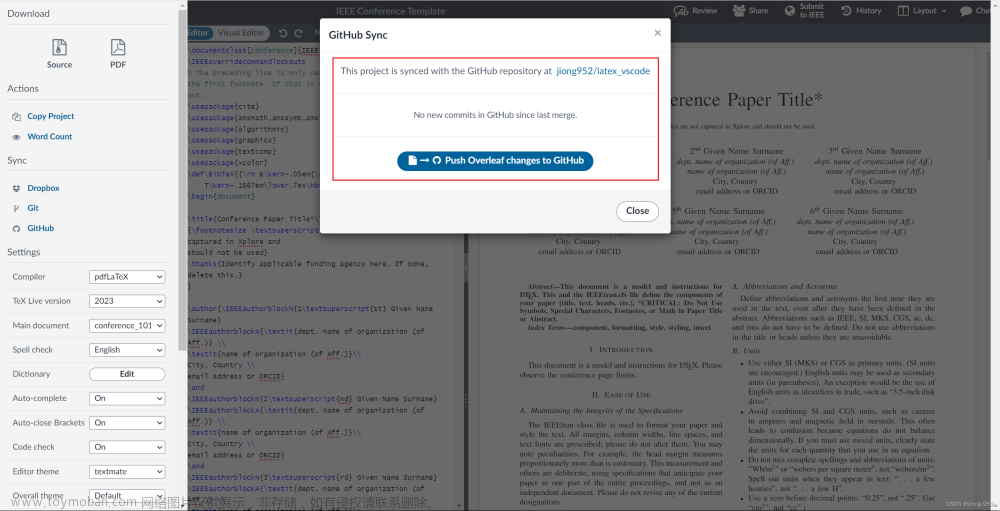
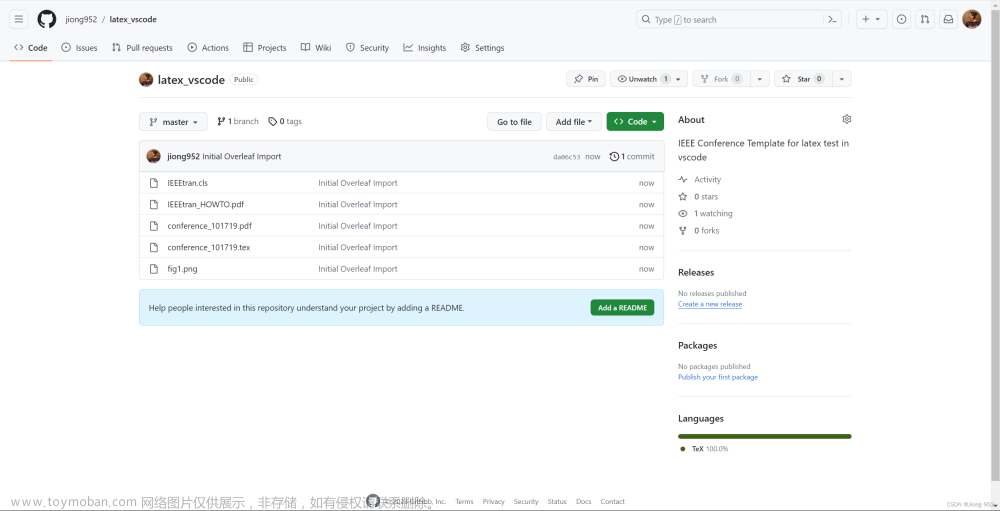
到github中查看显示创建成功
github连通本地
github联通本地就是常规操作了,可以参考上一步中的测试环境,使用git init + git clone克隆仓库
多端同步
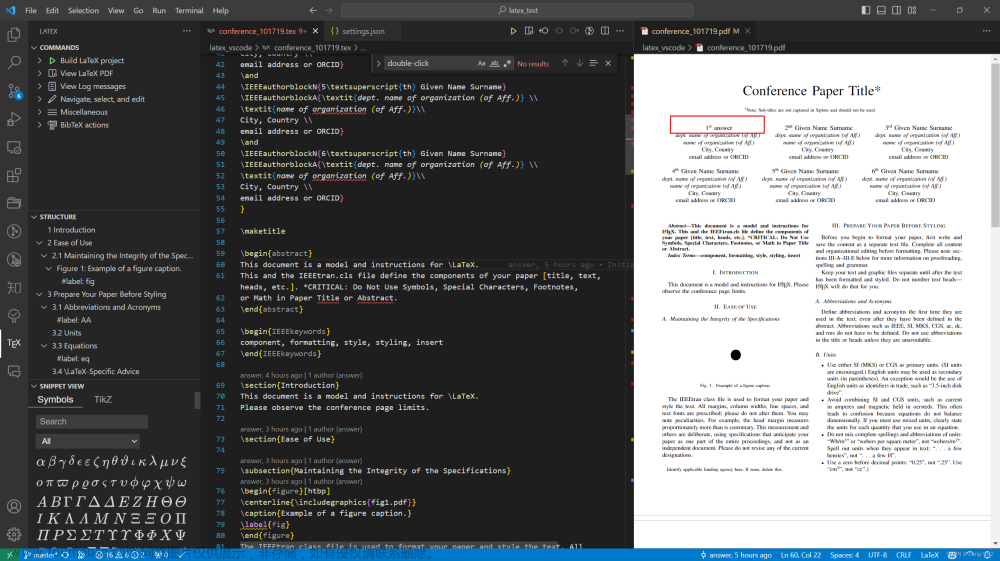
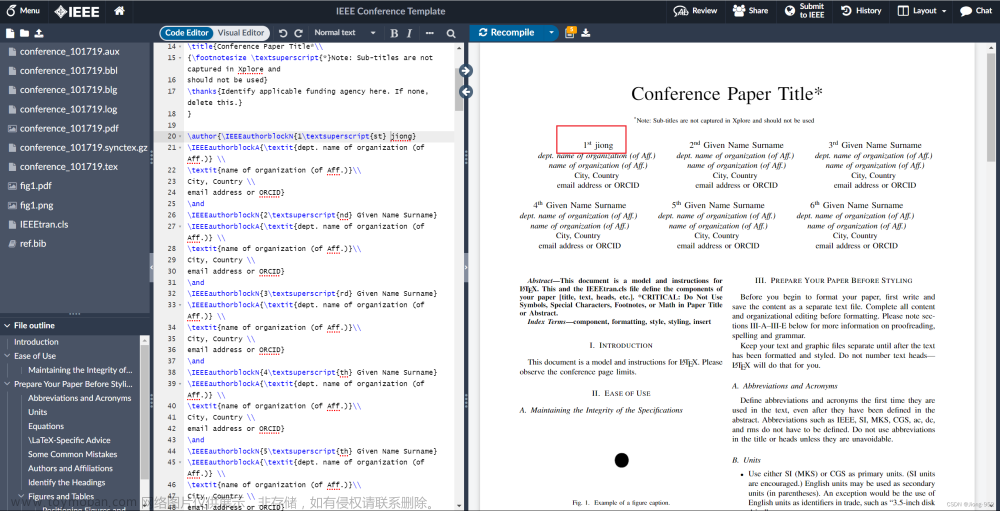
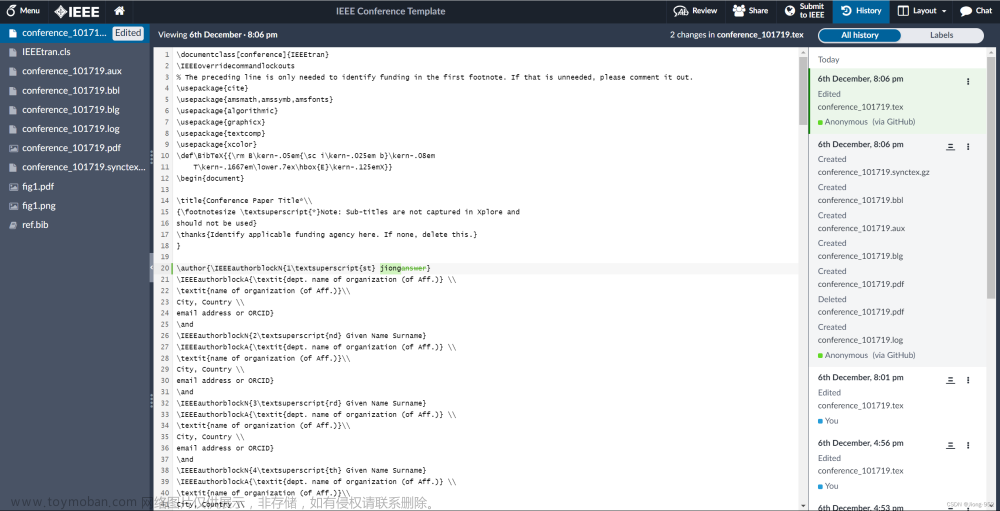
在overleaf修改后,点击push可以直接推送到github中,例如这里我修改作者1的名字为answer

点击push
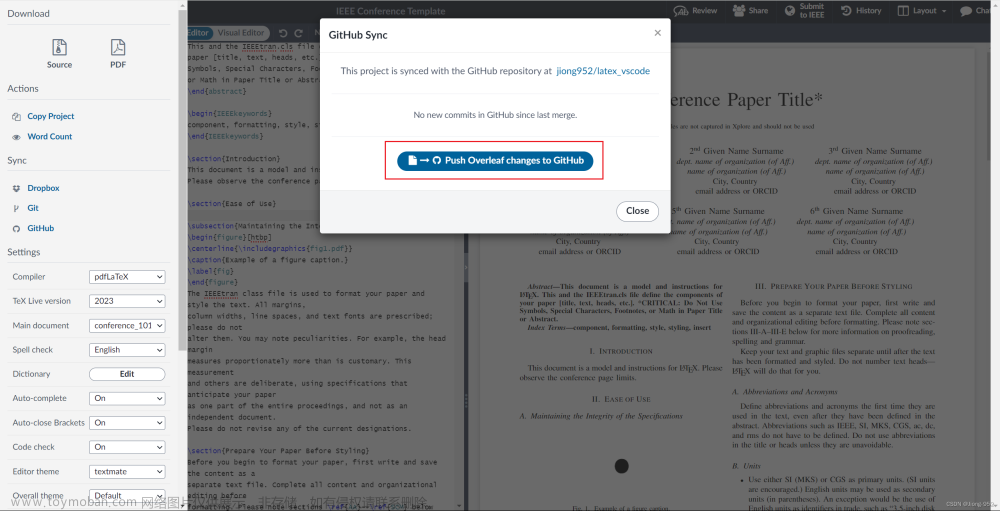
github信息
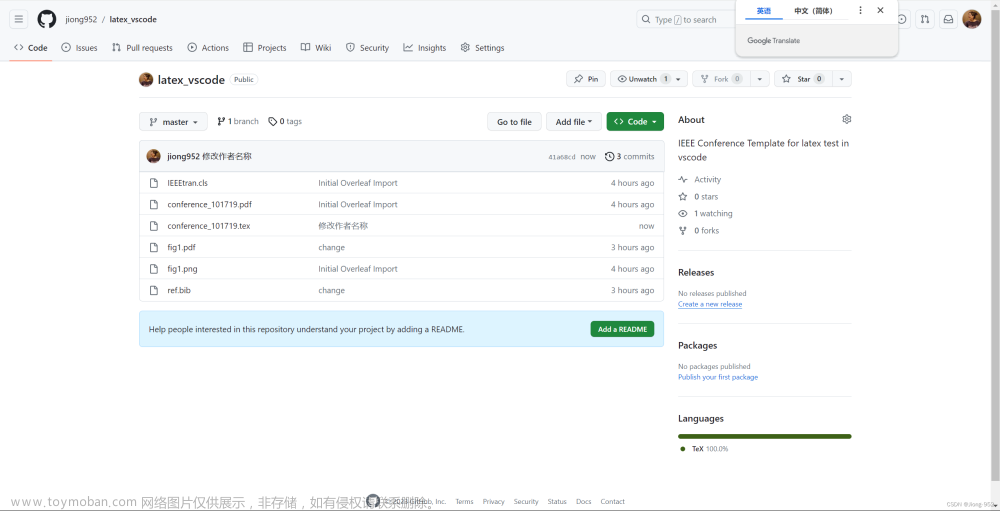
回到vscode本地使用git pull origin master ,重新编译,本地就同步了
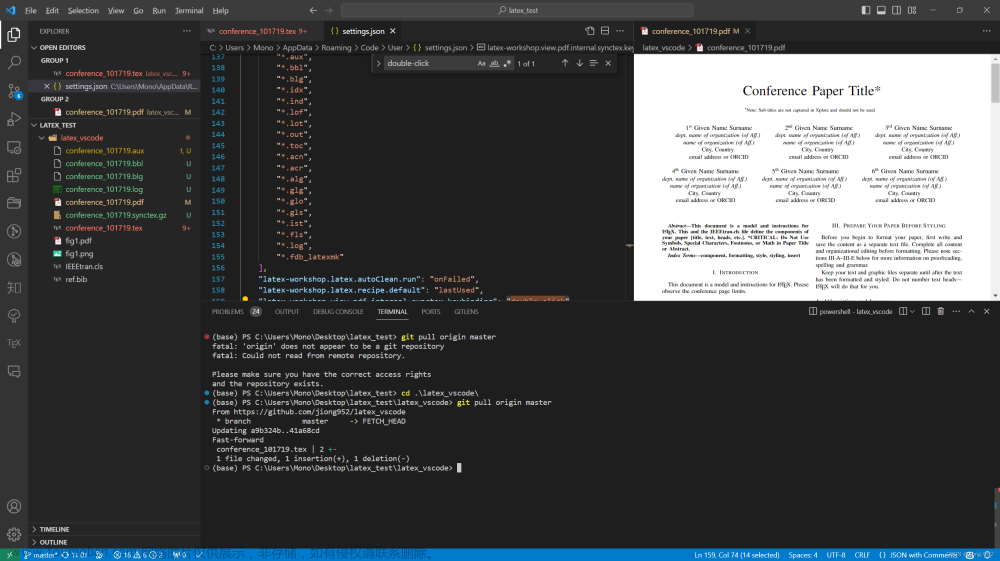
如果本地修改,比如我把answer改为jiong,推送到github
到overleaf中可以直接一键点击pull拉取
同时overleaf上面也可以有版本信息的显示
.gitignore文件
本地latex在运行时候会出现很多中间文件,这里我们给出一个.gitignore文件来进行忽略,不配置也是ok的
# LaTeX build files
*.aux
*.log
*.toc
*.out
*.synctex.gz
*.acn
*.acr
*.alg
*.bbl
*.blg
*.glg
*.glo
*.gls
*.ist
*.lof
*.lot
*.maf
*.mtc
*.mtc1
*.nlg
*.nlo
*.slg
*.slo
*.stg
*.stt
*.xdy
*.tdo

# Generated files
*.dvi
*.ps
*.pdf

# Editor and IDE files
*.swp
*~
.#*
*.bak
*.backup
*.sav
*.tmproj
*.tmproj.*
*.sublime-workspace
*.sublime-project
.vscode/
.idea/
*.bak
具体解释可以参考这篇博客Git 如何为LaTeX项目设置.gitignore文件
第四步 配置其他插件
vscode的最大优势就是all in one,强大的插件功能可以极大的提高开发效率
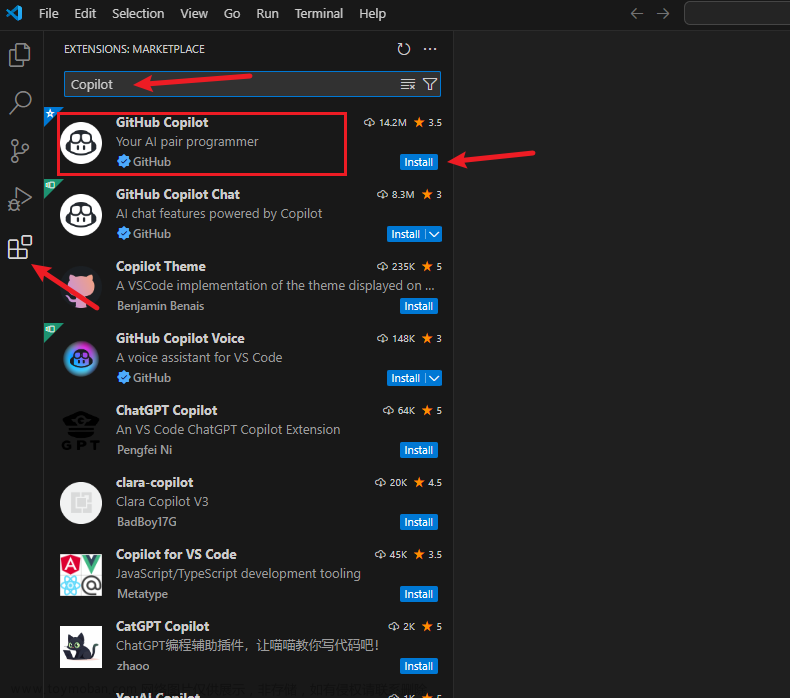
这里介绍三个插件,分别是github copilot、grammarly、Todo Tree
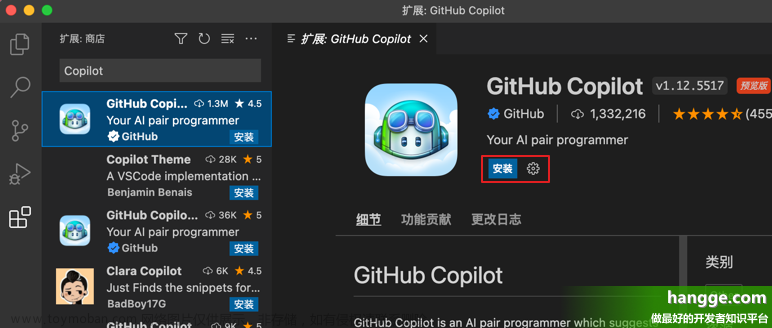
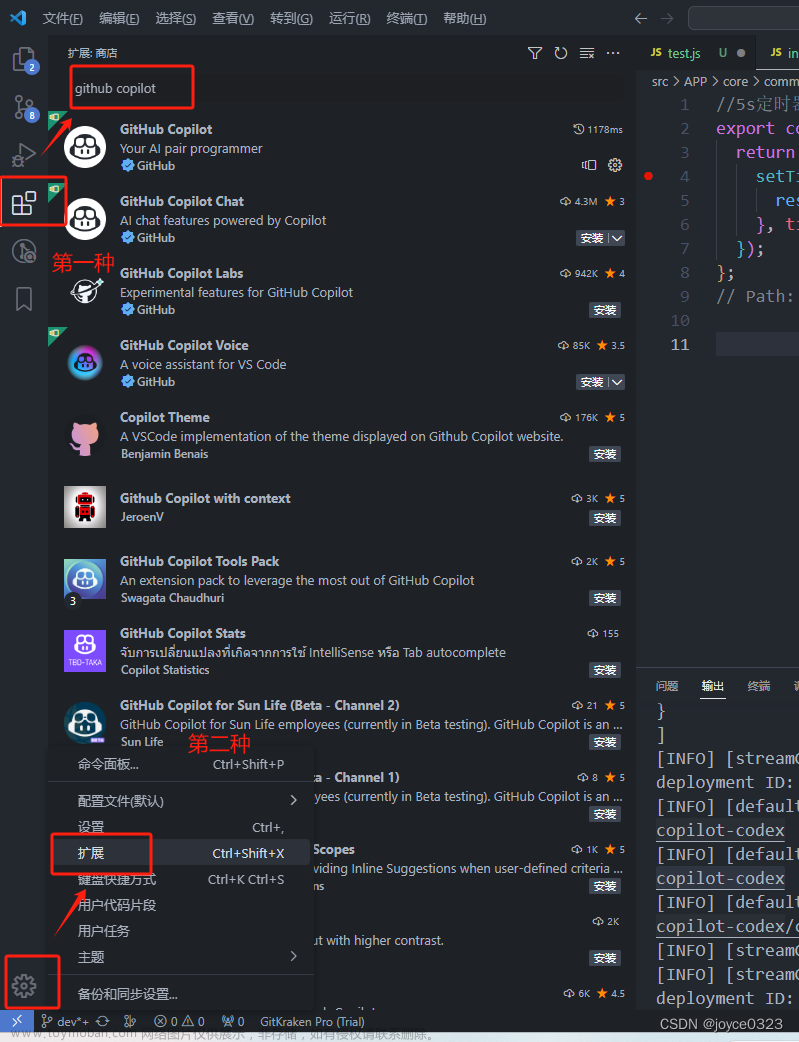
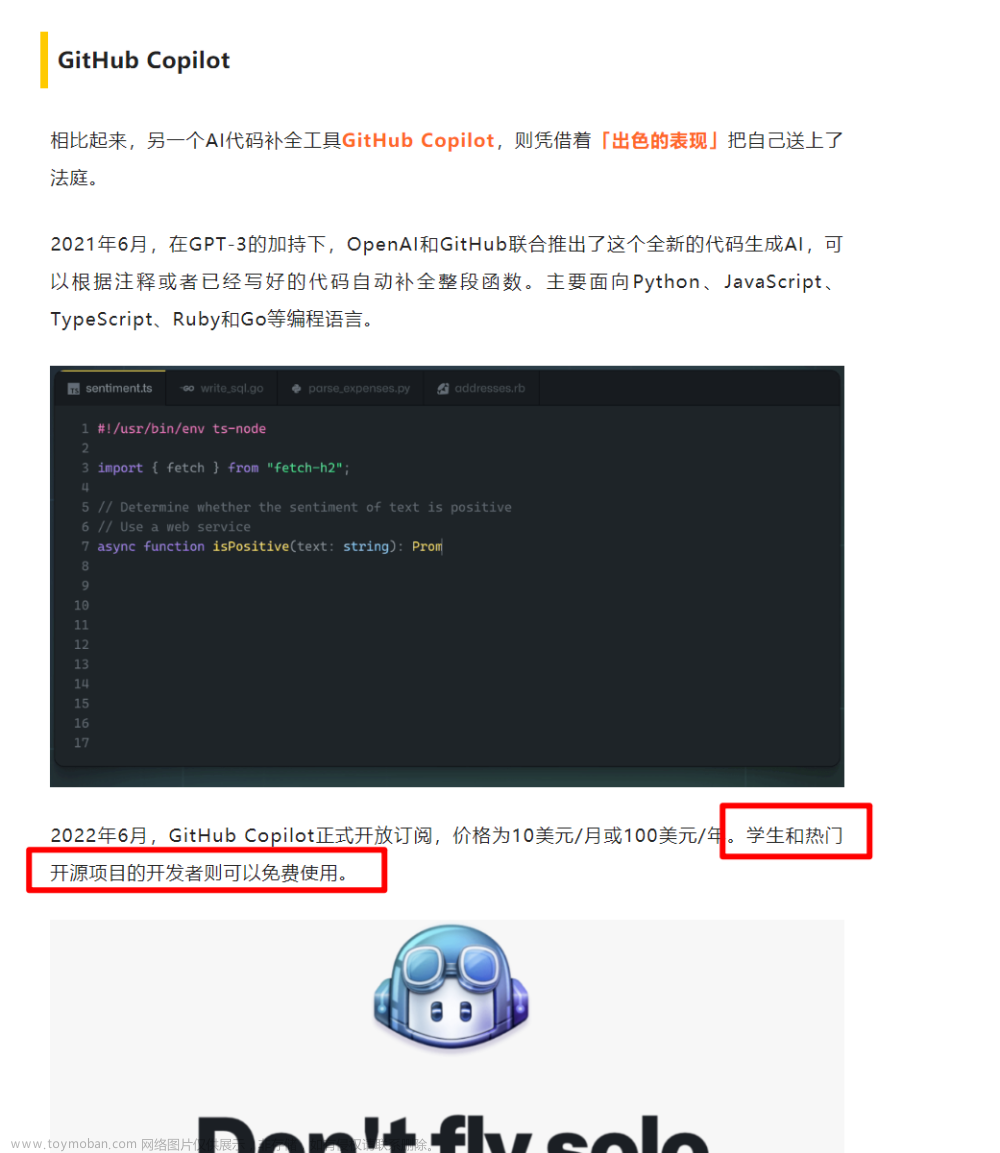
github copilot
在环境中配置 GitHub Copilot文章来源地址https://www.toymoban.com/news/detail-755136.html
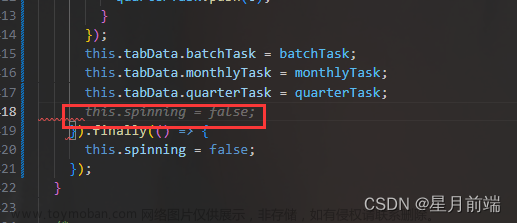
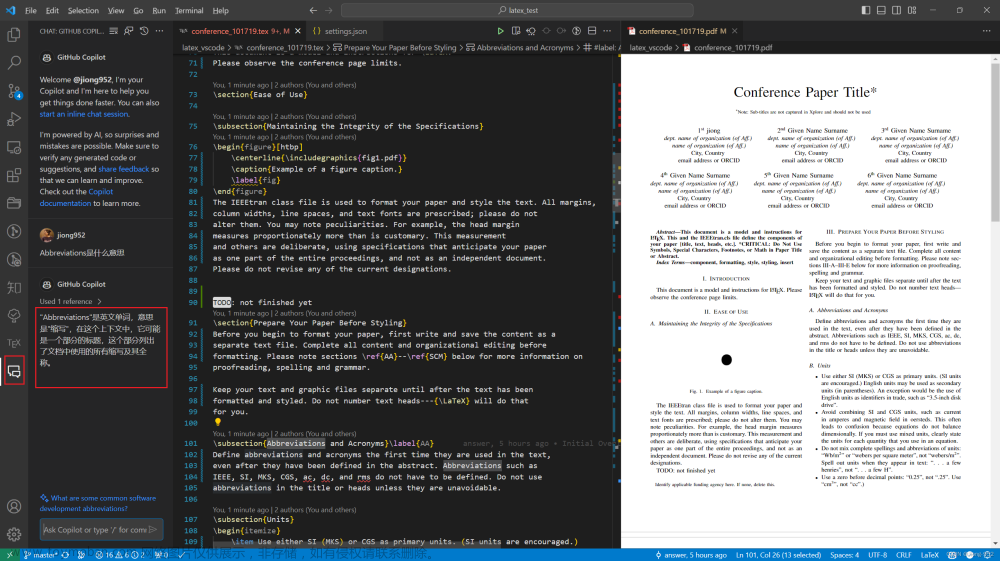
很多人将copilot用于代码开发,但他在写论文时候同样也可以帮你补写,如下方的灰色斜体部分就是copilot自动帮我补写的,按下TAB键之后就可以自动填充这部分了
学生党可以使用学校邮箱申请教育计划,网址,这个申请通过极其选修,可以查看网上其他人教程配置,多试几次
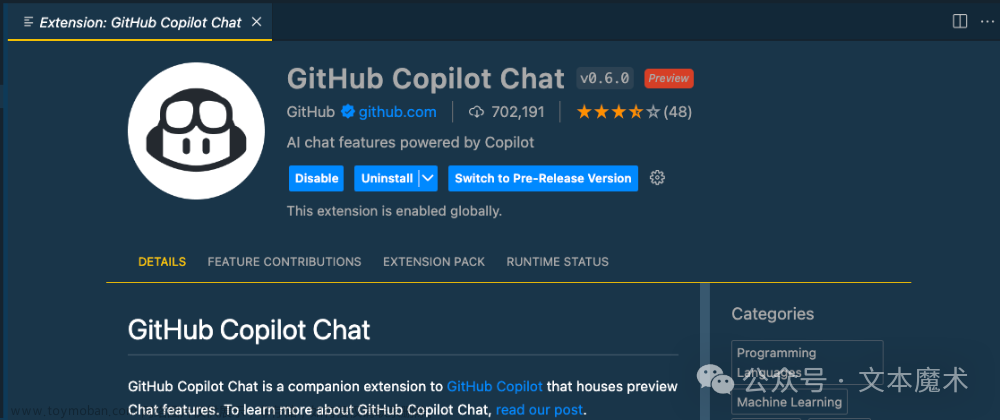
chat功能就不再解释,用过gpt的懂得都懂,不过速度偏慢,感觉没openai好用
点击左侧聊天按钮输入问题就可以对话了
grammarly
grammarly提供了vscode插件,帮你边写论文边检查语法
需要配置一下扫描的文件,这里我们加入**/*.tex文件
-
打开setting搜索grammarly.files.include
-
在其中加入**/*.tex就会自动扫描你的tex文件
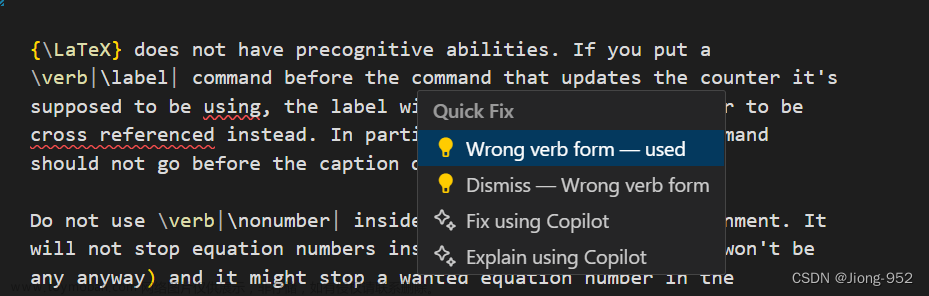
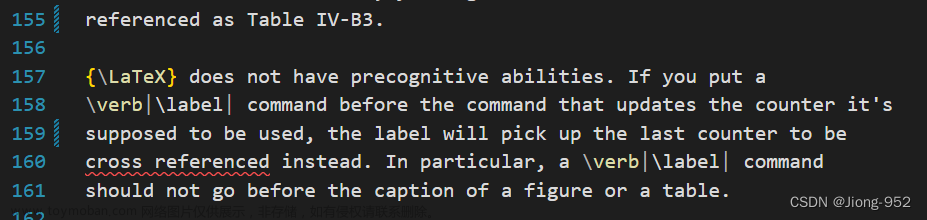
这里有个单词to be using写错了应该是to be used,grammarly自动帮我们查出来了,鼠标悬停点击Quick Fix后就可以一键直接替换了
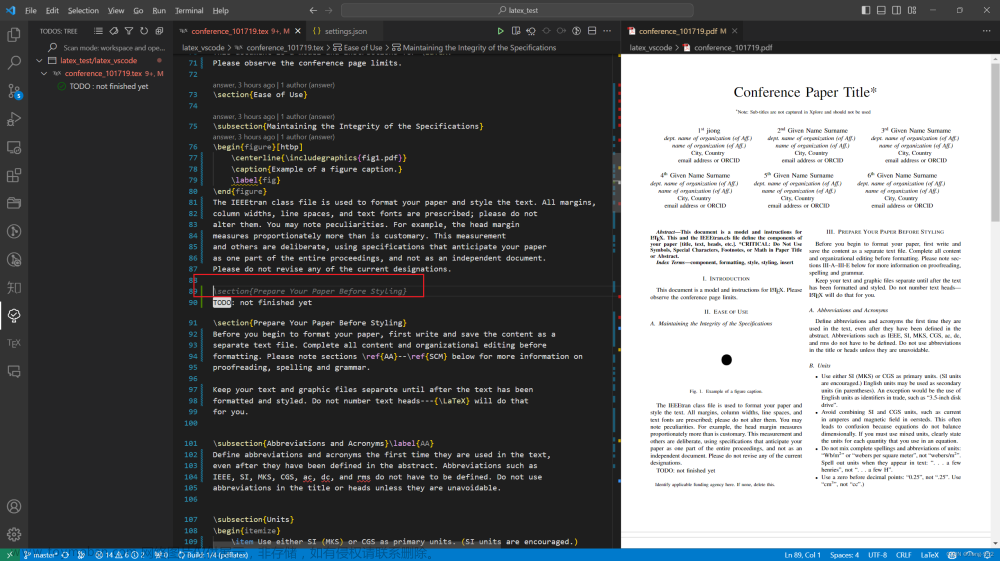
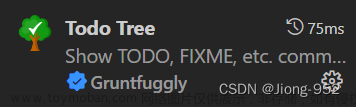
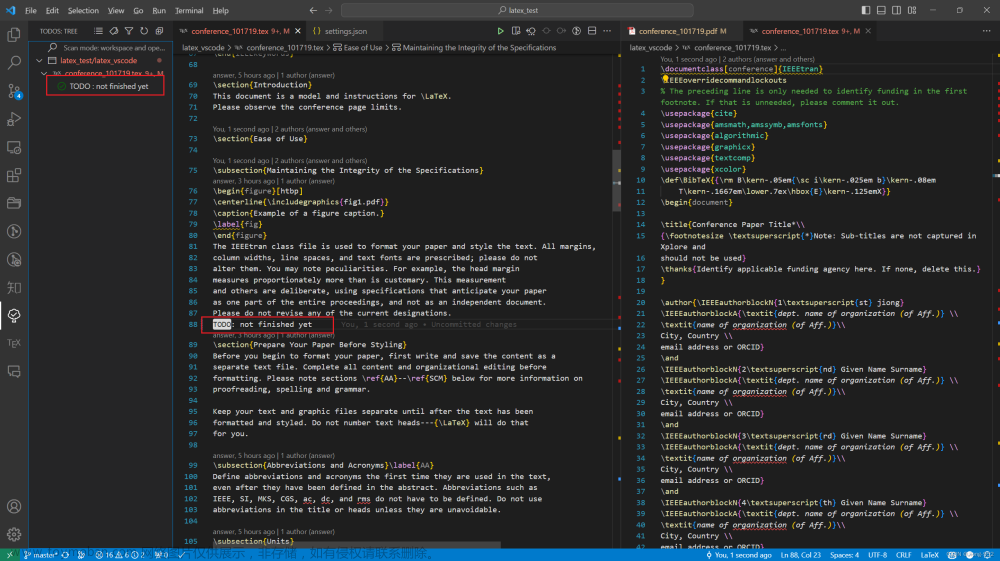
Todo Tree
这个功能一般在项目开发中使用,不过用在latex中也是很好用的
在tex文件中写下TODO,会高亮提示,左侧的TODO中会显示所有写了TODO的地方,用于提醒自己哪里还没写
补充:如果英文不太好,也可以下载这个插件修改界面为中文

参考链接:
配置Visual Studio Code和LaTex环境
Visual Studio Code (vscode)配置LaTeX
免费升级Overleaf Premium(IEEE Collabratec)
Overleaf_to_GitHub
Git 如何为LaTeX项目设置.gitignore文件文章来源:https://www.toymoban.com/news/detail-755136.html
dio Code和LaTex环境](https://yangyq.net/2022/05/latex-with-visual-studio-code.html)
Visual Studio Code (vscode)配置LaTeX
免费升级Overleaf Premium(IEEE Collabratec)
Overleaf_to_GitHub
Git 如何为LaTeX项目设置.gitignore文件
在环境中配置 GitHub Copilot
到了这里,关于科研神器:Vscode + latex+grammarly+github copilot的文章就介绍完了。如果您还想了解更多内容,请在右上角搜索TOY模板网以前的文章或继续浏览下面的相关文章,希望大家以后多多支持TOY模板网!