本篇文章主要是,使用 vite 创建一个vue3 书籍商城的小型案例,项目中主要运用到路由router及接口axios等知识点。
1.开始搭建项目框架,使用vite来构建项目
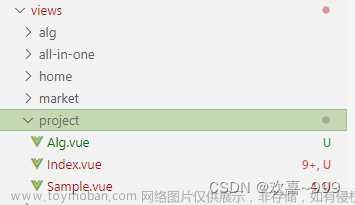
npm create vite@latest2.由于vite构建的项目中需要自己手动下载路由以及创建路由文件夹,所以在创建好的项目文档中找到src文件夹,在src文件夹下创建router文件夹,并且在其下创建index文件,对于index文件中要写的内容如下,在此之前还需要创建一个views文件夹,本次项目主要用到三个页面,所以需要在views文件夹下需创建三个文件,包括HomeView.vue、AboutView.vue、UserLoginView.vue。这些准备好之后还有重要的一点就是手动安装router。
npm install vue-router//终端中安装routerindex.js文件中的内容:
import { createRouter, createWebHashHistory } from "vue-router";
import HomeView from "../views/HomeView.vue";

const routes = [
  {//首页
    path: "/",
    name: "home",
    component: HomeView,
  },
  {//书籍商城
    path: "/about",
    name: "about",
    component: () =>
      import( "../views/AboutView.vue"),
  },
  {//登录页
    path: "/userlogin",
    name: "userlogin",
    component: () =>
      import("../views/UserLoginView.vue"),
  },
];

const router = createRouter({
  history: createWebHashHistory(),
  routes,
});

export default router;
3.上述内容完成之后,还需要在main.js中引入router,不然会报错,以及在app.vue中需要撰写跳转过程。
import router from "./router";

createApp(App).use(router).mount("#app");
<template>
<nav>
<router-link to="/">首页</router-link> |
<router-link to="/about">书籍商城</router-link> |
<router-link to="/userlogin">登录</router-link>
</nav>
<router-view />
</template>
<style>
#app {
font-family: Avenir, Helvetica, Arial, sans-serif;
-webkit-font-smoothing: antialiased;
-moz-osx-font-smoothing: grayscale;
text-align: center;
color: #2c3e50;
}
nav {
padding: 40px;
}
nav a {
font-weight: bold;
font-size: 1.4rem;
color: #2c3e50;
text-decoration: none;
}
nav a.router-link-exact-active {
color: #42b983;
}
</style>
4.接下来就是书写每个页面的代码,首先是首页,首页中未涉及过于复杂的过程,只是一个单纯的静态页面。
<template>
<div class="home">
<div class="box"></div>
<!-- 书籍新闻列表部分 -->
<div class="booklist">
<table>
<tr v-for="item in list">
<td>{{ item.type }} <a href="">{{ item.title }}</a></td>
<td>{{ item.type }} <a href="">{{ item.title }}</a></td>
</tr>
</table>
</div>
<!-- 好书推荐部分 -->
<div class="bookrec">
<div class="booktitle">
<h3 >好书推荐</h3>
</div>
<ul class="recomd">
<li class="booItem" v-for="item in bookitem">
<img :src="item.url" alt="">
<a href="#">{{item.title}}</a>
<p class="intro">{{ item.intro }}</p>
<p class="price">{{ item.price }}</p>
</li>
</ul>
</div>
</div>
</template>
<script setup>
import { ref} from 'vue'
const list=ref([
{
type:'[悬疑]',
title:'河尸诡棺:大河生凶煞,送棺三千里'
},
{
type:'[仙侠]',
title:'成就系统:我在武道世界里偷偷修仙'
},
{
type:'[历史]',
title:'一品权臣:权臣护国保民,安定社稷'
},
{
type:'[玄幻]',
title:'诡道修仙:雨淋血染草,月照鬼守尸'
},
{
type:'[都市]',
title:'我的空间能修仙:我混的风生水起!'
},
])
const bookitem=ref([
{
url:'../src/assets/img1.jpeg',
title:'大明:寒门辅臣',
intro:'寒门出身,临渊而行,三朝辅臣,巅峰大明!',
price:'¥23'
},
{
url:'../src/assets/img2.jpeg',
title:'津门诡事录',
intro:'浮尸丹鼎、黄仙寻仇、水鬼拉脚、凶灵砌墙……怪力乱神?装神弄鬼!',
price:'¥26'
},
{
url:'../src/assets/img3.jpeg',
title:'一品',
intro:'世家少年入江湖,一刀将这天下捅了个通透。',
price:'¥28'
},
{
url:'../src/assets/img4.jpeg',
title:'怒火狂飙',
intro:'一段视频引发战神狂怒,铁拳霸绝横推一切不平,九万里山河染血。',
price:'¥35'
}
])
</script>
<style lang="scss" scoped>
a{
text-decoration: none;
}
ul,li{
list-style: none;
}
.box{
width: 55rem;
height: 26rem;
background: url('../assets/pic3.jpg') no-repeat;
background-size: 100% 100%;
margin-left: auto;
margin-right: auto;
}
.booklist{
width: 50rem;
// height: 10rem;
// background: #fc0;
margin-left: auto;
margin-right: auto;
margin-top: 0.5rem;
table{
display: flex;
flex-wrap: wrap;
}
td{
width: 25rem;
height: 3rem;
color: rgb(160, 160, 159);
background: rgb(188, 205, 251);
a{
text-decoration: none;
color: rgb(46, 45, 44);
cursor: pointer;
transition: all 0.5s;
&:hover{
color: rgb(233, 115, 37);
}
}
}
}
.bookrec{
width: 55rem;
height: 25rem;
margin-top: 0.5rem;
background: rgba(219, 206, 245, 0.6);
margin-left: auto;
margin-right: auto;
.booktitle{
width: 55rem;
height: 3.2rem;
border-bottom: 1px rgb(161, 161, 159) solid;
h3{
float: left;
padding-left: 1rem;
}
}
.recomd{
display: flex;
justify-content: space-around;
li{
width: 10rem;
img{
width: 9.6rem;
height: 12.6rem;
}
a{
color: rgb(60, 60, 58);
&:hover{
color: rgb(233, 115, 37);
}
}
.intro{
-webkit-box-orient: vertical;
-webkit-line-clamp: 2;
white-space: nowrap;
overflow: hidden;
color: rgb(146, 146, 143);
}
.price{
color: rgb(243, 149, 8);
font-weight: 400;
}
}
}
}
</style>
首页效果图:

5.其次是书籍商城页面,本页面中由于查询之后会展示相应的书籍,所以涉及到了接口问题,还需要另外自己手动下载接口,对于接口文档是借用小说搜索 - LRY_API这个网站的。
npm install axios --save//在终端中下载接口<template>
<div class="about">
<h2>{{ title }}</h2>
<!-- 搜索 -->
<div class="search">
<input type="text" placeholder="请输入要查询的书籍类型" class="searchinput" @keyup.enter="search" v-model="book">
<button class="btn" @click="search">搜索</button>
</div>
<!-- 搜索结果 -->
<div class="searchResult">
<h3>搜索结果</h3>
</div>
<ul class="allbook">
<li class="bdesign" v-for="item in bookList">
<img :src="item.cover" alt="">
<div class="intro">
<h4 >{{item.title}}</h4>
<p class="bookintro">作者:{{ item.author }}</p>
<p class="bookintro">类型:{{ item.fictionType }}</p>
<p class="bookintro">简介:{{ item.descs }}</p>
<p class="bookintro">出版时期:{{ item.updateTime }}</p>
</div>
</li>
</ul>
</div>
</template>
<script setup>
// import { reactive } from 'vue';
import {useRoute} from 'vue-router'
import {ref} from 'vue'
import axios from 'axios'
const route=useRoute();
// let data=reactive({
// query: route.query
// })
const title=ref('欢迎来到阅读站')
const bookList = ref('')
const book=ref('')
//调用书籍目录接口
const search = () => {
axios.get(`https://api.pingcc.cn/fiction/search/title/小说/1/10`)
.then((result) => {
bookList.value=result.data.data
console.log(result.data);
})
.catch((err)=>{
alert("书籍输入错误")
console.log(err)
})
}
</script>
<style lang="scss" scoped>
a{
text-decoration: none;
}
ul,li,ol{
list-style: none;
}
.about{
width:55rem;
height:100rem;
background:rgba(214, 197, 248, 0.6);
margin-left: auto;
margin-right: auto;
h2{
color: rgb(39, 14, 162);
}
}
.searchinput{
width: 30rem;
height: 2.3rem;
margin-right: 1rem;
}
.btn{
width: 5rem;
height: 2.3rem;
background: rgb(66, 104, 240);
color: #fff;
border: none;
border-radius: 0.5rem;
cursor: pointer;
transition: all 0.5s;
}
.btn:hover{
background: rgb(245, 185, 66);
}
.searchResult{
margin-top: 1.5rem;
width: 55rem;
height: 3.2rem;
// background: #59c71e;
border-bottom: 1px #b1aeae solid;
h3{
padding-left: 1rem;
float: left;
}
}
.allbook{
margin-top: 1rem;
display: flex;
justify-content: space-between;
flex-wrap: wrap;
align-content: flex-start;
padding:0 10px;
.bdesign{
display: flex;
padding-top: 2rem;
img{
width: 12rem;
height: 14rem;
}
.intro{
width: 12rem;
height: 14rem;
// background: #c64848;
margin-left: 0.5rem;
.bookintro{
-webkit-box-orient: vertical;
-webkit-line-clamp: 2;
white-space: nowrap;
// text-overflow: ellipsis;
overflow: hidden;
text-align: justify;
}
}
}
}
</style>书籍商城效果图:

6.最后就是登录界面,登录界面功能要相对复杂一些,在登录界面中点击其他界面是禁止的,同时在登录之后会跳转到书籍商城界面,内容如下:
<template>
<div class="box">
<div class="title">
<h3>{{ msg }}</h3>
</div>
<div class="box_form">
<form method="post">
<div class="img_control">
<img src="../assets/pic.jpeg" class="pic"/>
</div>
<label class="form-label txt" for="username">用 户 名:</label>
<input class="form-input txt" type="text" placeholder="用户名" required="required" ref="username"/><br>
<label class="form-label" for="password">密 码:</label>
<input class="form-input paw" type="password" placeholder="密码" required="required" ref="password"/><br>
<label class="form-label" for="password">没有账号?<a href="#">点击注册</a></label><br>
<input class="form-button" type="submit" value="登录" @click="login"/>
</form>
</div>
</div>
</template>
<script setup>
import {useRouter,onBeforeRouteLeave} from 'vue-router';
import {ref} from "vue";
const router = useRouter();
const msg=ref('欢迎登录');
const username=ref(null);
const password=ref(null);
const login=()=>{
if(username.value.value === 'zhangsan' && password.value.value==='123456'){
window.localStorage.setItem('userToken',username.value.value+password.value.value)
router.push({
path:'/about',
query:{
username:"zhangsan",
password:123456
}
})
}else{
alert('用户名或密码错误!')
}
console.log(username.value.value)
}
onBeforeRouteLeave((to)=>{
let userToken=localStorage.getItem('userToken')
if(to.name!='userlogin' && userToken==null){
return false;
}
})
</script>
<style lang="scss" scoped>
.box{
width: 50rem;
height: 30.5rem;
background-color: rgba(188, 176, 212, 0.6);
margin-left: auto;
margin-right: auto;
}
.title {
text-align: center;
font-size: 2rem;
color: rgba(115, 87, 172, 0.6);
// margin-top: 1rem;
padding-top: 0.8rem;
}
.box_form {
width: 50rem;
height: 18rem;
margin-left: auto;
margin-right: auto;
.img_control{
margin-top: 6.5rem
}
.pic{
margin-left: 3rem;
float: left;
}
img{
width: 15rem;
height: 15rem;
}
.form-input {
width: 20rem;
height: 2.5rem;
padding-left: 0.5rem;
border-radius: 0.5rem;
border: none;
}
.paw{
margin-top: 2rem;
margin-bottom: 1rem;
margin-left: 0.7rem;
}
.form-label{
margin-left: 2rem;
margin-right: 1rem;
a{
// display: block;
text-decoration: none;
color: rgb(58, 58, 57);
&:hover{
color: #f17e0b;
}
}
}
.form-button {
width: 20.5rem;
height: 2.5rem;
margin-top: 1rem;
margin-left: 6.5rem;
font-size: 1.8rem;
border: none;
border-radius: 0.8rem;
font-family: "宋体";
background: rgb(245, 150, 199);
color: #fff;
font-weight: 400;
cursor: pointer;
&:hover{
background: #f17e0b;
}
}
}
</style>登录效果图:

7.最后来看看实际效果吧文章来源:https://www.toymoban.com/news/detail-757688.html
书籍商城案例文章来源地址https://www.toymoban.com/news/detail-757688.html
到了这里,关于vue3+axios+router实现页面跳转及登录的文章就介绍完了。如果您还想了解更多内容,请在右上角搜索TOY模板网以前的文章或继续浏览下面的相关文章,希望大家以后多多支持TOY模板网!


